Posted in 2023-2024 Stampin' Up! Annual Catalog, Emboss Powder, Gratitude/ Thanks, Lake/Sea/Ocean, Nature, Sea, Sealife, Turtle

Kylie’s International Blog Highlights Gallery-May 2023: Torn Paper Sea Turtle Thank You Card

Hello, thank you for visiting Theresa’s Treasures Paper Crafts. I am Theresa, an Independent Stampin’ Up! Demonstrator in Arizona, USA. I am super excited to be participating in Kylie Bertucci’s International Blog Highlight Gallery with my torn paper Sea Turtle Thank You card. Projects in this gallery are designed by Stampin’ Up! demonstrators from around the world! The theme for this Gallery is “Thank You”.

We often forget those simple words “Thank you”. However, it is super important to show appreciation to the people in your life who have helped you, supported you or inspired you. One way to express gratitude is to send a handmade thank you card. Discover the joy in making and sending a handmade card!

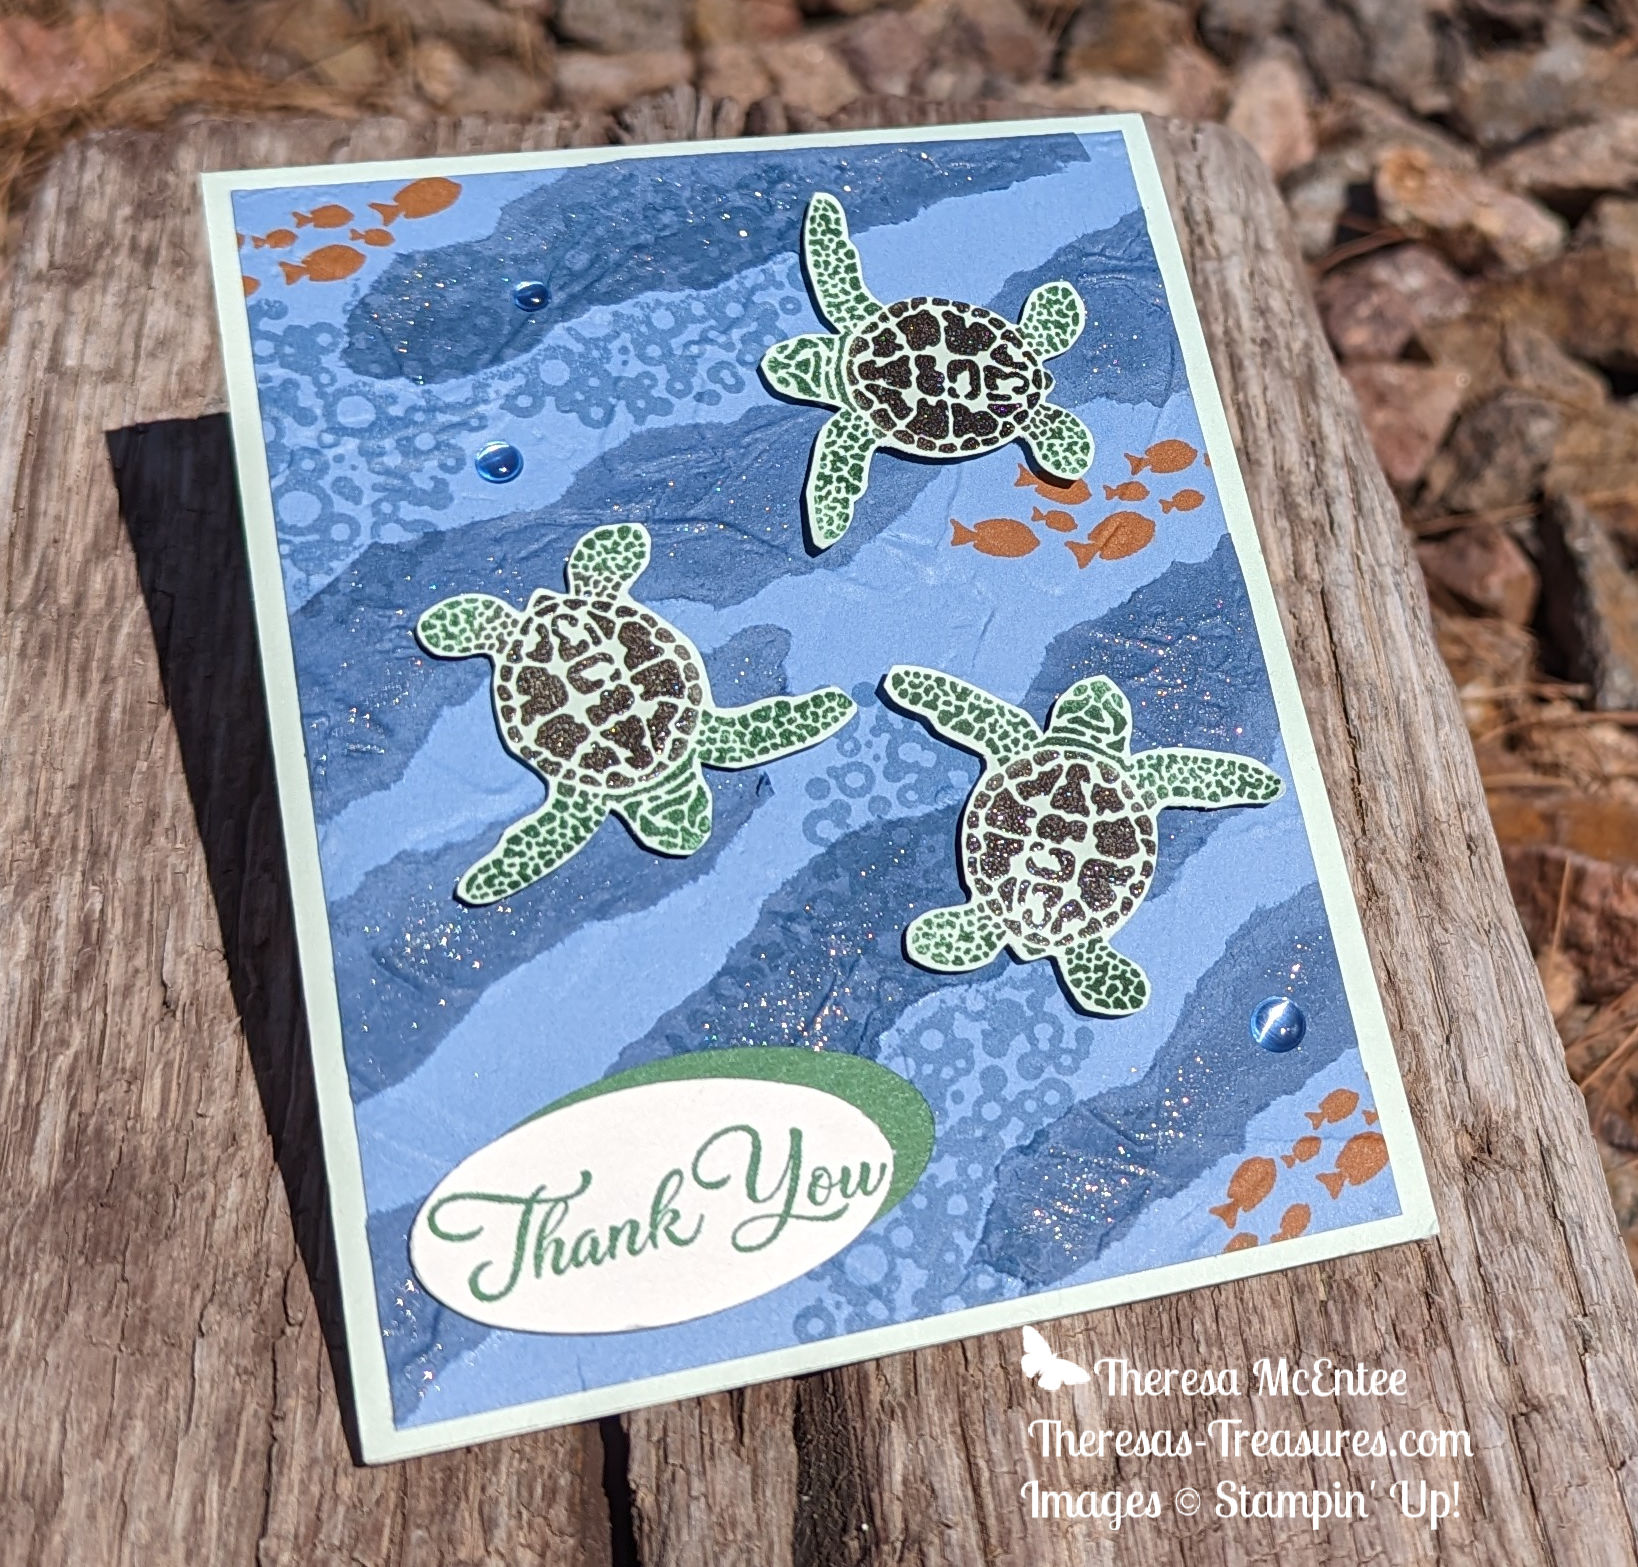
I am using torn card stock to create the background “water” for these cute sea turtles!

This Sea Turtle Thank You Card showcases the Sea Turtle stamp set in the new 2023-34 Stampin’ Up! Annual Catalog.

Current Host Code: F4TT24FW

Measurements

  • Soft Sea Foam card stock (cs) card base: 4 1/4″ x 11″ scored at 5 1/2″
  • Boho Blue cs: 4″ x 5 1/4″
  • Misty Moonlight cs: 6″ x 6″ torn into strips
  • Soft Sea Foam cs: 2″ x 8″ to stamp the sea turtles on
  • Very Vanilla cs: 4″ x 5 1/4″ (inside) and 2 1/2″ x 3″ for the sentiment
  • Garden Green cs: 2 1/2″ x 3″

Supplies

  • Sea Turtle stamp set
  • Go To Greetings stamp set
  • Painted Textures Embossing Folder
  • Double Oval Punch
  • Ink: Garden Green, Early Espresso, Pumpkin Pie and Boho Blue
  • Sponge Dauber (2)
  • Clear Emboss Powder
  • Heat Tool
  • 2023-25 In Color Dots
  • Take Your Pick Tool
  • Wink of Stella
  • Stampin’ Dimensionals
  • Multipurpose Liquid Glue
  • Paper Snips
  • Stampin’ Cut & Emboss Machine

Instructions

Create the Background

  1. Adhere several of the torn Misty Moonlight cs strips onto the 4″ x 5 1/4″ Boho Blue cs with the Multipurpose Liquid Glue.
  2. Stamp some bubbles in Boho Blue ink. Then use the Pumpkin Pie ink to stamp some fish.
  3. Place the card piece in the Painted Textures Embossing Folder and run through the Stampin’ Cut & Emboss Machine.

Stamping

  1. Use a Sponge Dauber and the Garden Green Ink to apply ink to the head, tail and extremities of the baby sea turtle.
  2. Now use another Sponge Dauber and the Early Expresso Ink to daub ink onto the shell. Before the ink dries, coat the shell with Clear Emboss Powder. If some powder gets on the Garden Green Ink, use a dry paint brush to brush it away.
  3. Use the Heat Tool. Repeat until you have 4 turtles.
  4. Fussy cut.
  5. Use the Garden Green Ink and the 2 1/2″ x 3″ Very Vanilla cs to stamp the medium “Thank You” from the Go To Greetings stamp set on one end.
  6. Punch the sentiment out with the smooth oval of the Double Oval Punch.
  7. Also punch a smooth oval from the Garden Green cs. Adhere to the back of the Very Vanilla cs oval, slightly off-set.
  8. Use the Boho Blue Ink to stamp some bubbles in the lower right-hand corner of the 4″ x 5 1/4″ Very Vanilla cs.

Putting it all Together

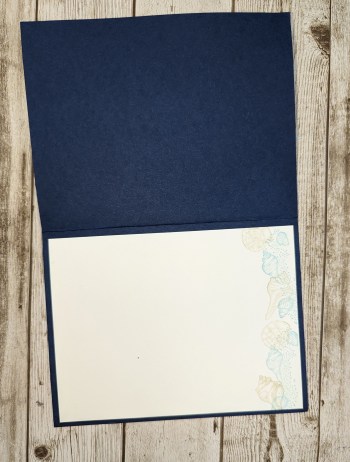
  1. Adhere the Very Vanilla cs with the Boho Blue bubbles on it to the inside of the Soft Sea Foam cs card base.
  2. Use the Multipurpose Liquid Glue to adhere one of the turtles to the inside.
  3. Apply Wink of Stella to the Misty Moonlight cs “waves”.
  4. Apply Stampin’ Dimensionals to the other 3 sea turtles and adhere to the background.
  5. Adhere the sentiment with Stampin’ Dimensionals.
  6. Adhere the card front to the front of the Soft Sea Foam cs card base.
  7. Add the Boho Blue In Color Dots for more “bubbles”.

Voila!

I hope you enjoyed my card today using the Sea Turtle stamp set and torn card stock.

Visit my Online Store to order what you need to make this card for yourself. Photographic supply list is at the end of this blog.

Current Host Code: F4TT24FW

When you click on the Vote For Me button will see a gallery of creative inspiration from Demonstrators around the world! You can visit everyone’s blog from the photo of their card on the Gallery. You are currently at Theresa McEntee-Theresa’s Treasures-USA. Enjoy! To vote for your favorite cards, click on the small heart in the upper right-hand corner of each photo. You have 5 votes! Enjoy and come visit Theresa’s Treasures again soon!

Clickable Supply List

Product List
Paper Snips
[103579]
$11.00

Thanks again for stopping by! Have a most wonderful and crafty day!

Theresa

Posted in 2023 January-April Mini Catalog, Aqua Painters, Emboss Resist Technique, Gratitude/ Thanks, Ink & Inspiration Blog Hop, Lake/Sea/Ocean, Nature, Sale-a-Bration 2023, Sea, Sealife, Stampin' Emboss Powder, Watercolor Techniques

Inspirations in Ink February 2023-Seaside Bay Emboss Resist Thank You Card

Today I have a Super Fun Seaside Bay Emboss Resist Thank You Card!

Welcome and thanks for visiting Theresa’s Treasures Paper Crafts! I am Theresa and I am a Stampin’ Up! Demonstrator in Arizona, USA. Today is the monthly Inspirations in Ink Blog Hop! I am excited to be hopping with awesome demonstrators from around the world. Be sure to check out everyone’s projects using the Seaside Bay Bundle. The Seaside Bay Bundle is in the 2023 Jan-April Mini Catalog. You may order form my Online Store HERE.

Seaside Bay Emboss Resist Thank You Card

Measurements

  • Balmy Blue card stock (cs) card base: 5 1/2 x 8 1/2 inches scored and folded at 4 1/4 inches
  • Textured 12×12 inch Shimmer Paper, Shaded Spruce: 4 x 5 1/4 inches (algae die cuts are from the center of this piece)
  • Fluid 100 5×7 inch Watercolor Paper: 3 1/2 x 4 3/4 inches
  • Crumb Cake cs: 1 1/2 x 4 inches for the seashell die cuts
  • Basic White cs: 4 x 5 1/4 inches (inside of card)

Supplies

  • Seaside Bay Bundle (stamp & dies)
  • Ink: Night of Navy, Shaded Spruce, Balmy Blue & Coastal Cabana
  • Versamark
  • Stampin’ Emboss Powder, Basics, White
  • Heat Tool
  • Water Painters, large pointed tip
  • Stampin’ Spritzer
  • Flat Adhesive-Backed Pearls
  • Wink of Stella Glitter Brush
  • Stampin’ Cut & Emboss Machine
Seaside Bay Emboss Resist Thank You Card

Instructions

Step 1- Emboss the Watercolor Paper

  1. Using the Versamark Ink stamp the images onto the Fluid 100 Watercolor Paper.
  2. Stamp two images, then cover them with the White Emboss Powder. Shake off the excess.
  3. Use the Heat Tool to set.
  4. Stamp two more images and repeat.
  5. That way you can see where you stamped to avoid stamping on top of another image.

Step 2- Emboss Resist Technique

  1. Prepare several layers of paper towels to work on.
  2. Squeeze each of the colored ink pads to get ink on the inside of the lid. Open & set up in a line above the paper towels.
  3. Use the Stampin’ Spritzer to spray water on the embossed Watercolor Paper. The water beads up on the paper.
  4. Use the Water Painter to pick up ink from the lid.
  5. Brush the ink onto the moist Watercolor Paper one color at a time.
  6. TIP: In between colors, squeeze water from the Water Brush onto a paper towel until it runs clear.
  7. Dry overnight. Or use the Heat Tool to speed up the drying process.

Step 3- Assembling the Card

  1. Use the Stampin’ Cut & Emboss Machine and the Seaside Bay Dies to cut one large & one small algae from the center of the Shaded Spruce Textured Shimmer Paper. C
  2. Cut 2 small & one large seashell from the Crumb Cake cs.
  3. Adhere the Basic White cs to the inside of the Balmy Blue cs card base.
  4. Adhere the Shaded Spruce Textured Shimmer Paper to the card front.
  5. Use Stampin’ Dimensionals to adhere the embossed & watercolored card piece to the card front.
  6. Adhere the large algae diecut to the bottom left corner of the card front. Adhere the small algae.
  7. Adhere the seashells

Step 4- Bling!

  1. First add some Wink of Stella to the seashells.
  2. Then add some of the Flat Adhesive-Backed Pearls.

Voila!

Seaside Bay Emboss Resist Thank You Card

Thank you so much for visiting today! Please visit all the blogs in this hop. You will see all the fun and inspiring projects made by the Inspirations In Ink demonstrators. You are currently visiting Theresa McEntee-USA creator of Theresa’s Treasures Paper Crafts.

Julie Golding Page – Canada   

Rebecca Nutley – Australia

Robbie Rubala – USA   

Theresa McEntee – USA  

Vicky Wright – Australia

Christy Gridley – USA  

Deirdre Croal – USA

Clickable Supply List

Product List

Have a most wonderful and creative day!

Theresa

Would you like your own Mini Cut & Emboss Machine? How about a Boho Blue Mini Cut & Emboss Machine! Join my Stamping Gems Team today and you can get a Mini Cut & Emboss Machine in your starter kit! Or if you already have a Cut & Emboss Machine and have a long wish list, you can join and get $175 UDS in product for $99 USD! This is the best deal! Click HERE to order your starter kit!

Sale-a-bration ends February 28, 2023! Order now to be able to get what you want! Remember to claim your Free product. New FREE products have been added!

Thinking of adding creativity to your life? Try a monthly paper crafting kit! The Paper Pumpkin Monthly Subscription delivers a kit with everything you need to make a project-right to your door! Sign up for a Pre-paid Paper Pumpkin Subscription HERE. The February kit has an Add On Die that coordinates with the images in the kit!

Ciao!

Posted in 2023 January-April Mini Catalog, Designer Series Paper, Fish, Gratitude/ Thanks, Lake/Sea/Ocean, Nature, Outdoors, Sea, Sealife

Kylie Bertucci’s Top 10 International Blog Highlight Winners Hop: Stampin Up!® Sneak Peek- Seaside Bay Bundle Thank You card

Welcome! I am Theresa McEntee, creator of Theresa’s Treasures Paper Crafts. I am so excited and thankful to be part of the Top 10 Winners Hop from Kylie Bertucci’s International Blog Highlights Gallery! Thank you to everyone who voted for my card from December 2022 Peaceful Deer & Fabulous Frames! Your vote for that card is allowing me an opportunity to post on the Winners Hop today. Ten fabulous demonstrators from around the world will be posting today! The theme for the card today is “Thank you”

My card today is a Sneak Peek of the Seaside Bay Bundle and By the Bay Designer Series Paper. These products will be in the Stampin’ Up! 2023 January- April Mini Catalog. They will be available for purchase on January 5, 2023! You can order from my Online Store HERE. A complete supply list is at the end of the blog.

Measurements

  • Night of Navy card stock(cs) card base: 5 1/2 x 8 1/2 inches scored & folded at 4 1/4 inches
  • Balmy Blue Textured 12 x 12 inch Shimmer Paper: 4 x 5 1/4 inches (NEW)
  • Basic White cs: 4 x 5 1/4 inches (inside) and 1 1/2 x 3 inches (sentiment)
  • Gold Foil: 1 1/2 x 3 inches
  • By the Bay Designer Series Paper(DSP): Iridescent Navy Blue Shell design: 1 1/2 x 3 3/8 inches; Balmy Blue crab design: 1 1/8 x 2 1/4 inches; Multicolor sea shell design: 1 1/2 x 1 1/2 inches; and Gold fish circle design: 3 1/8 x 2 1/4 inches.

Supplies

  • Night of Navy Ink pad
  • Balmy Blue Ink pad
  • Sahara Sand Ink pad
  • Deckled Rectangles Dies
  • Balmy Blue & White 1/2 inch Variegated Ribbon: 15 inches and 7 1/2 inches (NEW)
  • Flat Adhesive-Backed Pearls (NEW)
  • Mini Glue Dots
  • Stampin’ Dimensionals & Mini Stampin’ Dimensionals
  • Multipurpose Liquid Glue

Instructions

Inside

1.Take out the 4 x 5 1/4 inch Basic White cs. Use Balmy Blue Ink to stamp with the sand & seashell stamp on the right-hand end. Then stamp the snail and conch shells in Sahara Sand Ink.

2. Adhere to the inside of the Night of Navy cs card base.

Front

3. Take out the Balmy Blue 12 x 12 inch Textured Shimmer Paper. Place the By the Bay DSP pieces on top. Then adhere them to the Textured Shimmer Paper with Tombow Liquid Glue.

4. Fold the 15 inch piece of Balmy Blue & White Variegated Ribbon in half. Wrap around the Textured Shimmer Paper. Adhere each end to the back of the paper with Mini Glue Dots.

5. Tie the 7 1/2 inch piece of ribbon around the right-hand side of the ribbon adhered to the Textured Shimmer Paper. Adjust and trim as desired.

Sentiment

6. Take the 1 1/2 x 3 inch Basic White cs out. First Stamp Off then stamp the sand & seashell stamp in Balmy Blue Ink. Stamp the Thank You sentiment in Night of Navy Ink.

7. Die cut the sentiment with the smallest Deckled Rectangle Die.

8. Use Stampin’ Dimensionals to adhere the sentiment over the ribbon on the left side of the card front.

Finish Up

9. Use the Tombow Multipurpose Liquid Glue to adhere the Textured Shimmer Paper to the front of the Night of Navy cs card base.

10. Die cut the scallop seashells from the Gold Foil. You will need one large and two small ones. Use Mini Stampin’ Dimensionals and the Tombow Glue to adhere around the sentiment as shown.

11. Add one Flat Adhesive-Backed Pearls inside each of the Gold Foil shells.

Voila!

Thank you so much for stopping by today! Have a wonderful day! You are at Theresa’s Treasures created by Theresa McEntee-USA. Please visit all the rest of the blogs in Kylie’s Top Ten Winners Blog Hop to see more fabulous creations!

To order in my Online Store click on any photo below.

Supplies

Product List

Bye for now!

Theresa

Posted in Designer Series Paper, Lake/Sea/Ocean, Nature, Sea, Stampin Up! Sale

Stampin’ Up Seasonal Sale!!

From November 15 – 18, 2022 Stampin’ Up! will be having a Seasonal Sale on select stamps, dies, embossing folders, punches and Designer Series Paper. Print out the PDF at the end of this blog for a complete list of sale items. Shop my Online Store HERE. The current host code is: U73F9HD2

I have 3 cards to show you today using products that are on sale!

Let’s Set Sail

This colorful card is made with the Let’s Set Sail stamp set, Sailboat Builder Punch and Rays of Light stamp set. All are going to be ON SALE! I have a past blog post HERE if you want to see how to create this card for yourself.

Happiness Abounds

The Happiness Abounds stamp set has some great sentiments like the one on this elegant card. The flowers are from the Hues Of Happiness Designer Series Paper. The scalloped rectangles are found in the Scalloped Contours Dies. The embossed background is made with the Pretty Flowers Embossing Folder. And–you guessed it–these are all going to be ON SALE!

Nature’s Prints

The third and final card is created using the Nature’s Prints stamp set, Natural Prints Dies and Sun Prints Designer Series Paper. Yep-all are going to be ON SALE!

Do not miss out on this awesome sale! There are 7 pages of product in the PDF that are included in this Seasonal Sale starting Tuesday November 15 and ending Friday November 18, 2022. Print the PDF. Plan ahead and order early! Supplies will definitely run out! Please use Host Code: U73F9HD2

Be sure to print out the Seasonal Sale list!

Thanks for stopping by! I hope you get to take advantage of this awesome Sale!

Theresa

Posted in 2022-23 Stampin' Up! Annual Catalog, Avid Stamper, Ink & Inspiration Blog Hop, Lake/Sea/Ocean, Outdoors, Sea, Stamparatus

Let’s Set Sail for the Ink & Inspiration Blog Hop – July 2022- Scene and Color Inspiration

Hello everyone!  I’m so glad that you’re visiting today and hope you are having a wonderful day!  Today I am hopping with the Ink & Inspiration Blog Hop again this month! We are sharing inspiration from this lovely summer Scene & Color Challenge. There are several of us hopping today. You will find the list to follow along at the end of my blog post.

I was inspired mostly by the colors and used all of them! I really liked the idea of the sailboat too.

Creating the Card Yourself

Start by putting the Rays of Light stamp in the Stamparatus. Using a Sponge Dauber, apply the ink starting with Daffodil Delight Ink around the center of the rays. Next apply Mango Melody Ink in a circle around the Daffodil Delight Ink. Follow with Poppy Parade Ink. Finish up by applying Blackberry Bliss Ink on the edges of the stamp. Huff on the stamp to moisten the ink and stamp onto a 3 3/4 x 5 inch Basic White card stock. Repeat this process on a second 3 3/4 x 5 inch Basic White CS. You will use the second stamped Rays of Light card piece for the inside of the card.

In Smoky Slate Ink, stamp some birds around the center of the rays of light. Use the Smoky Slate Ink to stamp the sentiment “Adventure Awaits” onto a 1 1/2 x 2 1/2 inch strip of Basic White card stock. Use the Stylish Shapes Dies to cut out the sentiment.

Stamp the sailboat in Blackberry Bliss Ink onto a scrap of Basic White card stock. Use the Sailboat Builder Punch. Stamp each sail in Blackberry Bliss Ink and use the Sailboat Builder Punch. You will end up with 2 sails and a boat with a mast and flag.

Stamp the water in Pacific Point Ink onto a 2 x 6 inch Basic White card stock. Fussy cut.

Putting it all together

Adhere the Rays of Light card piece to a 4 x 5 1/4 inch Blackberry Bliss card stock. Then adhere the combo to the Pacific Point card stock card base (4 1/4 x 11 inches scored at 5 1/2 inches).

Trim a 1/2 inch strip off the right-hand edge of the second copy of the stamped Rays of Light. Adhere this to a 4 x 5 1/4 inch Basic White card stock. There will be a border around it. Adhere the card piece to the inside panel of the Pacific Point card stock card base.

Trim the stamped water to 1/2 x 5 1/2 inches. Use Stampin’ Dimensionals to adhere the water to the bottom of the card front.

Use Stampin’ Dimensionals to adhere the sentiment. Finish by adhering the boat followed by the sails-all on Stampin’ Dimensionals.

I hope this card has inspired you and hopefully brightened your day.  There are other amazing inspirations for you to see as you hop along this blog hop. Please see the list below. You are at Theresa’s Treasures written by Theresa McEntee-USA. Be sure not to miss anyone!

Thanks so much for stopping by today!

Theresa

Posted in Gratitude/ Thanks, Sea, Waves of the Ocean

Bruno & Kylie Bertucci’s Demonstrator Training Program Blog Hop-March 2022-Stampin’ Up!®Waves of the Ocean Thank You Card

I’m so excited to be training with Bruno and Kylie again this year and participating in our monthly Blog Hop with amazing Stampin’ Up! Demonstrators from around the world.  The purpose of this blog hop is to allow each of us in the training group an opportunity to learn and practice new skills to better ourselves and our Stampin’ Up! business. The benefit to you is that you get to “hop around the world” and get inspiration from many awesome Stampin’ Up! Demonstrators!

You are currently at Theresa’s Treasures with Theresa McEntee from Bisbee, Arizona USA to see my Waves of the Ocean Thank You Card . You will receive this card when you place an order with my Online Store during the month of March using the Host Code: TX3SVV3U. Be sure to visit everyone’s blog and see how the creative energy results in a variety of fabulous cards and projects!

This is a super simple card! You can make many very quickly!

Supplies

  • Granny Apple Green Card Stock (CS) card base: 5 1/2 x 8 1/2 inches with a score line at 4 1/4 inches
  • Blue Foils Specialty Paper: 4 x 5 1/4 inches and a 1/2 x 4 inch strip
  • Waves of the Ocean Designer Series Paper (DSP): 3 3/4 x 5 inches and a 3/4 inch strip
  • Basic White CS: 4 x 5 1/4 inches
  • Waves of Inspiration stamp set for the sentiment on the inside of the card (not shown)
  • Encircled in Friendship stamp set for the sentiment
  • Hippo & Friends Dies
  • Old Olive/Pretty Peacock 3/8 inch Reversible Ribbon
  • Rhinestone Waves Basic Jewels

Here is another card using Pool Party CS for the card base and the Night of Navy Blue Foil.

I quickly made all of these variations! To determine the colors to use, look at the label on the Waves of the Ocean DSP and the coordinating colors will be listed.

Voila! This Waves of the Ocean Thank You Card is simple and quick but great for expressing my gratitude to my customers.

You are at Theresa McEntee-Theresa’s Treasures-USA. Stop by the next blog on the list to see another fabulous Thank You card!

Thanks so much for stopping by. I hope to be mailing you a Waves of the Ocean Thank You Card for your order. If you have any questions about how to place an order, or about any of the Stampin’ Up! products, shoot me an email at: theresastreasures.az@gmail.com.

Have a most wonderful and crafty day!

Theresa
Supply List

Product List
Posted in Inspiration, Sea, Sealife, Waves of the Ocean

Stampin’ Up!® Waves of the Ocean Inspirational Card

The new Waves of the Ocean Suite is available now until May 2, 2022. This card showcases one of the inspirational sentiments as well as the main images. The Suite includes Waves Dies to make your card extra special!

If you would like to receive a downloadable PDF Tutorial to make this card for yourself, please subscribe to my Newsletter. There are 2 techniques used for this awesome card!

This is the complete Suite for the Waves of the Ocean #161797. You can purchase the Waves of the Ocean Suite in my online store by clicking on the item number or the on the photo above. The Blue Foils and the Waves of the Ocean Designer Series Paper are so beautiful! And the Rhinestone Waves Basic Jewels are terrific Bling for your projects! If you would like to order separate items from this suite, visit my Online Store HERE.

What else is happening with Stampin’ Up!?

Tomorrow, Thursday March 10th is the last day to subscribe to the Beyond the Horizon Paper Pumpkin kit that will coordinate with the On the Horizon stamp set and New Horizons Designer Series Paper. Sign up HERE today!

The All Together Suite includes new Stampin’ Blend Alcohol Markers in 10 different shades of skin colors, as well as black & white Designer Series Paper. Check out my card from this BLOG to see a sample of how the products come together to make an awesome card. Order your All Together products today in my Online Store.

If you need any assistance with subscribing to the Newsletter or with ordering, shoot me an email at theresastreasures.az@gmail.com.

Happy Crafting!

Theresa

Posted in 2021-2022 Stampin' Up! Annual Catalog, 2022 January-June Stampin' Up!® Mini Catalog, 3D Technique, Avid Stamper, Birds, Designer Series Paper, Fun/Fancy fold card, Nature, Outdoors, Sea

What I learned from this Friday Fun Fold Pop Up Box Birthday Card

Hello my stamping friends! I hope all has been well with you this week. Today I have a Friday Fun Fold Pop Up Box Birthday Card for you. I learned this fold from Rachel Tessman who made it as a Paper Pumpkin alternative. You can see her card HERE. The first go around I made several mistakes. There will be tips for you so that you will be able to avoid the same mistakes I made.

The New Horizons Designer Series Paper (DSP) is so awesome, I am in love with it! This paper is super great for scenic watercolor backgrounds. I will be using the New Horizons DSP for today’s card along with the Sailing Home stamp set.

This is a photo of the second Friday Fun Fold Pop Up Box Birthday Card card I made. I will give you tips so that your first card comes out right.

Measurements

Friday Fun Fold Pop Up Box Birthday Card

Misty Moonlight Card Stock (CS) card base: 5 1/2 x 8 1/2 inches.

New Horizons Designer Series Paper (DSP): The scene will be portrait orientation. Cut the 6 x 6 inch scene at 4 1/4 inches first. Then cut the resulting strip to be 1 5/8 x 5 1/2 inches. Cut the scene to be 3 1/4 x 4 1/4 inches. You will need to use 2 sheets to get both scenes. One scene for the front and one for the back of the card.

Basic White CS: 2 1/2 x 1 inch (for sentiment) and 2 x 4 inch to stamp the larger sailboats on.

Night of Navy CS: 2 3/4 x 1 inch (for sentiment)

Ink: Night of Navy

Scoring the Card Base

Score at 1/2, 2 1/8, 2 5/8, 4 1/4, 5 7/8, 6 7/8 and 8 inches.

Preparing the Card Base

First Tip: Do not burnish the score lines until after you make the slot. Make the slot as thin as you can. The slot on the left is too wide. This made the finished card unstable. Use the Stampin’ Up! Trimmer to get a thin slot. Set the left edge of the card base at 4 5/16 inches and make a cut from 1 1/8 to 4 3/8 inches. Then turn the card base 180° and cut again. Use your paper snips to cut the extra piece off to make the slot.

Second Tip: Adhere the 1 5/8 x 5 1/2 inch strips of the New Horizons DSP close to the 4 1/4 inch score line, but do not cover the score line. The card should be easy to fold.

Stamping

Stamp the large sailboat twice in Night of Navy Ink onto a scrap of Basic White CS. Use a scrap of the News Horizons to stamp the small sailboat twice. You may fussy cut the sailboats or use the Smooth Sailing Dies.

Stamp the desired sentiment onto the 1 x 2 1/2 inch Basic White CS with Night of Navy Ink. I used the “Happy Birthday” from the Celebrating You stamp set.

Assembling the Fun Fold

One difference between my card and Rachel’s is that I wanted an image on both the front and the back of the card. That way there is something to look at forward and backward. Adhere the top of the two sailboat scenes together. Apply a Tear-n-Tape strip to the bottom of the back one.

Insert the sailboat scene through the slot in the card base. Align the bottom of the sailboat scene with the 1/2 inch score line. Take the protective layer off of the Tear-n-Tape on the scene. Fold the base at the 1/2 inch score line so that it sticks to the sail boat scene. Apply a strip of the Tear-n-Tape to the Misty Moonlight bottom.

Peel the protective layer off of the Tear-n-Tape. Adhere the two sailboat scene pieces together. Press down. Apply more Tear-n-Tape over the bottom of the sail boat scene. Remove the protective covering.

Fold the card base at the 4 1/4 inch score line to adhere the sides together.

Here is how the Pop Up Box looks from the side and all the way folded down. Cool right?!

Decorating the Pop Up Box

Tip: The first go around I put the small sailboat on the left and the sentiment on the right. The second time I was able to add the larger sailboat if I put the small sailboat to the right. Note: I forgot to stamp the birds on the sail boat scene for the first card. I really like the scene much better with the birds added.

On the backside, I placed the small sailboat on the left and the larger sailboat on the right as shown.

Be sure to adhere the sail boats and sentiment to the small strip under the DSP piece so that they pop up!

Finished Product

Here are the forward and backward views of the first card.

Here are the forward and backward views of the second card.

Voila! I hope you are successful with this. I really felt a sense of accomplishment after figuring this Fun Fold Pop Up Box Birthday card out.

Thanks so much for reading my blog. Please leave a comment and let me know if you like the way I am doing this blog. Helpful suggestions are welcome.

Theresa

Stampin’ Up!® Promotions

Joining Special

Earn 2 FREE stamp sets of your choosing when you sign up to be a Stampin’ Up! demonstrator. Choose $125 of product for your Starter Kit and pay only $99 before shipping and handling! Join HERE. Contact me for more information at theresastreasures.az@gmail.com.

Paper Pumpkin Subscription

Don’t monkey around and miss this amazing adventure! Unleash your creativity with February’s wildly fun kit!

Answer the call of the wild—and your creativity—with the Safari Celebration Paper Pumpkin Kit. This playful, party-themed kit includes all the goodies and gear you need to create nine cards and coordinating envelopes in safari-inspired shapes and patterns you’ll go wild for! Make every occasion a celebration with this month’s amusing animals, beautiful botanicals, and celebratory sentiments.

Paper Pumpkin is a subscription kit. You earn FREE product when you order a pre-paid code from my Online Store. A pre-paid code will be sent in an email. Next, go to my Paper Pumpkin sign up and enter the code. You will get this Safari kit if you do so by February 10, 2022.

Paper Pumpkin Codes:

• 3-Month Prepaid Paper Pumpkin Subscription [137859] $63.00 : —https://bit.ly/3qin54v

• 6-Month Prepaid Paper Pumpkin Subscription [137860] $114.00:–https://bit.ly/3njb4tE

• One year Prepaid Paper Pumpkin Subscription [137861] $220.00:–https://bit.ly/3zNjj66

You will get an email with the Pre-paid code. Then you will go to: https://bit.ly/subscribeTheresasTreasuresPaperPumpkin and enter the pre-paid code to start your subscription! Shoot me an email with any questions

Celebrate Diversity

Lots of fun with diversity is coming on February 1, 2022. The All Together set will include 10 Stampin’ Blends for a range of skin colors. The images in the stamp set will celebrate diversity. Watch for more information on this fabulous set!

Get this FREE Creative Download from Stampin’ Up! for more on the celebration of diversity.

Thank you for your attention. If you need any assistance with your order please email me at theresastreasues.az@gmail.com

Posted in Animals, Inspiration, Sale-a-bration 2022, Sea, Sealife

Kylie’s International Blog Highlights Gallery- January 2022- Stampin’ Up!® Awesome Otters

Today I am taking part in Kylie Bertucci’s Monthly International Blog Highlights Gallery. The theme is- Thank You. It is so important to thank those who inspire us. My Awesome Otters card goes a little further by letting someone know just how awesome they are to me.

On this gallery, you can see thank you cards made by people from all over the world! I hope you enjoy my Awesome Otters card and take the time to see everyone else’s inspiring creations by visiting the gallery. You can get to the gallery by selecting the “Vote For Me” button at the end of this blog. I would greatly appreciate your vote for my card.

The Awesome Otters card is a super easy card to make. The circles are cut with the Picture This Die. The Simply Marbleous 6 x 6 Designer Series Paper is available for free during Sale-a-bration with a $50 purchase from my Online Store. The Awesome Otters stamp set is also a FREE Sale-a-bration item with an additional $50 purchase.

These adorable otters are colored with Stampin’ Blends Alcohol Markers. The colors I used are: Pool Party, Smoky Slate, Gray Granite and Basic Black. I added some Wink of Stella to the bubbles and around the otters. The card base is Bermuda Bay Card Stock.

https://www.kyliebertucci.com/2022/01/kylies-international-blog-highlights.htmlPlease vote for my card when you visit the Gallery by selecting the “Vote For Me” button below. Thank you!

Supply List

Product List


Ciao!

Theresa

Posted in 2021-2022 Stampin' Up! Annual Catalog, Animals, Blends Alcohol Technique, Guys cards, Sea, Techniques

Cardz4Guyz Challenge #278- Things With Tails and Stampin’ Up!® Turtle Friends with the Stampin’ Blends Alcohol Technique

I have such an exciting and fun card to share today! The cute Turtle Friends stamp set and Turtle Punch come together with the Stampin’ Blends Alcohol Technique for this cute card.

Stampin’ Blends Alcohol Technique

What you will need to do this technique is 99% Isopropyl Alcohol, a plastic dish for the alcohol, a paint brush, a straw, vellum card stock and the Stampin’ Blends Alcohol Markers. I recommend the Stampin’ Up! brand of vellum because it is thicker than the other brand I tried. The thicker vellum doesn’t curl as much when it dries.

I cut my vellum card stock to 4 1/4 x 5 1/2 inches. Using a light, medium and dark color of Stampin’ Blends Marker, I randomly colored in blotches to fill the paper. Here I am using Dark Fresh Freesia, Dark Highland Heather and Dark Blackberry Bliss. (For the turtle card, I used Dark Pool Party, Dark Bermuda Bay and Dark Misty Moonlight Stampin’ Blends Alcohol Markers.)

I filled in the spaces for this piece with the Dark Misty Moonlight. Next, dip the paint brush in the dish with the alcohol in it, and then dab it onto the vellum card stock. You can blow through the straw to help the alcohol spread, making neat patterns with the ink. I used my Stampin’ Up! Heat Tool to spread the alcohol and also to dry it. Use the low setting so you don’t melt the vellum.

When the vellum card stock is dried, use a glue stick or spread the Tombow Multipurpose Liquid Glue in a thin continuous layer on the back. Adhere to a piece of Basic White Card Stock. Now you just get the other basic pieces for a card together and Viola! you have a fun and cool card!

Back to the Turtle Card

The Scalloped Contour Dies make the waves on the Vellum Alcohol Technique card piece, as well as on a 5 x 1 1/2 inch Misty Moonlight Card Stock piece. These were adhered together slightly layered, then adhered to a 5 x 3 3/4 inch Pool Party Card Stock embossed with the Painted Texture 3D Embossing Folder. Next, the Pool Party card piece was adhered to the 5 1/4 x 4 inch Misty Moonlight Card Stock. To finish, adhere the Misty Moonlight/Pool Party card piece to the front of a 5 1/2 x 8 1/2 inch Basic White Card Stock card base.

Now for the turtles. The images were stamped onto Basic White Card Stock in Memento ink and colored with Stampin’ Blends Alcohol Markers in Dark Pool Party, Light Bermuda Bay and Light Misty Moonlight. Bermuda Bay ink was used to stamp the turtle’s shell. The little bird and the “Happy Birthday” sentiment were stamped in Misty Moonlight ink. I used a scrap of the Alcohol Technique card piece on the inside.

Add a few blue rhinestones from the Holiday Basic Rhinestone Jewels and Voila! You have a fun and cute birthday card for your favorite little guy!

Thanks for stopping by today. Please visit the Cardz4Guyz blog to see other great card ideas with the theme # 278-Things With Tails.

Supplies

Click on any photo to be connected with my online store.

Product List

Happy Stamping!

Theresa