Posted in beginner stamper, Cling Stamp, Father's Day, Grunge style, Occasions Catalog 2019, Stamping-off technique

Father’s Day in January?

This is the 2nd in a series of Blog posts about masculine cards. I have had many a time when a holiday has crept up on me before I was able to get a card ready. Ever had that happen? Well, today I am making a Father’s Day card, mostly because the sentiment is in the stamp set -Geared Up Garage-which I started using the other day. But also, I want to be ready this year!

This style of card is “grunge”. It is a lot easier than it looks!

Measurements: Whisper White card base 8 1/2 x 5 1/2 inches folded in half and burnished with the Bone Folder, Basic Black 5 1/4 x 4 inches, Whisper White 4 1/2 x 3 1/4 inches and a scrap of Whisper White 2 3/4 x 2 1/2 inches, and Real Red 2 1/4 x 1 inch.

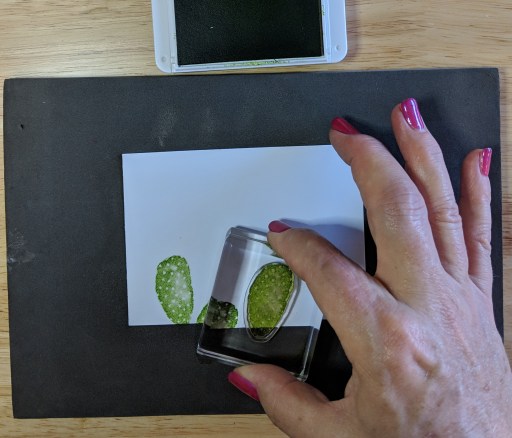
You will also need Memento ink and a C block to start. Later you will need an A, B, C and D block.

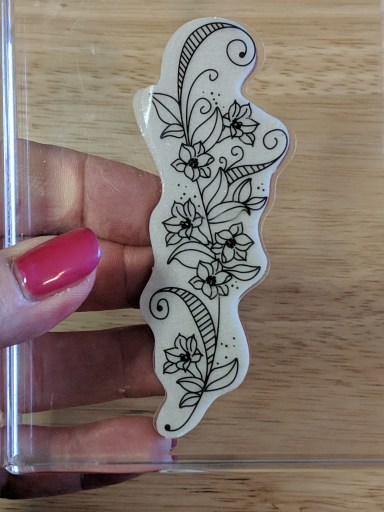
Just a reminder for how to put the label on the new Cling Stamps. First remove the stamp. Then turn the label sheet so the words are backward. Pinch the middle of the desired label.

Gently remove the paper backing without removing the label. Place the stamp with the foam side down over the label, taking care to line up the edges. Press firmly.

Now gently remove the label attached to the stamp. This is very sticky! Do not set it down on anything. Put it on the block right away and when finished, directly back into the stamp case. I do not always put the labels on, but I typically will put on the labels for sentiments.

Use the Memento ink and stamp the Father’s Day sentiment onto the scrap of Whisper White. Note: You do not need the Piercing mat for the red rubber stamps, just stamp onto a smooth firm surface.

Use your paper snips to cut around the sentiment leaving a slight border.

Adhere the sentiment to the Real Red piece. Now cut a banner edge, first by making a cut in the center, then from each corner to the center as shown. Set aside.

Now for the “grunge”! Mount the lug nuts on an A block, the oil can on a B block, the tool box on a C block and the oil spill on a D block (Clockwise from top).

Start with the tool box since it is one of the larger images. Stamp an odd number of times.

Now stamp the oil can and then the lug nuts an odd number of times. I messed up and stamped 6 lug nuts! Fortunately the sentiment with cover one!

We are going to use a technique called “Stamping Off” for stamping the oil spill. First apply Memento ink to the oil spill stamp and stamp it on a scrap of paper. Then stamp onto the card piece. This gives a slightly lighter image. That way the oil spill doesn’t over-power the rest of the images. It just makes it “grungy”.

Continue to first stamp on the scrap paper, then on the card piece, until you like the result.

Adhere the Basic Black to the folded card base. Now adhere the stamped “grunge” piece.

Apply Dimensionals to the back of the sentiment banner and adhere to the front of the card. Viola! You have a Father’s Day card ready to go! Now, if you can just put it away somewhere where you can find it!

Stampin’ Up! products used include: Stamp set: Geared Up Garage #148590; Cardstock: Whisper White #100730, Basic Black 121045 and Real Red #102482; Ink: Memento #132708; Blocks A #118487, B #117147, C #118486 and D #118485; Paper Snips #103579; Dimensionals #104430; Multipurpose Liquid Glue #110755

Posted in beginner stamper, Sale-A-Bration 2019, Simple stamping

Garage Grunge

Ever have trouble coming up with just the right card for a guy? There are plenty of flowers, butterflies, cakes and treats that lend themselves to more feminine cards. But what to do for a more masculine card?

The next series of 3 Blog posts with show several cards made with the Stampin’ Up! Geared Up Garage stamp set. I will also introduce the concept of a “grunge” style of card. So let’s rev up our engines and Go!

Measurements: Whisper White card base 8 1/2 x 5 1/2 inches folded in half. Poppy Parade 4 x 2 1/2 inches and Whisper White 3 3/4 x 2 1/4 inches.

First I would like to share a tip. I use a Bone Folder to rub the folded edge of my card base. This makes the fold a lot tighter and it looks more professional.

Tip: I mounted the car stamp onto a D block from corner to corner. This way you can get a slightly larger stamp on a smaller block. Using Memento ink, stamp the car image onto the Whisper White rectangular piece.

Mount the sentiment “You’re a Classic” on an H block and ink it in Memento ink. Be sure to push straight down and straight up with moderate pressure in order to get the ink evenly on the sentiment. I placed the car image on the Poppy Parade rectangle without adhesive for placement before stamping the sentiment on the card base.

Now adhere the car image to the Poppy Parade rectangle, then adhere them to the card base. Here is the first version of this card. You can stop right here, or pull ahead for a more “souped-up” version!

You can “soup it up” by adding red color to the car, or by adding “grunge” or both . First we will add color to the car.

Stampin’ Up! has the most amazing alcohol markers called Stampin’ Blends. The amazing part is that the markers come in a light and a dark version of many of the same colors used for the ink and cardstock.

There are many ways to use the Stampin’ Blends to get an interesting image. First, I used the light Poppy Parade on the whole car. Next, I added the dark Poppy Parade to the areas I wanted shaded. Lastly, I used the light Poppy Parade again to blend the edges.

Now let’s add some “grunge”!

I am going to use the “oil stain” and “lug nuts” to make the card more interesting. This is not for everyone, so if you don’t like it, just leave it as is.

First I put the Poppy Parade rectangle with the car image on the top of the card without adhesive for placement. Next, I added the oil stains, then the lug nuts. Tip: Often an odd number of a design element looks better than an even number. For example: 3 lug nut images is more interesting than 2. I did only 2 oil stains because of the size of this element but I rotated the stamp so it looks like 2 different images.

Now adhere the car image to the Poppy Parade rectangle, then to the card base.

Here is the completely “souped-up” version of the car card with “grunge”!

Join me for the next blog where I will show a Father’s Day card using the “grunge” style!

To purchase the supplies needed for these cards, select the “Click for my store” button at the top. It is currently the best time to buy Stampin’ Up! products because of Sale-a-bration, during which for every $50 you spend, you may select a free item from the Sale-a-bration brochure. Happy shopping!

Supplies used include: Stamp set: Geared Up Garage #148590; Cardstock: Whisper White #100730 and Poppy Parade #119793; Ink: Memento #132708; Stampin’ Blends: Poppy Parade combo pack #147275; Blocks: A #118487, D #118485 and H #118490; Bone Folder #102300 and Multipurpose Liquid Glue #110755

Posted in beginner stamper, Occasions Catalog 2019, Simple stamping

Incredibly Proud

I just love an excuse to tell my children who live far away from me how proud I am of them. Everyone could use praise from time to time. I try to communicate with them regularly to keep our connection to each other strong.

This is the 3rd in a series of Blogs using the Stampin’ Up! Incredible Like You stamp set. I apologize in advance if the photographic quality is decreased. I am having technical difficulties with my main computer so I am using my outdated laptop.

For this card you will need a Whisper White card base measuring 8 1/2 x 5 1/2 inches folded in half, and a strip measuring 5 x 2 1/4 inches. You will also need a 5 1/4 x 2 1/2 inch piece of Poppy Parade.

You will also need the stamp set, Memento ink, and the Stampin’ Up! ink in Poppy Parade, Granny Apple Green and Mango Melody.

Take the strip of Poppy Parade and lay it on the card base as shown to help with placement of the sentiment. The sentiment is stamped in Memento ink. Set aside.

This is a 2 step stamping process. For this particular stamp, I have found it easier to first stamp the more detailed stamp (left), then the less detailed stamp ( right) on top of it. Note: Sometimes the photopolymer stamps will get stained with use. This does not affect the quality of the stamped image as long as the stamp has been cleaned properly, i.e. with a baby wipe or the Stampin’ Scrub.

The first poppy is stamped in Mango Melody in the center of the Whisper White strip.

Now use the less detailed stamp, taking care to line the edges up. This does stamp a lighter image to give a 3-D effect.

Use the same 2 step stamping process to add the additional poppies in Poppy Parade ink.

Add the stems and the leaves in Granny Apple Green.

Tip: As you can see, I did not stamp the full image of the leaf. This is easy to fix with the Photopolymer stamps since you can see through them. Do Not re-ink the stamp. The ink is still on the part of the stamp corresponding to the missing image. You can carefully line it back up and apply a little pressure to the area that did not stamp to fix the image. I think that is so cool!

Adhere the stamped poppy strip to the Poppy Parade strip, then adhere to the card base. Now you have a very nice card to express how proud you are of someone!

The next series of 3 Blog posts with be a masculine theme using the Stampin’ Up! stamp set Geared Up Garage # 148590. So stayed tuned!

Supplies used are all Stampin’ Up! products and include: Stamp set: Incredible Like You #148708; Cardstock: Whisper White #100730 and Poppy Parade #119793; Ink: Memento #132708, Mango Melody #147093, Poppy Parade #147050 and Granny Apple Green #147095; Clear Blocks B #117147 and D #118485; Stampin’ Piercing Mat #126199; Multipurpose Liquid Glue #110755. I use the Stampin’ Scrub #126200 with the Stampin’ Mist Stamp Cleaner to clean my stamps.

Stampin’ Up! Sale-a-bration is going on until March 31, 2019! Get free stuff when you spend $50. Select the “shop here/ click here for my store” button on top to go to my Stampin’ Up! Web page and get all the details!

Posted in beginner stamper, Occasions Catalog 2019, Simple stamping

Adorable poppies and cat

Hello wonderful stampers! Anakin here is sleeping snuggly in his cat bed. I believe he will be rejuvenated after his nap. I find stamping to be instrumental in rejuvenating my spirit. That’s why I love to stamp as much as I can!

Don’t worry if you are short on time. Sometimes I just stamp for 10 or 15 minutes at a time. If you follow the instructions for this adorable card, you will have it made in no time at all.

The supplies you will need for this card will be listed below. I am using the same materials and stamp set at the previous post, with the addition of another color of ink.  However, I will put the measurements for the cardstock here. The Whisper White card base is the standard 8 1/2 x 5 1/2 inches, folded in half.  In Whisper White you will also need a 2 x 1 1/2 inch piece and a 5 x 2 1/4 inch piece.  In addition, cut a 2 1/4 x 1 1/2 inch piece of Pineapple Punch, and a 5 1/4 x 2 1/2 inch piece of Granny Apple Green.

To get started, use the “I just adore you” sentiment with Memento ink of the small Whisper White piece. Adhere the stamped piece to the Pineapple Punch rectangle.

As we did in the last post, we are going to do 2 step stamping to make the poppies. Begin by using the more detailed poppy first. This is stamped in Mango Melody.

Now use the less detailed poppy to complete the 2 step stamping of the poppy. This is also stamped in Mango Melody.

Next use the Pineapple Punch ink to stamp the more detailed poppy followed by the less detailed poppy as shown.

On the left is the completed poppies. Take care to hold onto your block or you will have something like what is shown on the right!

Remove the extra ink with a baby wipe or moist cloth.

New Technique. Next we are going to make a mask.  This will allow us to stamp the stems and leaves on without covering up the poppies. First stamp the less detailed poppy onto the non-sticky side but on the sticky end of a sticky note. You want the sticky part to be on back of the stamped image. Now you will use the Paper Snips to carefully cut out the image.

Stick the mask over one of the poppies. Stamp the stems on the poppies above the masked poppy.

Continue to stamp the stems onto the poppies, moving the mask as needed.

Use the mask as needed to stamp on the leaves. Adhere the completed poppy piece to the Granny Apple Green rectangle.

Adhere the Granny Apple Green piece to the left side of the card base.

We will lift the sentiment piece up a little using Stampin Dimensionals. These are little foam hexagons with sticky on both sides. Tip: I always put at least one in the center to prevent the elevated piece from getting flattened out.

And now you have an adorable card to share with someone you adore!

Stampin’ Up! supplies included: Stamp set: Incredible Like You #148708; Cardstock: Whisper White #100730, Pineapple Punch #146971 and Granny Apple Green #146990; Ink: Memento #132708, Pineapple Punch #147141, Mango Melody #147093 and Granny Apple Green #147095; Paper Snips #103579, Stampin Dimensionals #104430, and Multipurpose Liquid Glue #110755.

Remember that from now until March 31, 2019 Stampin’  Up! is having their Sale-a-bration! This means that for every $50 you spend, you can choose a free item from the Sale-a-bration brochure! Select the “Shop Here” button on this page. This will take you to my store.  If you would prefer a paper copy of the catalog and brochure, private message me on my Facebook page, and I will send it to you.

Posted in Occasions Catalog 2019, Simple stamping

Amazing Day

Hello fellow stampers! Here in the Warren District of Bisbee Arizona, I am blessed to have an amazing day start with a beautiful sunrise that I can see from my bedroom window quite often. 

 I hope you can have an amazing day as well. To get that started, here is an amazing card!

To make this amazing card you will need the following Stampin’ Up! products: the Incredible Like You stamp set, Pineapple Punch and Granny Apple Green cardstock and ink, Memento ink and Whisper White cardstock.  The Whisper White card base is 8 1/2 x 5 1/2 inches folded in half. You also need a 3 1/4 x 3 1/4 inch square of Whisper White, a 3 1/2 x 3 1/2 inch square of Granny Apple Green and a 1 1/4 x 5 1/4 inch strip of Pineapple Punch.

 In order to get the sentiment straight on the clear block, first lay it on the card and put the clear block over it. Apply light pressure to get it to stick. Apply Memento ink and put the sentiment onto the  bottom of the Whisper White square. 

The poppy is a 2 step stamp. That means you will stamp one image on top of the other to get the full image. In this case, I have found it easier to stamp the detailed image first.

I had to try this several times to get the final image to my liking.

Now you will stamp the less detailed poppy on top of the detailed image. Sometimes it takes practice to be able to get everything lined up. When you do, the image is incredible.

Next, use a sticky note to cover the sentiment. This allows you to put the stems on without getting them over the sentiment.

After adding the leaves remove the sticky note.

In order to cut the banner, you first make a cut down the center about 1/4 inch in. Cut from the left corner to the center, then from the right corner to the center as shown.

Adhere the stamped image onto the Granny Apple Green square. Now adhere the Pineapple Punch banner to the back. Apply adhesive to the whole piece, and adhere to the card base. And there you have it! An amazing card you can send to one of your amazing friends to brighten their day!

Supply specifics: Stamp set: Incredible Like You #148708; Cardstock: Whisper White #100730, Granny Apple Green #146990 and Pineapple Punch #146971; Ink: Memento #132708, Granny Apple Green #147095 and Pineapple Punch #147141; Clear blocks: A #118487, B #117147, D #118485 and H #118490; and  Multipurpose Liquid Glue #110755.

 Remember until March 31, 2019 you can order $50 worth of product and get a free Sale-a-bration item from the Sale-a-bration brochure. When you buy everything on the list above, plus some Stampin’ Dimensionals which we’ll use on the next card, you can pick out 2 free Sale-a-bration items. Select the “Shop Here” button on the top right of this blog and you will be taken to my Stampin’ Up! store so you can start collecting some amazing product!

Posted in beginner stamper, cactus, desert, Hello, Occasions Catalog 2019, Simple stamping

Beautiful Desert

Living in the desert can be very peaceful and colorful. When the cacti bloom and add color to the usually brown desert, it is breath-taking!

Today I am using the Stampin’ Up! stamp set called Flowering Desert. I have had a great deal of fun with this set! I am using the same colors I have used in previous blog posts, Shaded Spruce and Pineapple punch. I have added Granny Apple Green.

Here is today’s card. In addition to the cardstock and ink in Shaded Spruce, Granny Apple Green and Pineapple Punch you will need Whisper White cardstock and some adhesive. If you would like pink flowers on top of the cacti, you may use Melon Mambo ink.

I started with Whisper White cardstock cut at 4 1/2 x 3 1/4 inches using the larger cactus ‘leaf’ stamp in Granny Apple Green ink.

I added a couple more leaves allowing space in between for other smaller cactus leaves.

I added more to the cactus with the smaller leaf.

Keep adding more of the small leaves until you like how it looks.

Next I used the Agave leaves stamp in Shaded Spruce ink.

Top the cactus using the Pineapple Punch ink and the larger flower stamp.

To finish the design, I used Pineapple Punch ink to add the flower branch.

I used the Shaded Spruce ink for the sentiment “Hi There!”.

I am now done with the stamping.

Tip: Some of the ink will get on your Pierce Mat. This can easily be removed with a baby wipe or wet washcloth. Another option is to wrap white copy paper around the mat so the extra ink goes on the paper instead of the mat.

In order to assemble the card I cut a piece of Pineapple Punch cardstock at 5 1/4 x 4 inches and adhered it  to the Whisper White card base. The card base measures 8 1/2 x 5 1/2 and is folded in half.

I cut a piece of Shaded Spruce the same size as the stamped piece of Whisper White, 4 1/2 x 3 1/4 inches.

Place the Shaded Spruce piece at a slight angle and adhere to the card.

Adhere the stamped piece horizontally parallel to the Pineapple Punch piece.

And now you have the completed card! Be sure to send it to someone special. It’s always nice to get a handmade card in the mail from a good friend just saying “Hello”!

Here are some other variations. Have fun creating your own. To order any of the supplies listed below, click on the shop now button at the top of the blog and you will be connected to my store. If you have any questions about ordering please contact me. There is a special sale right now called Sale-a-bration which lasts until March 31, 2019. During Sale-a-bration, for every $50 ordered, you my choose a free item from the Sale-a-bration brochure. So, check out my store and get your deal on stamping supplies today!

Products used included: Stamps: Flowering Desert  #148700; Cardstock: Shaded Spruce #146981, Pineapple Punch #146971, Granny Apple Green #146990 and Whisper White #100730; Ink: Shaded Spruce #147088, Pineapple Punch #147141 and Granny Apple Green #147095; Clear Blocks: A, B, C and D; Multipurpose Liquid Glue #110755 If you wish to have pink flowers on top of the cactus’ you may use Melon Mambo ink # 147051.

Posted in beginner stamper, Cling Stamp

Butterflies in Winter

One of the scenes I love in Spring is of the butterflies and flowers. So, even though it is still winter I can bring this scene to life on a card. For this card I used Stampin’ Up! Beauty Abounds and the ‘You’re so Awesome’ sentiment from Flowering Desert. The colors are Shaded Spruce and Pineapple Punch. The card base is in Whisper White cardstock.

I started out with this stamp from Beauty Abounds, and the Shaded Spruce ink.

Apply the ink by tapping on the ink pad, straight up and straight down, until you have ink evenly on the raised part of the stamp. If you have ink on the red rubber around the stamp, or on your block, try tapping more lightly.

Press the stamp straight down on your cardstock and apply moderate but even pressure for about 5 seconds. Take care not to rock the block. Lift the stamp straight up. Following this procedure each time will allow you to get a nice clean image.

Add a few butterflies in Pineapple Punch ink.

Stamp the sentiment from Flowering Cactus in Shaded Spruce onto a strip of Whisper White cardstock measuring 3/4 inch by 4 inches.

The trick to getting a nice banner edge, is to start by cutting straight in at the middle.

Next, cut from one corner to the middle.

Then from the opposite corner to the middle.

Viola!

Now, adhere the Whisper White with the sentiment onto a strip of Pineapple Punch measuring 1 inch by 4 1/2 inches. Then cut the banner edge as shown.

I used Stampin’ Dimensionals to apply the sentiment to the card. These are a piece of foam with adhesive on both sides.

I applied the Dimensionals as shown. This will lift the sentiment up from the card a bit and add, well, add dimension to your card.

The Whisper White card base measures 8 1/2 x 5 1/2 inches and is folded in half. I trimmed the butterfly and flower piece to 2 1/2 x 3 5/8 inches and adhered it to a piece of Pineapple Punch measuring 2 5/8 x 3 3/4 inches. The first layer is Shaded Spruce at 5 1/4 x 4 inches. I added sequins to put some sparkle on the card.

Supplies used are : Cardstock: Whisper White #100730, Shaded Spruce #146981, and Pineapple Punch #146971; Ink: Shaded Spruce #147088 and Pineapple Punch #147141; Stamp sets: Flowering Desert #148700 and Beauty Abounds #148726; Clear Blocks: E #118484 and H #118490; Gingham Gala Adhesive Backed Sequins #148561; Paper Snips #103579 and Multipurpose Liquid Glue #110755.

Posted in beginner stamper, Cling Stamp, Occasions Catalog 2019

New Cling Stamps from Stampin’ Up!

Hello awesome stampers!  I would like to show you how to make this card, but I first want to spend some time on the new type of stamps called Cling Stamps. These are extra sticky so that they will stay on the acrylic block. However, some folks have had problems with them sticking to other things.

The ‘Beauty Abounds’ stamp set by Stampin’ Up! is an example of a Cling Stamp. You will know this by looking above the title of the stamp set.

Inside the case there will be the red rubber stamp attached to foam with a protective paper on the back, and the plastic vinyl sheet with the images on it.

First, gently remove the stamp from the red rubber/foam sheet.

Next, peel the paper off the back.

The plain foam will stick to the acrylic block, but you cannot see the image. Many stampers leave the images off and just use the stamp like this. However, sometimes you cannot see the orientation of the image.

I accidentally put the butterfly on at the wrong angle because I was using the stamp without the image on it.

Carefully peel the protective cover off of the vinyl image and do not let anything touch it. It is very, very sticky!


Taking care to line up the edges, place the rubber stamp over the image and press lightly to adhere them together.


Gently pull the stamp away from the image sheet. Again, it is very sticky!

Place the stamp with the image on it directly onto an acrylic block. DO NOT LAY THE STAMP DOWN ON PAPER, THE DESK OR ANYTHING ELSE!  It will stick to the paper and then be unusable! You may not be able to remove it from the other surfaces.

When you are done stamping, carefully remove the stamp with the image on it from the block and put it back in the stamp case. When removing the stamp with the image on it, be sure the plastic sheet with the image comes off first and does not tear away from the foam layer. The best way to do this is to slide something between the image sheet and the block–like a fingernail or guitar pick.

Join me tomorrow and we will make the card above!

Posted in beginner stamper, cactus, desert, Occasions Catalog 2019, Photopolymer, Simple stamping

Let’s Get Stamping!

Today I will show you how to use the Photopolymer stamps that Stampin’ Up! has. This set is Flowering Desert and is found in the Occasions Catalog. I just love to give a handmade card to someone to let them know I think they are awesome!

These are the supplies you will need to make this card. In addition to the stamp set, I used Shaded Spruce ink, Whisper White cardstock, Clear Block E, the Stampin’ Pierce Mat, and (not shown- Clear Block H, Gingham Gala Adhesive-Backed Sequins, Multipurpose Liquid Adhesive and Stampin’ Dimensionals)

The first step is to carefully remove the Photopolymer stamp from the sheet and place it on a Clear Block as shown.

Next is to tap the stamp onto the ink pad with a light to moderate pressure. You want to get ink on the image and not around the image. Be sure to press straight down, and lift straight up. If there is ink on your block, try using a lighter pressure.

When using the Photopolymer stamps you will need to have the Pierce Mat or a magazine under it to get the best image. Place the stamp straight down onto the paper and apply light to moderate pressure for about 5 seconds. This allows the ink to transfer onto the paper.  Lift the stamp straight up. It may take some practice to get a nice clear image. If there is ink around the image, that is called a halo, and it means you need to place the stamp on the ink with a lighter touch.

To finish the card, I stamped the sentiment onto a 3/4 inch strip of cardstock and cut a banner on one end. The cactus was cut to measure 4 x 2 1/2 inches and adhered to a 4 1/4 x 2 3/4 inch piece of Shaded Spruce. I then adhered the cactus piece onto a card base which measured 8 1/2 x 5 1/2, folded in half length-wise. The “You’re So Awesome” sentiment was adhered using Stampin’ Dimensionals to give it lift and add dimension to the card. I finished it off with some sequins.

This is a really nice, simple card that can definitely be given to someone to express how you feel about them, and pass on some positive energy!

Posted in beginner stamper, Ink

Tips for the New Stampin’ Up! Ink Pad

Hello! It is a lazy day for me and Cutie here. The boys are back in school so it is nice and quiet and I can get some work done.

The Stampin’ Up! ink pad was recently redesigned. It can be somewhat difficult to open. The following are some tips to make that easier.

Also, in order to help the stamp pad slide more easily when you open it, you can take a birthday candle and rub it along the track to put a little wax on it. Blow off the small flecks of wax so they do not get into your ink.

You may think doing a video on how to open the stamp pad to be silly, but when someone new comes to my card-making classes, that is the first question they ask.

I plan to address the difference types of stamps and how to get the best stamped image in the next blog. So I hope you will join me for that soon!

I apologize for this blog to have taken so long. I am learning how to do this, and found putting the video in to be quite challenging to say the least.