Posted in 2022 January-June Stampin' Up!® Mini Catalog, 3D Embossing Folder, Fun/Fancy fold card, Inspiration, Love/Affection, Nature, Stamping-off technique

Fun Fold Friday: Stampin’ Up!® Blessings of Home and Slim Line Sayings

Hello! Yay for Friday! I have a nice Fun Fold card for you today using both the Blessings of Home and Slim Line Sayings stamp sets. The Heart & Home Designer Series Paper (DSP) really adds a beautiful touch.

I recommend trying to cut this card out with plain paper first. It took a couple of tries for me to get it the way I wanted. Hopefully you’ll get it on the first go around!

Measurements

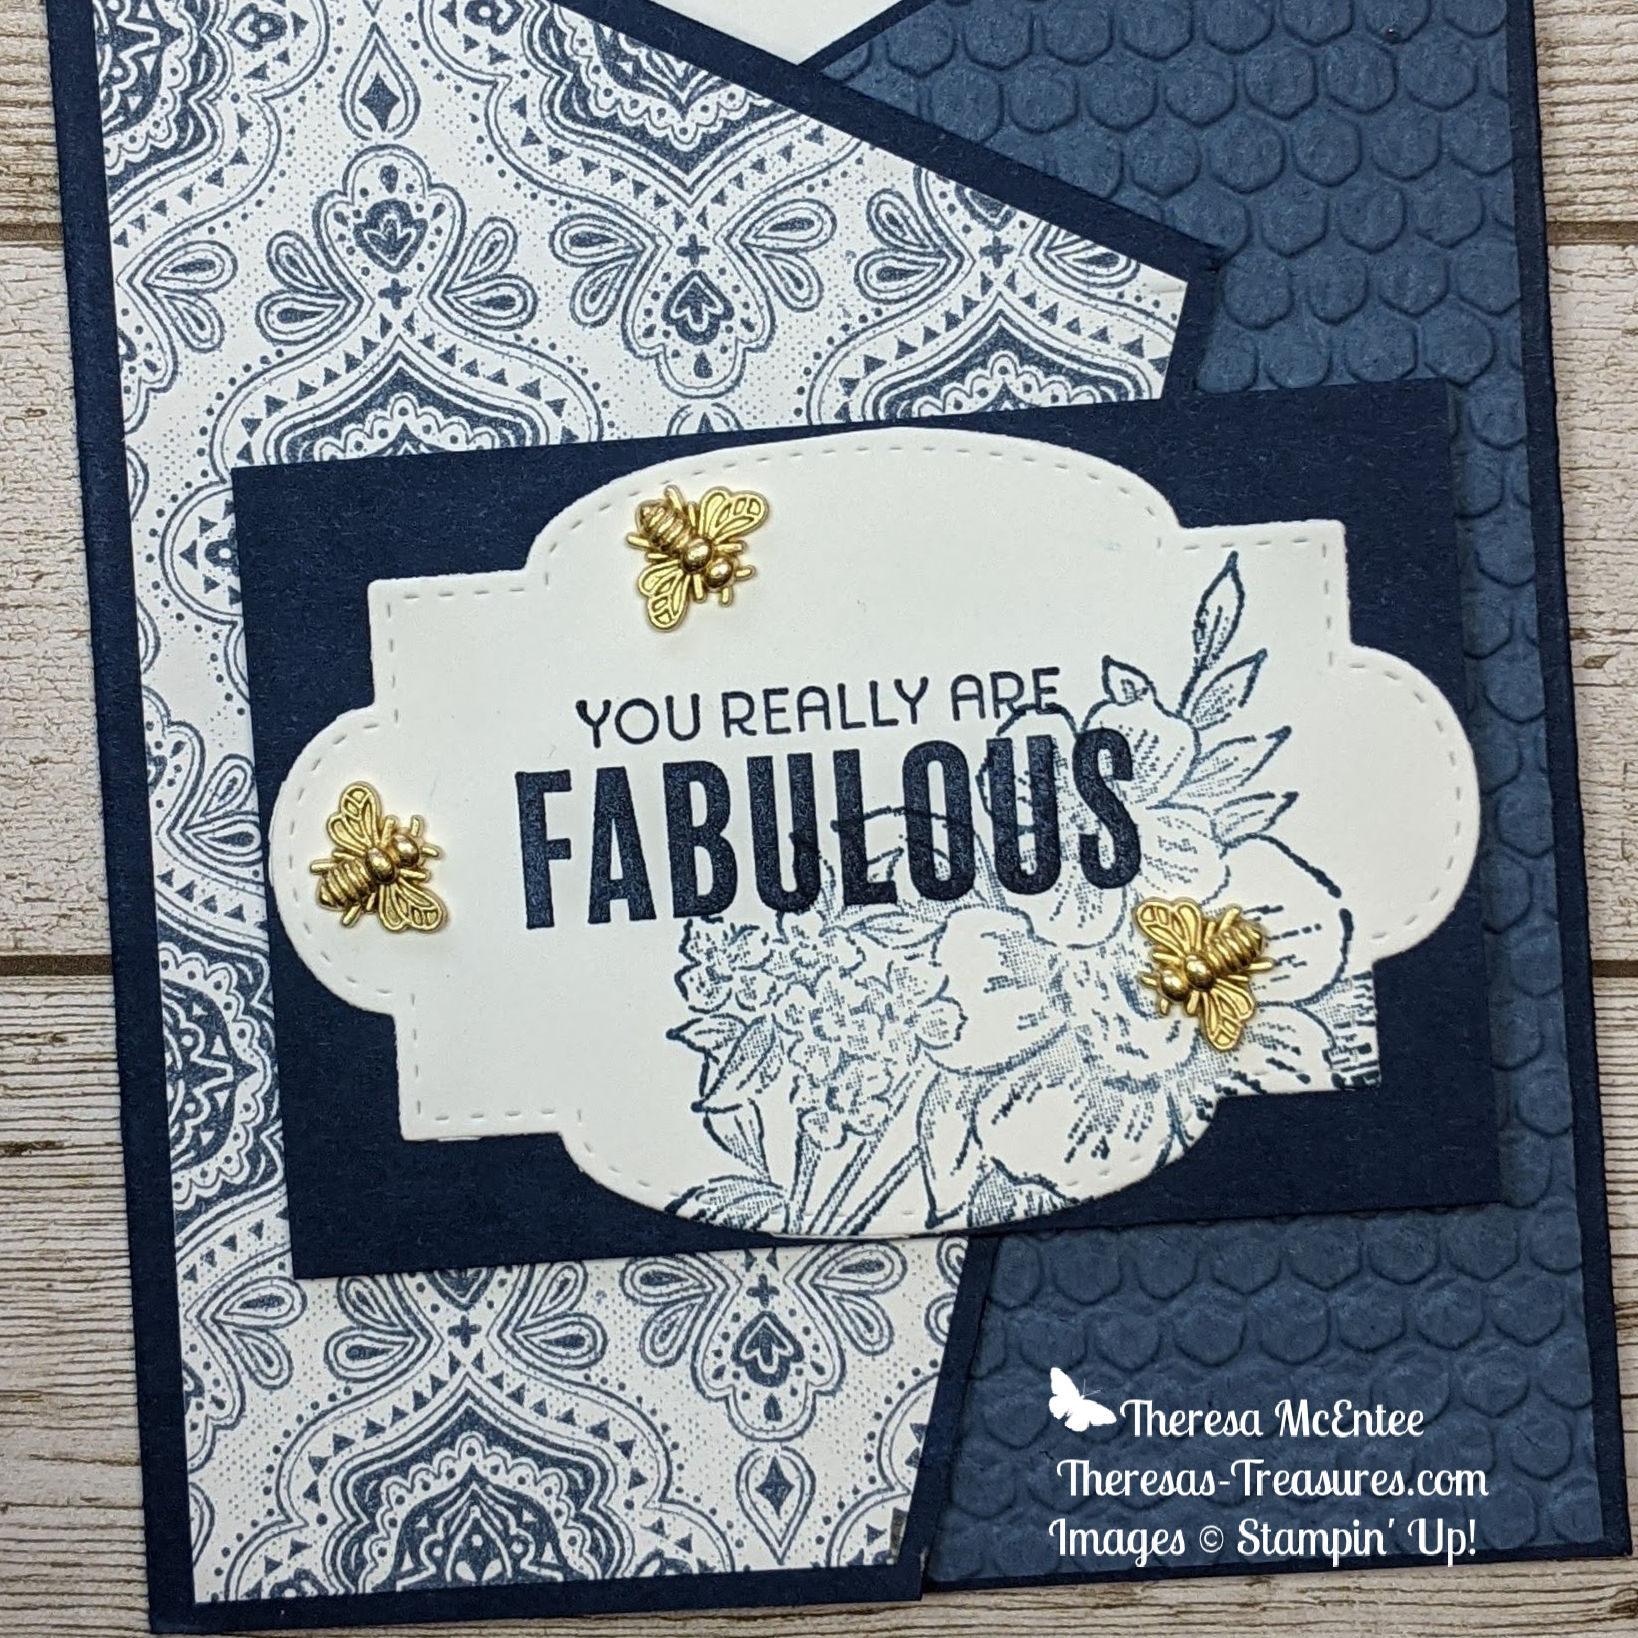
Blessings of Home and Slim Line Sayings You Are Fabulous Fun Fold Card

  • Night of Navy Card Stock (CS) card base: 5 1/2 x 11 inches
  • Night of Navy CS: 2 3/8 x 3 1/2 inches
  • Misty Moonlight CS: 3 1/8 x 5 1/4 inch
  • Basic White CS: 4 x 5 1/4 inch, 3 1/8 x 5 1/4 inches, and a label from the Stitched So Sweetly Dies
  • Heart & Home DSP: 3 1/8 x 5 1/4 inches

Ink: Night of Navy and Misty Moonlight

Preparing the Card Base

First make a score line at 3 3/8 and 7 5/8 inches. Then make a small notch on the horizontal axis at 1 1/8 and 9 7/8 inches, and on the vertical axis at 1 3/4 inches on each side.

Next make a cut between the score line and notch on the upper part of the card base bilaterally. Finally, cut between the 1 3/4 inch notch on the side and the notch on the bottom bilaterally.

Preparing the Front Panels

I found it easiest to make a pattern to use for this piece. Make a notch on the 3 1/8 x 5 1/4 inch Basic White CS 1 5/8 inches down the right-hand side and 1 1/8 inches in on the bottom from the right. Use this to cut the 3 1/8 x 5 1/4 inch Heart & Home DSP.

To make the other side, flip the pattern over. Note: This isn’t critical with a solid color, but would be if you were using a DSP on both panels. Cut the 3 1/8 x 5 1/4 inch Misty Moonlight CS. Then run this piece through the Stampin’ Cut & Emboss Machine with the Hive 3D Embossing Folder.

Stamping

Using the Misty Moonlight Ink Stamp Off once, then stamp the bunch of flowers from the Blessing of Home stamp set onto the label. Use the Night of Navy Ink to stamp the sentiment “You Really Are FABULOUS” onto the label. The sentiment is from the Slim Sayings stamp set.

Use the Misty Moonlight, Stamping Off once, to stamp the larger flowers onto the 4 x 5 1/4 inch Basic White CS. Then use the Night of Navy Ink to stamp the sentiment. This sentiment is in the Blessings of Home stamp set.

Assembling the Card

This is the back side of the card. Adhere the embossed Misty Moonlight CS to the left side and the Heart & Home DSP on the right.

Turn the card base over and adhere the inside panel.

Now adhere the sentiment label to the 2 3/8 x 3 1/2 inch Night of Navy CS. Place the sentiment label on the front of the card for placement.

Holding the sentiment in place, open the card. Draw a line with a pencil to mark the edge of the front of the card. Place Stampin’ Dimensionals where the label will adhere to the card front. Adhere the sentiment to the front of the card base.

Add some Bumblebee Trinkets and Voila! you have a fabulous card for someone fabulous!

Thank you for being so fabulous and visiting my blog. Have a fabulous Friday and a wonderful weekend!

Theresa

Stampin’ Up!® Promotions

Joining Special

Earn 2 FREE stamp sets of your choosing when you sign up to be a Stampin’ Up! demonstrator. Choose $125 of product for your Starter Kit and pay only $99 before shipping and handling! Join HERE. Contact me for more information at theresastreasures.az@gmail.com. Don’t delay-promotion ends February 28, 2022!

Paper Pumpkin Subscription

Answer the call of the wild—and your creativity—with the Safari Celebration Paper Pumpkin Kit. This playful, party-themed kit includes all the goodies and gear you need to create nine cards and coordinating envelopes in safari-inspired shapes and patterns you’ll go wild for! Make every occasion a celebration with this month’s amusing animals, beautiful botanicals, and celebratory sentiments.

Paper Pumpkin is a subscription kit. You earn FREE product when you order a pre-paid code from my Online Store. A pre-paid code will be sent in an email. Next, go to my Paper Pumpkin sign up and enter the code. You will get this Safari kit if you do so by February 10, 2022.

• 3-Month Prepaid Paper Pumpkin Subscription [137859] $63.00 : —https://bit.ly/3qin54v

• 6-Month Prepaid Paper Pumpkin Subscription [137860] $114.00:–https://bit.ly/3njb4tE

• One year Prepaid Paper Pumpkin Subscription [137861] $220.00:–https://bit.ly/3zNjj66

You will get an email with the Pre-paid code. Then you will go to: https://bit.ly/subscribeTheresasTreasuresPaperPumpkin and enter the pre-paid code to start your subscription! Shoot me an email with any questions.

Celebrate Diversity

Lots of fun with diversity is coming on February 1, 2022. The All Together set will include 10 Stampin’ Blends for a range of skin colors. The images in the stamp set will celebrate diversity. Watch for more information on this fabulous set!

Get this FREE Creative Download from Stampin’ Up! for more on the celebration of diversity.

Thank you for your attention. If you need any assistance with your order please email me at theresastreasues.az@gmail.com

Supply List

Product List
Posted in 2020-2021 Stampin' Up! Catalog, Nature, Rubber Band Background Technique, Stamping-off technique

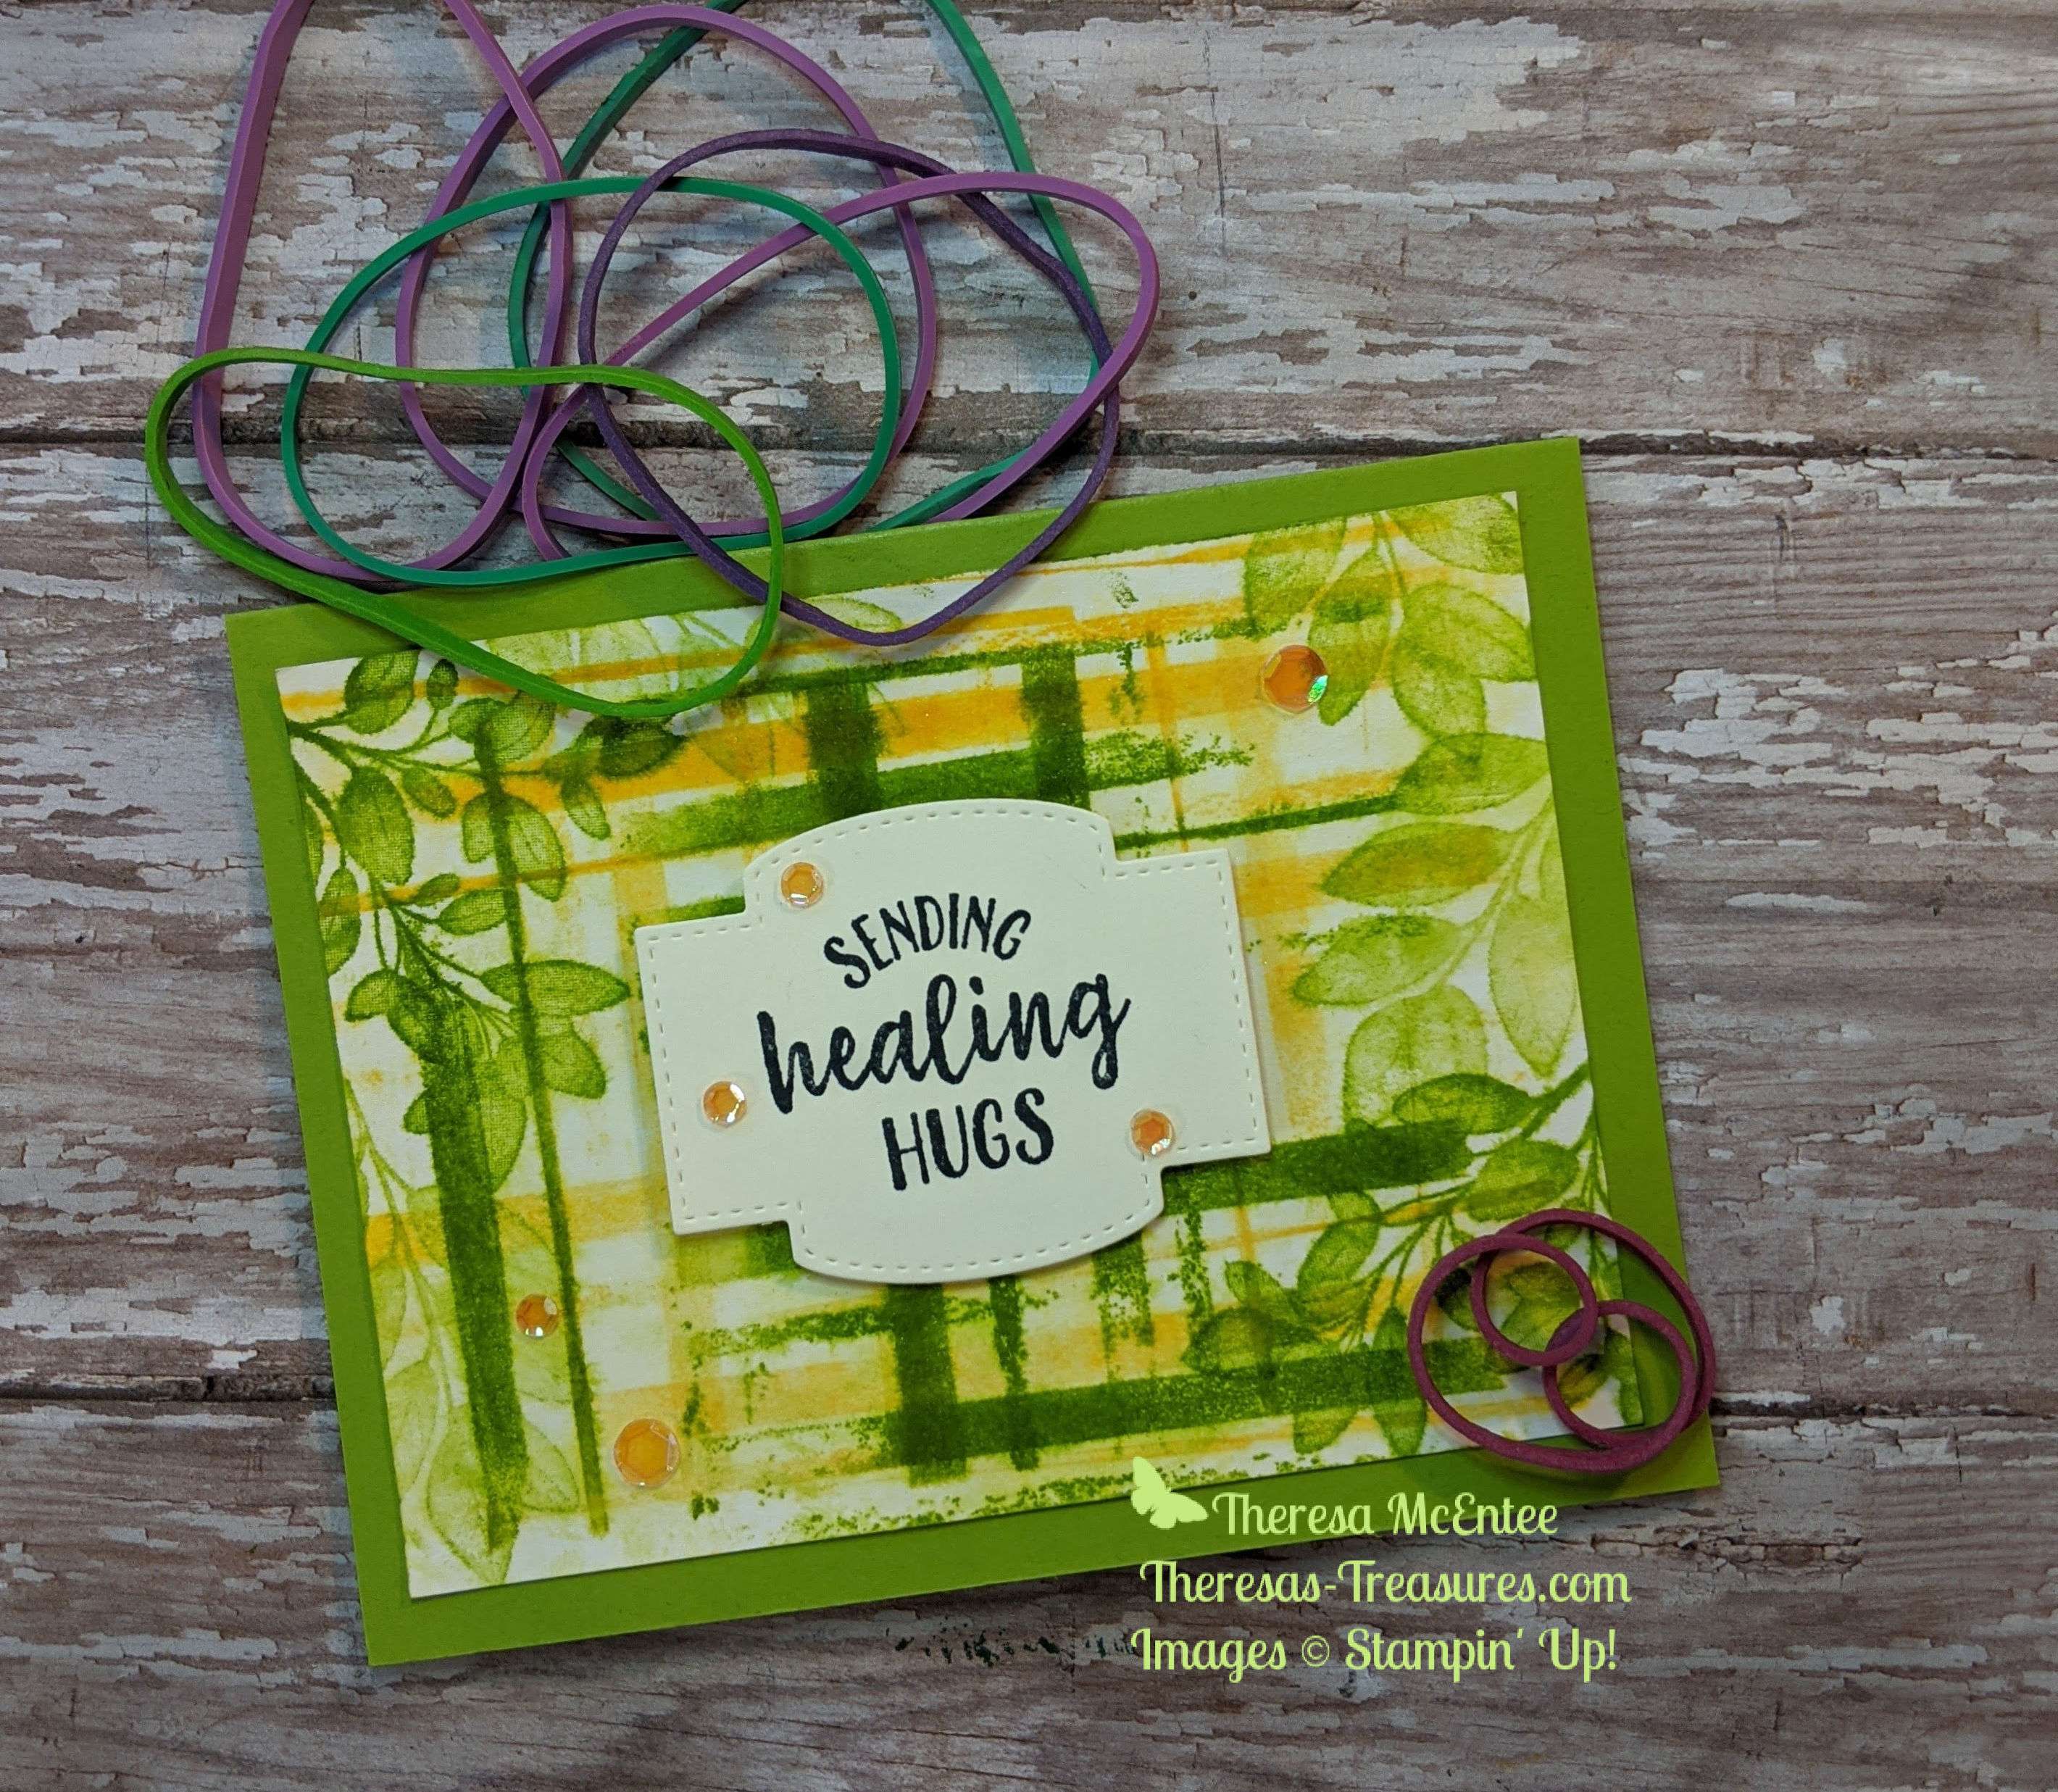
Stampin’ Up!® Forever Fern Rubber Band Background Get Well Card

Welcome to my Wacky Wednesday Technique. This Stampin’ Up!® Forever Fern card is really wacky because it is made using rubber bands around a clear block. The things we will do to make a creative background!

I will be using 2 stamp sets today. The Forever Fern stamp set has a lot of great leaf images. The So Sentimental is one of my all time favorites. Sadly it will be retiring. It is only available while supplies last so order yours HERE before it runs out.

Measurements

Measurements: Granny Apple Green Card Stock (CS) card base: 5 1/2 x 8 1/2 inches with a score line at 4 1/4 inches; Very Vanilla CS: 4 x 5 1/2 inches and 3 x 4 inches; and Shimmery White CS: 3 3/4 x 5 inches.

Stamping

Let’s start stamping! Stamp the sentiment “Sending Healing Hugs” onto the 3 x 4 inch Very Vanilla CS with the Memento Tuxedo Black Ink. Use you Stampin’ Cut & Emboss Machine and the Stitched So Sweetly dies to cut out the sentiment. Fortunately, the Stitched So Sweetly Dies are not on the retiring list!

Rubber band Background in Daffodil Delight

In order to try this technique you will need rubber bands of various thicknesses. Wrap the rubber band around an E size Clear Block in a random pattern.

For this step I used Daffodil Delight ink. Use the ink pad to apply ink to the rubber bands. Flip the clear block over onto the 3 3/4 x 5 inch Shimmery White CS.

Remove the clear block and see what you have. I think I would have needed to apply more ink. You can rotate the Shimmery White CS, apply more ink to the rubber bands, and stamp down on the Shimmery White again. I stamped once on the upper half and once on the bottom half.

Next I sprayed my rubber band background with a little water to make it bleed into the paper a little.

While the paper is still damp, use the Granny Apple Green ink and the large leaf image from the Forever Fern stamp set to stamp some leaves around the edges.

Stamp some more of the leaves onto edges of the 4 x 5 1/4 inch Very Vanilla CS. This will be the inside of the card. I Stamped Off once on the smaller leaf image before stamping onto the Very Vanilla CS.

Rubber band background in Granny Apple Green

I decided the background needed a little more added to it so I inked up the rubber band block with the Granny Apple Green ink and added more to the stamped background.

I also sprayed it with a little water again and then used a paper towel to dab it dry.

Open the Granny Apple Green CS card base and adhere the inside of the card to the inside of the card base.

Use the Bone Folder to fold the card base. Next adhere the Rubber Band Background card piece to the card front.

Use Stampin’ Dimensionals to adhere the sentiment to the background.

Bling!

The Artistry Blooms Self Adhesive Sequins are perfect to add some Bling! to this card! I use the Take Your Pick tool to easily move the sequins from the acetate sheet to the card front.

Viola! You have made a totally wacky Rubber Band Background for this get well card!

Thanks for coming by today. I hope you have had a chance to review the Retiring List in my Online Store. Some products are discounted. Check it all out HERE.

Supplies

Product List

Have a wonderful day!

Theresa

Posted in 2020-2021 Stampin' Up! Catalog, Cars, Guys cards, Stamping-off technique

Stampin’ Up!® Simple Stamping with Moving Along

Hello! I hope you all had a great weekend. Today I have a fun simple stamping card. The Moving Along stamp set by Stampin’ Up! is great for simple stamping. You can create a fun scene with all the little stamps in this set.

There are 24 stamps in this set! Each of the vehicles is a Two-Step Stamp. I recently made a going away card for someone with this set. The card for today is more of a congratulations and happy travels card.

This card is made with several ink colors that are good for a beginner stamper to have on hand. The primary colors are: Pacific Point (blue), Poppy Parade (red) and Daffodil Delight (yellow). I also used Smoky Slate (grey) and Memento black ink.

Measurements

Measurements: Basic White Card Stock (CS) card base: 5 1/2 x 8 1/2 inches with a score line at 4 1/4 inches; Poppy Parade CS: 4 1/8 x 5 3/8 inches; and Basic White CS: 4 x 5 1/4 inches.

Stamping

First I used the Smoky Slate ink to stamp the road on the bottom of the 4 x 5 1/4 inch Basic White CS.

Next switch to the Memento Black ink and stamp the outline for the little car and then the railroad tracks. My tracks are not quite straight so I guess the train ride will be a little bumpy!

Continuing with the Memento black ink, stamp the outline of the train, the caboose and the helicopter. Things are starting to look busy!

Finishing up with the Memento black ink, stamp the banner behind the vehicles. On hindsight, the train could be moved a little to the right so that the banner fits better.

To complete the card we just need to fill in the color which is the second step of the Two Step Stamping. I stamped the train in Smoky Slate, the car in Daffodil Delight, the caboose in Poppy Parade and the helicopter in Pacific Point ink. The blades on the helicopter are stamped in Smoky Slate ink. Now we can add the sentiments. I wanted it to be colorful so I just stamped the sentiments in the coordinating color of the vehicle. You can also add some birds with the Smoky Slate ink. Tip: I put both of the bird stamps on one block and stamped them together.

In order to finish the scene, add some clouds in Pacific Point ink. Tip: To make some clouds look farther away I used the Stamping Off Technique. Stamp the image once, then without adding more ink, stamp a second time.

Putting It All Together

Now we are ready to put it all together. First, adhere the stamped Basic White CS to the 4 1/8 x 5 3/8 inch Poppy Parade CS. There will be a very thin line of color showing around the stamped card piece. Use your Bone Folder to make a crisp fold at the 4 1/4 inch score line on the Basic White CS card base. Adhere the stamped card piece to the front of the Basic White CS card base.

Viola! You have a great card to wish someone a congratulations and happy travels.

Thank you for visiting my blog today. I am a Stampin’ Up! Demonstrator in Arizona, USA and I sell all of the products I use on my cards. Right now is Sale-a-bration! During Sale-a-bration you can choose a FREE product from the Sale-a-bration Brochure when you order $50 in the US. If you are in need of a 2021 January-June Stampin’ Up!® Mini catalog or 2020-2021 Stampin’ Up!® Annual catalog please leave me a comment or go to my Facebook page at Theresa’s Treasures Arts & Crafts and leave me a private message.

Supplies

Product List

Have a great day!

Theresa

Posted in 2021 January-June Stampin' Up!®Mini Catalog, balloons, Guys cards, Stamping-off technique, Vintage

Stampin’ Up!® Soar Confidently

Hello fellow crafters! I hope you are all doing well this week. Today’s card is made with Stampin’ Up!® Soar Confidently. This is a set that looks very vintage to me. Today’s card is a Simple Stamping card, perfect for the beginner stamper!

I love the simplicity of this card. This is definitely a very quick and simple card to make. I think this card with the words of encouragement would make a great Graduation wish.

Measurements

Measurements: Night Of Navy Card Stock (CS) card base: 5 1/2 x 8 1/2 with a score line at 4 1/4 inches; Whisper White CS: 2 1/4 x 4 3/4 inches and 4 x 5 1/4 inches (not pictured); Neutrals 6 x 6 inch Designer Series Paper (DSP) in Night Of Navy: 4 x 5 1/4 inches.

Stamping

Start stamping with Night Of Navy ink and stamp the sentiment “Soar Confidently In Your Own Sky” onto the bottom of the 2 1/4 x 4 3/4 inch Whisper White CS. Next stamp the hot air balloon image above the sentiment. Note: This is a red rubber stamp which can be stamped upon a firm surface. I have a scrap paper underneath in preparation of the next step. The black paper is just to allow you to see the card piece better.

The next step is to add a few more balloons, but to use the Stamping Off Technique. This means that after applying ink to the stamp, you first stamp onto a scrap paper, then onto the card piece. This is a great way to add dimension to the images on your card.

To conclude the stamping, stamp a hot air balloon on the right-hand side of the 4 x 5 1/4 inch Whisper White CS. Finish up using the Stamping Off Technique for the next 2 balloon images. This will be the inside panel of your card.

Putting the Card Together

Use your Bone Folder in order to make a crisp fold on the Night Of Navy CS card base. Begin to put the card together by adhering the inside panel onto the inside of the Night Of Navy card base.

Similarly, adhere the 4 x 5 1/4 inch Night Of Navy 6 x 6 inch Designer Series Paper to the front of the card base.

Complete the card by first adding Stampin’ Dimensionals to the back of the sentiment card piece. Finish by adhering the sentiment card piece to the card front slightly to the left-hand side.

Viola! You have made a quick and simple card that would be a great masculine Graduation card or just a card with words of encouragement. Also, you could use the image and stamp a different sentiment to make a nice masculine birthday card or thank you card if you wish.

Thank you for stopping by today. I have a new plan for the New Year. On Tuesdays I will be publishing a #simplestamping post, starting a Technique blog for a Wacky Wednesday post, and will continue the Fun Fold Friday posts. I hope you will enjoy all of them!

In order to purchase the supplies needed for today’s card from my Online Store, click on any photo below. January Host Code is UZ72Q6X4

Product List

Have a lovely and crafty day!

Theresa

Posted in 2020 August-December Mini Catalog, 2020-2021 Stampin' Up! Catalog, Avid Stamper, Stamparatus, Stampin" Blends Alcohol Markers, Stamping-off technique, Winter Holiday

Stampin’ Up!® Poinsettia Petals Merry Christmas with Stamparatus Tips & Tricks

I am on day 4 of my 15-Day Christmas Card Challenge! Today I have a gorgeous poinsettia card wishing a Merry Christmas!

The Poinsettia Petals stamp set and coordinating Poinsettia Dies create the perfect poinsettia for this card. The background has a Christmas Layers Die which is in the 2020-21 Stampin’ Up Annual Catalog. The Poinsettia Petals and Poinsettia Dies are in the 2020 Aug-Dec Mini Catalog.

Measurements: Very Vanilla CS card base: 4 1/4 x 11 inches with a score line at 5 1/2 inches; Very Vanilla CS: 3 7/8 x 5 1/8 inches, 7/8 x 3 1/4 inches, 5 x 5 inches and 4 x 6 inches; Mossy Meadow CS: 4 1/8 x 5 3/8 inches and 3 x 4 inches; and Real Red: 4 x 5 3/4 inches.

Warning: this blog is a little longer than usual so I can introduce some new products with some tips.

Stamp the sentiment ” Merry Christmas” in Mossy Meadow ink onto the 7/8 x 3 1/4 inch Very Vanilla CS. Set aside.

To make the background a little more interesting I stamped some small dots from the Gather Together stamp set in Real Red and in Mossy Meadow by Stamping Off first. Set aside.

To make it more simple to stamp all the pieces for the poinsettia, berries and leaves I used the Stamparatus. Tip: The Poinsettia Petals stamps are Photopolymer. In order to get a good image, it is helpful to use the Stamparatus Deluxe Foam Mat. The other option which I had used for quite awhile it to use the Stamparatus Foam Mat with a Silicone mat on top.

I placed the card stock I want to stamp on about 1 inch from the inner edge. Tip: If the stamp is too close to the inner edge it will not stamp all the way. Position the two leaves and the berries on one half of the 4 x 6 inch Very Vanilla CS. Trick: I wrapped my magnets in colorful duct tape with a little extra tab to grab onto. This makes it easier to pick the magnets up. It also prevents them from getting stuck together.

Apply Memento Black Ink to the stamps, close the panel and press firmly and evenly.

Turn the Very Vanilla CS and stamp onto the other side. As you can see, there is an area that did not get stamped on the upper right leaf. This is the beauty of the Stamparatus. Just apply more Memento ink, close the panel, press more firmly on the unstamped area, lift the panel and Viola! the problem area is fixed!

Using the second panel, position the three sizes of poinsettia on the 5 x 5 inch Very Vanilla CS. Repeat the process. Note: If you wanted to make, say 25 cards, that were all similar, this is the way to do it quickly. You just keep stamping until you have as many as you want. Can you tell I love my Stamparatus!

When I am done stamping I stamp onto a scrap paper to remove most of the ink. I then use my Simply Shammy moistened with water to clean the stamps. The Simply Shammy can be rinsed out although the ink does stain it a bit.

I used the Stampin’ Blends Alcohol Markers to color the poinsettia, leaves and berries. The colors I used were: Light & Dark: Cherry Cobbler, Real Red, Mossy Meadow and Old Olive. I used Light Mango Melody for the center of the poinsettia. For the berries I used the Bronze and Ivory. The images are cut with the Poinsettia Dies.

The leaves and petals of the poinsettia can be curved with the Bone Folder to add dimension to the card.

The last piece needed is the branch of leaves from the Christmas Layers Dies. I cut the branch into three smaller branches. Now we can put it all together.

Adhere the branches onto the stamped Very Vanilla CS card piece. Use a Stampin’ Dimensional on the center of the largest poinsettia and adhere it to the card piece. Add the berries. Since the petals of the poinsettia are not adhered, the berries slide right under the petals.

Use Stampin’ Dimensionals in the center of the two remaining poinsettias and adhere them to the first poinsettia. Adhere the leaves in place. Use Stampin’ Dimensionals to adhere the sentiment “Merry Christmas”.

Adhere the Cherry Cobbler CS to the front of the Very Vanilla CS card base, then adhere the Mossy Meadow CS. Finish the card by adhering the poinsettia panel to the card front.

Add a little sparkle with the Wink of Stella Glitter Brush.

Of course, I think the card needs a little more Bling! Add the Cherry Cobbler rhinestones that are in the Holiday Rhinestone Basic Jewels for a touch of sparkle in the background.

Viola! You have a gorgeous poinsettia card to wish someone a Merry Christmas!

Thanks for hanging in there today. This one was a little long. I wanted to be sure to introduce some new products and techniques with a few tips & tricks..

All of the products I used to create this card are pictured below. Select any photo to go to my Online Store and start shopping. If you have any questions, please send me an email at theresastreasures.az@gmail.com

Product List

I hope you give this one a try. It is a little bit of a challenge, but the end result gives a nice feeling of accomplishment. Have a great day and spend some quality time stamping soon!

Theresa

Posted in 2020-2021 Stampin' Up! Catalog, Nature, Outdoors, Stamping-off technique, Winter Holiday

Stampin’ Up!® Winter Woods Simple Stamping Seasons Greetings

Welcome to December! It finally got below freezing here in Arizona. It is still very sunny during the day, but Brrrr! Today I am showing a card made only with stamps, ink and paper- aka-#simplestamping.

The Winter Woods Stampin’ Up!® stamp set is in the 2020-21 Stampin’ Up! Annual Catalog on page 61. I love this set because I can create a serene scene with the magnificent trees in this awesome stamp set. And I love the sentiment!

Measurements: Whisper White Card Stock (CS) card base: 5 1/2 x 8 1/2 inches with a score line at 4 1/4 inches; Whisper White CS: 1 5/8 x 2 1/8 inches; Shaded Spruce CS: 4 x 5 1/4 inches and 1 3/4 x 2 1/4 inches; Soft Seafoam CS: 3 3/4 x 5 inches.

Start by stamping the group of trees in Shaded Spruce ink onto the 3 3/4 x 5 inch Soft Seafoam CS. Next stamp the large evergreen tree on the left side slightly covering the first group of trees. Tip: This is a red rubber stamp. You will get the best image by stamping on a smooth hard surface, like the top of a table.

Stamp another evergreen tree on the right-hand side, then without adding more ink, stamp under the bare trees on the left-hand side. Add some ink, stamp onto the scrap paper and then stamp onto the left-hand side slightly above the first evergreen tree. This technique is called Stamping Off and helps to give the tree line a 3D look. Stamp off a few more times to add more fullness under the bare trees on the right.

Stamp some of the smaller evergreen trees on the inside of the Whisper White CS card base in the bottom right-hand corner. Stamp off for one of the trees. Now stamp the sentiment “Thinking Of You This Season” onto the 1 5/8 x 2 1/8 inch Whisper White CS. Stamp two of the pine branches under the sentiment.

Adhere the sentiment to the 1 3/4 x 2 1/4 inch Shaded Spruce CS. Adhere the Soft Seafoam CS with the trees stamped on it to the 4 x 5 1/4 inch Shaded Spruce CS, then adhere it to the front of the Whisper White CS card base.

Use Stampin’ Dimensionals to adhere the sentiment card piece to the card front.

Viola! You have a fabulous seasonal card to let someone know you are thinking of them! And all you needed was stamps, ink and paper!

However, I will show you a few other options for this card if you feel it needs a little Bling! Bling! is my thing!

You could add a few of the Red Rhinestone Basic Jewels to the branches.

You could also use the Rhinestone Basic Jewels to add some stars in the sky. No matter which version you send, you will be spreading some Holiday Cheer!

Thanks for stopping by today! I really appreciate all the wonderful comments! A big thank you to all of you who placed an order.

Select any photo below to connect with my Online Store and start shopping!

Product List

Have a most wonderful and craft-filled Holiday Season!

Theresa

Posted in 2020 August-December Mini Catalog, Designer Series Paper, Fun/Fancy fold card, Stamping-off technique, Winter Holiday

Fun Fold Friday with Winter Woods

I love fun folds, so much so that I signed up for a Fun Fold Swap at the last Stampin’ Up! Convention. There were 12 people in the group, so I went home with 11 new Fun Folds! This card is inspired by one from a stamper who hailed from the Netherlands. One thing I am missing this year is meeting new people from around the world at the Stampin’ Up! Onstage Convention. We are having one, but it is virtual so it will be me, myself and I attending!

This Fun Fold highlights the double-sided Regals Assortment of 6 x 6 inch Designer Series Paper (DSP), in this case- Shaded Spruce. And this will give you another Christmas Card to have ready this year!

Measurements: Whisper White Card Stock (CS): 5 1/2 x 8 1/2 inches with a score line at 4 1/4 inches (this is your card base), 4 x 5 1/4 inches and 2 1/2 x 4 1/2 inches; Shaded Spruce CS: 3 3/4 x 5 inches and 2 1/2 x 4 1/2 inches; one sheet of the Regals 6 x 6 inch DSP in Shaded Spruce; Forever Gold Laser Cut Specialty Paper: 2 bunches of leaves.

The first step in a Fun Fold card is to cut the paper. Place the Regals Shaded Spruce 6 x 6 inch DSP on your paper trimmer to cut at 5 inches. Rotate the paper and cut at 3 3/4 inches. Tip: I could never remember which of the blades was for cutting and which was for scoring. I made 12 pt labels and stuck them on the proper blades.

With the 5 inch side on top, cut down 1 1/2 inches at the 2 1/2 inch mark.

Mark the inside end of the 1 1/2 inch cut with a black marker. This will not show once the card is put together.

Gently score between the corner and the black dot on each side. Tip: Keep your pressure light so you do not accidentally tear the DSP with the Scoring Blade.

Use the Bone Folder to make a crisp fold on the score lines as shown.

Now for some stamping!

Use Shaded Spruce ink to stamp the sentiment ” Thinking of you this SEASON” onto the 2 1/2 x 4 1/2 inch Whisper White CS. Stamp in the middle and a little toward the left side so you can punch it out. Stamping Off Technique: Stamp the evergreen tree onto your scrap paper and then stamp onto the edge of the 4 x 5 1/4 inch Whisper White CS.

Punch the sentiment out with the Label Me Lovely Punch. Use the 2 1/4 inch Circle Punch to punch a circle from the 2 1/2 x 4 1/2 inch Shaded Spruce CS.

Adhere the 4 x 5 1/4 inch Whisper White CS with the evergreen tree stamped on it to the inside of the 5 1/2 x 8 1/2 inch Whisper White CS card base.

Adhere the folded Shaded Spruce DSP to the 3 3/4 x 5 inch Shaded Spruce CS. Next adhere this card piece to the front of the Whisper White CS card base. Adhere the 2 1/4 inch Shaded Spruce circle to the center of the card front.

Use a small amount of Multipurpose Liquid Glue on the stems of the leaves and adhere them to the 2 1/4 inch Shaded Spruce circle.

Apply Stampin’ Dimensionals to the back of the sentiment and adhere it to the 2 1/4 inch Shaded Spruce circle.

Now for some Bling! The Gilded Gems are so gorgeous and shiny! The facets really make the gems sparkle!

I added 3 gems in decreasing size with the Take Your Pick tool.

Viola! You have a very easy but elegant Fun Fold winter holiday card! Add one more to your Christmas card stash!

Thank you for joining me today.

I want to share a Joining Special that Stampin’ Up! is having. When you Join My Stamping Gems Team this month you can take advantage of the Get & Go Starter Pack. You pay $99 + tax (free shipping) for $125 worth of product and you also get:

  • Enough card stock pieces to make 16 cards,
  • A pack of Rhinestone Basic Jewels,
  • So Much Love stamp set, and
  • Queen Anne’s Lace stamp set! 
  • The kit ships FREE!

The card stock pieces include:

8 packs of precut card stock of the coastal cabana pack will be provided, and 8 packs of precut cardstock of the Granny Apple Green pack, for a total of 16 cards (packs include envelopes).

  • Coastal Cabana card pack contents
    2-1/4″ x 3-1/2″ (5.7 x 8.9 cm) Whisper White Cardstock
    2-3/4″ x 4″ (7 x 10.2 cm) Daffodil Delight Cardstock
    3″ x 4″ (7.6 x 10.2 cm) Bermuda Bay Cardstock
    8-1/2 x 5-1/2″ (21.6 x 14 cm) Coastal Cabana Cardstock
    5-3/4″ x 4-3/8″ (14.6 x 11.1 cm) Whisper White Envelope
  • Granny Apple Green card pack contents
    8-1/2″ x 5-1/2″ (21.6 x 14 cm) Granny Apple Green Cardstock
    3″x 4″ (7.6 x 10.2 cm) Bermuda Bay Cardstock
    3″x 4″ (7.6 x 10.2 cm) Coastal Cabana Cardstock
    3/4″x 4″ (1.9 x 10.2 cm) Daffodil Delight Cardstock
    5-3/4″ x 4-3/8″ (14.6 x 11.1 cm) Whisper White Envelope

I hope you take advantage of this wonderful offer and join my Stamping Gems Team. To join go to https://bit.ly/JoinTheresasStampingGems and choose the JOIN tab. There is a suggested Starter Kit but you may choose whatever you want that totals a maximum of $125. This offer ends on September 30, 2020 so don’t wait and join today!

Products used for today’s card as shown below. Click on any photo to go to my Online Store.

Product List

Have a most wonderful and creative day!

Theresa

Posted in 2020-2021 Stampin' Up! Catalog, Gratitude/ Thanks, Stamping-off technique

Inspiring Iris for Appreciating Somebody Who Makes Everybody Feel Like Somebody #simplestamping

I believe you can always add some sunshine to your day by thanking somebody. Gratitude has a way of not only making the recipient feel good, but also the well-wisher. Today’s card is a super simple and beautiful card to send out a word of thanks.

The Inspiring Iris is a Two Step Stamp. I love the beautiful script font the sentiments are written in. This card is a Simple Stamping card because it uses primarily ink, stamps and paper.

Measurements: Whisper White Card Stock (CS): 5 1/2 x 8 1/2 inch card base with a score line at 4 1/4 inches, two 4 x 5 1/4 inches and 2 1/4 x 3 1/2 inches; Gorgeous Grape CS: 2 3/4 x 4 1/2 inches; and 6 x 6 inch Designer Series Paper Assortments-Brights-Gorgeous Grape: 2 x 4 inches.

Use Memento Black ink to stamp the outline of the irises onto the 2 1/4 x 3 1/2 inch Whisper White CS. Be sure to use the Stampin’ Pierce Mat or a catalog. Stamp the leaves in Granny Apple Green ink. Do not worry that the leaves do not exactly line up. Being offset a little is part of the design. i think this looked best when I tried lining up the top of the stems.

Stamp the body of the irises in Gorgeous Grape ink.

Stamp the sentiment “Thanks” in Gorgeous Grape ink onto the card piece with the irises. Then stamp the sentiment “You are somebody who makes everybody feel like somebody” in Gorgeous Grape ink onto one of the 4 x 5 1/4 inch Whisper White CS.

To fancy up the inside of the card, stamp the little flowers in Gorgeous Grape ink. The two darker flowers are stamped at full strength and the lighter one is Stamped Off. The center of the flower is Stamped Off for the darker flowers, and at full strength for the lighter Stamped Off flower. The body of the leaves is stamped in Granny Apple Green without using an outline.

Adhere the 2 3/4 x 4 1/2 inch Gorgeous Grape CS to the left side of the second 4 x 5 1/4 inch Whisper White CS, keeping the distance from the edge of the Whisper White equal on 3 sides, about 1/4 inch. Adhere the 2 x 4 inch Gorgeous Grape Designer Series Paper to the right side, about 1/4 inch from the right edge.

Apply Stampin’ Dimensionals to the back of the irises. Alternatively, the iris piece can be adhered flat to the card front.

Fold the 5 1/2 x 8 1/2 inch Whisper White CS card base at the 4 1/4 inch score line and use the Bone Folder to get a crisp fold. Adhere the iris card piece to the front of the card, then adhere the whole piece to the front of the card base.

Adhere the card piece with the sentiment to the inside of the card base.

Viola! That is all there is to making this wonderful card! You can stop here or….

You can add a little Bling! The Pearl Basic Jewels are great for this card.

I used the Take Your Pick tool to transfer 3 Pearl Basic Jewels in decreasing size to the lower left corner of the Gorgeous Grape CS.

Viola! Same wonderful card now with a little Bling! Either way, this is a nice card to send to someone to thank them for being a great person!

Thank you so much for coming by today and learning how to put together this beautiful card. Please leave a comment below letting me know what you think.

Click on any photo below to go to my Online Store.

Product List

Happy #simplestamping!

Theresa

Posted in 2020-2021 Stampin' Up! Catalog, Hello, Sponging technique, Stamping-off technique

Little Lambs Eat Ivy- Hippo Happiness

“Mairzy doats and dozy doats and liddle lamzy divey, a kiddle divey too, wouldn’t you?” I am really showing my age here. My Grandma used to sing that little ditty to us. For some reason, this little lamb reminded me of it. Have you any songs that your Grandma or Mom sang to you? It is fun to make a card as a reminder.

Measurements: Whisper White Card Stock (CS): 8 1/2 x 5 1/2 inch card base with a score line at 4 1/4 inches, 5 1/4 x 4 inches and 4 x 2 inches; Gorgeous Grape CS: 5 3/8 x 4 1/8 inches.

Ink Colors: Memento, Gorgeous Grape, Calypso Coral, Balmy Blue, Flirty Flamingo, Daffodil Delight and Granny Apple Green.

On the 4 x 2 inch Whisper White CS, stamp the sentiment “fluttering by just to say hi!” in Gorgeous Grape ink on to the right side. Allow space around the sentiment to be able to use the Label Me Fancy Punch. Use Calypso Coral ink to stamp the outline of the butterfly on the left side.

The main images on this card require Two Step Stamping. (Hover over underlined words for definition). I also used the Stamping Off Technique for this butterfly. Ink up your stamp and stamp it lightly but evenly onto a scrap paper, then stamp it onto your card piece without adding any ink. This way you get a lighter shade of the same ink color.

I added the little face for the butterfly in Memento ink. Punch the sentiment out with the Label Me Fancy Punch.

Lay the sentiment and butterfly pieces onto the 5 1/4 x 4 inch Whisper White CS. Use the Memento ink and the dotted swirl stamp to stamp the path of the butterfly just over the sentiment.

Now for the fun part! I found it easier to line up the second stamp if I stamped the full strength part of the image first. For the second stamp of the Two Step Stamping I first Stamped Off onto a scrap paper, then lined up the scallops on the head and body, and stamped over the full strength image. The first lambs are in Balmy Blue ink.

I added one color at a time, always starting with the full strength part of the image. The next colors I used are Flirty Flamingo ink and Daffodil Delight ink.

After you have all the lambs in place, add the face with Memento ink. (Confession: I had to do this card 3 times in order to get it all looking good. The first card, I had it all good, then dropped the block with the inked stamp on top of it! After that, I had a hard time lining the two images up. I waited a day and tried again. If you can’t get it lined up, take a break and try again later.)

Use the tiny flower stamp to stamp flowers in the spaces with Gorgeous Grape ink.

I wanted the sentiment to stand out a little more. I used the Sponging Technique to add a little Gorgeous Grape to the edge.

I used Stampin’ Dimensionals to adhere the sentiment and the butterfly, then Multipurpose liquid glue to adhere the stamped card piece to the 5 3/8 x 4 1/8 inch Gorgeous Grape CS. The entire piece is then adhered to the front of the 8 1/2 x 5 1/2 inch Whisper White CS card base.

And of course, now some Bling! I used the Champagne Rhinestone Basic Jewels and transferred them to the card with the Take Your Pick tool.

Viola! Plenty of colorful little lambs and a little fluttering butterfly to say “Hi!” and spread some joy!

I hope you found this card to be fun. I sure did! Thanks so much for stopping by and visiting my blog. Please leave a comment and let me know whether you like it or not.

Almost Over!!!

The chance to earn a $5 coupon towards your order in August for a $50 order now is almost gone! There is only 1 week left to take advantage of this promotion! Click HERE to get to my Online Store or click on any of the products below to get to the store before August 4, 2020.

Announcement: Stampin’ Up! is updating the Online Stampin’ Up! store on August 4, 2020. The links for the product photos below may not work after August 4, 2020.

Product List

Have a Happy Crafty Day!!

Theresa

Posted in 2020-2021 Stampin' Up! Catalog, Stamping-off technique

Simple Stamping with Blossoms in Bloom Birthday Card

Believe it or not, this card is made only with stamping! The Blossoms in Bloom stamp set by Stampin’ Up! lends itself to some beautiful bouquets. And the sentiments make this set so versatile! The colors were inspired by Lorraine’s Color Challenge. The colors are so bright and cheerful!

Measurements: Calypso Coral Card Stock (CS): 8 1/2 x 11 inches with a score line at 4 1/4 inches; Whisper White CS: two 5 1/4 x 4 inches and a 1/2 x 8 1/2 inch strip. The ink colors I used are: Mango Melody, Calypso Coral, Granny Apple Green, Bumble Bee and Magenta Madness.

For the large blooms stamp, I apply the ink with the stamp upside down on the table. I find it to be easier to see that the ink is evenly applied.

Stamp onto the 5 1/4 x 4 inch Whisper White CS using Mango Melody ink. Use the heel of your hand to apply even pressure to the center of the blooms to help the ink go onto the paper more evenly.

I added the center of the Mango Melody flowers in Calypso Coral ink. The center is Stamped Off. Next, the leaves are stamped in Granny Apple Green ink.

The five-petaled flowers are stamped in Magenta Madness ink. There are two different designs for the five-petaled flowers. I did the three in the middle with one design, and the two on the outer edges with the other design. Stamp the center of the five-petaled flowers in Bumble Bee ink. I did not Stamp Off but later thought that may look better.

I stamped the tiny five-petaled flowers in Calypso Coral ink. There are also two designs for the tiny five-petaled flowers. I just mixed them as I stamped. I tried to stick with an odd number of each of the colors of flowers. Generally, the odd number is more pleasing to the eye than an even number.

The “Happy Birthday” sentiment is stamped in Calypso Coral ink. I trimmed the strip of Whisper White CS, then cut a banner end as shown.

Adhere the stamped card piece to the front of the 8 1/2 x 5 1/2 inch Calypso Coral CS. Use Stampin’ Dimensionals to adhere the sentiment.

I used the 2020-2022 In Color Enamel Dots to add a little embellishment next to the sentiment. I find it easy to transfer the small dots with the Take Your Pick tool.

For this card I decided to stamp the inside panel as well. Start with the Mango Melody ink and the large blooms stamp. I stamped a little to the side so there would be space for writing.

I added the center for the Mango Melody flowers in Calypso Coral after Stamping Off. The leaves are in Granny Apple Green ink. The center of the Magenta Madness five-petaled flowers is stamped in Bumble Bee ink after Stamping Off.

Add the tiny five-petaled flowers in Calypso Coral ink.

Adhere the inside card piece to the inside of the Calypso Coral CS card base.

And Viola! you have a brightly colored Happy Birthday card to send to someone special! This card is sure to send some cheer!

Thanks for visiting today.

Right now you can purchase $50 USD in product and get a $5 USD coupon to use on your order in August! How cool is that?! Click HERE to get to my online store, or click on any photo below.

Product List

Have a bright and cheerful day!

Theresa