Posted in 2023-2024 Stampin' Up! Annual Catalog, Blending Brushes, Decorative Masks, Gratitude/ Thanks, Inspiration in Ink Blog Hop, Stampin' Cut & Emboss Machine

Inspirations in Ink May 2023- Timeless Arrangements Bundle Thank You Card

Today I have a really fun and pretty Timeless Arrangements Bundle Thank You Card for you!

Welcome and thanks for visiting Theresa’s Treasures Paper Crafts! I am Theresa and I am a Stampin’ Up! Demonstrator in Arizona, USA. Today is the monthly Inspirations in Ink Blog Hop! I am excited to be hopping with awesome demonstrators from around the world. Be sure to check out everyone’s projects using the Timeless Arrangements Bundle. The Timeless Arrangements Bundle is in the 2023-24 Stampin’ Up! Annual Catalog. Order your Bundle today at my Online Store HERE.

Measurements

  • Highland Heather cardstock (cs) card base: 4 1/4″ x 11″ scored at
    5 1/2″ (10.5cm x 29.7cm scored at 14.9cm)
  • Basic White cs inside: 4″ x 5 1/4″ (10cm x 14.4cm)
  • Basic White cs for diecutting: 2″ x 8 1/2″ (5.2cm x 20.9cm)

Supplies

  • Timeless Arrangements Bundle (stamp set & dies) #161526
  • Artistic Mix Decorative Masks #159178
  • Orchid Oasis Ink #159214
  • Blending Brushes # 153611 & Small Blending Brushes #160518
  • 1/8″ (3.2mm) Metallic Woven Ribbon in Orchid Oasis #159199
  • 2022-23 In Color Pearls #161621
  • Wink Of Stella Clear Glitter Brush #141897
  • Multipurpose Liquid Glue & Stampin’ Dimensionals
  • Take Your Pick Tool
  • Silicon Craft Sheet
  • Stampin’ Cut & Emboss Machine
  • Paper Snips

Instructions

Working with the Orchid Oasis Ink

  1. Fold the Highland Heather card base on the score line. Place on a scratch paper.
  2. Position the Artistic Mix Decorative Mask over the front panel of the card base. Hold in place with sticky tape.
  3. Use the Blending Brush and the Orchid Oasis Ink to gradually apply ink in a circle slightly left of center. Remove the mask.
  4. Place the Basic White inside card piece on the scratch paper. Position the mask and hold in place with the sticky tape.
  5. Now use the Blending Brush to gradually apply ink to the upper right and lower left corner of the Basic White cs inside.
  6. Remove the mask and rinse it off with water. Set aside to dry.
  7. Stamp the “THANK YOU” sentiment on the end of the 2 1/2″ x
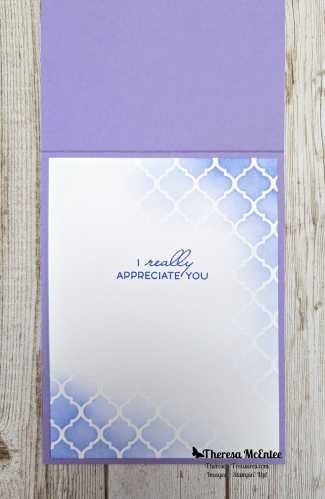
    8 1/2″ (6.4cm x 20.9cm) Basic White cs.
  8. Next stamp “I really appreciate You” on the Basic White inside card piece.
  9. Adhere the Basic White inside to the inside panel of the Highland Heather card base.

Timeless Arrangements Dies

  1. Diecut the following pieces from the Basic White cs with the “Thank You” stamped on it. The Dies are shown as well as the cut pieces. You will need four of the longer leaf branch.
  1. Die cut the Thank You with the medium sized rectangle die.
  2. Start gluing the leaf branches together on a Silicon Craft Sheet to make a longer branch to place over the thank you sentiment.
  3. Start with one long branch and several short branches to build the more full leaf branch to place under the sentiment.
  4. Use a Small Blending Brush to gradually add ink to the flowers as shown below.
  1. Glue the flowers to the top of the leaf branches.

Putting it altogether

  1. Position the leaves & flowers on the card front with the thank you sentiment in place but not adhered.
  2. Glue the leaves & flowers to the card front.
  3. Use Stampin’ Dimensionals to adhere the thank you sentiment.
  4. Now for the Bling!
  5. Tie a small bow with the beautiful Metallic Ribbon. Adhere to the card front with a Mini Dimensional.
  6. Add the awesome Orchid Oasis In Color Pearls. I used 5 pearls close to the leaf arrangements.
  7. If desired, use the marvelous Wink of Stella on the flowers for more sparkle!
  8. That is it!

Voila!

Thank you so much for visiting today! Please visit all the blogs in this hop. You will see fabulous, fun and inspiring projects made by the Inspirations In Ink Stampin’ Up! demonstrator group. You are currently visiting Theresa McEntee-USA creator of Theresa’s Treasures Paper Crafts. Check out these links on May 31st after midnight.

Christy Gridley – USA  

Deirdre Croal – USA

Julie Golding-Page – Canada

Karen Beck – Canada             

Theresa McEntee – USA

Robbie Rubala – USA 

Clickable Supply List

Product List
Paper Snips
[103579]
$11.00

Have a most wonderful and creative day!

Theresa

Would you like to join my Stamping Gems Team ? You can join to get good quality Stampin’ Up! products at a discount. I also have a special team Facebook page where we can share our creations. If you have a long wish list, you can join and get $125 USD in product for $99 USD! This is the best deal! Click HERE to join & order your starter kit!

Are you looking for high quality patterned paper for your card making or scrapbooking projects? Select Designer Series Paper will be 15% off starting June 1, 2023! Order early to be able to get what you want! Sale ends June 30, 2023.

The following Designer Series Papers will be 15% off June 1-30, 2023. Shop HERE.

Thinking of adding more creativity to your life? Try a monthly paper crafting kit! The Paper Pumpkin Monthly Subscription delivers a kit with everything you need to make a project-right to your door! Sign up for a Pre-paid Paper Pumpkin Subscription HERE.

ADD-ON

Welcome Inn Dies (Available for purchase starting the 11th of May while supplies last–right HERE).

Item number: 163192

$6.00 USD / $8.25 CAD,

This add-on includes:

  • One coordinating vase die: 1-1/2″ x 1-1/2″ (3.8 x 3.8 cm)
  • One coordinating flower die
  • One beautiful leaf die

Ciao!

Posted in 2021 Stampin' Up! July-December Mini Catalog, 3D Embossing Folder, Stampin" Blends Alcohol Markers, Stampin' Cut & Emboss Machine, Winter Holiday

Stampin’® Up! Great Tidings Religious Christmas Card

I am on Day 7 of the “12 Days of Christmas Card Making Challenge” with my stamping buddy Christy. Today’s card is a Stampin’ Up!® Great Tidings Religious Christmas Card. Each day of this challenge my blog will focus on a new holiday card. The challenge goes until December 10, 2021. I plan to showcase a different stamp set with each card. This will allow you plenty of time to see the great products that are available in the 2021 Stampin’ Up! July to December Mini Catalog, and to order in time to make your own Christmas cards! You can order HERE when you have your list ready!

Many of the products in the Stampin’ Up! July-December Mini Catalog will be retiring at the end of December. If you really want something, order now because products are “while supplies last”. Get more information on the “Last Chance” products HERE

I really like how colorful this Great Tidings Religious Christmas card turned out to be. The Wise Men Tidings Dies and the Gold Brushed Metallic Card Stock really make this card shine!

Measurements

Great Tidings Religious Christmas Card

  • Night of Navy Card Stock (CS) card base: 4 1/4 x 11 inches scored at 5 1/2 inches.
  • Basic White CS: 4 x 5 1/4 inches, 4 x 4 inches, and a 1/2 inch strip that is at least 3 inches long.
  • Gold Brushed Metallic CS: 5 3/8 x 4 1/8 inches.

Stamping

Use Memento Ink to stamp one each of the Three Kings onto the 4 x 4 inch Basic White CS.

Use Night of Navy Ink to stamp the sentiment “Wise men still seek Him” onto a 1/2 x 3 inch strip of Basic White CS. Also stamp, in Night of Navy Ink, the 4 x 5 1/4 inch Basic White CS with the sentiment “Sending Peace & Joy to you”, the 3 Gifts and the Star.

Use Stampin’ Blends Alcohol Markers to color the Three Kings. For skin color, I used the Light and Dark Cinnamon Cider, and Ivory. Additionally, I used the Light and Dark of: Bermuda Bay, Just Jade, Daffodil Delight, Blackberry Bliss and Night of Navy for the Kings’ dress. I shadowed the turban with Light Smoky Slate. Later I used Dark Poppy Parade for the gem in the turban and the jewel on the cloak of the middle King. Note: These are not the traditional colors for the Three Kings. Going left to right is Gaspar, Balthazar and Melchior.

Three Wise Men Dies and Hammered Metal Embossing Folder

The Three Wise Men Dies really help make the Great Tidings Religious Christmas Card shine. First die cut the Dome, placing the top of the die about 3/4 inch from the top edge and using the Stampin’ Cut & Emboss Machine. Use the dies for the Star and the Town of Bethlehem to diecut from the left over dome piece. Save the remainder of the dome cut out for future use. Tip: This is a great way to make the Gold Brushed Metallic CS last longer- use every scrap!

Use the Hammered Metal 3D Embossing Folder in the Stampin Cut & Emboss Machine for the texture on the 5 3/8 x 4 1/ 8 inch Gold Brushed Metallics CS card piece.

Assembling the Card

Adhere the inside card piece to the inside panel of the Night of Navy CS card base.

Start the front of the card by adhering the Hammered Metal Gold CS card piece to the front panel of the Night of Navy CS card base. Next adhere the Star with a Stampin’ Dimensional. Adhere the Little Town of Bethlehem flat to the background. Add the Three Kings using Stampin’ Dimensionals.

Finish the card by trimming the sentiment and adhering it to the card with Stampin’ Dimensionals. Add one large Gilded Gem to the center of the Star.

Voila! You have made a fabulous Great Tidings Religious Christmas Card!

For my family today is the second Sunday of Advent. Time is moving by so quickly! My son and husband are out to get the tree. I still need to wrap a bunch of packages to mail tomorrow. It is such a wonderful, busy time of year!

Supplies

Product List

I hope you have a Blessed Day!

Theresa

Posted in 2020 August-December Mini Catalog, Guys cards, Stampin' Cut & Emboss Machine, Winter Holiday

Stampin’ Up!® Tree Angle for the Cardz4Guyz Challenge #259- Traditional Christmas

Hello and Happy Monday! I hope you all had a crafty weekend!

Today’s card satisfies two challenges: my own 15-Day Christmas Card Challenge and the Cardz4Guyz Challenge #259-Traditional Christmas.

I designed this card with a traditional color combination and slightly modern Christmas trees from the Stampin’ Up!® Tree Angle stamp set.

The Tree Angle stamp set is from the 2020 August-December Stampin’ Up!® Mini Catalog. Tuesday December 8 is the start of the Giant End of Year Close Out Sale! I listed the retiring products and discounts which you can download here:

Measurements: Whisper White Card Stock (CS) card base: 4 1/4 x 11 inches with a score line at 5 1/2 inches; Whisper White CS: 3 1/2 x 5 1/2 inches embossed with the Winter Snow Embossing Folder, 3 x 5 inches to die cut a stitched rectangle from the Stitched Rectangles Dies and also to cut 2 stitched triangles from the Stitched Triangles Dies; and Red Foil Sheet: two strips at 1/2 x 5 1/2 inches and 3 1/2 x 3 1/2 inches to die cut the stitched circle from the Stitched Shapes Dies.

Using the Shaded Spruce ink stamp the sentiment “Joy & Cheer” onto the Stitched Rectangle Die Cut. For the Stitched Triangle Die-Cut Christmas Tree I tried both stamping first then die-cutting and die-cutting then stamping. Lining up the stamp on the cut Stitched Triangle is easier.

Stamp the inside of the Whisper White CS card base with the sentiment “Happy wishes to you and yours” in Shaded Spruce ink. Stamp the small group of ornaments in the upper right-hand corner first in Shaded Spruce ink, then in Real Red ink. Stamp the smaller triangle in Real Red ink on to the smaller Stitched Triangle Die-Cut.

Adhere the Red Foil 1/2 x 5 1/2 inch strips to the back of the Whisper White CS embossed with the Winter Snow Embossing Folder. I use the Silicon Sheet to be sure the excess glue won’t stick to my table. Adhere this card piece to the front of the Whisper White CS card base.

Use Stampin’ Dimensionals to adhere the Red Foil stitched circle and stitched rectangle with the sentiment stamped on it.

To adhere the green Christmas Tree I applied two Stampin’ Dimensionals to the bottom and used the Multipurpose Glue on the top.

Adhere the red Christmas tree to the card front with the Stampin’ Dimensionals.

You guessed it-time for Bling!

I used the pick side of the Take Your Pick tool to transfer the Star Designer Elements and the putty side to transfer the small silver circle sequins in the Snowflake Sequins. I wanted to add a little snow to the snowflake background with the silver sequins.

And Viola! you have a Traditional Christmas card to send to your favorite guy!

Thanks for coming by today. Check out more Traditional Christmas cards at the Cardz4Guyz blog here.

More on the Stampin’ Up!® Year End Closeout Sale. Download the PDF of the retiring products (above) and choose your products noting the item numbers. Then go to my Online Store HERE and start shopping and saving!

Product List

I hope you are having a good Holiday Season even though things are so different this year. I just try to stay positive and crafting really helps. I really feel joyful when I am designing and creating cards to send to my friends and family. I hope you do too! Have a great day!

Theresa