


Hello and welcome! I am Theresa McEntee, creator of Theresa’s Treasures Paper Crafts. Today I have the pleasure of participating in the Blog Hop with Around the World on Wednesday (AWOW) organized by Angie McKenzie. I hope you like my Lovely & Sweet Emboss Resist Technique card!

On the second Wednesday of each month, the AWOW team put together a thematic hop to give you some inspiration for your own crafting. This month’s challenge is a Technique Challenge.
Happy Valentine’s Day!
“What the world needs now is love, sweet love
It’s the only thing that there’s just too little of”

My Project for today
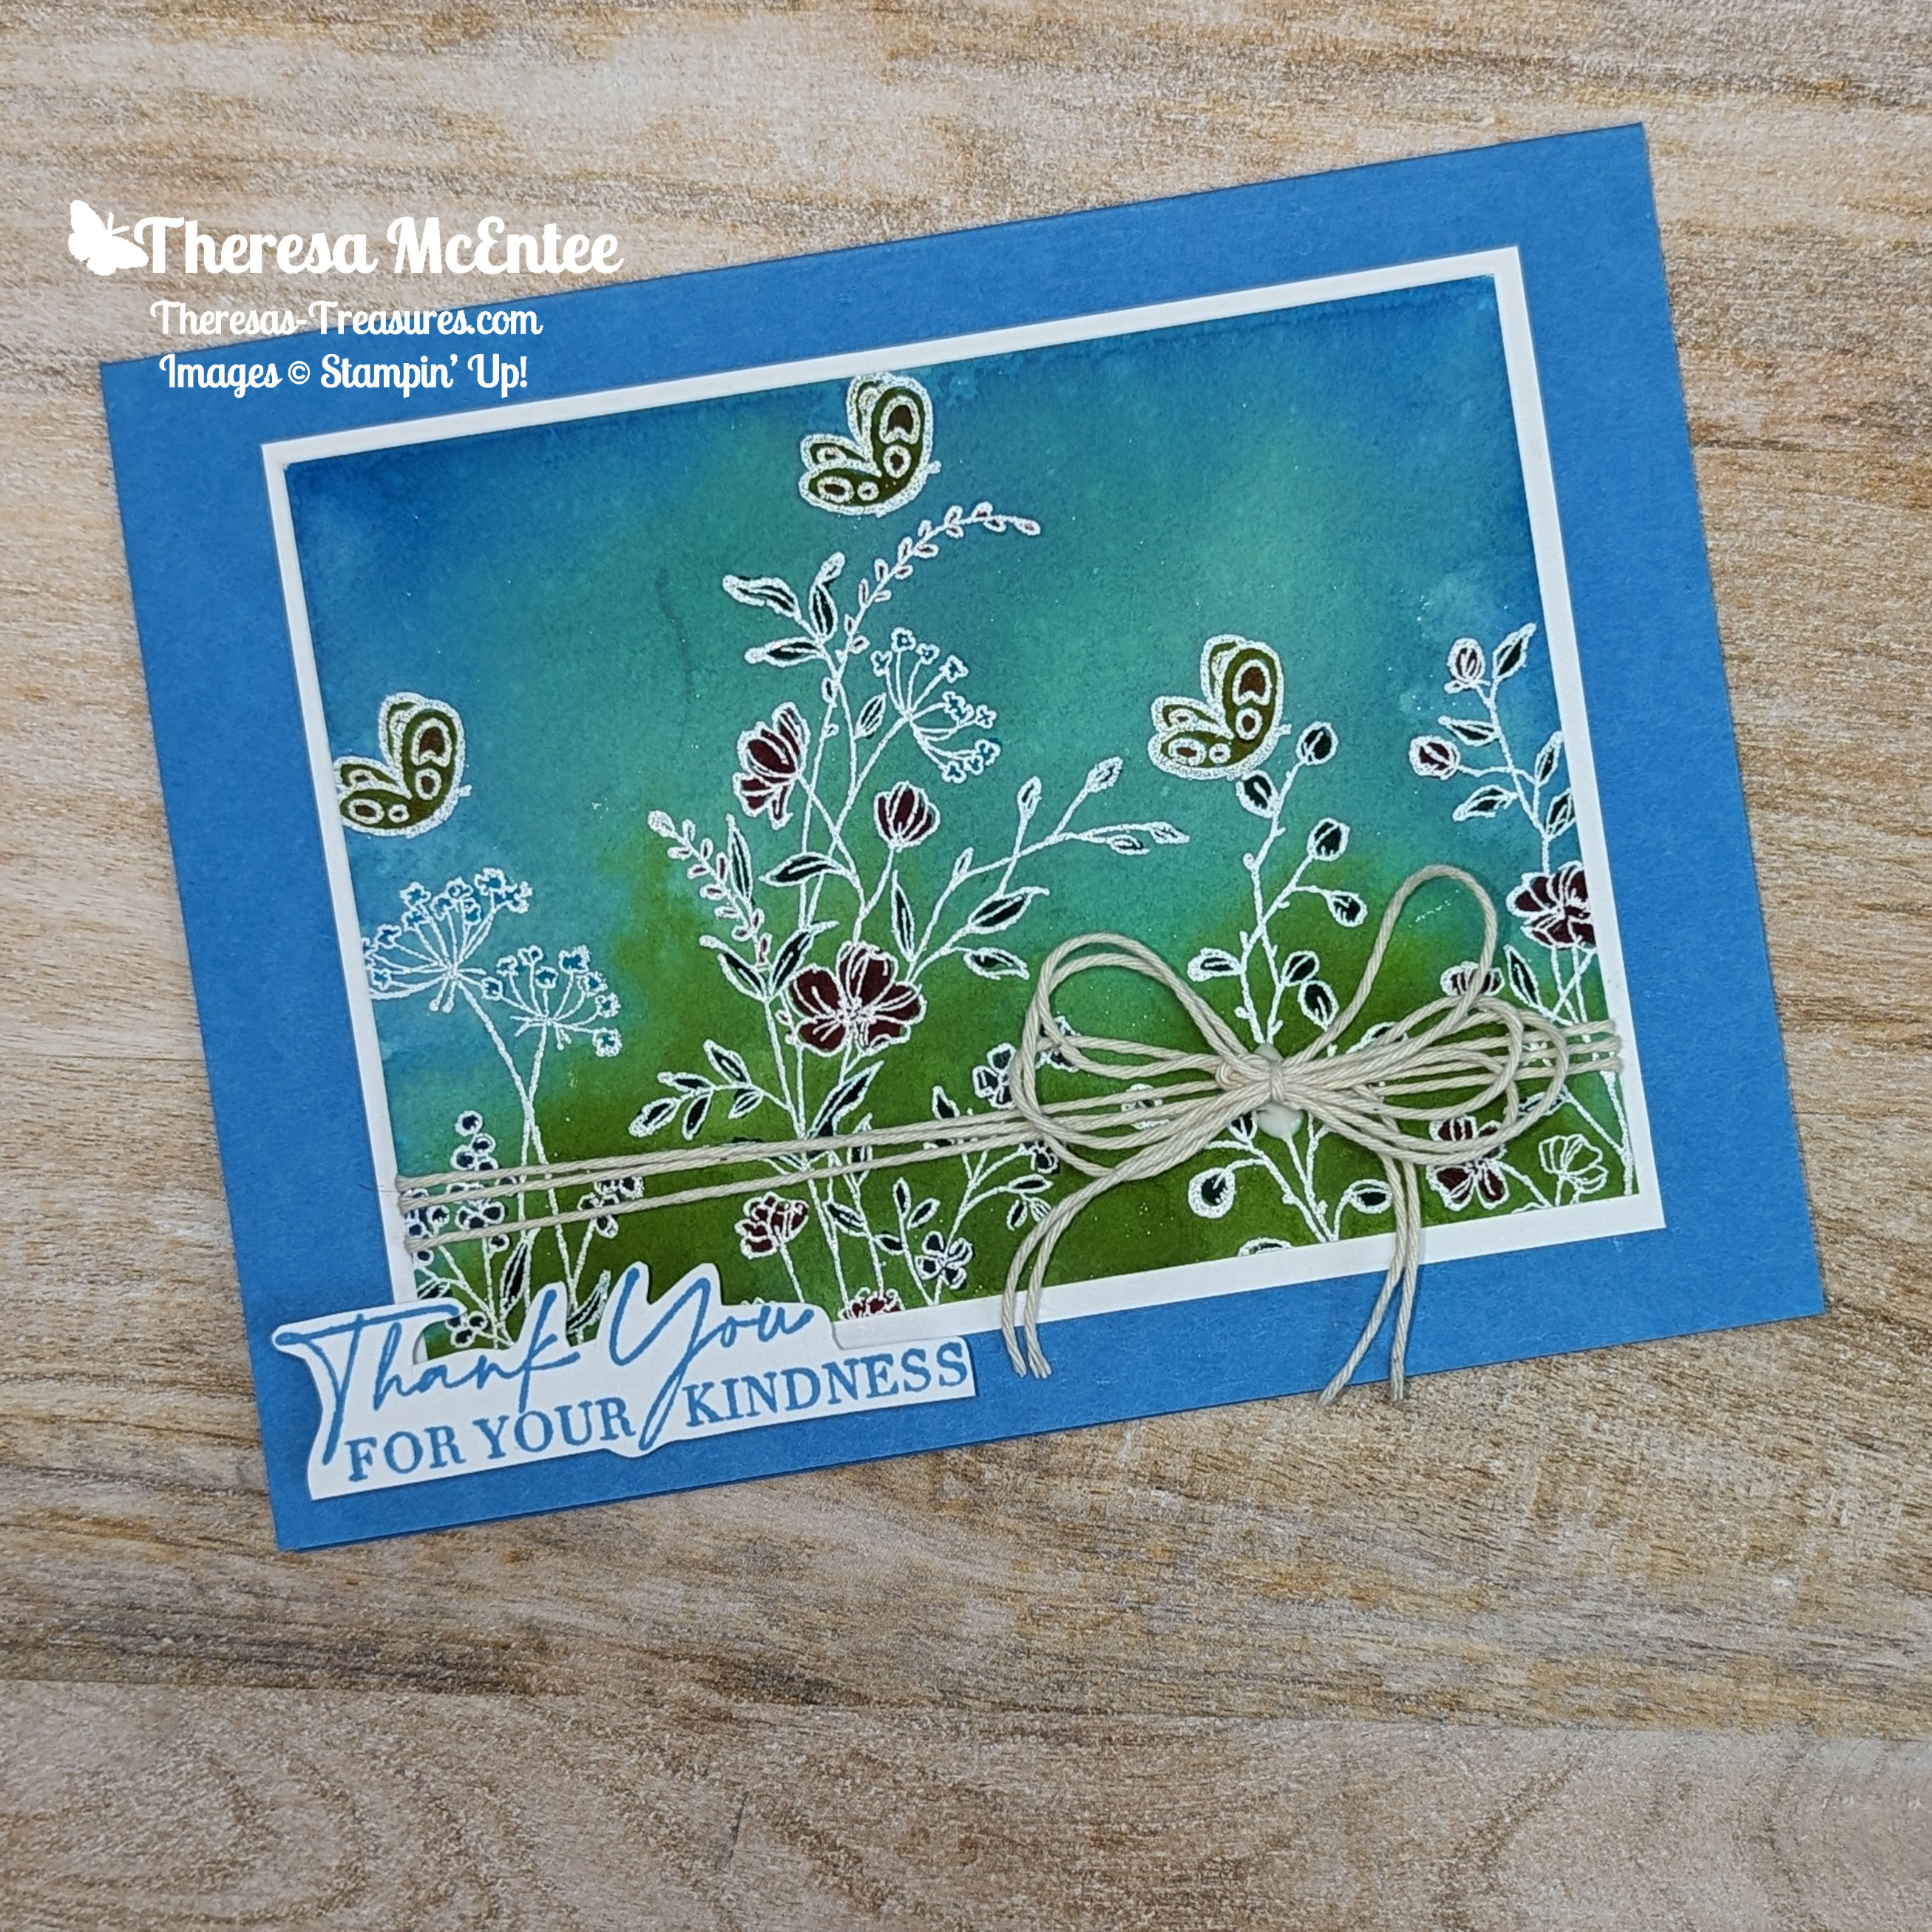
This card was made using the Emboss Resist Technique. I love this technique because it turns out differently each time. I also love using embossing powder. It is so magical to see the emboss powder change when you heat it up!

The Lovely & Sweet stamp set is a set of sketched botanical images. I really liked the image of the almond plant so I used it for my Technique Challenge.

Instructions
Embossing
- Emboss the 4″ x 5 1/4″ Fluid 100 Watercolor Paper. First use the Embossing Buddy to remove the static. Stamp the image in Versamark Ink.
- Sprinkle the White Emboss Powder over the ink and shake off the excess.
- Use a small paint brush to remove any embossing powder that is not supposed to be there.
- Use the Heat Tool to heat the emboss powder until it magically changes. Be sure that you have heated up all the areas.
- Set aside to cool for 10 minutes.
The Emboss Resist Technique


- With a Stampin’ Spritzer spray the paper that is embossed until damp. Use a paper towel to pat off the excess water.
- Start with the lightest color. Using the Pool Party Ink Pad, apply ink to an E size Clear Block.
- Next apply Coastal Cabana Ink on the edges alsousing the ink pad.


- Finish by applying some Pretty Peacock Ink to parts of the edges. Use the corner of the ink pad to apply a little ink to the center.
- Use the Stampin’ Spritzer to spray the block until the ink begins to run together.


- Flip the block over and onto the embossed Fluid 100 Watercolor Paper.
- Apply a little pressure by placing a punch on top.
- Leave alone for 10 to 15 minutes.

Assembling the Card
- Trim the edges and mount on a 3 5/8″ x 4 5/8″ Coastal Cabana cardstock.
- The card base is a 4 1/4 x 11″ Pretty Peacock cardstock with the front embossed using the Fern 3D Embossing Folder.
- Use Stampin’ Dimensionals to adhere the stamped card piece onto the front of the card base.

- Here is how I did the inside. I did not use a sentiment because I wanted to keep this as an all occasion note card.
- Add Bling! using the Iridescent Foil Gems.
Voila!

The AWOW Team
I am so glad you have joined me today in this worldwide hug that stretches all the way from Australia to Alaska across twelve different time zones. I hope you can feel the love!
Each month this group of creative friends prepare a project for a theme. Below is an image of the whole crew and where they are from around the globe. Such a talented and wonderful group of people! You will want to visit everyone to be sure to see all the amazing projects!

We all love sharing joy with you through projects from our individual parts of the world. I hope that you will be filled with lots of inspiration!
See More Inspiring Projects

Thank you so much for visiting today. I hope you enjoyed learning more about our projects. Have a most wonderful day!
Theresa
Product List ") $26.00 |  $9.50 |  $9.00 |  $9.00 |  $9.00 |
 $9.00 |  $10.00 |  $10.00 |  $8.00 |  $4.00 |
 $18.00 |  $27.00 | ") $31.00 |  $13.00 |  $9.50 |
 $10.00 |  $4.25 |


")
")


 Shimmer Paper")


")


