Posted in Designer Series Paper, Gratitude/ Thanks, Inspiration in Ink Blog Hop, Online Exclusives

Online Exclusive Simply Zinnia Bundle for the Inspirations in Ink March 2024 Blog Hop

I just love this Thank You card made with the Online Exclusives-Simply Zinnia Bundle!

Welcome! Thank you for visiting Theresa’s Treasures Paper Crafts! I am Theresa, a Stampin’ Up! Demonstrator in Arizona, USA. Today is the monthly Inspirations in Ink Blog Hop! I am excited to be hopping with talented demonstrators from around the world. Be sure to check out everyone’s projects using Stampin’ Up! Online Exclusives!

The Simply Zinnia Bundle is one of many Online Exclusives! It is only available in my Online Store. When you are ready, you may order from my Online Store HERE.

I enjoyed using the Stampin’ Blend Alcohol Markers to color the zinnia-which is one of my favorite flowers.

The Flowering Zinnias Designer Series Paper (DSP) is so vibrantly colorful! I wanted to be sure to use the DSP on my card! Too many choices!

Measurements

  • Melon Mambo cardstock card base: 5 1/2″ x 8 1/2″ scored at 4 1/4″
  • Flowering Zinnias DSP:
    • Large Floral with White background: 4 1/4″ x 5 1/4″ (die cut with the 2nd to largest Deckled Rectangle Die)
    • Melon Mambo floral design: 3 1/2″ x 4 3/4″ (die cut with the 3rd to the largest Deckled Rectangle Die)
    • Floral Design with Melon Mambo background: 1 1/4″ x 5 1/2″
  • Basic White cardstock: 2 1/2″ x 5″ (for stamping zinnia and leaf),
    1 1/4″ x 4 1/4″ (for sentiment) and 4″ x 5 1/4″ for inside

Supplies

  • Stamp Set: Simply Zinnia
  • Dies: Simply Zinnia & Deckled Rectangle
  • Ink: Blackberry Bliss & Memento ink pads
  • Stampin’ Blends: Lemon Lolly, Daffodil Delight, Flirty Flamingo, Melon Mambo, Lemon Lime Twist, Old Olive and Mossy Meadow
  • Embellishments: Adhesive-backed Shiny Sequins

Instructions

  1. Fold the Melon Mambo cardstock card base in half and burnish with a Bone Folder. Set aside.
  2. Die cut the DSP and set aside.
  3. Stamp the large zinnia image in Memento Ink onto the 2 1/2″ x 5″ Basic White cardstock. Stamp the leaves. TIP: Let dry or use your Heat Tool to dry the image more quickly so that the black ink doesn’t affect the Lemon Lolly Stampin’ Blend Ink.
  4. Color images as desired. Die cut with the Simply Zinnia Dies.
  5. Stamp the sentiment for the front of the card in Blackberry Bliss Ink onto the 1 1/4″ x 4 1/4″ Basic White cardstock. Use the largest Deckled Rectangle to die cut the edges of the sentiment.
  6. For the inside of the card, stamp the sentiment in Blackberry Bliss Ink. Stamp the trio of zinnias in Memento Ink in the lower right-hand corner. Let dry or use the Heat Tool on the trio. Color with Stampin’ Blends as desired.
  1. Adhere the inside card piece to the inside of the Melon Mambo cardstock card base.
  2. Adhere the DSP with the white background onto the front of the card base. Follow with the Melon Mambo floral DSP. Finish with the Floral strip with the pink background across the middle.
  3. Use Stampin’ Dimensionals to adhere the sentiment, zinnia and leaves.
  4. Add Bling! with the Adhesive-Backed Shiny Sequins as desired.

Voila!

Thank you so much for visiting today! I hope you enjoyed my project. Please visit all the blogs in the Inspirations In Ink Blog Hop. You will be amazed and inspired by all the fun and creative projects made by the Inspirations In Ink demonstrators. 

You are currently visiting Theresa McEntee-USA creator of Theresa’s Treasures Paper Crafts.

Blog Roll Call

Clickable Supply List

Product List
Simply Zinnia Bundle (English)
$52.00
Deckled Rectangles Dies
$30.00
Blackberry Bliss Classic Stampin' Pad
$9.00
Tuxedo Black Memento Ink Pad
$6.50
Lemon Lolly Stampin’ Blends Combo Pack
$10.00
Daffodil Delight Stampin' Blends Combo Pack
$10.00
Flirty Flamingo Stampin' Blends Combo Pack
$10.00
Melon Mambo Stampin' Blends Combo Pack
$10.00
Lemon Lime Twist Stampin’ Blends Combo Pack
$10.00
Old Olive Stampin' Blends Combo Pack
$10.00
Mossy Meadow Stampin' Blends Combo Pack
$10.00
Melon Mambo 8-1/2" X 11" Cardstock
$10.00
Basic White 8 1/2" X 11" Cardstock
$10.50
Flowering Zinnias 12" X 12" (30.5 X 30.5 Cm) Designer Series Paper
$12.50
Adhesive Backed Shiny Sequins
$7.50

Monthly Paper Pumpkin Subscription

Do you want to learn to stamp? Or do you want to build up some supplies while making awesome projects?

Start out by trying a monthly paper crafting kit! The Paper Pumpkin Monthly Subscription delivers a kit with everything you need to make a project-right to your door! Everything you need is included! You even get a ink spot in a different color every month!

Sign up for a Pre-paid Paper Pumpkin Subscription HERE.

Special Add-On Die Set for the April Paper Pumpkin is available in my Online Store HERE!

Have a most wonderful and creative day!

Ciao!

Theresa

Posted in 2024 Stampin' Up! January to April Mini Catalog, Birds, Fun/Fancy fold card, Inspiration in Ink Blog Hop, Nature, Sale-a-Bration 2024

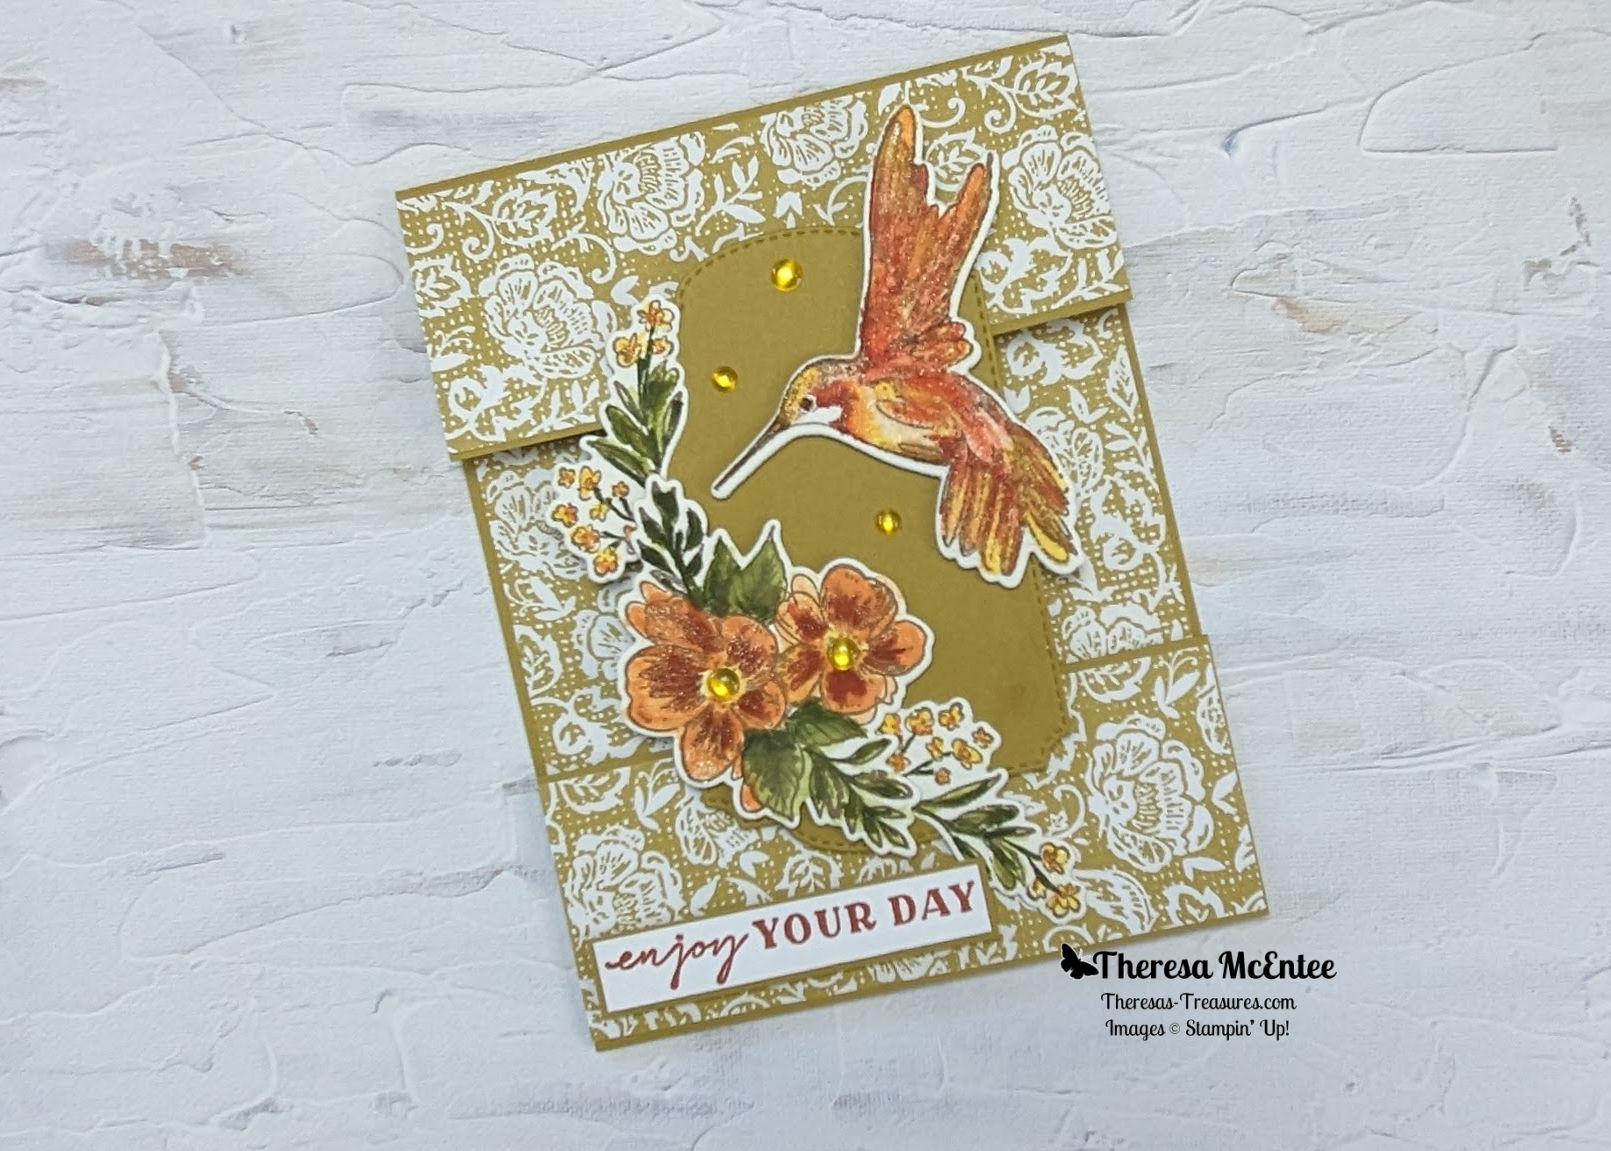
Thoughtful Expressions Watercolor Card for the Inspirations in Ink February 2024 Blog Hop

Welcome! Thank you for visiting Theresa’s Treasures Paper Crafts to see my Thoughtful Expressions Watercolor Card! I am Theresa, a Stampin’ Up! Demonstrator in Arizona, USA. Today is the monthly Inspirations in Ink Blog Hop! I am excited to be hopping with talented demonstrators from around the world. Be sure to check out everyone’s Thoughtful Expressions Bundle projects. The Thoughtful Expressions Bundle is in the 2024 January to April Mini Catalog. If you want your own, order before February 29,2024 so you can get Sale-a-bration Rewards! You may order from my Online Store HERE.

Why did I make this Thoughtful Expressions Watercolor Card? I am interested in learning to watercolor. The Stampin’ Up!® Inks are so vivid and work very well. I have been using a Nylon Round 1 paintbrush. If you would like to try watercoloring, there is a lot of trial and error. Don’t be afraid to try. There are many happy accidents that turn out well!

Measurements

  • Wild Wheat cardstock card base: 4 1/4″ x 11″ scored 5 1/2″
  • Wild Wheat cardstock: 2 3/4″ x 6″ (to die cut the center panel and inside panel), and 5/8″ x 2 5/8″ to put behind sentiment
  • Fluid 100 Watercolor Paper: one sheet
  • Basic White cardstock: 2 1/2″ x 3 3/4″ (to die cut inside) and
    1/2″ x 2 1/2″ for sentiment
  • Poetic Expressions 12″ x 12″ Designer Series Paper (DSP):
    4 1/8″ x 5 3/8″ and two 1 5/8″ x 4 1/4″

Supplies

  • Stamp Set: Thoughtful Expressions
  • Dies: Thoughtful Expressions
  • Ink refills: Lemon Lolly, Daffodil Delight, Wild Wheat, Pumpkin Pie, Cajun Craze, Old Olive and Mossy Meadow
  • Ink Pad: Stazon Saddle Brown
  • Embellishments: 2023-2025 In Color Dots and Wink of Stella

Instructions

  1. Fold the card base at the scoreline. Cut 1 3/4″ to the right of the scoreline. Then cut a 1 3/4″ x 4 1/4″off the piece that you cut off. This is the bottom of the card front.
  2. Die cut 2 labels from the Wild Wheat cardstock with the largest label die in the Thoughtful Expressions Dies. Set aside.
  3. Die cut the Basic White cardstock with the 2nd largest label die.
  4. Use the Stazon Saddle Brown Ink to stamp the bunch of flowers on the Basic White cardstock in the upper left and lower right corner for the inside of the card. (see photo of inside below).
  5. Adhere the stamped Basic White cardstock to one of the Wild Wheat cardstock labels.
  6. Adhere the Poetic Expressions DSP to the inside of the Wild Wheat cardstock card base. Then adhere the Basic White cardstock/Wild Wheat cardstock card piece to the center of the inside panel.
  1. Stamp the images of the hummingbird and flowers onto the Fluid 100 Watercolor Paper with the Stazon Saddle Brown Ink.
  2. Put one drop of each color onto a palette, acrylic block or the glass mat. Wet the paint brush and squeeze out the excess water.
  3. Start with the Lemon Lolly Ink and take up a small amount of ink with the paint brush and color the body of the hummingbird, the center of each of the large flowers and the small flowers in the bunch of flowers.
  4. Use the Pumpkin Pie Ink for the center of the small flowers.
  5. For the Hummingbird, use the Daffodil Delight ink, then progressively darker inks to color the wings and tail. Use a bit of Cajun Craze Ink for the base of the neck.
  6. The leaves are done in Old Olive Ink then Mossy Meadow Ink.
  7. Die cut the watercolored images.
  8. Adhere the Poetic Expressions DSP to the front flap of the Wild Wheat cardstock card base. Adhere the second piece of DSP to the 1 3/4″ x 4 1/4″ piece you cut off.
  9. Position this second piece on the bottom of the card front. Use Stampin’ Dimensionals to connect the top flap and bottom card piece together with the die cut Wild Wheat cardstock label.
  10. Glue the bunch of small flowers to the Wild Wheat cardstock label allowing space to adhere the larger flowers. Adhere the larger flowers with Stampin’ Dimensionals.
  11. Use Stampin’ Dimensionals to adhere the hummingbird.
  12. Stamp the sentiment “enjoy your day” into the strip of Basic White cs. Adhere this to the strip of Wild Wheat cardstock. Use Stampin’ Dimensionals to adhere the sentiment to the card front.
  13. Embellish with the In Color Dots in Wild Wheat and Wink of Stella.

Voila!

Thank you so much for visiting today to see my Thoughtful Expressions Watercolor Card! I hope you enjoyed my project as much as I did! Please visit all the blogs in the Inspirations In Ink Blog Hop. You will be amazed and inspired by all the fun and creative projects made by the Inspirations In Ink demonstrators. 

You are currently visiting Theresa McEntee-USA creator of Theresa’s Treasures Paper Crafts.

Blog Roll Call

Clickable Supply List

Product List
Thoughtful Expressions Bundle (English)
$55.75
Lemon Lolly Classic Stampin' Ink Refill
$5.00
Daffodil Delight Classic Stampin' Ink Refill
$5.00
Wild Wheat Classic Stampin' Ink Refill
$5.00
Pumpkin Pie Classic Stampin’ Ink Refill
$5.00
Cajun Craze Classic Stampin' Ink Refill
$5.00
Old Olive Classic Stampin' Ink Refill
$5.00
Mossy Meadow Classic Stampin' Ink Refill
$5.00
Saddle Brown Stazon Ink Pad
$10.00
Wild Wheat 8 1/2" X 11" Cardstock
$10.00
Basic White 8 1/2" X 11" Cardstock
$10.50
Fluid 100 Watercolor Paper
$9.00
2023–2025 In Color™ Dots
$8.00
Clear Wink Of Stella Glitter Brush
$8.00

Stampin’ Up Promotions

Sale-a-bration

What is Sale-a-Bration? It is a wonderful time of year for those ordering from Stampin’ Up! For every $50 USD you order, there are FREE products to choose from! Sale-a-bration starts January 4, 2024 and ends February 29, 2024. Visit my Online Store HERE

Join Now

If you’ve been thinking about becoming a Stampin’ Up! demonstrator, then there’s no better time than right now during Sale-A-Bration! Join Now by 29 February 2024 and choose between two fabulous offers:

Option 1: Get $125 worth of product PLUS our new Stampin’ Glass Mat Studio (a $60 value) for just $99!
Option 2: Get $125 worth of product PLUS an additional $30 worth of product of your choice when you join for $99. That’s a $155 value!

Join HERE today!

Monthly Paper Pumpkin Subscription

Thinking of adding creativity to your life this year? Start out by trying a monthly paper crafting kit! The Paper Pumpkin Monthly Subscription delivers a kit with everything you need to make a project-right to your door! Sign up for a Pre-paid Paper Pumpkin Subscription HERE.

Have a most wonderful and creative day!

Ciao!

Theresa

Posted in 2024 Stampin' Up! January to April Mini Catalog, Baby Wipe Technique, Hello, Inspiration in Ink Blog Hop, Love/Affection, Nature

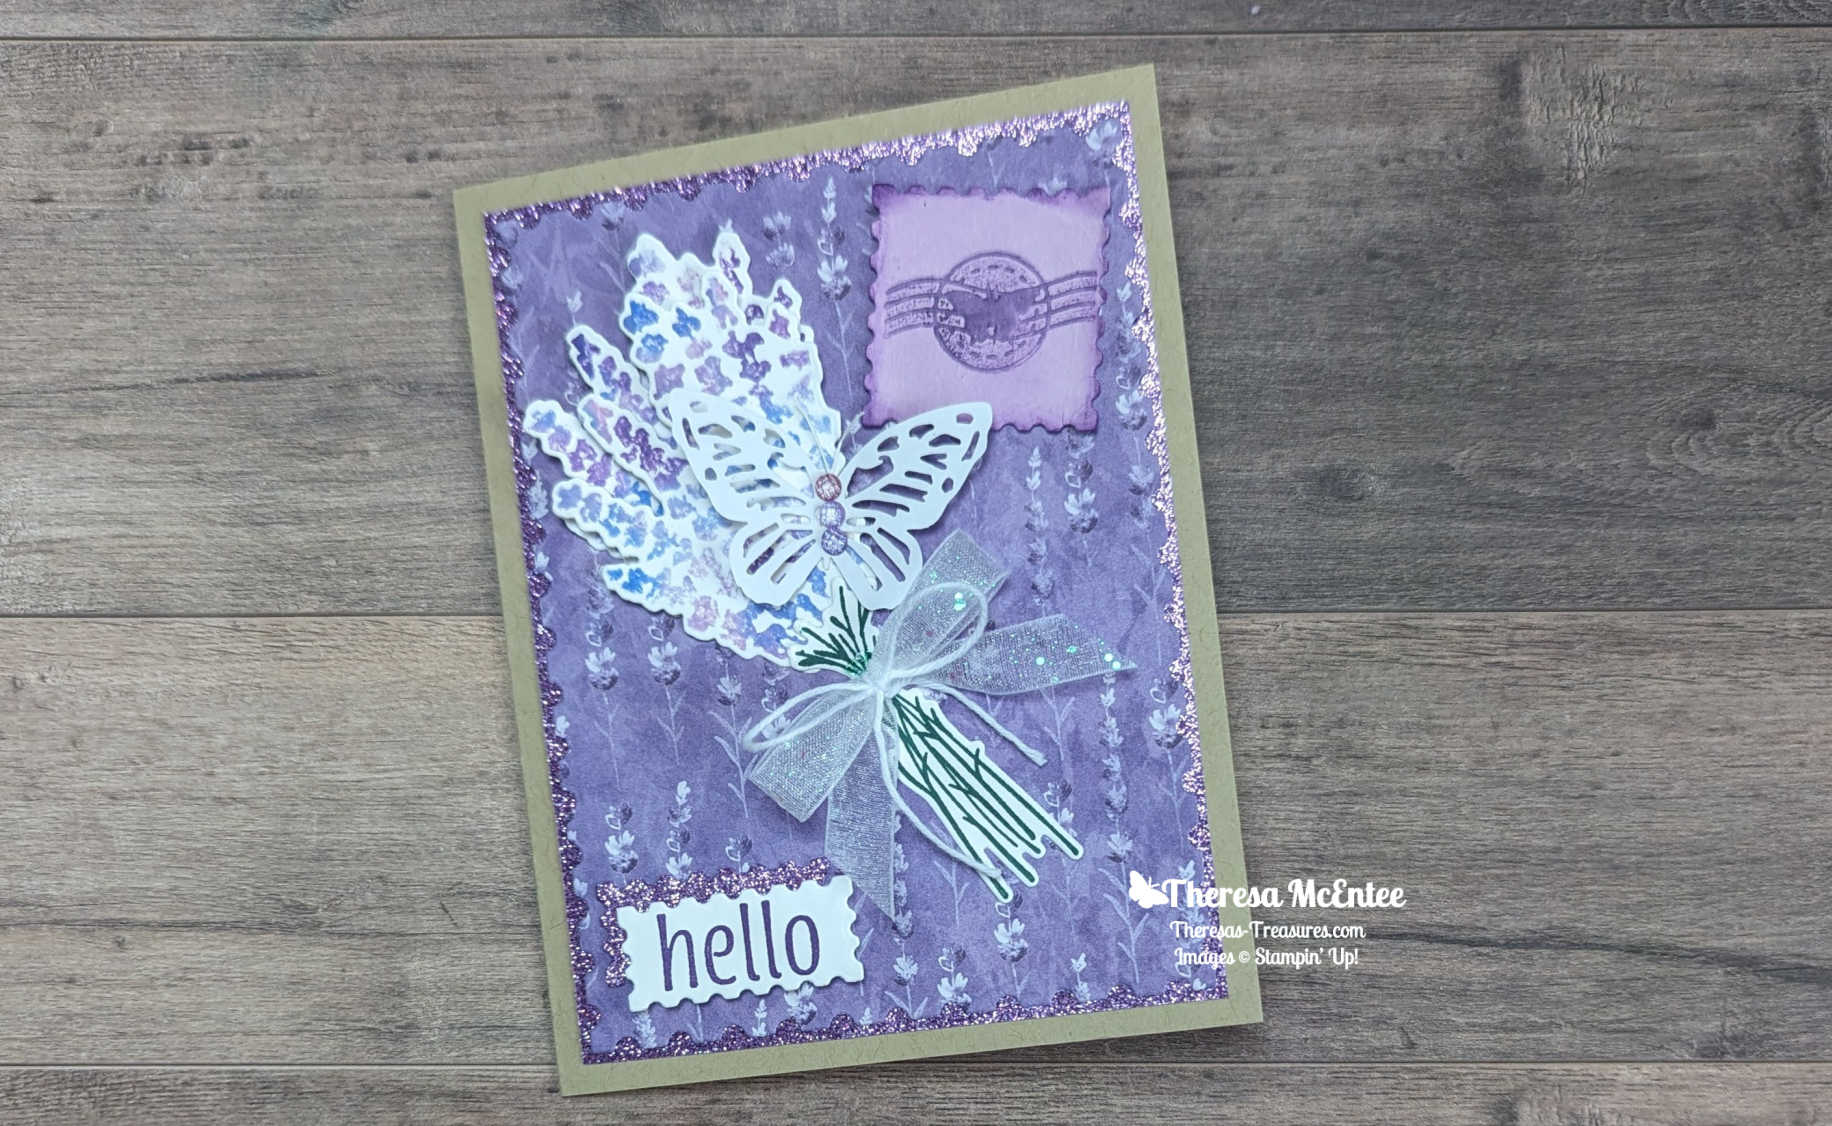
Painted Lavender Bundle & Baby Wipe Technique Hello card for the Inspirations in Ink Blog Hop – January 2024

This is my Hello card made with the Painted Lavender Bundle & the Baby Wipe Technique.

Welcome! Thank you for visiting Theresa’s Treasures Paper Crafts! I am Theresa, a Stampin’ Up! Demonstrator in Arizona, USA. Today is the monthly Inspirations in Ink Blog Hop! I am excited to be hopping with talented demonstrators from around the world! Be sure to check out everyone’s Painted Lavender Bundle projects. The Painted Lavender Bundle is in the 2024 January to April Mini Catalog. When you are ready, you may order from my Online Store HERE.

I absolutely love purple, lavender and butterflies! The Painted Lavendar Bundle is part of the Perennial Lavendar Suite which includes all of these elements!

I wanted to use the Baby Wipe Technique to be able to have multiple colors of flowers when I used the lavender flower stamp. I love how it came out!

Measurements

  • Crumb Cake cardstock (cs): 5 1/2″ x 8 1/2″ scored at 4 1/4″
  • Basic White cs: 3 3/4″ x 5″ (to diecut the inside), 4″ x 5 1/4″ (for stamping) and 1″ x 2″ (to stamp and diecut sentiment)
  • Highland Heather Glimmer Sheet: 3 7/8″ x 5 1/8″ and 1″ x 2″ (to diecut with smallest rectangular Perennial Postage Die)
  • Perennial Lavender DSP: 4 1/4″ x 5″ (to diecut with the largest Perennial Postage Die)
  • Fresh Freesia cs: 1 3/4″ x 1 3/4″ (to diecut with square Perennial Postage Die and emboss with the butterfly die)

Supplies

  • Stamp Sets: Painted Lavender & Artistically Inked (sentiment)
  • Dies: Painted Lavendar & Perennial Postage
  • Ink: Fresh Freesia, Highland Heather, Orchid Oasis, Gorgeous Grape & Shaded Spruce
  • Embellishments: Purple Fine Shimmer Gems
  • Ribbon: White Glitter Organza Ribbon and White Bakers Twine

Instructions

Baby Wipe Technique

  • To set up the Baby Wipes place about 5 Baby Wipes folded in half on one side the the Standard Stamp Case.
  • Randomly drop a few drops of each color of ink on the pile of Baby Wipes.
  • Use the lavender flower stamp and tap down on the Baby Wipes in a small circular motion. Stamp onto the Basic White cs. Ink up the stamp in a different area of the Baby Wipe and stamp the bunch of lavender flowers four times (you only need two of the stamped flowers for this card).

  • Use the other bunch of flowers and the Baby Wipe Technique to stamp flowers on the Basic White cs for the inside of the card. Stamp the leaves in Shaded Spruce Ink. Stamp at full strenth in the center, then Stamp Off once when stamping on each side.

Gathering the Pieces

  • Use the 2nd to largest Perennial Postage Die to diecut the stamped Basic White cs for the inside. Adhere the cardpiece to the inside of the Crumb Cake cs card base.
  • Diecut the stamped lavendar flowers with the Painted Lavender Dies.
  • Stamp the stems in Shaded Spruce Ink onto the Basic White cs. Diecut with the Painted Lavender Dies.
  • Use the square Perennial Postage Die to cut from the Fresh Freesia cs. Sponge the edges with a Sponge Dauber and Gorgeous Grape Ink.
  • Use the Stampin’ Write Marker in Gorgeous Grape to apply ink to the butterfly postage stamp die. Carefully lay the die on the Fresh Freesia cs and run throught the Stampin’ Cut & Emboss Machine. Carefully remove the die from the paper.
  • Stamp “Hello” in Gorgeous Grape Ink onto the strip of Basic White cs. Use the smallest rectangular die in the Perennial Postage Dies to diecut the sentiment. Also use the same die on the strip of Highland Heather Glimmer Paper.

Assembling the Card

  • Use the largest Perennial Postage Die to diecut the Perennial Lavendar DSP. Adhere the DSP to the Highland Heather Glimmer Paper. TIP: I used a Deckled Rectangle Die to cut the center form the Highland Heather Glimmer Paper before adhering the DSP to it.
  • Use Stampin’ Dimensionals to adhere the Glimmer Paper/DSP panel to the card front.
  • Adhere one bunch of the lavendar flowers to the card by applying adhesive only to the base. Use the Bone Folder to curl up the edges of the flowers.

  • For the 2nd bunch of lavendar flowers, use Stampin’ Dimensionals on the top and an adhesive at the base. (shown above). Adhere to the top of the other bunch of lavendar flowers but shifted to the left.
  • Now adhere the Fresh Freesia cs postage stamp cardpiece at a slight tilt in the upper right-hand corner.
  • Add the stems to the base of flowers.
  • Next adhere the small Highland Heather Glimmer Paper diecut to the Perennial Lavendar DSP. Use Stampin’ Dimensionals to adhere the “Hello” slightly lower and to the right of the Glimmer Paper.

Embellishment

  • Tie a bow with the White Glitter Organdy Ribbon. Then tie White Bakers Twine around the center of the bow. Tie a bow. Add to the stem of the lavendar bunch on the card front.
  • Use Mini Glue Dots to adhere the butterfly from the Paper Butterfly Accents.
  • Add one of each color of the Purple Fine Shimmer Gems to the body of the butterfly.

Voila!

Thank you so much for visiting today! I hope you enjoyed my project. Please visit all the blogs in the Inspirations In Ink Blog Hop. You will be amazed and inspired by all the fun and creative projects made by the Inspirations In Ink demonstrators. 

You are currently visiting Theresa McEntee-USA creator of Theresa’s Treasures Paper Crafts.

Blog Hop Line Up

Clickable Supply List

Product List
Painted Lavender Bundle
$46.75
Perennial Postage Dies
$33.00
Artistically Inked Cling Stamp Set
$24.00
Fresh Freesia Classic Stampin' Ink Refill
$5.00
Highland Heather Classic Stampin' Ink Refill
$5.00
Gorgeous Grape Classic Stampin' Ink Refill
$5.00
Orchid Oasis Classic Stampin' Ink Refill
$5.00
Shaded Spruce Classic Stampin' Pad
$9.00
Gorgeous Grape Classic Stampin' Pad
$9.00
Regals Stampin' Write Markers
$35.00
Crumb Cake 8-1/2" X 11" Cardstock
$10.00
Fresh Freesia 8 1/2" X 11" Cardstock
$10.00
Basic White 8 1/2" X 11" Cardstock
$10.50
Perennial Lavender 12" X 12" (30.5 X 30.5 Cm) Designer Series Paper
$12.50
Three Color Glimmer 12" X 12" (30.5 X 30.5 Cm) Specialty Paper
$10.50
White 3/8'' (1 Cm) Glittered Organdy Ribbon
$8.50
Baker's Twine Essentials Pack
$11.00
Purple Fine Shimmer Gems
$8.00
Paper Butterfly Accents
$8.00
Clear-Mount Stamp Cases
$9.00

Paper Pumpkin Monthly Kit

Thinking of adding creativity to your life this year? Start out by trying a monthly paper crafting kit! The Paper Pumpkin Monthly Subscription delivers a kit with everything you need to make a project-right to your door! Sign up for a Pre-paid Paper Pumpkin Subscription HERE.

Have a most wonderful and creative day!

Ciao!

Theresa

Posted in 2024 Stampin' Up! January to April Mini Catalog, 3D Embossing Folder, Inspiration in Ink Blog Hop

Painted Lavendar & Hot Air Balloon for the Ink & Inspiration Blog Hop-January 2024

Hello fellow stampers! I am Theresa McEntee-author of Theresa’s Treasures Paper Crafts. I am hopping along with the Ink & Inspiration Blog Hop today. You can visit super awesome blogs from around the world! The list to follow the hop is at the end of my blog post. Please stop by and see everyone’s projects!

The Ink & Inspiration Challenge is both an image and a color challenge. I was inspired by the image because I love spring flowers and look forward to my flower garden blooming each year. I absolutly love all of the colors! They are so vibrant and happy!

I grew up in Albuquerque New Mexico USA which is the Hot Air Balloon Capital of the World! Each year there is a Balloon Fiesta which lasts a whole week. There were over 500 hot air balloons at the 2023 Fiesta, which was attended by over 900,000 visitors! When Stampin’ Up!® brought out the Hot Air Balloon Bundle in the 2024 Mini Catalog- I was ecstatic! I could not wait to use the Hot Air Balloons with the Painted Lavender Bundle for this challenge.

Measurements

  • Azure Afternoon cardstock (cs) card base: 5 1/2″ x 8 1/2″ scored at 4 1/4″
  • Azure Afternoon cs: 4″x 5 1/4″ (1st layer)
  • Highland Heather Glimmer Paper: 3 3/8″ x 4 5/8″
  • Basic White cs: two 3 3/4″ x 5″ (diecut with Perennial Postage Die-one for front & one for inside), 2″ x 4″ (to stamp balloon and diecut clouds) and 1/2″ x 4 1/4″ (sentiment)
  • Melon Mambo cs: 2″ x 2 1/2″ to die cut balloon gandola

Supplies

  • Stamp Sets: Painted Lavender & Hot Air Balloon
  • Dies: Perennial Postage & Hot Air Balloon
  • Embossing Folder: Painted Textures
  • Ink: Poppy Parade, Melon Mambo, Daffodil Delight, Granny Apple Green, Highland Heather and Azure Afternoon
  • Embellishments: Wink of Stella
  • Other: Blending Brush

Instructions

  1. Fold the card base at the score line and burnish with the Bone Folder.
  2. Emboss the 1st layer with the Painted Textures Embossing Folder (EF). Adhere to the front of the card base.
  3. Diecut the 2 Basic White cs panels for the front & inside with the 2nd to largest Perennial Postage Die.
  4. Stamp the 1st part of the balloon envelope with Highland Heather Ink. Stamp the 2nd part with Azure Afternoon Ink. Stamp the sentiment onto the 1/2″ Basic White cs in the middle of the strip with Azure Afternoon Ink.
  5. On one diecut Basic White cs panel, use the Blending Brush with Azure Afternoon Ink to lightly blend a cloudy sky. On the 2nd Basic White cs diecut Basic White cs, blend the ink along the edges.
  1. To finish the 2nd panel for the inside of the card, use Granny Apple Green Ink. Stamp the grass from the Painted Lavender stamp set in the lower right-hand corner, going from tall to short as you move left. Add the tiny flowers in the Highland Heather Ink. Adhere to the inside of the Azure Afternoon cs card base.

  1. Go back to the 1st Basic White diecut for the front of the card.The flowers & grass are from the Painted Lavender stamp set. Stamp the grass in Granny Apple Green Ink on either side of the bottom edge. Then stamp the small tight bunch of flowers in Melon Mambo on either side and in the middle. Stamp the tiny flowers in Highland Heather Ink. Next, stamp the tall thin stalk of flowers in Daffodil Delight Ink to fill in. Finally, stamp the wider stalk of flowers in Poppy Parade Ink.

  1. Adhere to the Highland Heather Glimmer Paper. Tip: I use one of the Deckled Rectangle Dies to cut the center out of the Glimmer Paper diecut. This helps decrease the weight of the card and you have more Glimmer Paper to play with later!

  1. Stick the Stampin’ Dimensionals on the back so that they are attached to both the Glimmer Paper and the Basic White cs. Adhere to the card front.
  2. Adhere 2 of the clouds flat and the 3rd cloud on Dimensionals.
  3. Adhere the 2 pieces of the gondola together. Then adhere it to the balloon envelope.
  4. Use Stampin’ Dimensionals to adhere the balloon to the card front.
  5. Adhere the sentiment to the corner before you trim the edges. This way it will fit nicely.

I hope you give this card a try. I had such fun designing it and putting it together! Hopefully you will have fun too!

Blog Roll Call

Have a most wonderful day!

Theresa

Order Supplies Here:

Product List
Painted Lavender Bundle
$46.75
Hot Air Balloon Bundle (English)
$45.00
Perennial Postage Dies
$33.00
Painted Texture 3 D Embossing Folder
$10.00
Poppy Parade Classic Stampin' Pad
$9.00
Melon Mambo Classic Stampin' Pad
$9.00
Daffodil Delight Classic Stampin' Pad
$9.00
Granny Apple Green Stampin' Pad
$9.00
Highland Heather Classic Stampin' Pad
$9.00
Azure Afternoon Classic Stampin' Pad
$9.00
Azure Afternoon 8 1/2" X 11" Cardstock
$10.00
Three Color Glimmer 12" X 12" (30.5 X 30.5 Cm) Specialty Paper
$10.50
Basic White 8 1/2" X 11" Cardstock
$10.50
Melon Mambo 8-1/2" X 11" Cardstock
$10.00
Clear Wink Of Stella Glitter Brush
$8.00
Blending Brushes
$13.00
Posted in 2023 Stampin' Up! Holiday Mini Catalog, 2023-2024 Stampin' Up! Annual Catalog, Animals, Birds, Inspiration in Ink Blog Hop, Winter Holiday

Hey Chuck Bundle for the Inspirations in Ink November 2023 Blog Hop

Welcome and thanks for visiting Theresa’s Treasures Paper Crafts! I am Theresa, a Stampin’ Up! Demonstrator in Arizona, USA. Today is the monthly Inspirations in Ink Blog Hop! I am excited to be hopping with talented demonstrators from around the world. Be sure to check out everyone’s Hey Chuck Bundle projects. The Hey Chuck Bundle is in the Annual Catalog. When you are ready, you may order from my Online Store HERE.

I decided to make a Christmas card with the Hey Chuck chickens to spotlight the versatility of this set. I stamped the hat and scarf from the Beary Cute stamp set in the 2023 Mini Catalog. The lovely sentiment is also from the Beary Cute stamp set.

I used Wink of Stella to make the chicken very sparkly! Just right for the holidays!

Measurements

  • Poppy Parade cardstock: 4 1/4″ x 11″ scored at 5 1/2″
  • Basic White cardstock: 3 1/4″ x 4 3/4″ (for the diecut Deckled Rectangle inside), 3 1/4″ x 3 1/4″ (for the diecut Deckled Circle on front), 1/2″ x 3″ for the sentiment and enough to stamp the images.
  • Shaded Spruce cardstock: 2 1/4″ x 5 1/2″
  • Brights 6″x 6″ DSP in Poppy Parade, striped pattern: 2″ x 5 1/2″
  • Daffodil Delight cardstock: 2″ x 2 1/2″ (for the diecut sun)

Supplies

  • Hey Chuck Bundle
  • Beary Cute stamp set
  • Deckled Rectangles & Deckled Circles Dies
  • Ink: Memento, Poppy Parade and Shaded Spruce
  • Stampin’ Blends Alcohol Markers: Poppy Parade, Daffodil Delight and Shaded Spruce
  • Wink of Stella
  • Iridescent Rhinestone Basic Jewels

Instructions

  1. Die cut the Deckled Circle (#6 from center), the Deckled Rectangle (#6 from center) and the sun.
  2. Use Memento Ink to stamp the two chickens and the tree (from Beary Cute). Diecut the chickens after you color them with the Stampin’ Blends Alcohol Markers as desired.
  3. Use Shaded Spruce Ink to stamp the inside of the tree. Fussy cut the tree.
  4. Stamp two hats and one scarf in Shaded Spruce Ink. Fussy cut.
  5. Also use the Shaded Spruce Ink to stamp the “Merry Christmas” sentiment from Beary Cute onto the 1/2″ x 3″ Basic White cardstock strip. Cut the ends into a banner.
  6. Use Poppy Parade Ink to stamp “Rise and Shine” on the Deckled Rectangle (portrait orientation). I had to stamp a few stars around the inside sentiment because I was covering up a halo-oopsy!
  7. Adhere the Brights Designer Series Paper Poppy Parade, stripe pattern, onto the Shaded Spruce cardstock.
  8. Adhere this to the card front, slightly to the left.
  9. Use Stampin’ Dimensionals to adhere the Deckled Circle to the card front.
  10. Adhere the sun with Multipurpose Liquid Glue or Stampin’ Seal.
  11. Use Stampin’ Dimensionals to adhere the colored fat chicken to the card front. Add the scarf and hat.
  12. Use Stampin’ Dimensionals on each end of the sentiment, and glue in the center to adhere the sentiment banner.
  13. For the inside, adhere the Deckled Rectangle followed by the Christmas tree. Finish with the colored skinny chicken and the hat.
  14. Embellish the chickens with Wink of Stella.
  15. Add the Iridescent Rhinestone Basic Jewels.

Voila!

Thank you so much for visiting today! Please visit all the blogs in the Inspirations In Ink Blog Hop. You will be amazed and inspired by all the fun and creative projects made by the Inspirations In Ink demonstrators. 

You are currently visiting Theresa McEntee-USA creator of Theresa’s Treasures Paper Crafts.

Clickable Supply List

Product List

Have a most wonderful and creative day!

Ciao!

Theresa

Posted in 2023 Stampin' Up! Holiday Mini Catalog, 2023-2024 Stampin' Up! Annual Catalog, Blending Brushes, Inspiration in Ink Blog Hop, Nature, Winter Holiday

Magical Meadow Bundle for the Inspirations in Ink October 2023 Blog Hop

Welcome and thanks for visiting Theresa’s Treasures Paper Crafts! I am Theresa, a Stampin’ Up! Demonstrator in Arizona, USA. Today is the monthly Inspirations in Ink Blog Hop! I am excited to be hopping with talented demonstrators from around the world. Be sure to check out everyone’s Magical Meadow Bundle projects. The Magical Bundle is in the 2023 Mini Catalog. When you are ready, you may order from my Online Store HERE.

I made this card using most of the diecuts form the Magical Meadow Die set using the colors shown in the catalog for this set. I love the color combination and how the bouquet turned out!

Measurements

  • Blueberry Bushel cardstock card base: 4 1/4″ x 11″ scored at 5 1/2″
  • Gray Granite cardstock: 4 1/4″ x 5 1/2″ (to diecut with the largest Scalloped Contour Die)
  • Basic White cardstock: 3 3/4″ x 5″ (inside), 2 1/4″ x 2 1/4″ (to diecut the circle with Labels Aglow Dies) and 3 1/2″ x 5″ (to diecut with the 2nd to the largest Scalloped Contour Die)
  • Scrap cardstock in Moody Mauve, Lost Lagoon, Shaded Spruce and Blueberry Bushel to diecut the foliage

Supplies

  • Magical Meadow stamp set & dies
  • Scalloped Contours Dies
  • Labels Aglow Dies
  • Blueberry Bushel Ink
  • Blending Brush
  • Tinsel Gems 4 Pack
  • White & Silver Ribbon

Voila!

Thank you so much for visiting today! Please visit all the blogs in the Inspirations In Ink Blog Hop. You will be amazed and inspired by all the fun and creative projects made by the Inspirations In Ink demonstrators. 

You are currently visiting Theresa McEntee-USA creator of Theresa’s Treasures Paper Crafts.

Have a most wonderful and creative day!

Ciao!

Theresa

Posted in Designer Series Paper, Inspiration in Ink Blog Hop, Nature

Translucent Florals Bundle for the Inspirations in Ink September 2023 Blog Hop

Today I have an awesome Translucent Florals Bundle Birthday Card!

Welcome and thanks for visiting Theresa’s Treasures Paper Crafts! I am Theresa, a Stampin’ Up! Demonstrator in Arizona, USA. Today is the monthly Inspirations in Ink Blog Hop! I am excited to be hopping with talented demonstrators from around the world. Be sure to check out everyone’s Translucent Florals projects. You may order from my Online Store HERE.

Measurements

  • Basic White cardstock card base: 4 1/4″ x 11″ scored at 5 1/2″
  • Basic White cardstock: 3″ x 4 1/2″ for stamping the branch of leaves, 2 1/2″ x 2 1/2″ to diecut the stitched square, and 3/4″ x 1 1/2″ for the sentiment
  • Pretty Peacock cardstock: 1 3/4″ x 3 3/4″ and 1 1/4″ x 4 3/4″ for inside
  • Parakeet Party cardstock: 3 1/4″ x 4 3/4″
  • Delightful Floral Designer Series Paper: 3″ x 4 1/2″ of the light leaf design and 1 1/2″ x 3 1/2″ and 1/2″ x 5 1/2″ of the dark leaf design

Supplies

Instructions

  1. Prepare the branch of leaves stamp by first using the Lemon Lolly Stampin’ Write Marker to color the top end of the leaves.
  2. Next use the Parakeet Party Stampin’ Write Marker to color the bottom portion of the leaves.
  3. Lastly, use the Pretty Peacock Stampin’ Write Marker to color the stem. Add in a line in the center of each leaf.
  4. Huff on the stamp, then stamp onto the 3″ x 4 1/2″ Basic White cardstock. Hold the stamp on the paper for at least 10 seconds. This will give you the variegated coloration.
  5. Use the Translucent Florals Dies to diecut the branch of leaves. Set aside.
  6. Use the Pretty Peacock Ink to stamp “Happy Birthday” onto the 3/4″ x 1 1 /2″ Basic White cardstock. Cut the end to form a banner. Set aside.
  7. Adhere the Delightful Florals Designer Series Paper to the corresponding cardstock.
  8. Adhere the Parakeet Party cardstock/Delightful Floral Designer Series Paper card piece to the front of the Basic White cardstock card base.
  9. Use Stampin’ Dimensioals to adhere the Pretty Peacock cardstock/Delightfull Floral Designer Series Paper card piece to the right-hand side of the front panel on the card base.
  10. Apply Stampin’ Dimensionals to the back of the stitched square. On the back of the left side of the stitched square apply another layer of Stampin’ Dimensionals. Adhere to the front of the card.
  11. Use the Multipurpose Liquid Glue to adhere the stamped branch of leaves to the Basic White cardstock stitched square.
  12. Use the glue to adhere the sentiment to the lower left side of the card front.
  13. Adhere the 1/2″ strip of the Delightful Floral Designer Series Paper to the right side of the inside. Then adhere the 1/4″ Pretty Peacock strip.
  1. Embellish with the Loose Frosted Dots as desired.

Voila!

Thank you so much for visiting today! Please visit all the blogs in the Inspirations In Ink Blog Hop. You will be amazed and inspired by all the fun and creative projects made by the Inspirations In Ink demonstrators. 

You are currently visiting Theresa McEntee-USA creator of Theresa’s Treasures Paper Crafts.

Clickable Supply List

Product List

Have a most wonderful and creative day!

Theresa

Posted in 2023 Stampin' Up! Holiday Mini Catalog, 2023-2024 Stampin' Up! Annual Catalog, Designer Series Paper, Fun/Fancy fold card, Inspiration in Ink Blog Hop, Nature, Online Exclusives, Outdoors, Stampin" Blends Alcohol Markers

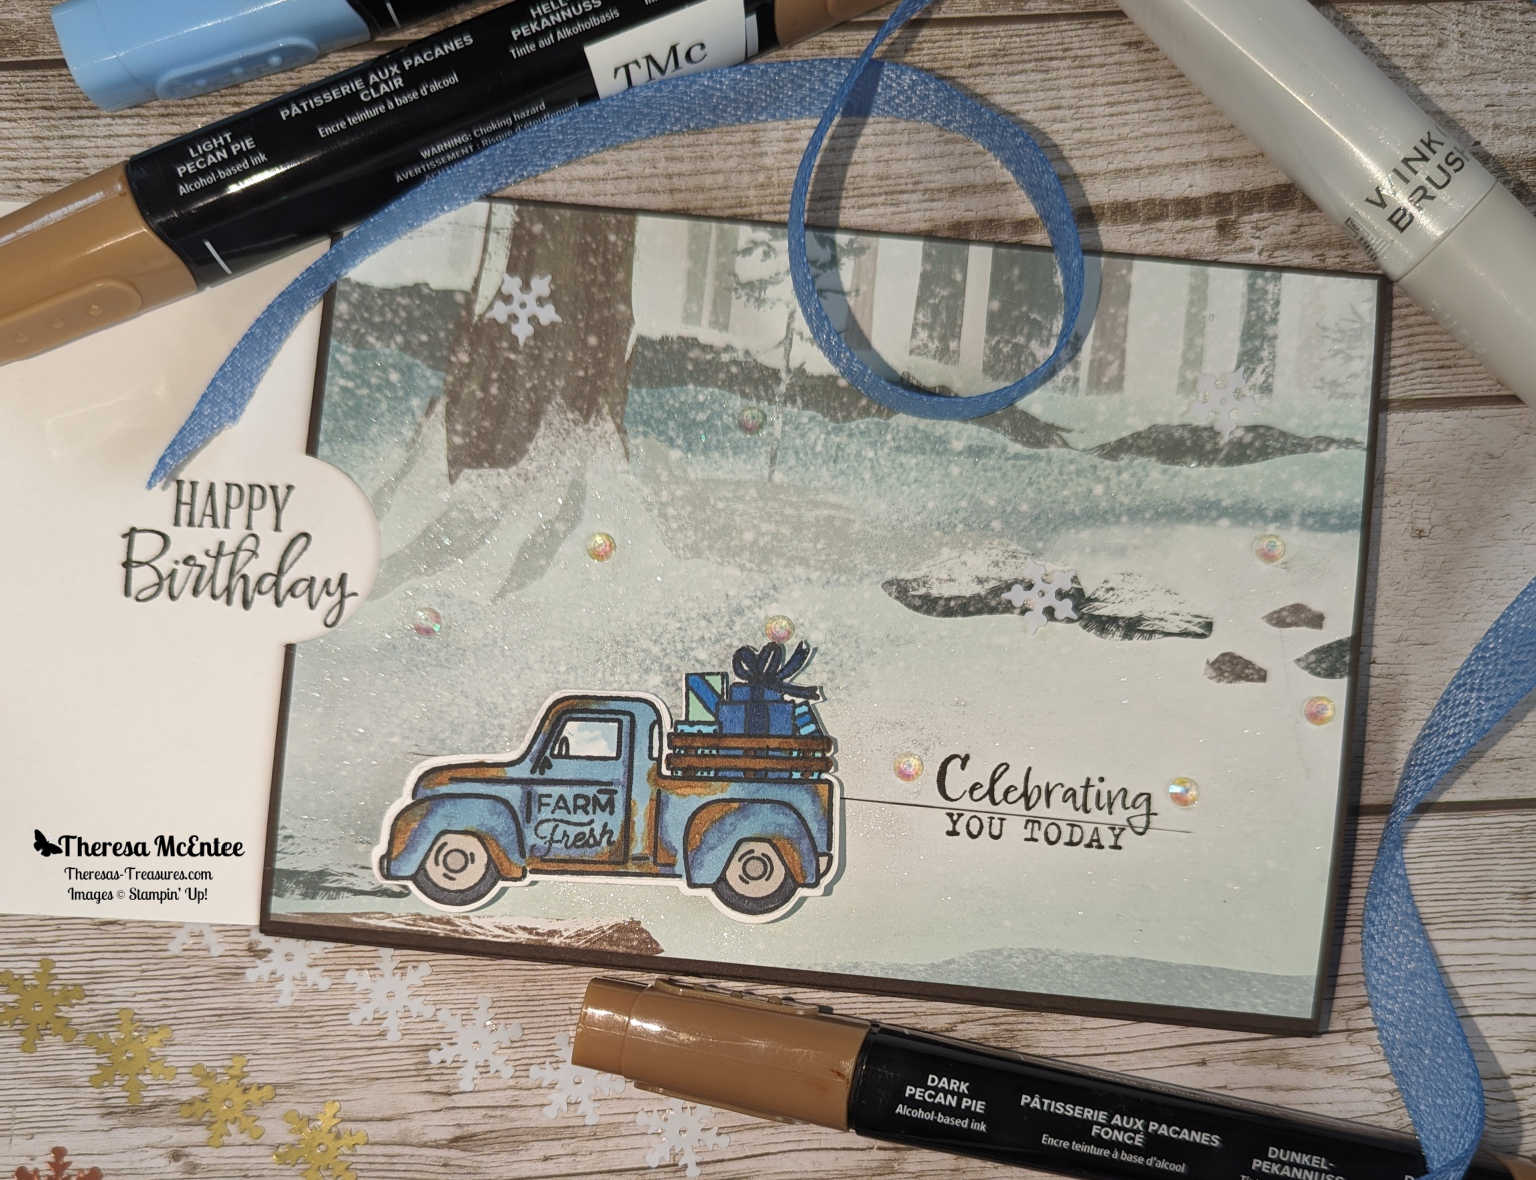
Trucking Along Bundle for the Inspirations in Ink Fun Fold Blog Hop – September 2023

Today I have an awesome Trucking Along Bundle Slit Slider Birthday Card!

Welcome and thanks for visiting Theresa’s Treasures Paper Crafts! I am Theresa, a Stampin’ Up! Demonstrator in Arizona, USA. Today is the monthly Inspirations in Ink Blog Hop! I am excited to be hopping with talented demonstrators from around the world. Be sure to check out everyone’s Fun Fold projects. The Trucking Along Bundle is an Online Exclusive and is not found in any catalog. You may order from my Online Store HERE.

Today’s Blog Hop is a Fun Fold Hop. Each of us is demonstrating a different Fun Fold. I first learned about the Slit Slider Card from Tina Hamp, who learned it from Julie Davidson. Tina made a Slit Slider Card with the Legendary Ride motorcylcle set. Julie did a cute Slit Slider Card with an octopus. Julie has a video demonstrator of her card HERE.

Measurements

  • Early Espresso cardstock card base: 5 1/2″ x 8 1/2″ scored at 1/2″ & 4 1/2″
  • Basic White cardstock: 3 3/4″ x 5 1/4″ (inside) and 3/4″ x 3″ (mechanism)
  • One Horse Open Sleigh 6″ x 6″ Designer Series Paper (DSP):
    3 3/4″ x 5 1/4″

Supplies

  • Trucking Along stamp set & punch
  • Beside Me stamp (Celebrating You Today sentiment)
  • Peaceful Moments stamp (Happy Birthday sentiment)
  • Ink: Memento Black & Early Espresso
  • Stampin’ Blends Alcohol Markers: Pecan Pie, Boho Blue, Misty Moonlight, Azure Afternoon, Night of Navy, Blueberry Bushel Basic Black, Smoky Slate, Gray Granite and Color Lifter
  • Foam Adhesive Strip
  • Multipurpose Liquid Glue
  • Tear & Tape Adhesive
  • 3/8″ Textured Ribbon in Boho Blue
  • Adhesive Backed Snowflake Assortment (Online Exclusive)
  • Iridescent Rhinestone Basic Jewels
  • Wink of Stella

Instructions

Prepare the Card Base

  1. Adhere the designer series paper to the Early Espresso card base.
  2. Make a circular finger notch at the midline of the DSP panel on the left. (Use the Circle Dies or the retired 1″ circle punch)
  3. Place the Early Espresso card base in your trimmer at the 1 1/2″ mark, with the 1/2″ score line to the left.
  1. Make a cut from 3/4″ down to 4 3/4″.

Stamping

  1. Use Memento Ink to stamp the pick up truck on a scrap of Basic White cardstock. Stamp the “Farm Fresh” sentiment on the door.
  2. Color with the Stampin’ Blends Alcohol Markers as desired.
  1. Stamp the “Happy Birthday” sentiment on the Basic White cardstock for the inside. Punch a hole in the midline near the left edge for the ribbon. Thread the ribbon through the hole. Tip: this ribbon frays easily so I used a lighter to melt the ends.
  2. Stamp “Celebrate You Today” to straddle the slit and so that it will hide behind the pick up truck.

Putting it Together

  1. Take out the 3/4″ x 3″ Basic White cardstock strip. Add a strip of the Adhesive Foam Strips to the bottom as close to the edge as possible. This is the mechanism for moving the pick up.
  1. Slide the strip into the slit, up underneath until the strip of Foam Adhesive Strips is close to the slit.
  2. Flip this over.
  1. Apply Multipurpose Liquid Glue (or Tear & Tape) to 2/3 of the top of the Basic White cardstock strip.
  2. Adhere the Basic White cardstock with the Happy Birthday sentiment to the strip by laying it in position to cover the panel. Be sure the Happy Birthday is on the back to the right.
  1. Fold the Early Espresso cardstock on the score lines. Use a strip of Tear & Tape on the 1/2″ flap. Fold the top panel down over the 1/2″ strip and secure it.
  2. Flip over to the front. Adhere the pick up to the mechanism.
  1. Add the Wink of Stella to the snow drifts.
  2. Add the Iridescent Rhinestones as desired.

Voila!

Thank you so much for visiting today! Please visit all the blogs in the Inspirations In Ink Blog Hop. You will be amazed and inspired by all the fun and creative projects made by the Inspirations In Ink demonstrators. 

You are currently visiting Theresa McEntee-USA creator of Theresa’s Treasures Paper Crafts.

Clickable Supply List

Product List

Stamp-Along Online Retreat

Join me with my fellow Demonstrator friends Christy & Jeanne for a relaxed paced online retreat where you will be able to “Stamp Along” with us. We will demonstrate 6 cards you can make with the Make-n-Take Kit you can purchase. You will need to purchase the Inked & Tiled Bundle to complete the cards.

Learn more about the Stamp-Along Online Retreat by clicking on the “My Class Schedule” tab up top.

Paper Pumpkin Monthly Subscription

Thinking of adding creativity to your life? Try a monthly paper crafting kit! The Paper Pumpkin Monthly Subscription delivers a kit with everything you need to make a project-right to your door! Sign up for a Pre-paid Paper Pumpkin Subscription HERE.

Have a most wonderful and creative day!

Theresa

Ciao!

Posted in 2023-2024 Stampin' Up! Annual Catalog, 3D Embossing Folder, Designer Series Paper, Inspiration in Ink Blog Hop, Nature, Online Exclusives, Punch, Summer

Inked & Tiled Bundle for the Inspirations in Ink July 2023 Blog Hop

Today I have a beautiful Inked & Tiled “just a note” Card!

Welcome and thanks for visiting Theresa’s Treasures Paper Crafts! I am Theresa, a Stampin’ Up! Demonstrator in Arizona, USA. Today is the monthly Inspirations in Ink Blog Hop! I am excited to be hopping with very talented demonstrators from around the world. Be sure to check out everyone’s projects using the Inked & Tiled Bundle. The Inked & Tiled Bundle is in the Annual Catalog. You may order from my Online Store HERE.

Measurements

  • Thick Basic White cardstock card base: 4 1/4″ x 11″ scored at 5 1/2″ (21cm x 29.7cm scored at 10.5cm)
  • Basic White cardstock: 2″ x 3″ (6cm x 8.2cm) for the sentiment
  • Lost Lagoon cardstock: 3 1/8″ x 4 1/8″ (7.5cm x 10.3cm),
    2 1/8″ x 5 1/8″ (5.5cm x 13.7cm) and optional for leaves 2″ x 3″ (6cm x 8.2cm)
  • Inked Botanicals Designer Series Paper (DSP) Lost Lagoon patterns: 3″ x 4″ (7.2cm x 10.1cm) and 2″ x 5″ (5.2cm x 13.5cm)
  • Inked Botanicals DSP Calypso Coral pattern: 2″ x 6 3/4″ (5.2cm x 17.2cm)
  • Inked Botanicals DSP Crushed Curry pattern: 2″ x 4 1/2″ (5.2cm x 11.5cm)
  • For inside of card: Lost Lagoon cardstock: 3/4″ x 4 1/8″ (2cm x 13.9cm), Inked Botanicals Lost Lagoon pattern: 3/4″ x 5 1/2″ and 1/2″ x 4 7/8″ (2cm x 14.2cm and 1.3cm x 13.1cm)

Supplies

  • Inked & Tiled stamp set and Punch Pack Bundle
  • Basics Embossing Folder (Online Exclusive)
  • Lost Lagoon Ink
  • Lost Lagoon 1/4″ (6.4mm) Bordered Ribbon
  • Iridescent Pastel Gems
  • Bone Folder
  • Stampin’ Dimensionals
  • Paper Trimmer
  • Multipurpose Liquid Glue

Instructions

  1. Adhere the Lost Lagoon colored Inked Botanicals DSP to the corresponding Lost Lagoon cardstock card pieces.
  2. Adhere to the front of the Thick Basic White cardstock card base.
  1. Use the Basics Embossing Folder with the cross hatches to emboss the front of the Thick Basic White cardstock card base with the pieces adhered to it.
  2. Complete the inside of the card base by adhering the strips of paper.
  1. To make the flowers, first punch out 3 pieces with the star pattern punch from the Calypso Coral colored Inked Botanicals DSP.
  2. Use the “X” pattern punch to punch 3 pieces from the Crushed Curry colored Inked Botanicals DSP.
  1. I used my scoring tool to gently push down in the middle of each flower. I also made score marks on the “petals” to help create a 3D look.
  2. Adhere 1 star and 1 “X” together to make each flower.
  3. Adhere to the card front.
  4. Tie a bow with the Lost Lagoon Bordered Ribbon and adhere just under the trio of flowers.
  5. Stamp “just a NOTE” in Lost Lagoon Ink onto the Basic White cardstock.
  6. Punch the sentiment out with the “X” punch. Trim off 2 arms of the “X”.
  7. Use Stampin’ Dimensionals to adhere the sentiment to the card front.
  8. Finish by adding the Calypso Coral colored Iridescent Pastel Gems to the center of each flower.

Voila!

Thank you so much for visiting today! Please visit all the blogs in the Inspirations In Ink Blog Hop. You will be amazed and inspired by all the fun and creative projects made by the Inspirations In Ink demonstrators. 

You are currently visiting Theresa McEntee-USA creator of Theresa’s Treasures Paper Crafts.

Karen Beck – Canada    Theresa McEntee – USA   Rebecca Nutley – Australia   Robbie Rubala – USA    Vicky Wright – Australia   Christy Gridley – USA     Deirdre Croal – USA

Clickable Supply List

Product List

Have a most wonderful and creative day!

Theresa

Thinking of adding creativity to your life? Try a monthly paper crafting kit! The Paper Pumpkin Monthly Subscription delivers a kit with everything you need to make a project-right to your door! Sign up for a Pre-paid Paper Pumpkin Subscription HERE.

Ciao!

Posted in 2023-2024 Stampin' Up! Annual Catalog, Blending Brushes, Decorative Masks, Gratitude/ Thanks, Inspiration in Ink Blog Hop, Stampin' Cut & Emboss Machine

Inspirations in Ink May 2023- Timeless Arrangements Bundle Thank You Card

Today I have a really fun and pretty Timeless Arrangements Bundle Thank You Card for you!

Welcome and thanks for visiting Theresa’s Treasures Paper Crafts! I am Theresa and I am a Stampin’ Up! Demonstrator in Arizona, USA. Today is the monthly Inspirations in Ink Blog Hop! I am excited to be hopping with awesome demonstrators from around the world. Be sure to check out everyone’s projects using the Timeless Arrangements Bundle. The Timeless Arrangements Bundle is in the 2023-24 Stampin’ Up! Annual Catalog. Order your Bundle today at my Online Store HERE.

Measurements

  • Highland Heather cardstock (cs) card base: 4 1/4″ x 11″ scored at
    5 1/2″ (10.5cm x 29.7cm scored at 14.9cm)
  • Basic White cs inside: 4″ x 5 1/4″ (10cm x 14.4cm)
  • Basic White cs for diecutting: 2″ x 8 1/2″ (5.2cm x 20.9cm)

Supplies

  • Timeless Arrangements Bundle (stamp set & dies) #161526
  • Artistic Mix Decorative Masks #159178
  • Orchid Oasis Ink #159214
  • Blending Brushes # 153611 & Small Blending Brushes #160518
  • 1/8″ (3.2mm) Metallic Woven Ribbon in Orchid Oasis #159199
  • 2022-23 In Color Pearls #161621
  • Wink Of Stella Clear Glitter Brush #141897
  • Multipurpose Liquid Glue & Stampin’ Dimensionals
  • Take Your Pick Tool
  • Silicon Craft Sheet
  • Stampin’ Cut & Emboss Machine
  • Paper Snips

Instructions

Working with the Orchid Oasis Ink

  1. Fold the Highland Heather card base on the score line. Place on a scratch paper.
  2. Position the Artistic Mix Decorative Mask over the front panel of the card base. Hold in place with sticky tape.
  3. Use the Blending Brush and the Orchid Oasis Ink to gradually apply ink in a circle slightly left of center. Remove the mask.
  4. Place the Basic White inside card piece on the scratch paper. Position the mask and hold in place with the sticky tape.
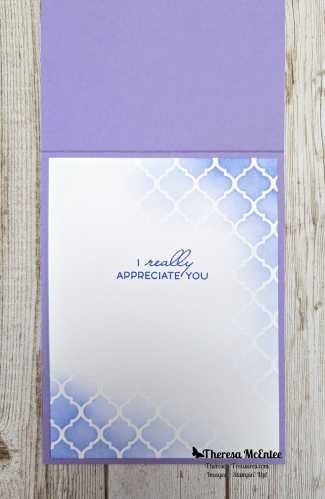
  5. Now use the Blending Brush to gradually apply ink to the upper right and lower left corner of the Basic White cs inside.
  6. Remove the mask and rinse it off with water. Set aside to dry.
  7. Stamp the “THANK YOU” sentiment on the end of the 2 1/2″ x
    8 1/2″ (6.4cm x 20.9cm) Basic White cs.
  8. Next stamp “I really appreciate You” on the Basic White inside card piece.
  9. Adhere the Basic White inside to the inside panel of the Highland Heather card base.

Timeless Arrangements Dies

  1. Diecut the following pieces from the Basic White cs with the “Thank You” stamped on it. The Dies are shown as well as the cut pieces. You will need four of the longer leaf branch.
  1. Die cut the Thank You with the medium sized rectangle die.
  2. Start gluing the leaf branches together on a Silicon Craft Sheet to make a longer branch to place over the thank you sentiment.
  3. Start with one long branch and several short branches to build the more full leaf branch to place under the sentiment.
  4. Use a Small Blending Brush to gradually add ink to the flowers as shown below.
  1. Glue the flowers to the top of the leaf branches.

Putting it altogether

  1. Position the leaves & flowers on the card front with the thank you sentiment in place but not adhered.
  2. Glue the leaves & flowers to the card front.
  3. Use Stampin’ Dimensionals to adhere the thank you sentiment.
  4. Now for the Bling!
  5. Tie a small bow with the beautiful Metallic Ribbon. Adhere to the card front with a Mini Dimensional.
  6. Add the awesome Orchid Oasis In Color Pearls. I used 5 pearls close to the leaf arrangements.
  7. If desired, use the marvelous Wink of Stella on the flowers for more sparkle!
  8. That is it!

Voila!

Thank you so much for visiting today! Please visit all the blogs in this hop. You will see fabulous, fun and inspiring projects made by the Inspirations In Ink Stampin’ Up! demonstrator group. You are currently visiting Theresa McEntee-USA creator of Theresa’s Treasures Paper Crafts. Check out these links on May 31st after midnight.

Christy Gridley – USA  

Deirdre Croal – USA

Julie Golding-Page – Canada

Karen Beck – Canada             

Theresa McEntee – USA

Robbie Rubala – USA 

Clickable Supply List

Product List
Paper Snips
[103579]
$11.00

Have a most wonderful and creative day!

Theresa

Would you like to join my Stamping Gems Team ? You can join to get good quality Stampin’ Up! products at a discount. I also have a special team Facebook page where we can share our creations. If you have a long wish list, you can join and get $125 USD in product for $99 USD! This is the best deal! Click HERE to join & order your starter kit!

Are you looking for high quality patterned paper for your card making or scrapbooking projects? Select Designer Series Paper will be 15% off starting June 1, 2023! Order early to be able to get what you want! Sale ends June 30, 2023.

The following Designer Series Papers will be 15% off June 1-30, 2023. Shop HERE.

Thinking of adding more creativity to your life? Try a monthly paper crafting kit! The Paper Pumpkin Monthly Subscription delivers a kit with everything you need to make a project-right to your door! Sign up for a Pre-paid Paper Pumpkin Subscription HERE.

ADD-ON

Welcome Inn Dies (Available for purchase starting the 11th of May while supplies last–right HERE).

Item number: 163192

$6.00 USD / $8.25 CAD,

This add-on includes:

  • One coordinating vase die: 1-1/2″ x 1-1/2″ (3.8 x 3.8 cm)
  • One coordinating flower die
  • One beautiful leaf die

Ciao!