Posted in 2023 Stampin' Up! Holiday Mini Catalog, 2023-2024 Stampin' Up! Annual Catalog, Blending Brushes, Decorative Masks, Hello

Bruno & Kylie Bertucci’s Demonstrator Training Program Blog Hop-October 2023- Abundant Beauty Hello Card

Hello! Welcome to Bruno & Kylie Bertucci’s Demonstrator Training Blog Hop for October 2023. I’m Theresa with Theresa’s Treasures Paper Crafts. I have a Hello card made with the Abundant Beauty Decorative Masks for you today. I am so glad you are joining me!

We are a group of Stampin’ Up! Demonstrators from around the world, interested in building a successful Stampin’ Up! business. My goal this year is to continue to participate in the monthly Blog Hop. I will be showing the card I send my customers when they order from me. This blog hop is full of ideas and creative inspiration! Be sure to visit everyone’s blog by clicking on the links at the end of my blog.

Measurements

  • Cajun Craze cardstock card base: 8 1/2″ x 5 1/2″ scored 4 1/4″
  • Pumpkin Pie cardstock: 4 1/4″x 5 1/2″ (for diecutting the 2nd from the largest Deckled Circles Die)
  • Basic White card stock: 2″ x 3″, 4″ x 5 1/4″ and 4″ x 5 1/4″ (for diecutting the 4th from the largest Deckled Circles Die)

Supplies

  • Abundant Beauty Decorative Masks
  • Layering Leaves stamp set for the sentiment
  • Autumn Leaves Dies
  • Ink: Daffodil Delight, Pumpkin Pie, Cajun Craze, Lemon Lime Twist, Parakeet Party, Granny Apple Green, Pecan Pie and Early Espresso
  • Small Blending Brushes (at least 2 packs)
  • Real Red & Burlap Ribbon Combo Pack
  • Rustic Metallic Adhesive-Backed Dots

Instructions

Blending the Flower Petals

  1. Diecut the Deckled Circle from the Basic White cardstock.
  2. Secure it to a piece of scrap paper with removable adhesive.
  3. Secure the scrap paper to the work space with tape.
  4. Lay the #1 Decorative Mask over your Deckled Circle cardpiece as desired. Take note of where the notch along the edge of the mask is. Use a pen to draw a line along that edge to help with placement of the next masks.
  5. Secure the Decorative Mask with some removable tape (sticky note tape).
  6. Use a Small Blending Brush and the Daffodil Delight Ink to apply ink along the tips of the flower petals. You can make this as light or as dark as you wish. See photo above on left.
  7. Now use another Small Blending Brush and the Cajun Craze Ink. Apply a layer of ink around the center circle.
  8. Lastly blend in Pumpkin Pie Ink with a third blending brush to complete the flower petals.
  9. Carefully remove the mask without disturbing the cardpiece.

Blending the Leaves

  1. Lay the #2 mask with the leaves by matching up the notch on the edge of the mask with the mark you made on the scrap paper.
  2. Secure the mask with removable tape.
  3. Use a clean Small Blending Brush to apply the Lemon Lime Twist Ink to the leaves first. Then apply the Parakeet Party Ink leaving a bit of the Lemon Lime Twist showing on the upper edge of each leaf.
  4. Finish the leaf by blending in some of Granny Apple Green Ink along the bottom edge of each leaf.
  5. Carefully remove the mask.

Blending the Center of the Flower

  1. The last 2 masks will complete the center of the flower.
  2. Lay mask # 3 over the card piece matching the notch. Secure it with the removable tape.
  3. Use a Small Blending Brush to apply the Pecan Pie Ink.
  4. Carefully remove mask #3.
  5. Lay mask #4 over the card piece, matching the notch and securing it to the scrap paper.
  6. Apply Early Espresso Ink.
  7. Remove the mask.
  8. Tip: Be sure to keep the masks away from your cardpieces as they will have residual ink on them. Rinse them in water. Use a mild soap if needed.

Blending the Flower for the Inside

  1. Repeat the above process to blend on a small flower in the lower right-hand corner of the Basic White cardstock for the inside of the card.
  2. Adhere this piece to the inside of the Cajun Craze cardstock card base.

Assemble the Card

  1. Use the Deckled Circles Die to diecut from the Pumpkin Pie cardstock.
  2. Adhere the Basic White cardstock card piece with the flowers on it to the Pumpkin Pie cardstock circle.
  3. Position the circles on the front of the Cajun Craze cardstock card base and trim any excess that is on the left border.
  4. Adhere this to the card base.
  5. Use Early Espresso Ink and the “Hello” sentiment from the Layering Leaves stamp set to stamp onto the 2″ x 3″ Basic White cardstock. Diecut with the label die from the Autumn Leaves Dies. Use Stampin’ Dimensionals to adhere the sentiment to the card front.
  6. Tie a bow with the Burlap Ribbon and adhere to the card front with a few Mini Glue Dots.
  7. Bling! Apply the Rustic Metallic Dots as desired.

Voila!

Remember to visit everyone’s blog. You will see creative inspiration from Demonstrators around the world! You are currently at Theresa McEntee-Theresa’s Treasures-USA. Enjoy!

I appreciate your visit to my blog today. Those who place an order with me during October will receive one of today’s cards as a thank you!

Please subscribe to my blog so you will continue to see these blogs. If you need any assistance with placing an order so you can make your own card, let me know in the comments. Thanks!

Have a most wonderful day! Happy crafting!

Theresa

Order Supplies Here:

Product List
Posted in 2023 Stampin' Up! Holiday Mini Catalog, Blending Brushes, Decorative Masks, Gratitude/ Thanks, Nature

Kylie & Bruno Bertucci’s Demonstrator Training Program Blog Hop-September 2023- Abundant Beauty Thank You Card

Hello! Welcome to the Kylie & Bruno Bertucci Demonstrator Training Blog Hop for September 2023. I’m Theresa with Theresa’s Treasures Paper Crafts & I have an Abundant Beauty Thank You card today. Abundant Beauty is a set of Decorative Masks (stencils). For this card I used the leaf mask.

I am so glad you are joining me! We are a group of Stampin’ Up! Demonstrators from around the world. We are taking part in training to help us build a successful Stampin’ Up! business. My goal is to participate in the monthly Blog Hop to help me make my customer Thank You cards. When you place an order with me, I will send one of the cards to you!

This blog hop is full of ideas and creative inspiration! Be sure to visit everyone’s blog by clicking on the links at the end of my post.

Measurements

  • Colored card stock: Copper Clay, Pumpkin Pie and Cajun Craze: 4 1/4″ x 11″ scored at 5 1/2″
  • Daffodil Delight cardstock: 4″ x 5 1/4″
  • Very Vanilla cardstock: 3 3/4″ x 5″ (two)
  • Very Vanilla cardstock strip: 3/4″ x 5″ (for inside)
  • Very Vanilla cardstock for sentiment: 2 1/4″ x 3″

Supplies

  • Abundant Beauty Decorative Masks
  • Autumn Leaves Bundle (stamp & dies)
  • Ink: Daffodil Delight, Pumpkin Pie, Copper Clay and Cajun Craze
  • Blending Brushes
  • Baker’s Twine Essentials Pack: Crumb Cake
  • Rustic Metallic Adhesive-Backed Dots

Instructions

  1. Secure one of the Very Vanilla cardstock 4″ x 5 1/4″ panels to a piece of scrap paper with a repositionable adhesive.
  2. Secure the leaf mask over top with sticky note tape.
  3. Gently blend the Daffodil Delight Ink first. Start in the middle with a small circular motion. Or start around the edge. You will then blend progressively darker ink away from the Daffodil Delight Ink.
  4. Blend in the Pumpkin Pie Ink, then Copper Clay Ink and finally Cajun Craze Ink.
  5. Carefully remove the mask and bring to the sink to rinse off with water before using it again.
  6. Secure the 3/4″ x 5″ strip to the scrap paper. Secure the leaf mask over top. Blend with the Blending Brushes as you did before, but use a lighter touch.
  7. Use the Copper Clay Ink to stamp the sentiment “I’m Thankful” on the 2 1/4″ x 3″ Very Vanilla cardstock.
  8. Stamp the “For all you do” in Pumpkin Pie Ink on the very edge of the same Very Vanilla cardstock. Use your trimmer to cut a thin strip with the sentiment on it.
  9. Die cut the “I’m Thankful” sentiment with the Autumn Leaves Dies.
  10. Adhere the layers to the card front.
  11. Use Stampin’ Dimensionals to adhere the sentiment.
  12. Make a bow with the Crumb Cake Twine from the Baker’s Twine Essentials Pack.
  13. Add some Rustic Metallic Adhesive-Backed Dots.

Voila!

Remember to visit everyone’s blog. You will see lots of creative inspiration from Demonstrators around the world! You are currently at Theresa McEntee-Theresa’s Treasures-USA. Enjoy!

I appreciate your visit to my blog today. Please subscribe to my blog and receive more ideas and inspiration for your own cards!

If you need any assistance with placing your order, let me know in the comments. Thanks!

Have a most wonderful day! Happy crafting!

Theresa

Product List
Posted in 2023-2024 Stampin' Up! Annual Catalog, Blending Brushes, Decorative Masks, Gratitude/ Thanks, Inspiration in Ink Blog Hop, Stampin' Cut & Emboss Machine

Inspirations in Ink May 2023- Timeless Arrangements Bundle Thank You Card

Today I have a really fun and pretty Timeless Arrangements Bundle Thank You Card for you!

Welcome and thanks for visiting Theresa’s Treasures Paper Crafts! I am Theresa and I am a Stampin’ Up! Demonstrator in Arizona, USA. Today is the monthly Inspirations in Ink Blog Hop! I am excited to be hopping with awesome demonstrators from around the world. Be sure to check out everyone’s projects using the Timeless Arrangements Bundle. The Timeless Arrangements Bundle is in the 2023-24 Stampin’ Up! Annual Catalog. Order your Bundle today at my Online Store HERE.

Measurements

  • Highland Heather cardstock (cs) card base: 4 1/4″ x 11″ scored at
    5 1/2″ (10.5cm x 29.7cm scored at 14.9cm)
  • Basic White cs inside: 4″ x 5 1/4″ (10cm x 14.4cm)
  • Basic White cs for diecutting: 2″ x 8 1/2″ (5.2cm x 20.9cm)

Supplies

  • Timeless Arrangements Bundle (stamp set & dies) #161526
  • Artistic Mix Decorative Masks #159178
  • Orchid Oasis Ink #159214
  • Blending Brushes # 153611 & Small Blending Brushes #160518
  • 1/8″ (3.2mm) Metallic Woven Ribbon in Orchid Oasis #159199
  • 2022-23 In Color Pearls #161621
  • Wink Of Stella Clear Glitter Brush #141897
  • Multipurpose Liquid Glue & Stampin’ Dimensionals
  • Take Your Pick Tool
  • Silicon Craft Sheet
  • Stampin’ Cut & Emboss Machine
  • Paper Snips

Instructions

Working with the Orchid Oasis Ink

  1. Fold the Highland Heather card base on the score line. Place on a scratch paper.
  2. Position the Artistic Mix Decorative Mask over the front panel of the card base. Hold in place with sticky tape.
  3. Use the Blending Brush and the Orchid Oasis Ink to gradually apply ink in a circle slightly left of center. Remove the mask.
  4. Place the Basic White inside card piece on the scratch paper. Position the mask and hold in place with the sticky tape.
  5. Now use the Blending Brush to gradually apply ink to the upper right and lower left corner of the Basic White cs inside.
  6. Remove the mask and rinse it off with water. Set aside to dry.
  7. Stamp the “THANK YOU” sentiment on the end of the 2 1/2″ x
    8 1/2″ (6.4cm x 20.9cm) Basic White cs.
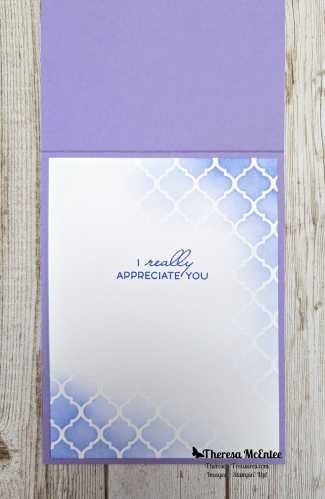
  8. Next stamp “I really appreciate You” on the Basic White inside card piece.
  9. Adhere the Basic White inside to the inside panel of the Highland Heather card base.

Timeless Arrangements Dies

  1. Diecut the following pieces from the Basic White cs with the “Thank You” stamped on it. The Dies are shown as well as the cut pieces. You will need four of the longer leaf branch.
  1. Die cut the Thank You with the medium sized rectangle die.
  2. Start gluing the leaf branches together on a Silicon Craft Sheet to make a longer branch to place over the thank you sentiment.
  3. Start with one long branch and several short branches to build the more full leaf branch to place under the sentiment.
  4. Use a Small Blending Brush to gradually add ink to the flowers as shown below.
  1. Glue the flowers to the top of the leaf branches.

Putting it altogether

  1. Position the leaves & flowers on the card front with the thank you sentiment in place but not adhered.
  2. Glue the leaves & flowers to the card front.
  3. Use Stampin’ Dimensionals to adhere the thank you sentiment.
  4. Now for the Bling!
  5. Tie a small bow with the beautiful Metallic Ribbon. Adhere to the card front with a Mini Dimensional.
  6. Add the awesome Orchid Oasis In Color Pearls. I used 5 pearls close to the leaf arrangements.
  7. If desired, use the marvelous Wink of Stella on the flowers for more sparkle!
  8. That is it!

Voila!

Thank you so much for visiting today! Please visit all the blogs in this hop. You will see fabulous, fun and inspiring projects made by the Inspirations In Ink Stampin’ Up! demonstrator group. You are currently visiting Theresa McEntee-USA creator of Theresa’s Treasures Paper Crafts. Check out these links on May 31st after midnight.

Christy Gridley – USA  

Deirdre Croal – USA

Julie Golding-Page – Canada

Karen Beck – Canada             

Theresa McEntee – USA

Robbie Rubala – USA 

Clickable Supply List

Product List
Paper Snips
[103579]
$11.00

Have a most wonderful and creative day!

Theresa

Would you like to join my Stamping Gems Team ? You can join to get good quality Stampin’ Up! products at a discount. I also have a special team Facebook page where we can share our creations. If you have a long wish list, you can join and get $125 USD in product for $99 USD! This is the best deal! Click HERE to join & order your starter kit!

Are you looking for high quality patterned paper for your card making or scrapbooking projects? Select Designer Series Paper will be 15% off starting June 1, 2023! Order early to be able to get what you want! Sale ends June 30, 2023.

The following Designer Series Papers will be 15% off June 1-30, 2023. Shop HERE.

Thinking of adding more creativity to your life? Try a monthly paper crafting kit! The Paper Pumpkin Monthly Subscription delivers a kit with everything you need to make a project-right to your door! Sign up for a Pre-paid Paper Pumpkin Subscription HERE.

ADD-ON

Welcome Inn Dies (Available for purchase starting the 11th of May while supplies last–right HERE).

Item number: 163192

$6.00 USD / $8.25 CAD,

This add-on includes:

  • One coordinating vase die: 1-1/2″ x 1-1/2″ (3.8 x 3.8 cm)
  • One coordinating flower die
  • One beautiful leaf die

Ciao!

Posted in 2021 Stampin' Up! July-December Mini Catalog, Decorative Masks, Gratitude/ Thanks

Bruno & Kylie Bertucci’s Demonstrator Training Program Blog Hop-December 2021-Stampin’ Up!® Penguin Place Thank You Card

Thank you!

Thank you for joining me for our last Stampin’ Up!® Demonstrator Monthly Team Blog Hop for 2021! I am excited that you could join us today because I know you will get lots of ideas and creative inspiration to bring into the New Year! My Penguin Place Thank You Card is made using the Adorning Designs Decorative Masks and the Blending Brushes.

I belong to a group of Stampin’ Up!® Demonstrators from around the world that are taking part in training that is helping us to build a successful Stampin’ Up!® business. I am a Demonstrator in Arizona, USA. If you are not already an amazing Demonstrator, or do not have a fabulous Demonstrator and live in the USA, I would love to be your most awesome Demonstrator! I really appreciate your support. Be sure to visit all the different blogs and see all the inspiring creations!

The theme for the cards today is: Thank You. I have many customers who support me and I like to send them a Thank You card every once in awhile. The following set of cards is for my fabulous customers which I will be sending to anyone who orders during the month of December 2021.

I had so much fun making the background for these thank you notes. I made 24 using different colors. To make all the penguins, I used the Stamparatus. It goes quickly that way! The “Thanks” sentiment is from the Simply Succulents stamp set.

I also used the snowflake mask and Blending Brush to add some snowflakes to the inside.

I hope you have an great end of 2021! An “Attitude of Gratitude” is very helpful at this time of year. Thank you so much for visiting today!

Have an awesome day!

Theresa