Posted in Blending Brushes, Emboss Powder, Hello, Hybrid Die and Embossing Folder, Ink & Inspiration Blog Hop, Inspiration in Ink Blog Hop, Lake/Sea/Ocean, Sea, Sealife

Seaside Wishes & Beauty of the Deep team up for the Ink & Inspiration Blog Hop-February 2025

Hello fellow stampers! I am Theresa McEntee-author of Theresa’s Treasures Paper Crafts Blog. I am hopping along with the Ink & Inspiration Blog Hop today. You can visit super awesome blogs from around the world and get inspiration for your own projects! The list to follow the hop is at the end of my blog post. Please stop by and see everyone’s projects!

The Theme for February 2025

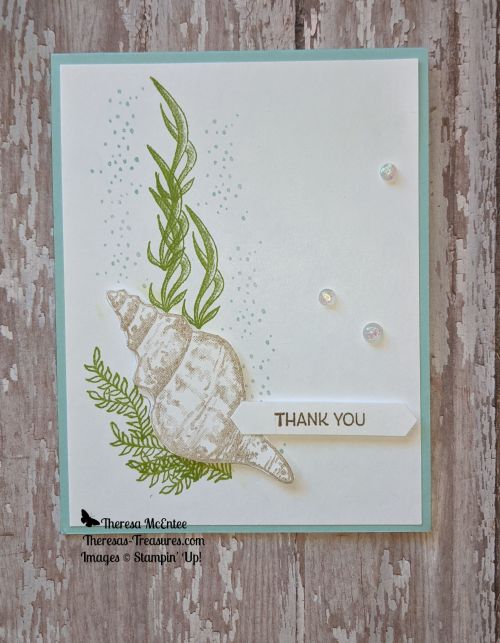
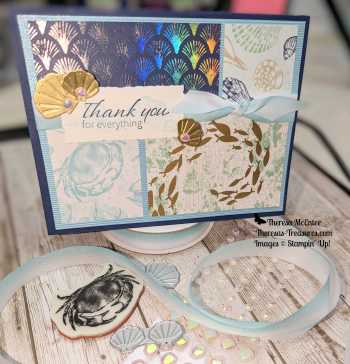
The Ink & Inspiration Challenge for February 2025 is both an image and a color challenge. I was primarily inspired by the beautiful, vibrant colors. The underwater image was intriguing.

My Card

I started to make this card by finding any sea-related stamp sets I had. I came up with Seaside Wishes and Beauty of the Deep. Seaside Wishes is still available as a bundle which includes both the dies and the hybrid embossing folder with the stamp set. The Beauty of the Deep stamp set and dies are sold separately.

Measurements

  • Azure Afternoon cardstock card base: 5 1/2″ x 8 1/2″ scored at
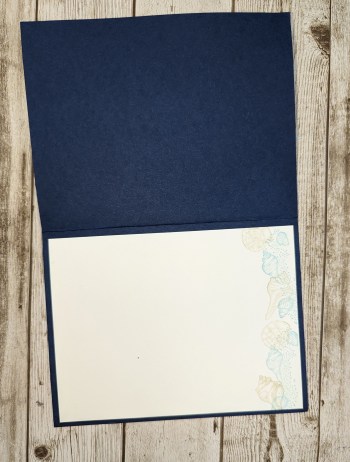
    4 1/4″
  • Basic White cardstock: 4″ x 5 1/4″ (for the background), 2 1/4″ x 3″ (for sentiment), 3 3/4″ x 5″ (for inside of card) and 1/2″ x 4 1/4″ (for inside strip)
  • Calypso Coral cardstock: enough to die cut a large coral from the Beauty of the Deep dies, one large starfish and 3 small starfish from Seaside Wishes stamp and dies, and two stamped coral from Beauty of the Deep.
  • Azure Afternoon cardstock: 3″ x 3″ for the large sand dollar.
  • Coastal Cabana cardstock: 2 1/4″ x 4 1/4″ for two small sand dollars.
  • Summer Splash cardstock: enough to stamp 5 vines of seaweed from the Beauty of the Deep stamp set.
  • Melon Mambo cardstock: enough to cut 3 of the stick-like coral from Beauty of the Deep dies.
  • Cajun Craze cardstock: enough to die cut nine of the small bush-like coral.

Supplies

  • Stamp Sets: Beauty of the Deep, Seaside Wishes and Layering Leaves (sentiment)
  • Dies: Beauty of the Deep, Seaside Wishes and Linked Together (oval for sentiment)
  • Embossing Folder: Seaside Wishes hybrid
  • Ink: Azure Afternoon, Cajun Craze, Calypso Coral, Coastal Cabana, Melon Mambo, Summer Splash and Versamark
  • Embossing Powder: Clear and White from the Basics Embossing Powder set
  • Embellishments: Two Tone Sparkle Gems and Wink of Stella
  • Misc.: Blending Brushes, Heat Tool, Stampin’ Cut & Emboss Machine, Paper Trimmer, Stampin’ Dimensionals

Instructions

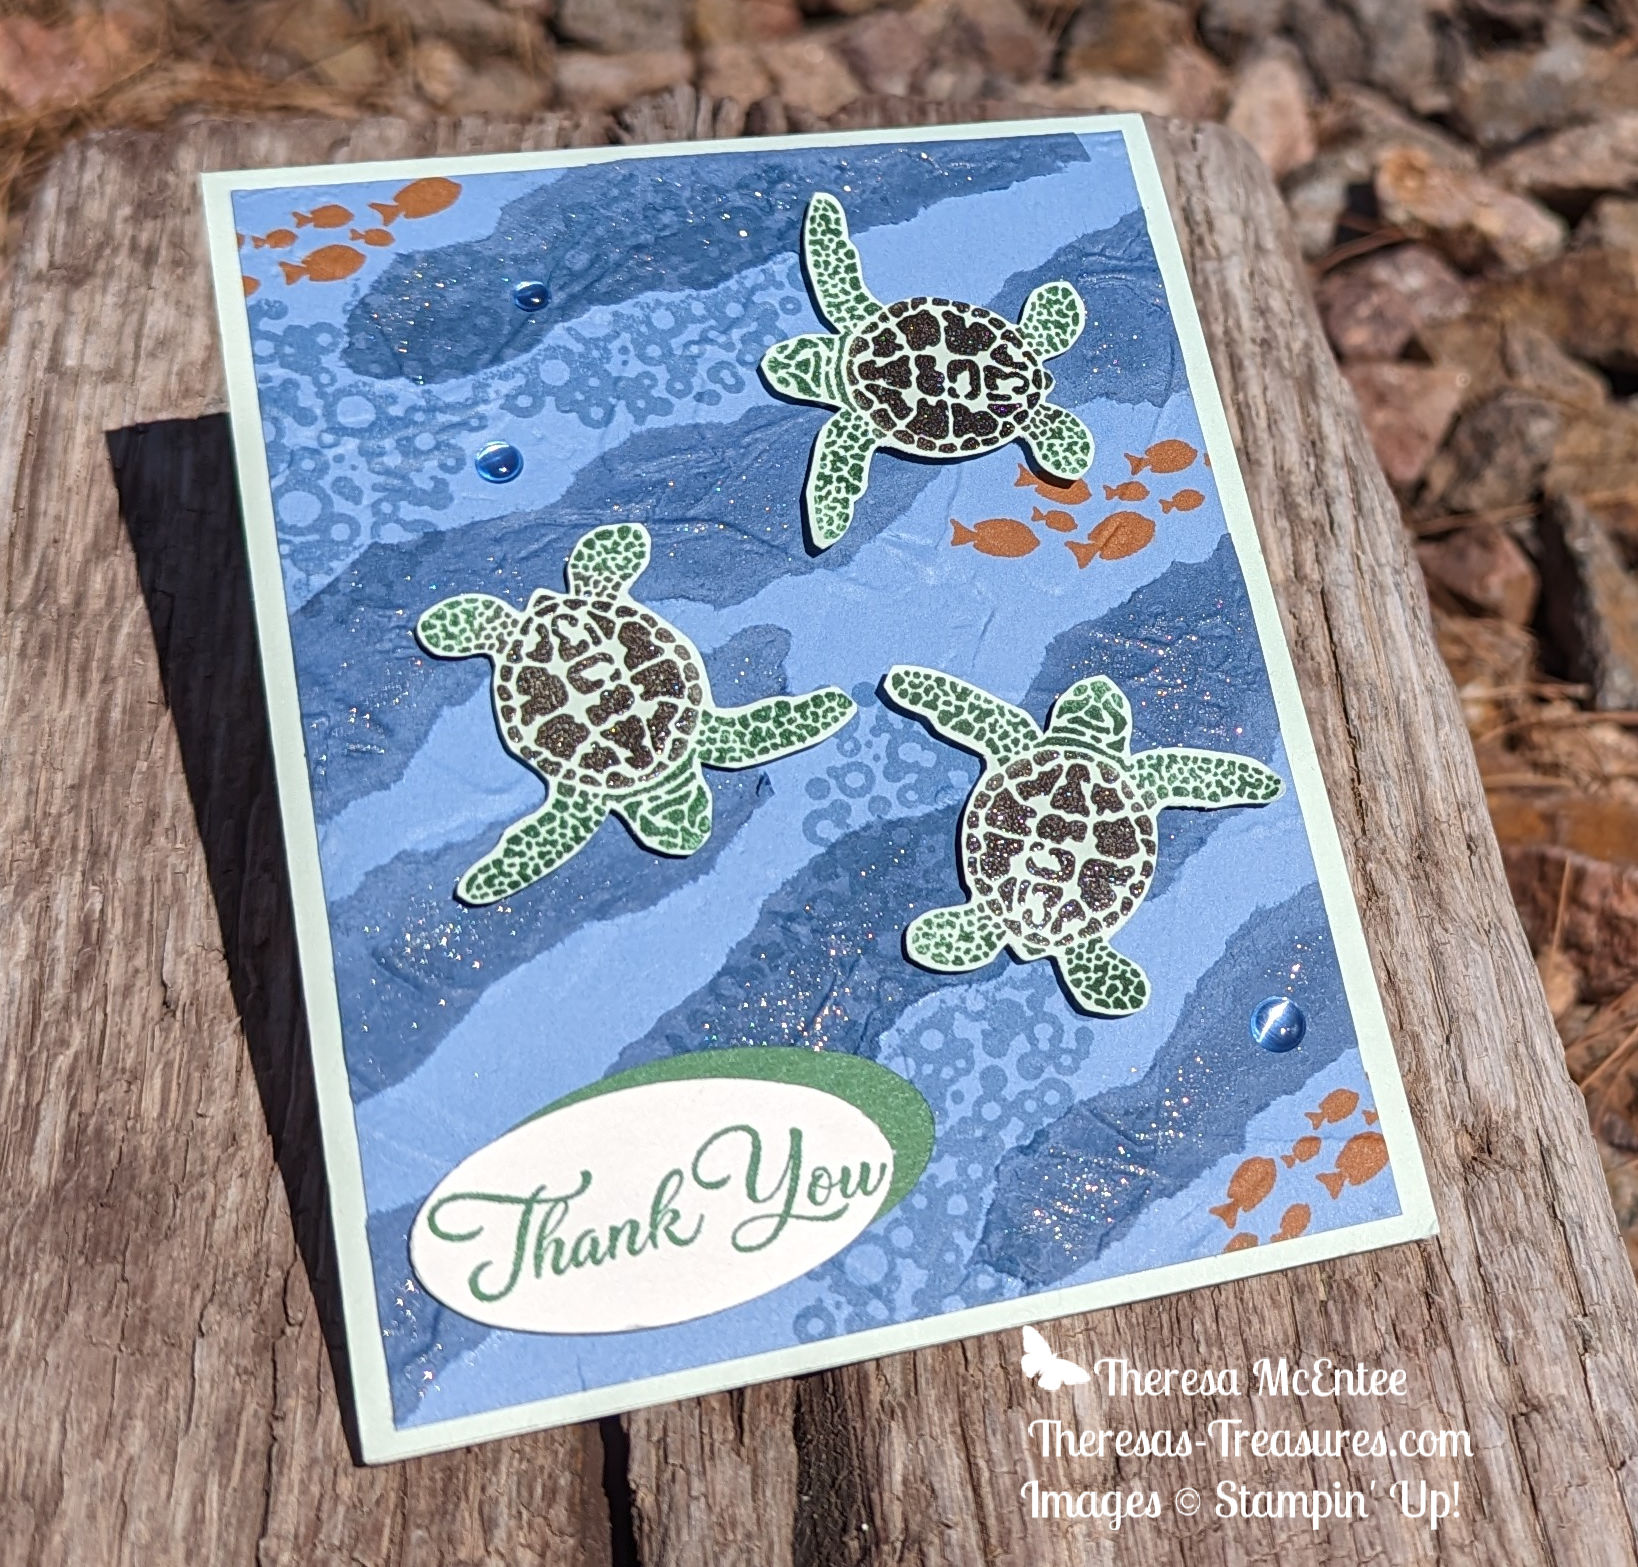
  1. I started this off by stamping with the colored ink then using Clear Emboss Powder over it for the vines of seaweed, starfish, and stamped coral. I kept making the images until I had several to create with. NOTE: the short fat coral is stamped in Cajun Craze Ink onto Calypso Coral cardstock, then covered in Clear Emboss Powder and heat set.
  2. Next I started to die cut stuff. As stated above, I die cut several of the different types of coral.
  3. To create the sand dollar, I stamped in Versamark and used the White Emboss Powder. I then put the sand dollar through the hybrid embossing folder/dies. With my fingers I made the sand dollars curve more to give them dimension.
  4. The background was created using the Summer Splash, Coastal Cabana and Azure Afternoon Inks with Blending Brushes. I also made a 1/2″ x 4 1/4″ inch strip to go on the inside.
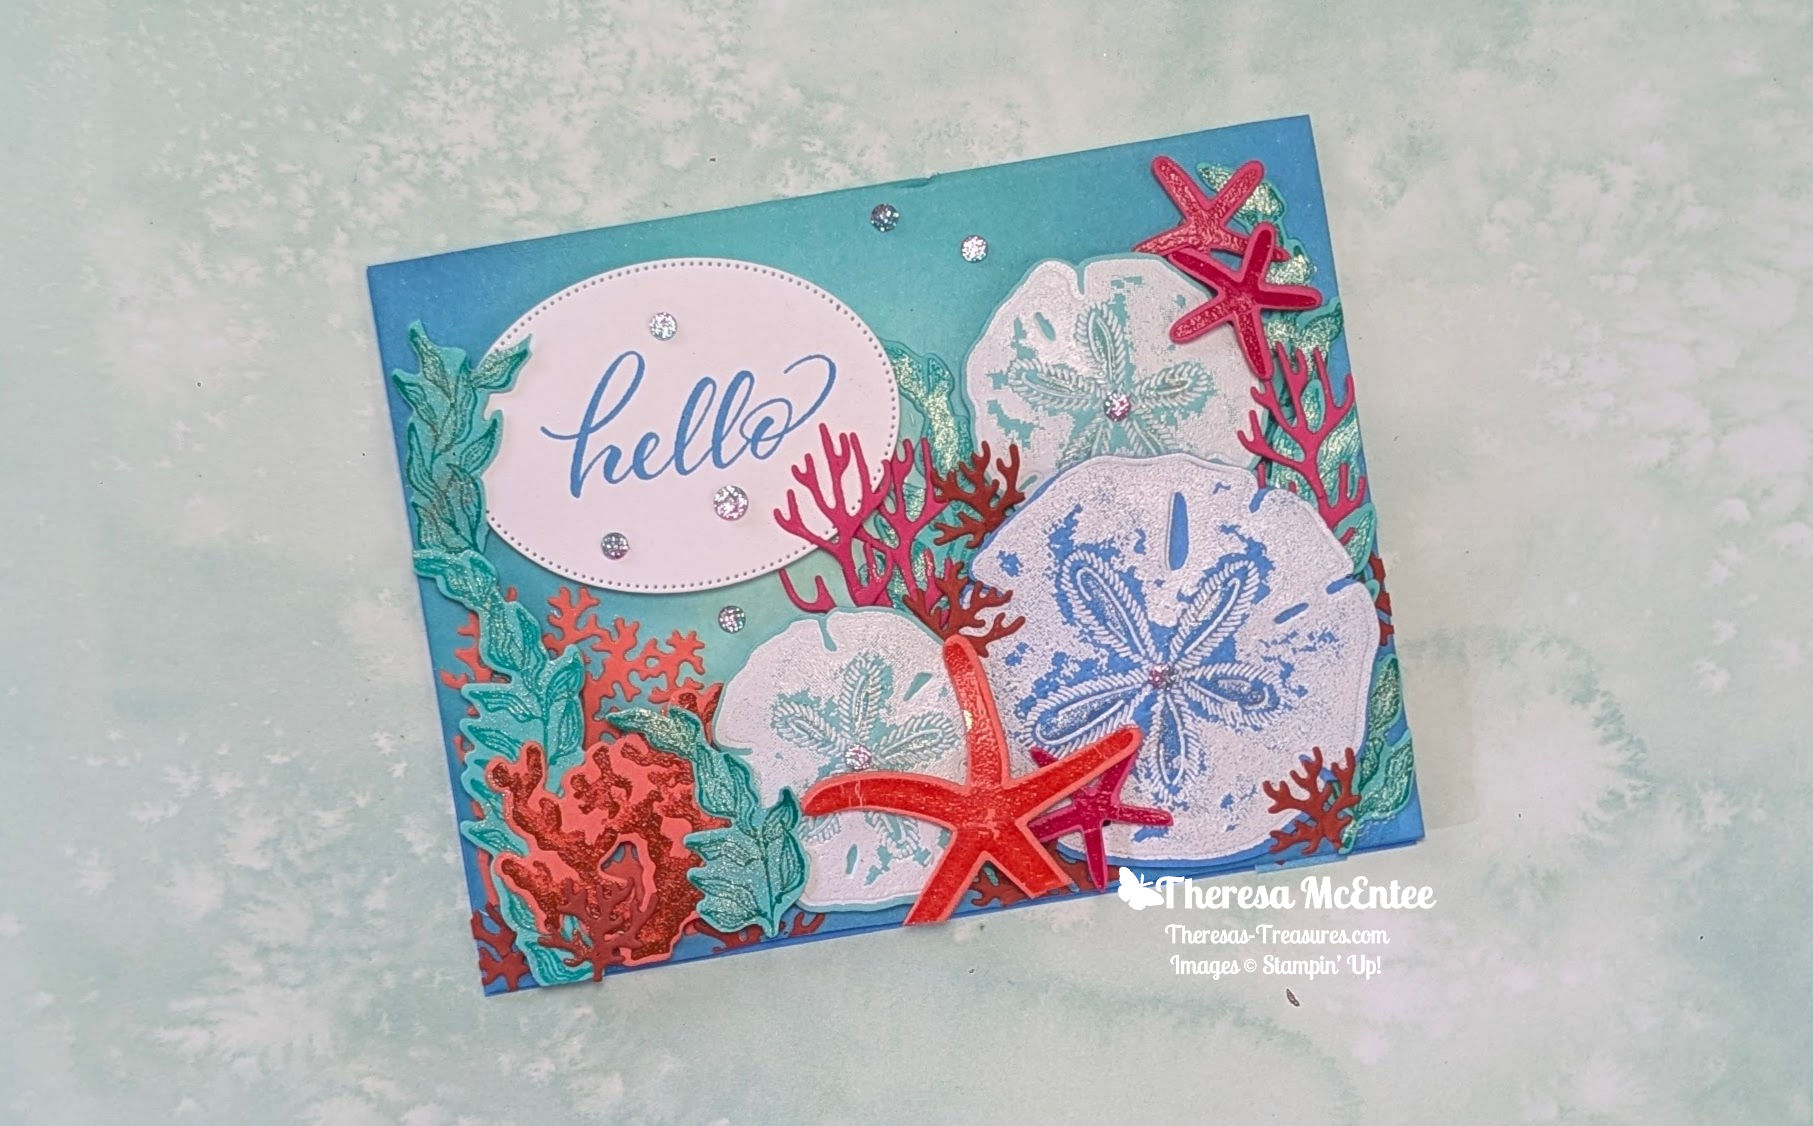
  1. Now I had numerous images to work with so I started placing them on the card base to see how it looked. Play around with your own ideas until you like what you see.
  2. Once I had it figured out, I started gluing it down. The center of the sand dollars have 2 Stampin’ Dimensionals piled on top of each other for more dimension. The sentiment is adhered with a single layer of Stampin’ Dimensionals.
  3. Finish it up with the Wink of Stella and Two Tone Sparkle Gems!

¡Voila!

I hope you enjoyed my interpretation of this color and image challenge. Stop by everyone’s Blog to see more ideas using the same colors and/or image theme. You are at Theresa McEntee-USA right now.

Blog Roll Call

Have a most wonderful day!

Theresa

Order Supplies Here:

Product List
Seaside Wishes Bundle (English)
$47.50
Beauty Of The Deep Cling Stamp Set
$25.00
Beauty Of The Deep Dies
$33.00
Layering Leaves Photopolymer Stamp Set (English)
$24.00
Azure Afternoon Classic Stampin' Pad
$9.00
Cajun Craze Classic Stampin' Pad
$9.00
Calypso Coral Classic Stampin' Pad
$9.00
Coastal Cabana Classic Stampin' Pad
$9.00
Melon Mambo Classic Stampin' Pad
$9.00
Summer Splash Classic Stampin Pad
$9.00
Versamark Pad
$9.50
Basics Embossing Powders
$18.00
Azure Afternoon 8 1/2" X 11" Cardstock
$11.50
Basic White 8 1/2" X 11" Cardstock
$13.00
Cajun Craze 8-1/2" X 11" Cardstock
$11.50
Calypso Coral 8-1/2" X 11" Cardstock
$11.50
Coastal Cabana 8-1/2" X 11" Cardstock
$11.50
Melon Mambo 8-1/2" X 11" Cardstock
$11.50
Summer Splash 8 1/2" X 11 Cardstock
$11.50
Blending Brushes
$15.00
Clear Wink Of Stella Glitter Brush
$9.00
Two Tone Sparkle Gems
$9.50
Stampin' Dimensionals
$4.25
Mini Stampin' Dimensionals
$4.25
Posted in 2024-2026 Stampin' Up! Annual Catalog, 3D Embossing Folder, Ink & Inspiration Blog Hop, Nature, Outdoors, Sea, Sealife

Seaside Wishes Encouragement Card for the Ink and Inspiration Color Challenge Blog Hop- July 2024

Hello fellow stampers! I am Theresa McEntee-author of Theresa’s Treasures Paper Crafts. I am hopping along with the Ink & Inspiration Blog Hop today with my Seaside Wishes Encouragement Card. Here you can also visit super awesome blogs from around the world! The list to follow the hop is at the end of my blog post. Please stop by and see everyone’s wonderful projects!

The Seaside Wishes Encouragement Card is designed with the Seaside Wishes stamp set and dies available in my Online Store HERE.

The Ink & Inspiration Challenge this month is both an image and a color challenge. I was really stuck with this one. The colors were more inspiring to me than the image. Several stamp sets were tried and several cards made before I decided on this Seaside Wishes Encouragment Card.

Measurements for the Seaside Wishes Encouragment Card

  • Thick Basic White cardstock (cs) card base: 4 1/4″ x 11″ scored at 5 1/2″
  • Basic White cs: 4″ x 8″ (to die cut the sand dollars)
  • Basic White cs: 5/8″ x 4 1/4″ (for sentiment)
  • Calypso Coral cs: 3″ x 5 1/2″ (to stamp & die cut the starfish)
  • Coastal Cabana cs: 3 1/2″ x 5 1/2″
  • Garden Green cs: 1 1/2″ x 3 1/2″ (to die cut the seaweed)
  • Old Olive cs: 1″ x 3 1/2″ (to die cut the seaweed)

Supplies

  • Stamp Set: Seaside Wishes
  • Dies: Seaside Wishes
  • Embossing Folder: Seaside Wishes Hybrid Embossing Folder & So Swirly Embossing Folder
  • Ink: Crumb Cake, Calypso Coral & Coastal Cabana
  • Embellishments: Adhesive-Backed Dappled Dots
  • Wink of Stella
  • Blending Brushes
  • Sponge Dauber

Instructions for the Seaside Wishes Encouragement Card

  1. Use a Blending Brush and the Crumb Cake Ink to blend color onto the front panel of the Thick Basic White cs card base. Apply a darker color to the edges.
  2. Stamp the stones and sand with the Crumb Cake Ink.
  3. Die cut the sand dollars using the Seaside Wishes Hybrid Embossing Folder with the Seaside Wishes Dies.
  4. Apply a light layer of Crumb Cake Ink to each sand dollar with a Blending Brush. Make some areas a little darker. Set aside.
  5. Stamp the starfish onto the Calypso Coral cs in Calypso Coral Ink. Die cut with the Seaside Wishes Dies. Set aside.
  6. Tear the Coastal Cabana cs along the right-hand side to make an ocean wave. Emboss with the So Swirly Embossing Folder.
  7. Apply Wink of Stella to the torn portion of the Coastal Cabana cs. Adhere to front left of the Basic White cs card base.
  8. Die cut some of the seaweed from the Garden Green and Old Olive cardstock.
  9. Arrange the sand dollars, starfish & seaweed as desired.
  10. Add the Adhesive-Backed Dappled Dots as stones.
  11. Stamp the sentiment in Coastal Cabana Ink onto the 5/8″ strip of Basic White cs. Adhere to the card front.

In the end I really enjoyed designing the Seaside Wishes Encouragement Card because it reminded me of a vacation I took with my family to a beach in Florida. We had such a wonderful time. Good memories! I will have to design a scrapbook page now!

I hope the project you’ve seen here on my blog today has inspired you & brightened your day. You are currently visiting Theresa McEntee-US. Please see the list below & hop through all of the people on the list to see all our projects. You don’t want to miss any!

Blog Roll Call

Have a most wonderful day!

Theresa

Order Supplies to make your own Seaside Wishes Encouragement Card Here:

Product List
Seaside Wishes Bundle (English)
$47.50
Seaside Wishes Photopolymer Stamp Set (English)
$20.00
Seaside Wishes Hybrid Embossing Folder
$33.00
Crumb Cake Classic Stampin' Pad
$9.00
Calypso Coral Classic Stampin' Pad
$9.00
Basic White 8 1/2" X 11" Thick Cardstock
$11.25
Basic White 8 1/2" X 11" Cardstock
$13.00
Calypso Coral 8-1/2" X 11" Cardstock
$11.50
Coastal Cabana 8-1/2" X 11" Cardstock
$11.50
Garden Green 8-1/2" X 11" Cardstock
$11.50
Old Olive 8-1/2" X 11" Cardstock
$11.50
Blending Brushes
$15.00
Clear Wink Of Stella Glitter Brush
$9.00
Adhesive Backed Dappled Dots
$8.00
Posted in 2024-2026 Stampin' Up! Annual Catalog, Around the World on Wednesday Blog Hop, Fish, Fun/Fancy fold card, Hello, Lake/Sea/Ocean, Sealife

Around the World On Wednesday Blog Hop-June 2024- The Adventures of Benji with Submarine Life

Hello and welcome! I am Theresa McEntee, creator of Theresa’s Treasures Paper Crafts. Today I have the pleasure of participating in the Blog Hop with Around the World on Wednesday (AWOW) organized by Angie McKenzie for the Adventures of Benji!

On the second Wednesday of each month, the AWOW team put together a thematic hop to give you some inspiration for your own crafting. The Adventures of Benji is this month’s theme.

Today’s hop is special because of Benji. Benji is Angie’s little Shih Tzu. He is her stamping and walking buddy. He is so full of personality! He will want Angie to carry him after a short walk, but he loves to run and play soccer! He also loves cheese, eggs, popcorn and anything with butter.

Angie promised Benji she would take him on a trip around the world- so here he goes!

First he is going to travel to the coast of California from where I am in Bisbee Arizona. He is going by submarine up to British Columbia Canada to visit Lori Wilcox. Hense, the inspiration for my card!

My Project for today

Before Benji could board the sub, the scene needed to be created. The Submarine Life Bundle is the perfect choice as there are many sea creatures so that Benji will have some friends to make along the way! This card has Craig the crab and Ollie the Octopus on the front panel.

On the inside panel are Gertrude the Guppy and her five little fishies- Gary, Geraldine, Glenda, George and Gregory. And don’t forget Sandy the Starfish!

Here is the template for this fun fold card. I hope you enjoyed the card and the story that went along with it!

To add a little Bling! I used the new 2024-26 In Color Shimmer Gems in Shaded Summer.

The AWOW Team

I am so glad you have joined me today in this worldwide hug that stretches all the way from Australia to Alaska across twelve different time zones. Each month this group of creative friends prepare a project for a theme. Below is an image of the whole crew and where they are from around the globe. Benji had quite the Adventure! And such a talented and wonderful group of people! You will want to visit everyone to be sure to see all the amazing projects!

We all love sharing joy with you through projects from our individual parts of the world. I hope that you will be filled with lots of inspiration from Benji’s Adventures. I know I sure was!

See More Inspiring Projects

Leonie Stuart – AU

Rochelle Laird-Smith – AU

Cheryll Miller – AU

Aurélie Fabre – FR

TIna Zinck-MacDonald – CA

Angie McKenzie – US

Chris Smith – US

Theresa McEntee – US

Lori Willcox – CA

Bree Renwick-US

Thank you so much for visiting today. I hope you enjoyed learning more about our projects along with the Adventures of Benji! Have a most wonderful day!

Theresa

Posted in 2023-2024 Stampin' Up! Annual Catalog, Emboss Powder, Gratitude/ Thanks, Lake/Sea/Ocean, Nature, Sea, Sealife, Turtle

Kylie’s International Blog Highlights Gallery-May 2023: Torn Paper Sea Turtle Thank You Card

Hello, thank you for visiting Theresa’s Treasures Paper Crafts. I am Theresa, an Independent Stampin’ Up! Demonstrator in Arizona, USA. I am super excited to be participating in Kylie Bertucci’s International Blog Highlight Gallery with my torn paper Sea Turtle Thank You card. Projects in this gallery are designed by Stampin’ Up! demonstrators from around the world! The theme for this Gallery is “Thank You”.

We often forget those simple words “Thank you”. However, it is super important to show appreciation to the people in your life who have helped you, supported you or inspired you. One way to express gratitude is to send a handmade thank you card. Discover the joy in making and sending a handmade card!

I am using torn card stock to create the background “water” for these cute sea turtles!

This Sea Turtle Thank You Card showcases the Sea Turtle stamp set in the new 2023-34 Stampin’ Up! Annual Catalog.

Current Host Code: F4TT24FW

Measurements

  • Soft Sea Foam card stock (cs) card base: 4 1/4″ x 11″ scored at 5 1/2″
  • Boho Blue cs: 4″ x 5 1/4″
  • Misty Moonlight cs: 6″ x 6″ torn into strips
  • Soft Sea Foam cs: 2″ x 8″ to stamp the sea turtles on
  • Very Vanilla cs: 4″ x 5 1/4″ (inside) and 2 1/2″ x 3″ for the sentiment
  • Garden Green cs: 2 1/2″ x 3″

Supplies

  • Sea Turtle stamp set
  • Go To Greetings stamp set
  • Painted Textures Embossing Folder
  • Double Oval Punch
  • Ink: Garden Green, Early Espresso, Pumpkin Pie and Boho Blue
  • Sponge Dauber (2)
  • Clear Emboss Powder
  • Heat Tool
  • 2023-25 In Color Dots
  • Take Your Pick Tool
  • Wink of Stella
  • Stampin’ Dimensionals
  • Multipurpose Liquid Glue
  • Paper Snips
  • Stampin’ Cut & Emboss Machine

Instructions

Create the Background

  1. Adhere several of the torn Misty Moonlight cs strips onto the 4″ x 5 1/4″ Boho Blue cs with the Multipurpose Liquid Glue.
  2. Stamp some bubbles in Boho Blue ink. Then use the Pumpkin Pie ink to stamp some fish.
  3. Place the card piece in the Painted Textures Embossing Folder and run through the Stampin’ Cut & Emboss Machine.

Stamping

  1. Use a Sponge Dauber and the Garden Green Ink to apply ink to the head, tail and extremities of the baby sea turtle.
  2. Now use another Sponge Dauber and the Early Expresso Ink to daub ink onto the shell. Before the ink dries, coat the shell with Clear Emboss Powder. If some powder gets on the Garden Green Ink, use a dry paint brush to brush it away.
  3. Use the Heat Tool. Repeat until you have 4 turtles.
  4. Fussy cut.
  5. Use the Garden Green Ink and the 2 1/2″ x 3″ Very Vanilla cs to stamp the medium “Thank You” from the Go To Greetings stamp set on one end.
  6. Punch the sentiment out with the smooth oval of the Double Oval Punch.
  7. Also punch a smooth oval from the Garden Green cs. Adhere to the back of the Very Vanilla cs oval, slightly off-set.
  8. Use the Boho Blue Ink to stamp some bubbles in the lower right-hand corner of the 4″ x 5 1/4″ Very Vanilla cs.

Putting it all Together

  1. Adhere the Very Vanilla cs with the Boho Blue bubbles on it to the inside of the Soft Sea Foam cs card base.
  2. Use the Multipurpose Liquid Glue to adhere one of the turtles to the inside.
  3. Apply Wink of Stella to the Misty Moonlight cs “waves”.
  4. Apply Stampin’ Dimensionals to the other 3 sea turtles and adhere to the background.
  5. Adhere the sentiment with Stampin’ Dimensionals.
  6. Adhere the card front to the front of the Soft Sea Foam cs card base.
  7. Add the Boho Blue In Color Dots for more “bubbles”.

Voila!

I hope you enjoyed my card today using the Sea Turtle stamp set and torn card stock.

Visit my Online Store to order what you need to make this card for yourself. Photographic supply list is at the end of this blog.

Current Host Code: F4TT24FW

When you click on the Vote For Me button will see a gallery of creative inspiration from Demonstrators around the world! You can visit everyone’s blog from the photo of their card on the Gallery. You are currently at Theresa McEntee-Theresa’s Treasures-USA. Enjoy! To vote for your favorite cards, click on the small heart in the upper right-hand corner of each photo. You have 5 votes! Enjoy and come visit Theresa’s Treasures again soon!

Clickable Supply List

Product List
Paper Snips
[103579]
$11.00

Thanks again for stopping by! Have a most wonderful and crafty day!

Theresa

Posted in 2023 January-April Mini Catalog, Aqua Painters, Emboss Resist Technique, Gratitude/ Thanks, Ink & Inspiration Blog Hop, Lake/Sea/Ocean, Nature, Sale-a-Bration 2023, Sea, Sealife, Stampin' Emboss Powder, Watercolor Techniques

Inspirations in Ink February 2023-Seaside Bay Emboss Resist Thank You Card

Today I have a Super Fun Seaside Bay Emboss Resist Thank You Card!

Welcome and thanks for visiting Theresa’s Treasures Paper Crafts! I am Theresa and I am a Stampin’ Up! Demonstrator in Arizona, USA. Today is the monthly Inspirations in Ink Blog Hop! I am excited to be hopping with awesome demonstrators from around the world. Be sure to check out everyone’s projects using the Seaside Bay Bundle. The Seaside Bay Bundle is in the 2023 Jan-April Mini Catalog. You may order form my Online Store HERE.

Seaside Bay Emboss Resist Thank You Card

Measurements

  • Balmy Blue card stock (cs) card base: 5 1/2 x 8 1/2 inches scored and folded at 4 1/4 inches
  • Textured 12×12 inch Shimmer Paper, Shaded Spruce: 4 x 5 1/4 inches (algae die cuts are from the center of this piece)
  • Fluid 100 5×7 inch Watercolor Paper: 3 1/2 x 4 3/4 inches
  • Crumb Cake cs: 1 1/2 x 4 inches for the seashell die cuts
  • Basic White cs: 4 x 5 1/4 inches (inside of card)

Supplies

  • Seaside Bay Bundle (stamp & dies)
  • Ink: Night of Navy, Shaded Spruce, Balmy Blue & Coastal Cabana
  • Versamark
  • Stampin’ Emboss Powder, Basics, White
  • Heat Tool
  • Water Painters, large pointed tip
  • Stampin’ Spritzer
  • Flat Adhesive-Backed Pearls
  • Wink of Stella Glitter Brush
  • Stampin’ Cut & Emboss Machine
Seaside Bay Emboss Resist Thank You Card

Instructions

Step 1- Emboss the Watercolor Paper

  1. Using the Versamark Ink stamp the images onto the Fluid 100 Watercolor Paper.
  2. Stamp two images, then cover them with the White Emboss Powder. Shake off the excess.
  3. Use the Heat Tool to set.
  4. Stamp two more images and repeat.
  5. That way you can see where you stamped to avoid stamping on top of another image.

Step 2- Emboss Resist Technique

  1. Prepare several layers of paper towels to work on.
  2. Squeeze each of the colored ink pads to get ink on the inside of the lid. Open & set up in a line above the paper towels.
  3. Use the Stampin’ Spritzer to spray water on the embossed Watercolor Paper. The water beads up on the paper.
  4. Use the Water Painter to pick up ink from the lid.
  5. Brush the ink onto the moist Watercolor Paper one color at a time.
  6. TIP: In between colors, squeeze water from the Water Brush onto a paper towel until it runs clear.
  7. Dry overnight. Or use the Heat Tool to speed up the drying process.

Step 3- Assembling the Card

  1. Use the Stampin’ Cut & Emboss Machine and the Seaside Bay Dies to cut one large & one small algae from the center of the Shaded Spruce Textured Shimmer Paper. C
  2. Cut 2 small & one large seashell from the Crumb Cake cs.
  3. Adhere the Basic White cs to the inside of the Balmy Blue cs card base.
  4. Adhere the Shaded Spruce Textured Shimmer Paper to the card front.
  5. Use Stampin’ Dimensionals to adhere the embossed & watercolored card piece to the card front.
  6. Adhere the large algae diecut to the bottom left corner of the card front. Adhere the small algae.
  7. Adhere the seashells

Step 4- Bling!

  1. First add some Wink of Stella to the seashells.
  2. Then add some of the Flat Adhesive-Backed Pearls.

Voila!

Seaside Bay Emboss Resist Thank You Card

Thank you so much for visiting today! Please visit all the blogs in this hop. You will see all the fun and inspiring projects made by the Inspirations In Ink demonstrators. You are currently visiting Theresa McEntee-USA creator of Theresa’s Treasures Paper Crafts.

Julie Golding Page – Canada   

Rebecca Nutley – Australia

Robbie Rubala – USA   

Theresa McEntee – USA  

Vicky Wright – Australia

Christy Gridley – USA  

Deirdre Croal – USA

Clickable Supply List

Product List

Have a most wonderful and creative day!

Theresa

Would you like your own Mini Cut & Emboss Machine? How about a Boho Blue Mini Cut & Emboss Machine! Join my Stamping Gems Team today and you can get a Mini Cut & Emboss Machine in your starter kit! Or if you already have a Cut & Emboss Machine and have a long wish list, you can join and get $175 UDS in product for $99 USD! This is the best deal! Click HERE to order your starter kit!

Sale-a-bration ends February 28, 2023! Order now to be able to get what you want! Remember to claim your Free product. New FREE products have been added!

Thinking of adding creativity to your life? Try a monthly paper crafting kit! The Paper Pumpkin Monthly Subscription delivers a kit with everything you need to make a project-right to your door! Sign up for a Pre-paid Paper Pumpkin Subscription HERE. The February kit has an Add On Die that coordinates with the images in the kit!

Ciao!

Posted in 2023 January-April Mini Catalog, Designer Series Paper, Fish, Gratitude/ Thanks, Lake/Sea/Ocean, Nature, Outdoors, Sea, Sealife

Kylie Bertucci’s Top 10 International Blog Highlight Winners Hop: Stampin Up!® Sneak Peek- Seaside Bay Bundle Thank You card

Welcome! I am Theresa McEntee, creator of Theresa’s Treasures Paper Crafts. I am so excited and thankful to be part of the Top 10 Winners Hop from Kylie Bertucci’s International Blog Highlights Gallery! Thank you to everyone who voted for my card from December 2022 Peaceful Deer & Fabulous Frames! Your vote for that card is allowing me an opportunity to post on the Winners Hop today. Ten fabulous demonstrators from around the world will be posting today! The theme for the card today is “Thank you”

My card today is a Sneak Peek of the Seaside Bay Bundle and By the Bay Designer Series Paper. These products will be in the Stampin’ Up! 2023 January- April Mini Catalog. They will be available for purchase on January 5, 2023! You can order from my Online Store HERE. A complete supply list is at the end of the blog.

Measurements

  • Night of Navy card stock(cs) card base: 5 1/2 x 8 1/2 inches scored & folded at 4 1/4 inches
  • Balmy Blue Textured 12 x 12 inch Shimmer Paper: 4 x 5 1/4 inches (NEW)
  • Basic White cs: 4 x 5 1/4 inches (inside) and 1 1/2 x 3 inches (sentiment)
  • Gold Foil: 1 1/2 x 3 inches
  • By the Bay Designer Series Paper(DSP): Iridescent Navy Blue Shell design: 1 1/2 x 3 3/8 inches; Balmy Blue crab design: 1 1/8 x 2 1/4 inches; Multicolor sea shell design: 1 1/2 x 1 1/2 inches; and Gold fish circle design: 3 1/8 x 2 1/4 inches.

Supplies

  • Night of Navy Ink pad
  • Balmy Blue Ink pad
  • Sahara Sand Ink pad
  • Deckled Rectangles Dies
  • Balmy Blue & White 1/2 inch Variegated Ribbon: 15 inches and 7 1/2 inches (NEW)
  • Flat Adhesive-Backed Pearls (NEW)
  • Mini Glue Dots
  • Stampin’ Dimensionals & Mini Stampin’ Dimensionals
  • Multipurpose Liquid Glue

Instructions

Inside

1.Take out the 4 x 5 1/4 inch Basic White cs. Use Balmy Blue Ink to stamp with the sand & seashell stamp on the right-hand end. Then stamp the snail and conch shells in Sahara Sand Ink.

2. Adhere to the inside of the Night of Navy cs card base.

Front

3. Take out the Balmy Blue 12 x 12 inch Textured Shimmer Paper. Place the By the Bay DSP pieces on top. Then adhere them to the Textured Shimmer Paper with Tombow Liquid Glue.

4. Fold the 15 inch piece of Balmy Blue & White Variegated Ribbon in half. Wrap around the Textured Shimmer Paper. Adhere each end to the back of the paper with Mini Glue Dots.

5. Tie the 7 1/2 inch piece of ribbon around the right-hand side of the ribbon adhered to the Textured Shimmer Paper. Adjust and trim as desired.

Sentiment

6. Take the 1 1/2 x 3 inch Basic White cs out. First Stamp Off then stamp the sand & seashell stamp in Balmy Blue Ink. Stamp the Thank You sentiment in Night of Navy Ink.

7. Die cut the sentiment with the smallest Deckled Rectangle Die.

8. Use Stampin’ Dimensionals to adhere the sentiment over the ribbon on the left side of the card front.

Finish Up

9. Use the Tombow Multipurpose Liquid Glue to adhere the Textured Shimmer Paper to the front of the Night of Navy cs card base.

10. Die cut the scallop seashells from the Gold Foil. You will need one large and two small ones. Use Mini Stampin’ Dimensionals and the Tombow Glue to adhere around the sentiment as shown.

11. Add one Flat Adhesive-Backed Pearls inside each of the Gold Foil shells.

Voila!

Thank you so much for stopping by today! Have a wonderful day! You are at Theresa’s Treasures created by Theresa McEntee-USA. Please visit all the rest of the blogs in Kylie’s Top Ten Winners Blog Hop to see more fabulous creations!

To order in my Online Store click on any photo below.

Supplies

Product List

Bye for now!

Theresa

Posted in Inspiration, Sea, Sealife, Waves of the Ocean

Stampin’ Up!® Waves of the Ocean Inspirational Card

The new Waves of the Ocean Suite is available now until May 2, 2022. This card showcases one of the inspirational sentiments as well as the main images. The Suite includes Waves Dies to make your card extra special!

If you would like to receive a downloadable PDF Tutorial to make this card for yourself, please subscribe to my Newsletter. There are 2 techniques used for this awesome card!

This is the complete Suite for the Waves of the Ocean #161797. You can purchase the Waves of the Ocean Suite in my online store by clicking on the item number or the on the photo above. The Blue Foils and the Waves of the Ocean Designer Series Paper are so beautiful! And the Rhinestone Waves Basic Jewels are terrific Bling for your projects! If you would like to order separate items from this suite, visit my Online Store HERE.

What else is happening with Stampin’ Up!?

Tomorrow, Thursday March 10th is the last day to subscribe to the Beyond the Horizon Paper Pumpkin kit that will coordinate with the On the Horizon stamp set and New Horizons Designer Series Paper. Sign up HERE today!

The All Together Suite includes new Stampin’ Blend Alcohol Markers in 10 different shades of skin colors, as well as black & white Designer Series Paper. Check out my card from this BLOG to see a sample of how the products come together to make an awesome card. Order your All Together products today in my Online Store.

If you need any assistance with subscribing to the Newsletter or with ordering, shoot me an email at theresastreasures.az@gmail.com.

Happy Crafting!

Theresa

Posted in Animals, beginner stamper, Inspiration, Sale-a-bration 2022, Sea, Sealife

Kylie’s International Blog Highlights Gallery- January 2022- Stampin’ Up!® Awesome Otters

Today I am taking part in Kylie Bertucci’s Monthly International Blog Highlights Gallery. The theme is- Thank You. It is so important to thank those who inspire us. My Awesome Otters card goes a little further by letting someone know just how awesome they are to me.

On this gallery, you can see thank you cards made by people from all over the world! I hope you enjoy my Awesome Otters card and take the time to see everyone else’s inspiring creations by visiting the gallery. You can get to the gallery by selecting the “Vote For Me” button at the end of this blog. I would greatly appreciate your vote for my card.

The Awesome Otters card is a super easy card to make. The circles are cut with the Picture This Die. The Simply Marbleous 6 x 6 Designer Series Paper is available for free during Sale-a-bration with a $50 purchase from my Online Store. The Awesome Otters stamp set is also a FREE Sale-a-bration item with an additional $50 purchase.

These adorable otters are colored with Stampin’ Blends Alcohol Markers. The colors I used are: Pool Party, Smoky Slate, Gray Granite and Basic Black. I added some Wink of Stella to the bubbles and around the otters. The card base is Bermuda Bay Card Stock.

https://www.kyliebertucci.com/2022/01/kylies-international-blog-highlights.htmlPlease vote for my card when you visit the Gallery by selecting the “Vote For Me” button below. Thank you!

Supply List

Product List


Ciao!

Theresa

Posted in 2021 January-June Stampin' Up!®Mini Catalog, beginner stamper, Clean and Simple, Gratitude/ Thanks, Lake/Sea/Ocean, Nature, Sea, Sealife

Kylie’s Stampin’ Up!® International Blog Highlights Gallery- April 2021-Thank You using Friends Are Like Seashells

Welcome to Theresa’s Treasures today for my Thank You using Friends Are Like Seashells. I am Theresa and I am a Stampin’ Up!® Demonstrator in Arizona, USA. Today I am taking part in Kylie Bertucci’s Monthly International Blog Highlights Gallery. The theme is- Thank You. On this gallery, you can see thank you cards made by folks from all over the world! I hope you enjoy my card and take the time to see everyone else’s creations by visiting the gallery. You can get to the gallery by selecting the “Vote For Me” button at the end of this blog. Please vote for my card while you are at the gallery.

The Stampin’ Up® Friends Are Like Seashells stamp set lends itself to a lot of creative cards. There are 23 different stamps in this set! I have only used 5 of the stamps in the set for this card.

The card base is Pool Party Card Stock (CS). The remaining CS is Basic White. The ink colors are: Pool Party, Granny Apple Green and Soft Suede. The seashell has been Stamped Off once. I embellished the card with Opal Rounds. The sentiment is made with the Classic Label Punch.

Viola! That is all it takes!

Please vote for my card when you visit the Gallery by selecting the “Vote For Me” button below. Thank you!

Supplies

Product List

Have a wonderful and creative day!

Theresa

Posted in 2020-2021 Stampin' Up! Catalog, beginner stamper, Lake/Sea/Ocean, Sea, Sealife, Simple stamping, Stampin" Blends Alcohol Markers

Seaside Notions for End of Summer Seaside Birthday Card

This wonderful summer Birthday card was inspired by a swap I received. A swap is a card that you make multiple copies of and take to a stamping event with you. There you will meet others who have made swap and you swap cards with them. Unfortunately I have lost the name of who made the swap I was inspired by.

Measurements: Very Vanilla Card Stock (CS): 4 1/4 x 11 inch card base with a score line at 5 1/2 inches, two 4 x 5 1/4 inch, 2 x 4 1/2 inches and 1 x 3 3/4 inches.

I used Memento ink for the stamping and I colored with Stampin’ Blends Alcohol Markers. I used the light and dark Blend of each of the following colors: Pool Party, Purple Posy, Petal Pink, Crumb Cake and Soft Suede.

Using the Memento ink, stamp the sea horse onto the 2 x 4 1/2 inch Very Vanilla CS and the “Happy Birthday” sentiment onto the 1 x 3 3/4 inch strip of Very Vanilla CS.

On one of the 4 x 5 1/4 inch Very Vanilla CS pieces I stamped a row of the conch shell, then added the sand dollars.

Next I stamped the snail shell. I filled in the spaces with the clam shell. I added another conch shell on the very bottom left and top right. This is a slightly organized random pattern in my book! Ha, ha! 🙂 

Don’t do this step because it turned out to be a mistake later on but i wanted to share this with you so you won’t make the same mistake. On the inside of the card base I stamped another sea horse and two sand dollars. I recommend that you stamp the sea horse and sand dollars onto the other 4 x 5 1/4 inch Very Vanilla CS piece.

Again do not do this step. Once I used the Stampin’ Blends to color the sea horse and sand dollars, I realized that the markers bled through to the back. Whoa! 😲 The way I fixed it is that I cut the inside panel to be 4 x 5 1/4 inches and made another 4 1/4 x 11 inch Very Vanilla CS card base.

On with the fun. Color the sea horse with the light and dark Soft Suede Blends.

For each of the shells, I decided to add a shadow to the lower right hand side. I did this by first coloring in the shell with the Light Crumb Cake Blend. I then went over the lower right with the Dark Crumb Cake Blend. Lastly I went over the area I wanted shadowed again with the Light Crumb Cake Blend to blend the light and dark together.

I repeated the process with all the shells. The conch shells are colored in Petal Pink. The snail shell is colored in Pool Party and the clam shell in Purple Posy.

Fussy cut the sea horse that is stamped on the 2 x 4 1/2 inch Very Vanilla CS. Place cut up Stampin’ Dimensionals and Mini Stampin’ Dimensionals on the tail and head, leaving the body without Dimensionals.

Adhere the body of the sea horse to the left side of the Happy Birthday sentiment. Cut a banner end on the right end of the sentiment strip.

Adhere the 4 x 5 1/4 inch Very Vanilla CS stamped with the sea horse to the inside of the 4 1/4 x 11 inch Very Vanilla CS card base. Use the Bone Folder on the 5 1/2 inch score line to make a crisp fold.

Adhere the other 4 1/4 x 5 inch Very Vanilla CS stamped with the shells to the card front. Use Stampin’ Dimensionals on the back of the sentiment strip and adhere in place.

Now for some Bling! The Wink of Stella Glitter Brush is perfect for adding a little sparkle to the sea horse.

Viola! You have a fun end of summer Birthday card to send off to someone special. I just love the sparkle!

Thank you for visiting theresas-treasures.com today. I hope you enjoyed this end of summer card. I am looking forward to some cooler temperatures, but here in Arizona it may be quite awhile. Good thing I can craft inside!

Product List

Have a wonderful day full of creative ideas!

Theresa