


Hello and welcome! I am Theresa McEntee, creator of Theresa’s Treasures Paper Crafts. Today I have the pleasure of participating in the Blog Hop with Around the World on Wednesday (AWOW).

On the second Wednesday of each month, the AWOW team put together a thematic hop to give you some inspiration for your own crafting. “Seasons” is this month’s theme.

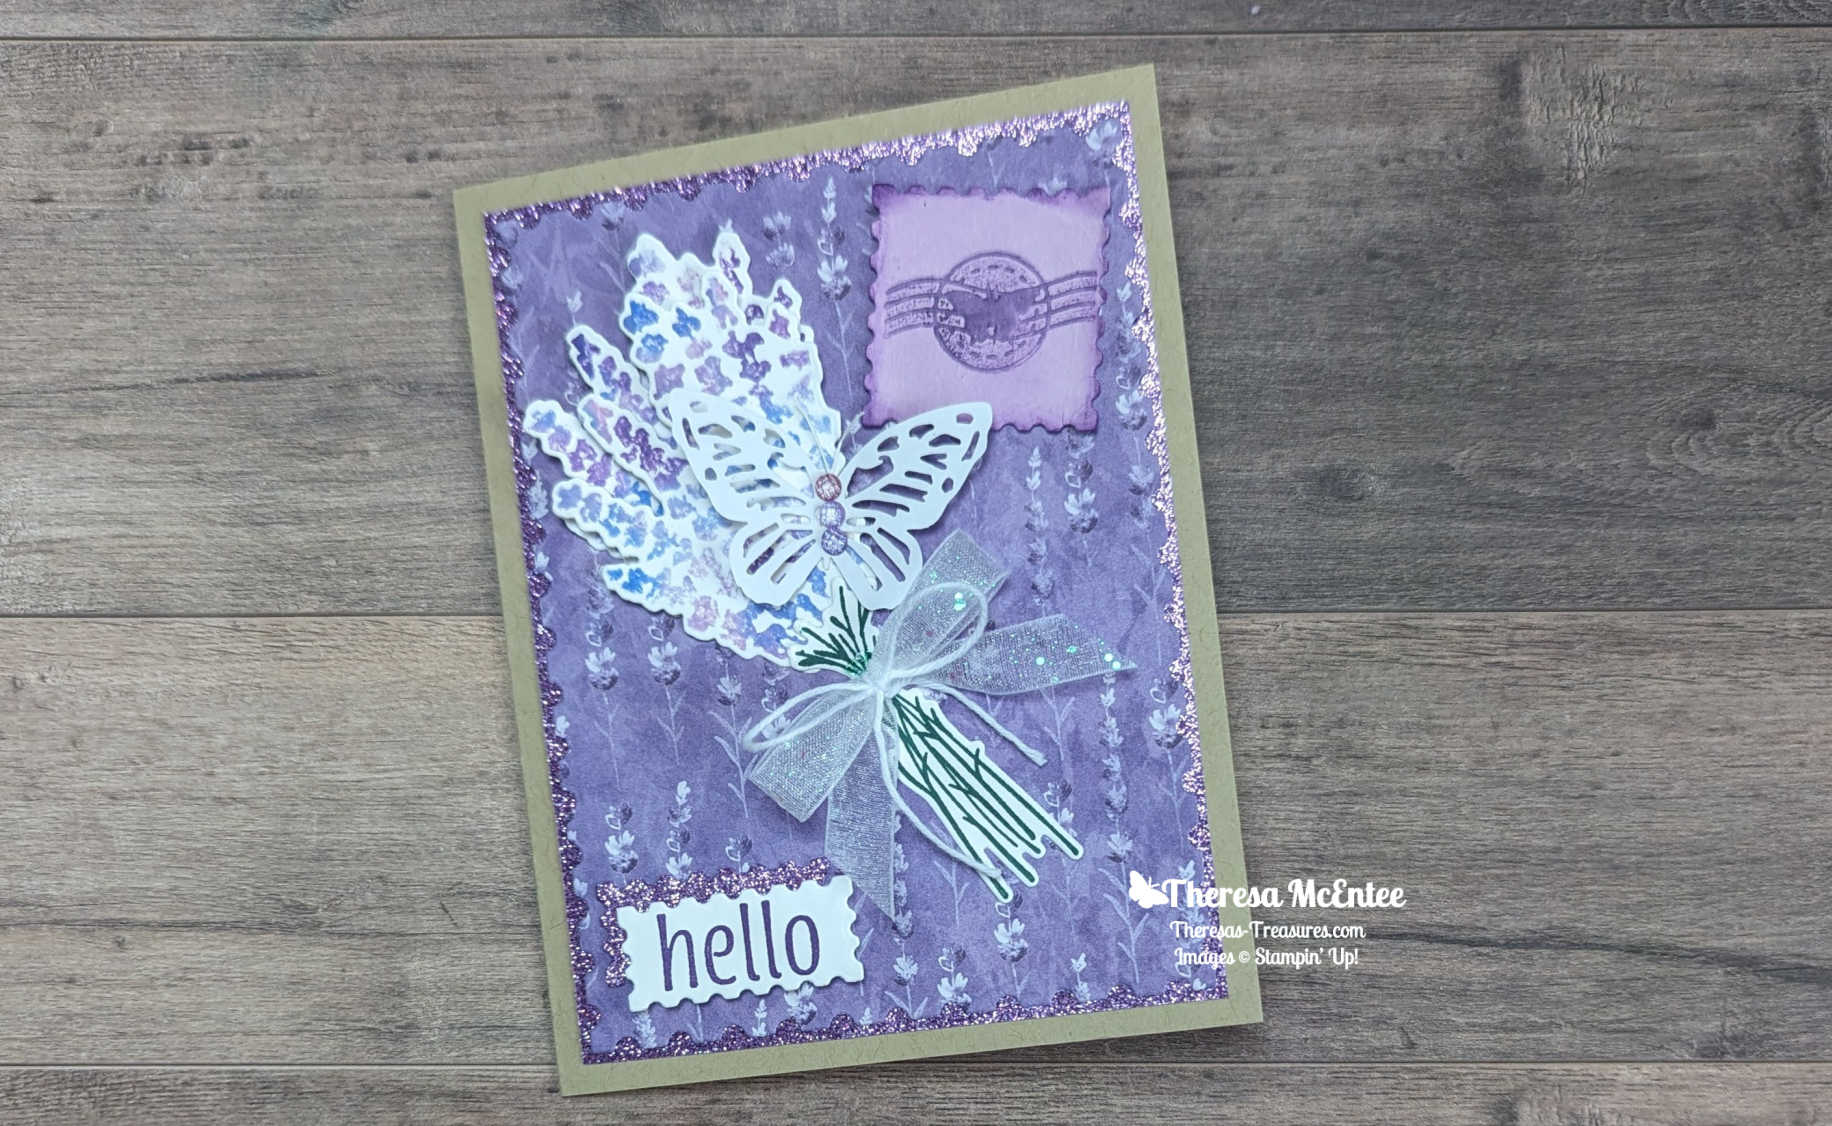
We are also focusing on team member Cheryll Miller. This month I am using a technique that Cheryll used on a beautiful card she posted on her blog in February 2025.


Cheryll’s card is the green and gold one on the left. I was inspired by the verdigris look of her card, which gives the card an antique appearance. The season I chose was Spring/Summer. I wanted to try the technique using pinks and copper embossing instead.

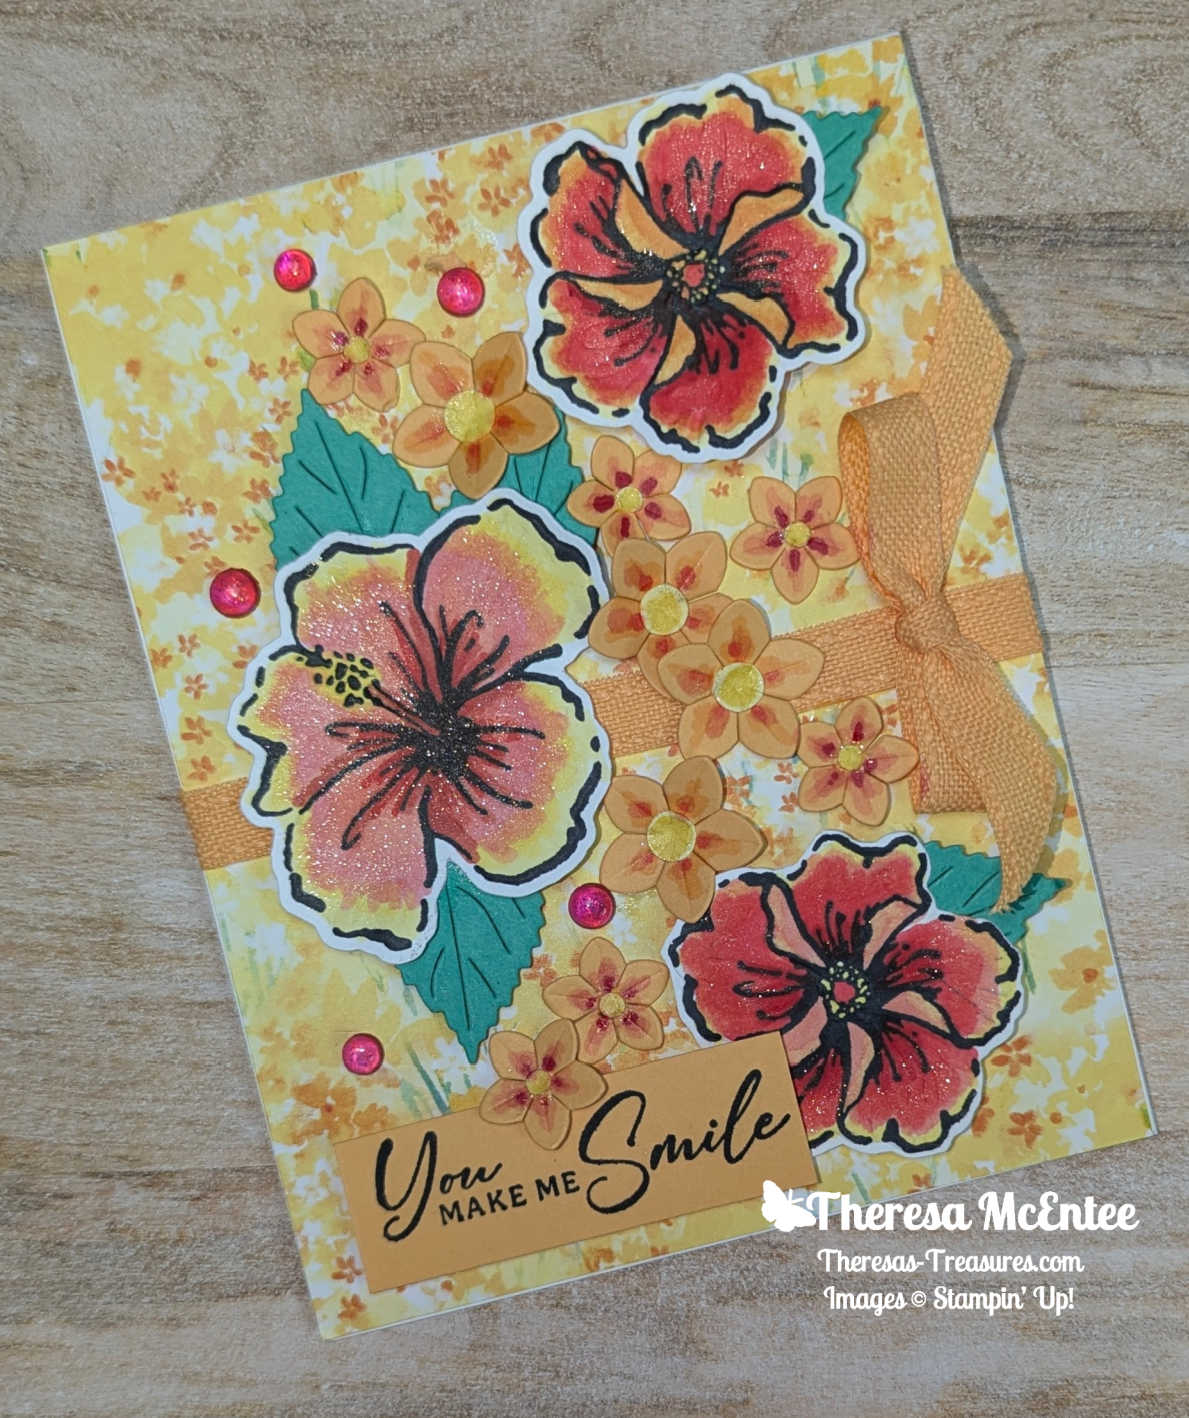
I love the season between spring and summer because it is a lot cooler here in Arizona. There are so many vivid cactus flowers that are blooming and it’s actually comfortable to be out in the sun. Of my most favorite things about the season is the emergence of the flowers. That is why I chose the flower from Gallery Blooms for the centerpiece of this card. (See some awesome Arizona catctus flower photos at the very end of this blog).
My Project for today

The technique is an Embossing Technique Cheryll called Double Embossing. Here is the process in photos.


First apply a light color of ink to the inside of the embossing folder that has the Stampin’ Up! logo on it. Then place a 4″ x 5 1/4″ Basic White cardstock in and run through the Stampin’ Cut & Emboss Machine.


Next use a Sponge Dauber to apply a medium dark ink to the raised design. Then blend the two colors using a slightly darker color with a Blending Brush. The colors here are: light – Pretty in Pink, medium- Melon Mambo and dark- Blackberry Bliss.

Finally, Use a Versamark Ink pad and gently rub along the embossing. I was a bit light on the copper embossing. If I were to try it again, I would put a little more embossing powder on it.

I did not have any copper foil. So I took a piece of Pecan Pie cardstock, and covered the edge in Versamark. Then applied Copper Embossing Powder and heat set it. This is the first layer behind the embossed layer.

For the inside of the card, blend some Pecan Pie ink onto Very Vanilla cardstock. Cut a strip from a Melon Mambo cardstock die cut with the largest rectangle in the Textured Notes Dies.

All in all, I love the look!

The AWOW Team
I am so glad you have joined me today in this worldwide hug that stretches all the way from Australia to Alaska across twelve different time zones. Each month this group of creative friends prepare a project for a theme. Below is an image of the whole crew and where they are from around the globe. Such a talented and wonderful group of people! You will want to visit everyone to be sure to see all the amazing projects!

We all love sharing joy with you through projects from our individual parts of the world. I hope that you will be filled with lots of inspiration!
See More Inspiring Projects

Leonie Stuart – AU
Rochelle Laird-Smith – AU
Cheryll Miller – AU
Marga Bultena – DE
Kelly Taranto – US
Chris Smith – US
Theresa McEntee – US
Lori Willcox – CA
Teri West – US
Thank you so much for visiting today. I hope you enjoyed learning more about our projects. Have a most wonderful day!
Theresa
Supplies
Product List ![Gallery Blooms Photopolymer Stamp Set [ 165211 ]](https://i0.wp.com/assets1.tamsnetwork.com/images/EC042017NF/165211s.jpg?w=100&ssl=1 "Gallery Blooms Photopolymer Stamp Set [ 165211 ]") $19.00 | ![Textured Notes Dies [ 165555 ]](https://i0.wp.com/assets1.tamsnetwork.com/images/EC042017NF/165555s.jpg?w=100&ssl=1 "Textured Notes Dies [ 165555 ]") $31.00 | ![Delightful Wishes Photopolymer Stamp Set (English) [ 164701 ]](https://i0.wp.com/assets1.tamsnetwork.com/images/EC042017NF/164701s.jpg?w=100&ssl=1 "Delightful Wishes Photopolymer Stamp Set (English) [ 164701 ]") $20.00 | ![Delightful Wishes Dies (English) [ 164707 ]](https://i0.wp.com/assets1.tamsnetwork.com/images/EC042017NF/164707s.jpg?w=100&ssl=1 "Delightful Wishes Dies (English) [ 164707 ]") $35.00 | ![Damask Designs Embossing Folder [ 165214 ]](https://i0.wp.com/assets1.tamsnetwork.com/images/EC042017NF/165214s.jpg?w=100&ssl=1 "Damask Designs Embossing Folder [ 165214 ]") $9.50 |
![Pretty In Pink Classic Stampin Pad [ 163807 ]](https://i0.wp.com/assets1.tamsnetwork.com/images/EC042017NF/163807s.jpg?w=100&ssl=1 "Pretty In Pink Classic Stampin Pad [ 163807 ]") $9.00 | ![Melon Mambo Classic Stampin' Pad [ 147051 ]](https://i0.wp.com/assets1.tamsnetwork.com/images/EC042017NF/147051s.jpg?w=100&ssl=1 "Melon Mambo Classic Stampin' Pad [ 147051 ]") $9.00 | ![Blackberry Bliss Classic Stampin' Pad [ 147092 ]](https://i0.wp.com/assets1.tamsnetwork.com/images/EC042017NF/147092s.jpg?w=100&ssl=1 "Blackberry Bliss Classic Stampin' Pad [ 147092 ]") $9.00 | ![Old Olive Classic Stampin' Pad [ 147090 ]](https://i0.wp.com/assets1.tamsnetwork.com/images/EC042017NF/147090s.jpg?w=100&ssl=1 "Old Olive Classic Stampin' Pad [ 147090 ]") $9.00 | ![Pecan Pie Classic Stampin' Pad [ 161665 ]](https://i0.wp.com/assets1.tamsnetwork.com/images/EC042017NF/161665s.jpg?w=100&ssl=1 "Pecan Pie Classic Stampin' Pad [ 161665 ]") $9.00 |
![Versamark Pad [ 102283 ]](https://i0.wp.com/assets1.tamsnetwork.com/images/EC042017NF/102283s.jpg?w=100&ssl=1 "Versamark Pad [ 102283 ]") $9.50 | ![Metallics Wow! Embossing Powder [ 165678 ]](https://i0.wp.com/assets1.tamsnetwork.com/images/EC042017NF/165678s.jpg?w=100&ssl=1 "Metallics Wow! Embossing Powder [ 165678 ]") $21.00 | ![Heat Tool (Us And Canada) [ 129053 ]](https://i0.wp.com/assets1.tamsnetwork.com/images/EC042017NF/129053s.jpg?w=100&ssl=1 "Heat Tool (Us And Canada) [ 129053 ]") $32.00 | ![Stampin' Cut & Emboss Machine [ 149653 ]](https://i0.wp.com/assets1.tamsnetwork.com/images/EC042017NF/149653s.jpg?w=100&ssl=1 "Stampin' Cut & Emboss Machine [ 149653 ]") $130.00 | ![Basic White 8 1/2" X 11" Cardstock [ 166780 ]](https://i0.wp.com/assets1.tamsnetwork.com/images/EC042017NF/166780s.jpg?w=100&ssl=1 "Basic White 8 1/2\" X 11\" Cardstock [ 166780 ]") $14.00 |
![Very Vanilla 8 1/2" X 11" Cardstock [ 166784 ]](https://i0.wp.com/assets1.tamsnetwork.com/images/EC042017NF/166784s.jpg?w=100&ssl=1 "Very Vanilla 8 1/2\" X 11\" Cardstock [ 166784 ]") $14.00 | ![Pecan Pie 8 1/2" X 11" Cardstock [ 161717 ]](https://i0.wp.com/assets1.tamsnetwork.com/images/EC042017NF/161717s.jpg?w=100&ssl=1 "Pecan Pie 8 1/2\" X 11\" Cardstock [ 161717 ]") $11.50 | ![Melon Mambo 8-1/2" X 11" Cardstock [ 115320 ]](https://i0.wp.com/assets1.tamsnetwork.com/images/EC042017NF/115320s.jpg?w=100&ssl=1 "Melon Mambo 8-1/2\" X 11\" Cardstock [ 115320 ]") $11.50 |
Awesome Cactus Flower Photos


Photos taken in the Tucson desert by Theresa McEntee May 2025


")


")


 Designer Series Paper")


 Designer Series Paper")
 Specialty Paper")
 Glittered Organdy Ribbon")


")


 Sheer Ribbon")


")

")

")
")


")


 Crinkled Seam Binding Ribbon")


")
")


 Designer Series Paper")


")


 Designer Series Paper")
