Posted in 2021-2022 Stampin' Up! Annual Catalog, beginner stamper, Designer Series Paper, Fun/Fancy fold card, Gratitude/ Thanks, Mystery Stamping

Fun Fold Friday- Stampin’ Up!® Artistically Inked Thank You Card

Join me today to make this gorgeous Artistically Inked Thank You card!

It is gradually getting cooler here in Arizona, but I am not quite ready to show Christmas cards yet. Today I have a Fun Fold that I had my Stamping Gems Team members make as a Mystery Stamping activity.

Fun Fold Friday is on!

Mystery Stamping is a fun way to make cards together. You give the clues one by one. Each person picks the paper and stamp set they want to use. All of the cards are uniquely different. Usually you do not show the finished card until the end.

Clue #1 Supplies

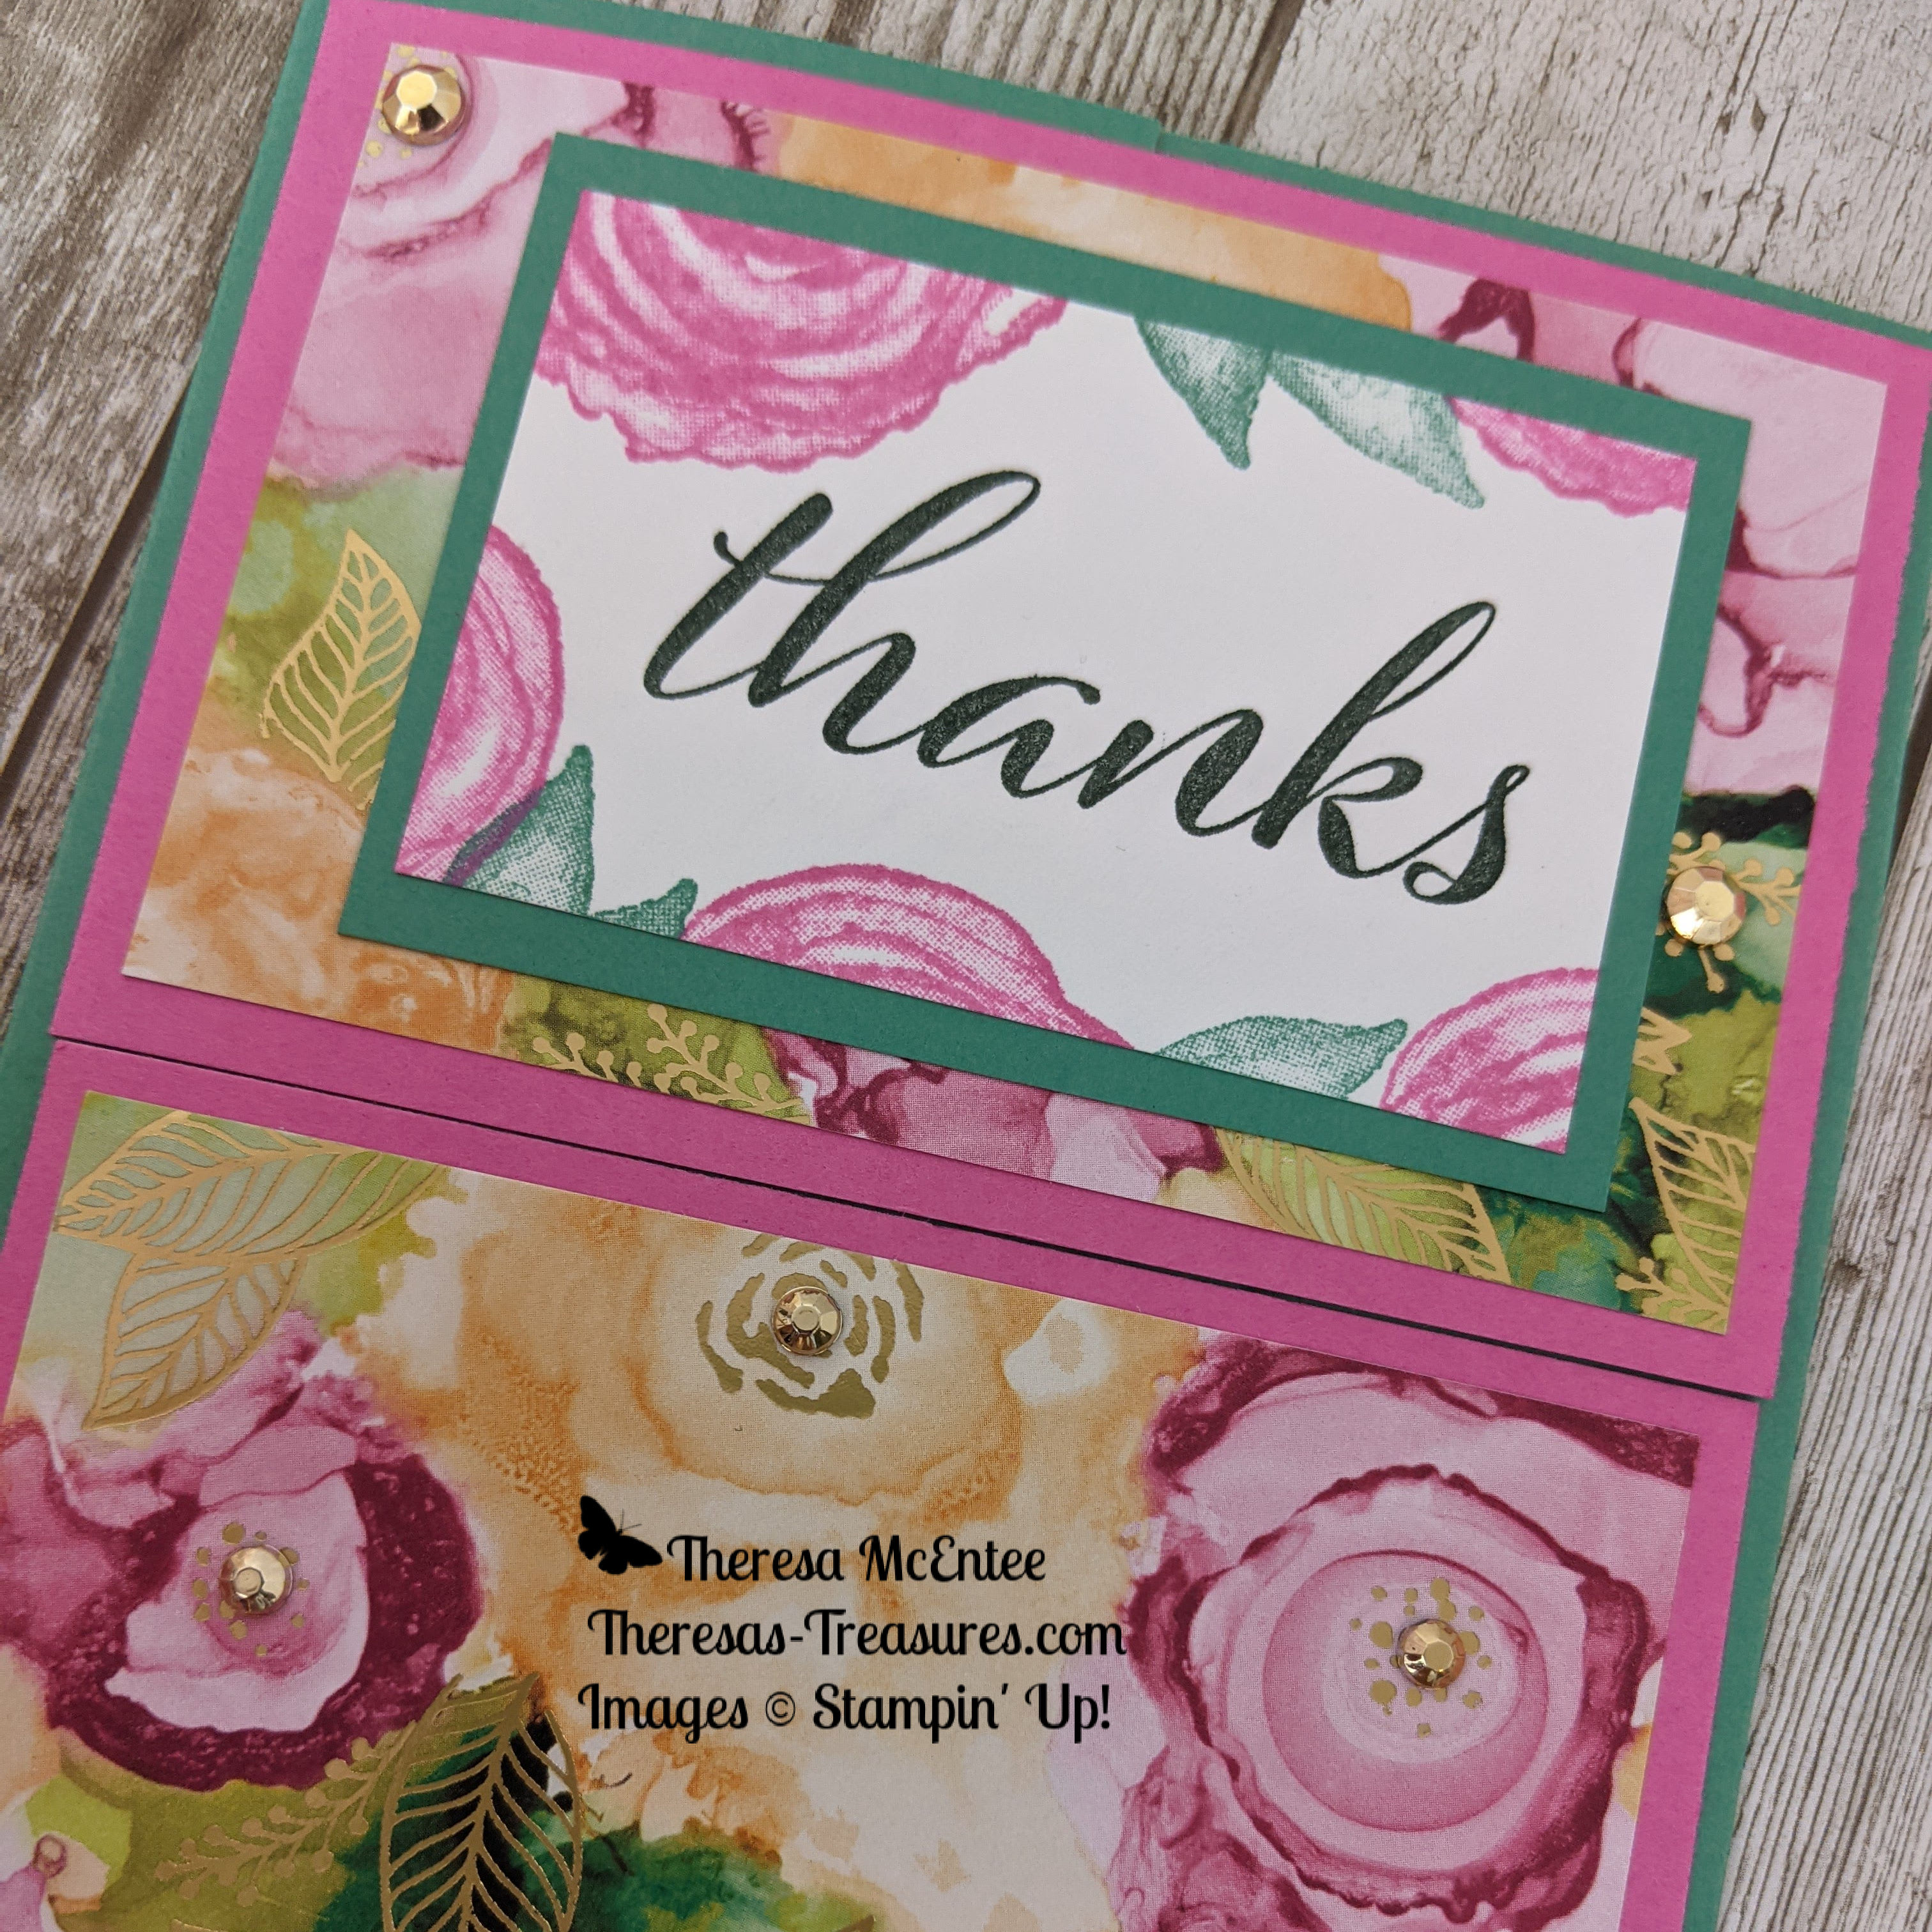
  1. Color Card Stock (CS) Color A: 8 1/2 x 5 1/2 inches with score lines at 2 1/8 and 6 3/8 inches. (This is the card base and it is in portrait orientation.) You also need a 3 x 2 inch piece.
  2. Color CS Color B: choose a color to coordinate with Color A. Two 4 x 2 5/8 inches.
  3. Designer Series Paper (DSP) to coordinate with the Color A and Color B CS. Two 3 3/4 x 2 3/8 inches.
  4. Basic White CS: 2 3/4 x 1 3/4 inches and 5 1/4 x 4 inches.
  5. A sentiment stamp to fit inside the 2 3/4 x 1 3/4 inch Basic White CS card piece.
  6. Images to make a border around the sentiment and the inside of the card.
  7. Coordinating ink, embellishments, adhesive and Stampin’ Dimensionals.

Clue #2

Stamp your sentiment onto the 2 3/4 x 1 3/4 inch Basic White CS. Stamp images around the sentiment.

Clue #3

Stamp the images around the outside edge of the 5 1/4 x 4 inch Basic White CS. Leave the center blank so one could write a note.

Clue #4

Adhere the sentiment to the 3 x 2 inch Color A CS. Adhere the 5 1/4 x 4 inch Basic White CS to the center panel of the 8 1/2 x 5 1/2 inch Color A CS.

Clue #5

Adhere the DSP to the Color B CS. Repeat for the other pieces. You should have two identical card pieces.

Clue #6

Bring the 2 side panels together so they meet in the center of the card. Apply adhesive to the back of the left half of one of the card pieces with the DSP on it. Adhere this to the top of the left-hand panel. Now apply adhesive to the back of the right side of the second DSP card piece. Adhere it to the bottom of the right-hand panel.

Clue # 7

Use Stampin’ Dimensionals to adhere the sentiment to the center of the upper DSP card piece.

Clue #8

Use embellishments as desired.

Voila! That is the Mystery Stamping Fun Fold using the Artistically Inked stamp set and Expressions in Ink DSP! The Mystery Stamping is a really fun way for my Stamping Gems Team and me to stamp together as part of our monthly team meeting.

Product List

I hope you have some time to do some crafting this weekend! I find stamping and card making is so peaceful and relaxing.

Bye for now!

Theresa

Posted in 2021-2022 Stampin' Up! Annual Catalog, Gratitude/ Thanks, Mystery Stamping

Bruno and Kylie Bertucci’s Demonstrator Training Program Blog Hop- October 2021 Mystery Stamping Thank You Card*

I have an exciting card to share for Bruno and Kylie’s Demonstrator Training Blog Hop today that was a Mystery Stamping I participated in. I will explain more about that in a minute.

Thank you for joining me today for our Stampin’ Up!® Demonstrator Training Program Monthly Blog Hop! The Demonstrator Training Program is for Stampin’ Up! Demonstrators all over the world who are working towards bettering their business. Be sure to visit all the blogs and see all the different Thank You cards from around the world! I know you will get lots of ideas and creative inspiration! If you wish to become a Stampin’ up! Demonstrator please let me know by commenting on this post or sending me an email at theresastreasures.az@gmail.com Now for the card:

Mystery Stamping is when you are given the measurements for the pieces and then you get “clues” on how to put the card together without knowing what the card looks like. So fun!!

*This card is compliments of Lorraine Masters-Green, who I believe got the idea from Sharon Armstrong.

Clue #1 Card Recipe & Supplies:

1. Colored Card Stock (CS) Color A (ex. Misty Moonlight): 8 1/2 x 5 1/2 inches with a score at 4 1/4 inches, 4 x 5 1/4 inches, and 2 1/8 x 2 1/8 inches.

2. Colored CS Color B (ex. Just Jade): 3 1/2 x 3 1/2 inches

3. Basic White CS: 3 1/4 inches x 3 1/4 inches, and a scrap for the sentiment and image.

4. Designer Series Paper (DSP): 5 coordinating pieces 1 x 1 inch (can be different or 2 of one pattern and 3 of another). My DSP is from the Pattern Party DSP in the Annual Catalog.

5. Sentiment stamp and punch or die to cut it out.

6. Image stamp or dies to cut an image from DSP to fit on 2 1/8 x 2 1/8 inch Color A CS piece. I used Simply Succulents for my image and my sentiment.

7. Ink, embossing folder, adhesive, dimensionals. and embellishments.

Clue # 2- The card is in a portrait orientation.

The remaining clues are the directions on how to put the pieces together. The fun part is that you don’t know what the card is supposed to look like until you are done! It is a blast!

If you need the remaining clues for this card, just leave a comment or send me an email and I will send them to you.

Voila! After you follow all of the clues you have a fun Thank You card. Since I had so much fun making this card, I decided to use it as a thank you note to my September customers.

Be sure to click on the next person in line to see more amazing cards. You are at Theresa McEntee-Theresa’s Treasures-USA

Product List

Thanks for stopping by today! Have a great day!

Theresa