Posted in Stampin' Up! 2019-2020 Annual Catalog

Retiring Stamp Sets- Painted Harvest

The new Stampin’ Up! Annual Catalog for 2020-2021 will be mailed out on May 8, 2020. If you would like a copy, shoot me an email at theresastreasures.az@gmail.com. There are many products that will be retiring and some are now at a great discount. Check the “Last Chance Products” tab in the left hand column at my online store here.

This card started off as a Color Challenge I wanted to be in. A Color Challenge is when someone gives you one or more colors to use in a card. You can create whatever you want. The inspiration also came from wanting to use the retiring stamp sets once more.

Today I mainly used the Painted Harvest stamp set. However, the sentiment is from Piece of Cake and the bee is from Honey Bee.

Measurements: Whisper White Card stock (CS): 8 1/2 x 5 1/2 inches with a score line at 4 1/4 inches, 4 1/4 x 3 inches, 2 1/2 x 1 1/2 inches and a 3 x 1/2 inch strip: Lovely Lipstick CS: 5 7/8 x 4 1/8 inches; and Blushing Bride CS: 4 1/4 x 3 inches.

The Painted Harvest stamp is Two Step Stamp. This means that there are two slightly different stamps that are intended to be stamped on top of one another. These are the two stamps for the sunflower. I am starting with the less detailed stamp on the left.

Stamp three of the sunflowers in a cascade down the 4 1/4 x 3 inch Whisper White CS using Blushing Bride ink.

Switch to the other more detailed stamp of the sunflower. Use Lovely Lipstick ink to stamp right on top of the Blushing Bride flowers.

Using the same detailed sunflower, stamp in Lovely Lipstick along the outside borders of the Lovely Lipstick CS. I call this Tone on Tone because you use the same color for the paper and the ink.

Use Soft Suede ink to stamp the center of the sunflowers.

The leaf is also a Two Step Stamp. I have tried stamping with the more detailed leaf or with the less detailed leaf first. For this stamp I think it is easier to line up the stamps when I start with the more detailed leaf and finish with the less detailed leaf stamp.

Stamp the sentiment “Happy Birthday” and the bee on the corresponding Whisper White CS in Memento ink.

Color the stripes on the bee with the Pineapple Punch Stampin’ Write Marker. Fussy cut the bee (or if you have the Detailed Bee Dies you can cut the bee out with the die).

Trim the sentiment “Happy Birthday” and then we will make a banner end. Make a small center cut.

Now make a cut from one corner to the top of the center cut. Repeat on the other side.

Make another banner on the other end of the sentiment strip.

Use the Bone Folder to get a nice crisp fold at the 4 1/4 inch score line on the 8 1/2 x 5 1/2 inch Whisper White CS. This is the card base. Adhere the Lovely Lipstick background card piece to the front of the card base.

Adhere the 4 1/4 x 3 inch Blushing Bride CS at a slant on top of the Lovely Lipstick background. Now adhere the sunflower card piece parallel to the Lovely Lipstick card piece.

Oops! I got some Soft Suede ink in the wrong place. This happens when the edge of the clear block gets inked. No worries. You can always fix this with either a sentiment over the top or Bling. I put the “Happy Birthday” right over the mistake and no one is the wiser!

Add the cute little bee and Viola! You have a wonderful Birthday card ready to go!

Thanks so much for coming by today! I wish you a great day and hope you are well and safe!

I am an Independent Stampin’ Up!® Demonstrator and I would love to help you pick out just what you need to make that special card or put together a project. This blog is intended for the beginning stamper so there are basic tips included. I hope you find some time to be creative! Let me know via email if you need help putting your order together at theresastreasures.az@gmail.com.

The supplies I used are pictured below. If you want to order something, just click on the photo and you will go directly to my Online Store. Have a lovely day!

Product List
Posted in Avid Stamper, Barbecue, Guys cards, Summer

Cardz4Guyz Challenge # 243 Use Dies as a Main Feature

Here is a little extra post for the avid stamper. It is for the Cardz4Guyz Challenge #243 to Use Dies as a Main Feature.

I am so looking forward to the day when we will be able to be outside and have family and friends over for a big barbecue! That thought is what inspired me to make this card.

I used a lot of different products for this scene. The Stampin’ Up!® products are listed below.

Do you see all the lovely yellow butterflies! And don’t forget a drink!

Thanks for stopping by to see my card for the Cardz4Guyz Challenge to Use Dies as a Main Feature! It is so fun to have a challenge to do!

The Stampin’ Up! Products are:

Product List
Posted in Birds, Stampin' Up! 2019-2020 Annual Catalog

Mosaic Mood Hummingbird

Well the Retired List of Stampin” Up!® products in the 2019-2020 Annual Catalog is out. You can find out what is retiring in my Online Store here , and then by clicking on the tab in the left hand column that says “Last Chance Products”. The Mosaic Mood Suite is retiring so I wanted to use it one last time.

I really enjoyed making cards with the Mosaic Mood Designer Series paper (DSP). The colors are so pretty!

Measurements: Whisper White cardstock (CS): 8 1/2 x 5 1/2 inches with a score line at 4 1/4 inches and 2 x 3/4 inches for the sentiment; Terracotta Tile CS: 4 3/4 x 3 inches and 2 1/8 x 7/8 inches; Daffodil Delight CS: 4 x 2 inches; and Mosaic Mood DSP: a hummingbird to fussy cut, 4 5/8 x 2 5/8 inches of the Terracotta Tile colored mosaic pattern, 3 7/8 x 1 7/8 inches of the rose and butterfly pattern and a stripe for the inside that is 5 1/2 x 1 1/2 inches.

The first step is stamping the sentiment “Best Wishes” from the Stitched All Around stamp set in Terracotta Tile ink onto the 2 x 3/4 inch Whisper White CS.

Now fussy cut the hummingbird from the Mosaic Mood DSP.

Use the Bone Folder to make a crisp fold at the 4 1/4 inch score line on the 8 1/2 x 5 1/2 inch Whisper White CS. Adhere the 5 1/2 x 1 1/2 inch stripe of Mosaic Mood DSP to the inside of the card.

Adhere the Terracotta Tile pattern to the 4 3/4 x 3 inch Terracotta Tile CS. Adhere the sentiment to the strip of Terracotta Tile CS.

Adhere the rose and butterfly pattern to the Daffodil Delight CS.

Apply Stampin’ Dimensionals to the back of the hummingbird.

Adhere the Terracotta Tile mosaic piece to the card front slightly to the left. Now adhere the Daffodil Delight rose and butterfly piece slightly to the right. You may want to lay this piece down without adhering it first so you can check placement for the hummingbird.

Add the Hummingbird to the card front, then the sentiment.

And Viola! You have made a quick and simple but stunning card!

Best Wishes to you and your family during this crazy and trying time. I hope you are all staying healthy and safe. Thank you for checking out my card today!

Here are the Stampin’ Up! products I used. Click on the photo and go directly to my online store where you can purchase the product and look at the catalog.

Product List
Posted in Uncategorized

2018-2020 In Colors to Fly Away Soon!

This is the last chance you will have to order anything with the following colors: Lovely Lipstick, Grapefruit Grove, Pineapple Punch, Call Me Clover and Blueberry Bushel. These colors are retiring soon. As a tribute, I decided to make some butterfly cards to send these colors off. We will be getting 5 new colors for 2020-2022 but we don’t know what they will be yet! I personally love these nice basic colors and will miss them.

This is a great technique and is quite easy to do.

I will make the Grapefruit Grove card today. The stamp set is Butterfly Gala.

Measurements: Whisper White Cardstock (CS): 8 1/2 x 5 1/2 inches with a score line at 4 1/4 inches for the card base and 5 1/4 x 4 inches, 4 3/8 x 3 1/8 inches and 3 3/8 x 2 1/8 inches for the layers; Grapefruit Grove CS: 5 3/8 x 4 1/8 inches, 4 1/2 x 3 1/4 inches and 3 1/2 x 2 1/4 inches for the layers and 4 x 2 1/2 inches for the Butterfly to punch out.

The first step is to stamp the butterflies onto the bottom of the 4 x 2 1/2 inch Grapefruit Grove cardstock. I used Terracotta Tile ink to make a darker image, but you could use the Grapefruit Grove ink just as well. Be sure to use your Stampin’ Pierce mat since these are Photopolymer stamps.

Punch the butterflies out with the coordinating Butterfly Duet punch and set aside.

This next step is a little scary. I am going to cut my stamp! If you are careful to make a straight cut, you can piece it back together and use it again in the proper position for the punch again.

Do not trim the uneven edges because you will not be able to piece it back together if you do.

Stack the 3 layers of Whisper White CS by applying a wee bit of repositionable or non-permanent adhesive to the backs of the 1st and 2nd layers.

Stamp the sentiment “a little note” in Grapefruit Grove ink onto the top layer of the Whisper White CS. Position the punched out butterflies and a small bow tied from the 1/8 inch Grosgrain Ribbon in Grapefruit Grove. This will help you stamp the butterflies in a complimentary pattern.

Begin stamping the larger butterfly. Consider that you will want to stamp a smaller butterfly in between the larger butterflies when you choose where to stamp the larger butterfly.

Stamp the smaller butterfly to fill in the spaces.

Separate the layers of Whisper White CS and adhere them to the corresponding layer of Grapefruit Grove CS.

Use the Bone Folder to make a nice crisp fold at the 4 1/4 inch score line on the Whisper White CS card base. Adhere the first layer to the front of the Whisper White card base.

Adhere the next two layers taking care to line up the outlines of the butterflies.

Oops! I forgot the bodies of the butterflies! Stamp the bodies of the butterflies in Terracotta Tile ink.

I used the Bone Folder to gently curl the wings of the butterflies to give them some dimension.

Use Mini Glue Dots to adhere the two butterflies and the bow to the card front.

Viola! You have just made a really cool and interesting card!

If you would like to shop by color, you can select that from the left hand column of choices once you go to my online store here. Then click on the color and a menu of all that is available in that color will come up for you. Don’t wait too long. People go crazy when stuff is retiring and the products are only available while the supply lasts.

I am an Independent Stampin’ Up! Demonstrator and my small business has definitely been affected by the Covid-19 situation. Any support you can give by ordering Stampin’ Up! Products from me is greatly appreciated. Please let me know if I can help you make the most of your order by emailing me at: theresastreasures.az@gmail.com. I am happy to assist you in acquiring your crafting supplies to make great projects.

Thanks for joining me today. A list of the supplies I used today are listed below. Just click on the photo and you will go directly to my Online Store.

Product List

Posted in Lake/Sea/Ocean, Sponging technique, Summer

Tips for Sponging a sunset with Stampin’ Up!® Inks

Sometimes I need something new to try, so I wanted to do something a little different today. I thought I would show you how fun it is to make a sunset by using the Sponging Technique.

This card was made with a Host set called Soft Spring. I will discuss how to get a Host set below. To me this is a very serene appearing card and could be used for a variety of occasions.

Measurements: Bermuda Bay card stock (CS) card base: 8 1/2 x 5 1/2 inches with a score line at 4 1/4 inches; Pool Party (CS): 5 7/8 x 4 1/8 inches and a 1/2 x 5 inch strip; Whisper White (CS): two 5 1/4 x 4 inches.

The colors of ink we will be using today are: Mango Melody, Daffodil Delight, Coastal Cabana and Bermuda Bay.

To prepare the scene you will need full sticky note paper punched with the 1 1/2 inch Circle Punch. Tape the 5 1/4 x 4 inch Whisper White to a sheet of scrap paper. Tape another sheet of scrap paper about 1 3/4 inches down from the top of the Whisper White card piece. This will be a mask.

To prepare the sponges, first cut the Stampin’ Up! Stamping Sponges in half.

Now cut the half in half, then the quarter in half.

I use a square punched out of the color of cardstock that I am going to use the sponge for, attached with a staple. I store my sponges in a compartmentalized crafters box.

Dab the sponge onto the Daffodil Delight ink pad. If the ink is quite wet, dab lightly. Now rub the sponge onto the scrap paper with a small circular motion. This will give you an idea of how the sponging will look and will take off any excess ink.

Sponge the ink onto the Whisper White with a small circular motion very lightly. It is best to go light at first then gradually add to the color to make it the shade you want. I wanted a medium color. You can see that it is a little blotchy. Do not worry about that. It will not be noticeable on the completed card.

Apply the sticky note circle. The area that is masked will become the sun. Using the Mango Melody ink, sponge over the Daffodil Delight until you get a darker shade. Make it a little darker near the “sun” and the “horizon”.

I apologize for the blurry photo. My phone has been acting strangely all day. You can get the idea of how the sun and sky will look once you remove the sticky note.

Now move the scrap paper that was masking the bottom of the card piece to mask the area above the horizon. Leave a wee bit of color showing under the mask so that you do not end up with a white space between the sky and the lake. Start sponging the Coastal Cabana ink onto the lower part of the card piece, using the same gentle circular motion.

Once you have covered the area in Coastal Cabana ink, you can start sponging with the Bermuda Bay. Only sponge along the outer edge of the lake.

When you have finished with the Bermuda Bay ink, remove the scrap paper mask. Place the card piece on a Stampin’ Pierce Mat since we will be using a Photopolymer stamp set.

Using Memento ink, stamp the images from the Soft Spring stamp set on the edges of the card piece.

Add images until you like the look. You could stop here if you like. This stamp set is a two step stamp which means you can stamp some more over the outline of the leaves and flowers to make them more of a silhouette.

Add the little dragonfly.

Now you can add the second step of the stamping. This will make the leaves and flowers darker and more of a silhouette.

As you may have noticed, my second stamp does not line up with the outline perfectly. I do struggle with getting the two step stamps to line up. However, I do not think this will detract from the overall look.

Adhere the second 5 1/4 x 4 inch Whisper White to the inside of the card base. Use the Bone Folder to fold the card base at the 4 1/4 inch score line.

Adhere the stamped card piece to the Pool Party CS, then to the front of the card base.

Now for the sentiment. Stamp the sentiment “Happy Day” from the Itty Bitty Birthday stamp set in Memento ink onto the 1/2 inch strip of Pool Party CS. Trim it down and make a banner end. If you need help with the banner end, please click on THIS for a “How to”. Boy my fingers are blue!

Apply Stampin’ Dimensionals to the back of the sentiment strip, then adhere it to your card front.

And Viola! you have learned how to sponge a sunset and make a very serene appearing card. You could use a different sentiment and make this card very versatile. Now to go wash all the ink off my fingers!

Thank you for stopping by today. I hope you are well and staying safe. If you want to get the Soft Spring Host Set, you would need to place a $150 order. Then you can order it for $9.50. One way to place such a large order is to have your friends order with you. Then you can all get together (once the pandemic is over) and use the Soft Spring stamp set!

Stampin” Up! Products used include:

Product List

Have a great day and try some sponging!

Posted in Guys cards, Sea, Stampin' Up! 2019-2020 Annual Catalog

Cardz 4 Guyz Challenge #242- By the Sea

The current challenge on the Cardz 4 Guyz blog is to create a masculine card with the theme “By the Sea”.

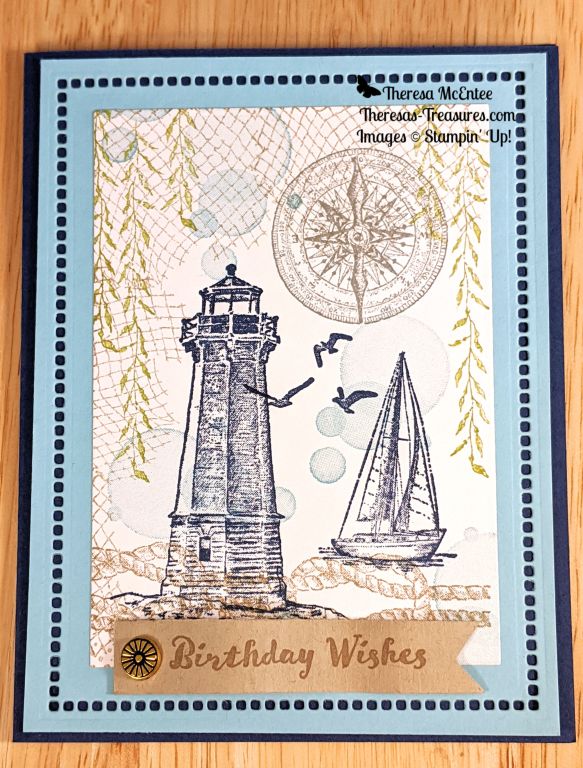
This card was made using a few Stampin’ Up!® stamp sets. Several images come from the Sailing Home and Sea of Textures stamp sets. The sentiment is from Itty Bitty Birthdays. The watermarks are from the Beauty Abounds stamp set.

The colors are: Balmy Blue, Night of Navy, Smoky Slate, Pear Pizzazz and Crumb Cake.

So check out Cardz4guyz.blogspot.com for more masculine cards with the “By the Sea theme.

Here are my supplies. Click on the picture to order from my online store.

Product List

Thanks for stopping by! Have a great day!

Posted in Fun/Fancy fold card, Stampin' Up! 2019-2020 Annual Catalog

Garden Birthday with Layered with Kindness

As you may have noticed from my last Blog post, I have been learning to participate in a Blog Hop. I think I finally have it working if you would like to check it out. After you scroll through my portion there will be a list of names. Click on the name and visit their Blog. You can get a lot of great ideas from a Blog Hop.

Today’s card is a Birthday card. I have 6 people in my family with Birthdays in May! I need to stock up on Birthday cards. This card can be made with any Designer Series Paper (DSP). I am using Garden Lane DSP from the 2019-2020 Stampin’ Up!® Annual Catalog.

I made this card with the Layered With Kindness stamp set by Stampin’ Up!® and the coordinating punch.

Measurements: Garden Green Card stock (CS): 5 1/2 x 4 1/4 inches, 8 1/2 x 3 inches and 5 x 3 inches; Garden Lane DSP: 5 1/4 x 4 inches and 4 x 3 inches; and Whisper White CS: 4 x 3 inches and 5 x 3 inches.

The first step is to stamp the “Happy Birthday” sentiment in Memento onto the 5 x 3 inch Whisper White CS. Set aside.

Stamp the leaves in Garden Green ink onto the right hand side of the 4 x 3 inch Whisper White CS.

Now stamp the little flower in Petal Pink ink.

Stamp several flowers.

Stamp the single leaf several times in Garden Green ink.

Adhere the 5 1/4 x 4 inch Garden Lane DSP to the 5 1/2 x 4 1/4 inch Garden Green CS.

Fold the 8 1/2 x 3 inch Garden Green in half at 4 1/4 inches and use the Bone Folder to make the fold nice and crisp.

Adhere the 4 x 3 inch Garden Lane DSP to the front of the folded Garden Green CS.

The floral card piece will go inside the folded Garden Green CS piece.

Adhere the floral card piece.

Adhere the back of the Garden Green folded card piece to the front of the Garden Lane DSP on the 5 1/2 x 4 1/4 inch piece of Garden Green CS.

Use the Label Me Lovely punch to cut out the “Happy Birthday” sentiment and then punch another label out of the 5 x 3 inch Garden Green CS.

Adhere the two labels together with the Garden Green label slightly to the right of the “Happy Birthday” label.

Adhere some Stampin’ Dimensionals to the back of the “Happy Birthday” label on the half behind the “H” and the “B”.

Adhere to the card front with the right edge hanging off a little.

Now for some Bling! I used the Champagne Rhinestone Basic Jewels and applied them with the Take Your Pick tool.

Slide the pick under the adhesive on the rhinestone and transfer it to where you want it on the card. Apply slight pressure to the rhinestone and slide the pick out from underneath. Tip: If you do not have a pick tool, try a toothpick.

Add as many rhinestones as you like, keeping with an odd number. An odd number is more pleasing to the eye.

And Viola! You have a really nice Birthday Card that folds in a new and fun way. (This type of card is called a Fun Fold or Fancy Fold).

Product List

I am so glad you joined me today. This is a great card to use any designed paper you may have around. You can easily substitute another sentiment, and if you do not have any punches, just make the sentiment a square. I am going to make a few more in different colors so I can get them mailed out to my family soon!

Posted in Animals, Easter, Mini Catalog 2020, Rabbit

Kylie’s Demonstrator Training Blog Hop-April 2020

Thank you for joining us for our Stampin’ Up!® Demonstrator Monthly Team Blog Hop! We are so happy that you could join us today for this blog hop for ideas and creative inspiration. We are a group of Stampin’ Up!® Demonstrators from around the world that are taking part in training that is helping us to build a successful Stampin’ Up!® business and reach some goals we have set. We really appreciate your support.
You may be starting here or have come from another blog – either way you can find the link list at the bottom of this post so that you can see every blog post and idea today.

This card is made using the Stampin’ UP!® Welcome Easter stamp set in the 2020 Stampin’ Up!® Mini Catalog.

Thank you so much for coming by today! We have an amazing line up of Stampin’ Up!® demonstrators from around the world, and we know you are going to love all the amazing projects that you are going to see today. Don’t miss one blog link. Remember you are currently on my page – Theresa McEntee, see who is below me to know where to go next.

Blog Hop List


Posted in Punch

Get Well World with Timeless Tulips

Hello and welcome to my blog today. In the midst of the Coronavirus, I decided to make a Get Well card for the World. There is so much healing that needs to be done right now. I know some of you have been affected more than others. I hope all of you and your families stay safe and well, and if anyone has gotten sick, I hope they recover completely.

I love the Timeless Tulips stamp set by Stampin’ Up!® and felt it was perfect for this card. The bright colors are Poppy Parade and Mango Melody.

Measurements: Poppy Parade cardstock (CS): 8 1/2 x 5 1/2 inches with a score line at 4 1/4 inches; Mango Melody CS: 5 3/8 x 4 1/8 inches; Whisper White CS: 5 1/8 x 3 7/8 inches, 5 x 3 inches and a 3 x 1/2 inch strip. You will also need a Whisper White CS that is 5 1/4 x 4 inches for the inside of the card.

Use the Poppy Parade ink to stamp the sentiment “Get Well Soon” onto the 3 x 1/2 inch strip of Whisper White CS. Use the largest tulip and stamp it in Poppy Parade ink onto the 5 x 3 inch Whisper White on the far right hand side. Tip: This is a Photopolymer stamp and you will get the best image if you stamp onto the Stampin’ Pierce Mat or use your Stampin’ Up! catalog. I cover my Stampin’ Pierce mat in white paper so the ink gets absorbed into the paper. The black cardstock is just to help you see the card piece better.

Now stamp the largest tulip in Poppy Parade ink in the upper left hand quadrant of the 5 1/8 x 3 7/8 inch Whisper White CS.

Add another large tulip on the right hand side in the center. Now use the smaller tulip and stamp it in Poppy Parade just under the large tulip in the upper left hand quadrant.

Using the Mango Melody ink, stamp the large tulip slightly higher and to the right of the one in the left upper quadrant. Stamp the tulip bud in Mango Melody just under the large Poppy Parade tulip on the right.

Stamp another large tulip onto the 5 x 3 inch Whisper White CS next to the Poppy Parade tulip. Stamp the fattest leaf in Granny Apply Green ink to the far left. Tip: Before you stamp an image that will be punched out, look at the punch to determine the placement. More on that later.

Continue to use the Granny Apple Green ink for the stems and leaves. There are two long stems. One leans to the right and the other is more straight. I used the one that leans to the right for the three tulips on the right.

Use the straighter stem on the tulips to the left.

Use the fattest leaf to stamp three leaves in Granny Apple Green ink.

With the Granny Apple Green ink use one of the skinny leaves to stamp a couple of leaves, then use the other skinny leaf to stamp a couple more leaves. This gives a nice variety of leaves and makes the bouquet look full.

Now you will see why I stamped the images the way I did. First punch out the leaf. There should be plenty of space to avoid punching out the Mango Melody tulip.

Punch out the Mange Melody tulip, then the Poppy Parade tulip last.

Apply Stampin’ Dimensionals to the back of each of the tulips and the leaf.

Tip: To make the Stampin’ Dimensionals last a little longer, I cut them in half as shown. This is much faster than cutting each one in half before you use it.

Adhere the Mango Melody tulip, then the Poppy Parade tulip. Next adhere the fat Granny apple Green leaf to the center of the bouquet.

Here is the completed card front.

Fold the 8 1/2 x 5 1/2 inch Poppy Parade cardstock at the 4 1/4 inch score line and use the Bone Folder to make the fold nice and crisp. This is the card base. Adhere the 5 3/8 x 4 1/8 inch Mango Melody CS to the front of the card base.

Adhere the stamped card piece to the card front.

Trim the sentiment a bit on each end. We are going to cut a banner end. The easiest way to make the banner symmetrical is to start with a center cut.

The next cut is from the upper corner to the top of the center cut. Repeat from the other corner.

Cut a banner end on both ends of the sentiment

Apply Stampin’ Dimensionals to the back of the sentiment and adhere it to the card front.

And Viola! You have a beautiful, soothing Get Well card. But wait….

You can step up the card a bit by adding a bow with a Glue Dot. This is the Crushed Curry 3/8 inch Seam Binding Ribbon in the Stampin’ Up! 2019-2020 Annual Catalog. Even though it is a different color than the Mango Melody, it seems to work well. But that is not all…..

There is always Bling! I added some colored rhinestones from the Holiday Rhinestone Basic Jewels to add some sparkle. Any of the 3 versions of this card would send a soothing Get Well Wish to someone who needs it. I am sending out Get Well Wishes to everyone and to Mother Earth as well.

Thank you so much for visiting today. I really enjoyed making this card. I hope you give it a try. The Timeless Tulips stamp set is wonderful to make cards for various occasions- Sympathy, Wedding, Friendship, Love, Birthday, Mother’s Day and Easter to name a few. This is a great stamp to start out with if you are just beginning to stamp at home because of its versatility.

I am an Independent Stampin’ Up!® Demonstrator and am happy to help you be more creative at home. If you need help starting out, please send me an email at theresastreasures.az@gmail.com or message me on Facebook at Facebook.com/theresastreaures.az/

Click on any image below to get to my Online Store and view that product.

Product List

Best wishes to you all for good health and healing!

Posted in Animals, Stampin' Up! 2019-2020 Annual Catalog

This is Knot Good

The state of the world is “knot” good. All I can do at this point is keep being creative to stay positive and pray that all will be well soon.

This little Get Well card is made with the Back on Your Feet stamp set by Stampin’ Up!® It’s good to add a little humor when the situation is not the best. I do hope that all of you are safe and well, and that your families are well too.

Measurements: Whisper White cardstock (CS): 8 1/2 x 5 1/2 inches with a score at 4 1/4 inches, 5 1/4 x 4 inches and 4 x 2 1/2 inches; Crushed Curry CS: 5 3/8 x 4 1/8 inches and 4 1/4 x 2 3/4 inches; Soft Suede CS: 5 1/8 x 3 7/8 inches. You will also need a 9 x 1/4 inch strip of the Birthday Bonanza Designer Series paper (DSP) -not shown.

Stamp the giraffe and the sentiment “This is knot good” onto the 4 x 2 1/2 inch Whisper White CS with black Memento ink.

I used a stamp from the Gallery Grunge stamp set to make the background. Stamp the image in Soft Suede ink. Gallery Grunge is a great stamp set to have on hand as you can make many different backgrounds.

Color the giraffe with the Crushed Curry Stampin’ Write Marker. One of the wonderful benefits of Stampin’ Up! is that the paper, ink, markers, ribbon, etc all match!

Color the giraffe’s spots with the Soft Suede Stampin’ Write Marker. Use the Basic Black Stampin’ Write Marker for the hooves.

Finish the giraffe with a little Petal Pink in the ears and Old Olive for the grass.

Use the Bone Folder to make a crisp fold on the 8 1/2 x 5 1/2 inch Whisper White CS at the 4 1/4 inch score to make the card base. Adhere the 5 3/8 x 4 1/8 inch Crushed Curry CS to the front of the card base.

Adhere the Soft Suede piece to the Crushed Curry piece on the card front.

Adhere the giraffe to the 4 1/4 x 2 3/4 inch Crushed Curry CS. Adhere the whole piece to the Soft Suede CS on the card front.

Cut two 2 inch strips from the 9 1/4 x 1/4 inch Birthday Bonanza DSP. Apply to the card front so they look like strips of tape, like on a scrapbook page.

I decided to make the inside of the card with a sentiment. I used Whisper White CS 5 1/4 x 4 inches and stamped the sentiment in Memento ink.

Adhere a 5 1/4 x 1/4 inch strip of the Birthday Bonanza DSP to the left side of the insert. Then adhere it to the inside of the card.

And Viola! You have a slightly humorous card to let someone who is having a hard time know that you are there for them.

The stamp set has a few other animals and sentiments, so I made a set.

I hope you enjoyed that card. I am very thankful you stopped by.

The 2019-2020 Stampin’ Up!® Annual Catalog will be good for a bit longer. The 2020-2021 Stampin’ Up!® Annual Catalog will be available as a PDF to Stampin’ Up!® Demonstrators on April 22, 2020. If you would like an early sneak peek of the catalog, join my team! You may order a Starter Kit which contains whatever you wish for $99 and you can choose $125 worth of product! If you are interested, email me at theresastreausres.az@gmail.com and I can walk you through the process. Otherwise come by my online store and see what there is to start being more creative today! Click here for the store. I recommend checking out the all inclusive kits. Order today and you can be crafting in no time!

Product List

See you next time! Take care, be safe and be well!