Posted in Cars, Cling Stamp, Designer Series Paper, Occasions Catalog 2019

Fast Car Card

Still looking for a great card for your guy? This is a fast one, and is the last in a series of 3 masculine cards using the Stampin’ Up! Geared Up Garage Stamp Set. Today I introduce you to a card made with Stampin’ Up! Designer Series Paper.

Stampin’ Up! has several types of paper, one being Designer Series (DSP). This paper is a little thinner than cardstock and will have a pattern on both sides. Some come in 12 x 12 inch size. The Classic Garage Designer Series Paper comes in 6 x 6 inches with 4 each of 12 double-sided designs.

The designs are pictured above. For this card I chose the lug nut design.

Measurements: Whisper White card base 8 1/2 x 5 1/2 inches folded in half at 4 1/4 inches; Whisper White 3 1/2 x 2 inches and 3 x 3/4 inches; Shaded Spruce 5 1/2 x 3 1/4 inches and Classic Garage DSP 5 1/2 x 3 inches.

This card will also be pretty quick to make. First I adhered the DSP to the Shaded Spruce. Then I adhered that piece to the card base.

I stamped the car image in Memento ink onto the Whisper White 3 1/2 x 2 inch piece.

Next, I stamped the sentiment “All Geared Up To Celebrate” onto the 3/4 inch strip of Whisper White. It is important to get the label on straight so you can stamp straight! See the post on the Stampin’ Up! Cling Stamps to help you do this.

I cut the banner edge as shown.

I added 3 Stampin’ Dimensionals to raise the sentiment up a bit.

You can leave the car this way, or choose to color it. Refer to the first post in this series for instructions on coloring and shading with the Stampin’ Blends markers.

So there you have it my friends! A fast car card that was fast to make!

Stampin’ Up! continues their Sale-a-bration sale! For every $50 you spend, you can choose a free product from the Sale-a-bration brochure.

Stampin’ Up! Products used include: Stamp Set: Geared Up Garage #148590; Cardstock: Whisper White #100730 and Shaded Spruce #146981; Classic Garage Designer Series Paper #148482; Ink: Memento #132708; Stampin’ Blends: Real Red combo pack #147935; Clear Block: C #118486 and D #118485; Paper Snips #103579; Stampin’ Dimensionals #104430; and Multipurpose Liquid Glue #110755.

Posted in Cling Stamp, Father's Day, Grunge style, Occasions Catalog 2019, Stamping-off technique

Father’s Day in January?

This is the 2nd in a series of Blog posts about masculine cards. I have had many a time when a holiday has crept up on me before I was able to get a card ready. Ever had that happen? Well, today I am making a Father’s Day card, mostly because the sentiment is in the stamp set -Geared Up Garage-which I started using the other day. But also, I want to be ready this year!

This style of card is “grunge”. It is a lot easier than it looks!

Measurements: Whisper White card base 8 1/2 x 5 1/2 inches folded in half and burnished with the Bone Folder, Basic Black 5 1/4 x 4 inches, Whisper White 4 1/2 x 3 1/4 inches and a scrap of Whisper White 2 3/4 x 2 1/2 inches, and Real Red 2 1/4 x 1 inch.

You will also need Memento ink and a C block to start. Later you will need an A, B, C and D block.

Just a reminder for how to put the label on the new Cling Stamps. First remove the stamp. Then turn the label sheet so the words are backward. Pinch the middle of the desired label.

Gently remove the paper backing without removing the label. Place the stamp with the foam side down over the label, taking care to line up the edges. Press firmly.

Now gently remove the label attached to the stamp. This is very sticky! Do not set it down on anything. Put it on the block right away and when finished, directly back into the stamp case. I do not always put the labels on, but I typically will put on the labels for sentiments.

Use the Memento ink and stamp the Father’s Day sentiment onto the scrap of Whisper White. Note: You do not need the Piercing mat for the red rubber stamps, just stamp onto a smooth firm surface.

Use your paper snips to cut around the sentiment leaving a slight border.

Adhere the sentiment to the Real Red piece. Now cut a banner edge, first by making a cut in the center, then from each corner to the center as shown. Set aside.

Now for the “grunge”! Mount the lug nuts on an A block, the oil can on a B block, the tool box on a C block and the oil spill on a D block (Clockwise from top).

Start with the tool box since it is one of the larger images. Stamp an odd number of times.

Now stamp the oil can and then the lug nuts an odd number of times. I messed up and stamped 6 lug nuts! Fortunately the sentiment with cover one!

We are going to use a technique called “Stamping Off” for stamping the oil spill. First apply Memento ink to the oil spill stamp and stamp it on a scrap of paper. Then stamp onto the card piece. This gives a slightly lighter image. That way the oil spill doesn’t over-power the rest of the images. It just makes it “grungy”.

Continue to first stamp on the scrap paper, then on the card piece, until you like the result.

Adhere the Basic Black to the folded card base. Now adhere the stamped “grunge” piece.

Apply Dimensionals to the back of the sentiment banner and adhere to the front of the card. Viola! You have a Father’s Day card ready to go! Now, if you can just put it away somewhere where you can find it!

Stampin’ Up! products used include: Stamp set: Geared Up Garage #148590; Cardstock: Whisper White #100730, Basic Black 121045 and Real Red #102482; Ink: Memento #132708; Blocks A #118487, B #117147, C #118486 and D #118485; Paper Snips #103579; Dimensionals #104430; Multipurpose Liquid Glue #110755

Posted in Cling Stamp

Butterflies in Winter

One of the scenes I love in Spring is of the butterflies and flowers. So, even though it is still winter I can bring this scene to life on a card. For this card I used Stampin’ Up! Beauty Abounds and the ‘You’re so Awesome’ sentiment from Flowering Desert. The colors are Shaded Spruce and Pineapple Punch. The card base is in Whisper White cardstock.

I started out with this stamp from Beauty Abounds, and the Shaded Spruce ink.

Apply the ink by tapping on the ink pad, straight up and straight down, until you have ink evenly on the raised part of the stamp. If you have ink on the red rubber around the stamp, or on your block, try tapping more lightly.

Press the stamp straight down on your cardstock and apply moderate but even pressure for about 5 seconds. Take care not to rock the block. Lift the stamp straight up. Following this procedure each time will allow you to get a nice clean image.

Add a few butterflies in Pineapple Punch ink.

Stamp the sentiment from Flowering Cactus in Shaded Spruce onto a strip of Whisper White cardstock measuring 3/4 inch by 4 inches.

The trick to getting a nice banner edge, is to start by cutting straight in at the middle.

Next, cut from one corner to the middle.

Then from the opposite corner to the middle.

Viola!

Now, adhere the Whisper White with the sentiment onto a strip of Pineapple Punch measuring 1 inch by 4 1/2 inches. Then cut the banner edge as shown.

I used Stampin’ Dimensionals to apply the sentiment to the card. These are a piece of foam with adhesive on both sides.

I applied the Dimensionals as shown. This will lift the sentiment up from the card a bit and add, well, add dimension to your card.

The Whisper White card base measures 8 1/2 x 5 1/2 inches and is folded in half. I trimmed the butterfly and flower piece to 2 1/2 x 3 5/8 inches and adhered it to a piece of Pineapple Punch measuring 2 5/8 x 3 3/4 inches. The first layer is Shaded Spruce at 5 1/4 x 4 inches. I added sequins to put some sparkle on the card.

Supplies used are : Cardstock: Whisper White #100730, Shaded Spruce #146981, and Pineapple Punch #146971; Ink: Shaded Spruce #147088 and Pineapple Punch #147141; Stamp sets: Flowering Desert #148700 and Beauty Abounds #148726; Clear Blocks: E #118484 and H #118490; Gingham Gala Adhesive Backed Sequins #148561; Paper Snips #103579 and Multipurpose Liquid Glue #110755.

Posted in Cling Stamp, Occasions Catalog 2019

New Cling Stamps from Stampin’ Up!

Hello awesome stampers!  I would like to show you how to make this card, but I first want to spend some time on the new type of stamps called Cling Stamps. These are extra sticky so that they will stay on the acrylic block. However, some folks have had problems with them sticking to other things.

The ‘Beauty Abounds’ stamp set by Stampin’ Up! is an example of a Cling Stamp. You will know this by looking above the title of the stamp set.

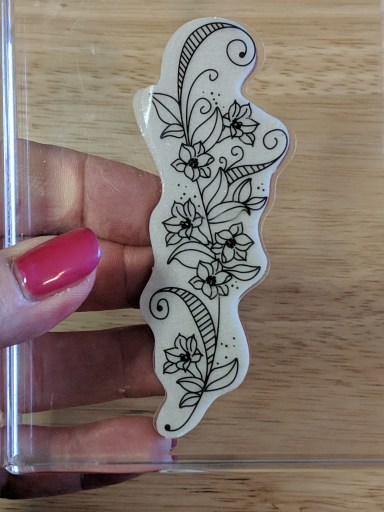
Inside the case there will be the red rubber stamp attached to foam with a protective paper on the back, and the plastic vinyl sheet with the images on it.

First, gently remove the stamp from the red rubber/foam sheet.

Next, peel the paper off the back.

The plain foam will stick to the acrylic block, but you cannot see the image. Many stampers leave the images off and just use the stamp like this. However, sometimes you cannot see the orientation of the image.

I accidentally put the butterfly on at the wrong angle because I was using the stamp without the image on it.

Carefully peel the protective cover off of the vinyl image and do not let anything touch it. It is very, very sticky!


Taking care to line up the edges, place the rubber stamp over the image and press lightly to adhere them together.


Gently pull the stamp away from the image sheet. Again, it is very sticky!

Place the stamp with the image on it directly onto an acrylic block. DO NOT LAY THE STAMP DOWN ON PAPER, THE DESK OR ANYTHING ELSE!  It will stick to the paper and then be unusable! You may not be able to remove it from the other surfaces.

When you are done stamping, carefully remove the stamp with the image on it from the block and put it back in the stamp case. When removing the stamp with the image on it, be sure the plastic sheet with the image comes off first and does not tear away from the foam layer. The best way to do this is to slide something between the image sheet and the block–like a fingernail or guitar pick.

Join me tomorrow and we will make the card above!