Posted in 2021 Stampin' Up! July-December Mini Catalog, 3D Embossing Folder, Animals, Birds, Fun/Fancy fold card, Stampin" Blends Alcohol Markers, Winter Holiday

Stampin’ Up!® Happy Holly Days Happy Christmas card

I am on Day 9 of the “12 Days of Christmas Card Making Challenge” with my stamping buddy Christy. Today’s card is a Stampin’ Up!® Happy Holly Days Happy Christmas Card. Each day of this challenge my blog will focus on a new holiday card. The challenge goes until December 10, 2021. I plan to showcase a different stamp set with each card. This will allow you plenty of time to see the fabulous products that are available in the 2021 Stampin’ Up! July to December Mini Catalog, and to order in time to make your own Christmas cards! You can order HERE when you have your list ready! Tomorrow there is FREE shipping!

I was inspired to make this particular card by a Color Challenge that Stampin’ Up! puts out every month. This months colors are Mossy Meadow, Real Red, Crumb Cake and Gold. This Happy Holly Days Happy Christmas card shows all of these colors.

Measurements

Happy Holly Days Happy Christmas card

  • Mossy Meadow Card Stock (CS) card base: 5 1/2 x 8 1/2 inches scored at 4 1/4 inches. One end has been cut 1/2 inch shorter with the scalloped pattern in the Basic Borders Dies.
  • Basic White CS: 2 1/4 x 5 1/2 inches, 2 3/4 x 5 1/4 inches, 3 x 3 1/2 inches and 3/4 x 3 1/2 inches(not shown).
  • Real Red CS: 2 x 5 1/2 inches
  • Gold Brushed Metallic CS: 3 x 4 1/4 inches. Cut with the 3rd smallest Scalloped Contours Die.
  • Crumb Cake CS: 1 1/4 x 5 1/2 inches. Embossed with the Tasteful Textile 3D Embossing Folder

Stamping

Stamp the bird image in Sahara Sand Ink onto the 3 x 3 1/2 inch Basic White CS. Then stamp the holly image 3 times onto the 2 3/4 x 5 1/2 inch Basic White CS.

Next stamp the holly image 2 times onto the corners of the 2 3/4 x 5 1/4 inch Basic White CS. Then stamp the sentiment in Mossy Meadow Ink. Also in Mossy Meadow Ink, stamp the sentiment “Happy Christmas” onto the 3/4 x 3 1/2 inch Basic White CS (not shown).

Coloring With Stampin’ Blends Alcohol Markers

I love the Stampin’ Blends Alcohol Markers because you can blend the colors and create beautiful images. My bird doesn’t look as realistic as some, but I am satisfied with the results. I learned to use the Dark Blend first for small areas to create shadows. Then blend in the Light color. The colors here are: Dark Daffodil Delight, Dark Basic Black, and the Light and Dark Crumb Cake, Real Red and Mossy Meadow.

The same procedure, Dark Blend first followed by the Light, is followed for the holly images.

Fussy cut the bird and holly. Also fussy cut the “Happy Christmas” sentiment (not shown).

Tip: Sometimes it is very difficult to cut exactly and not have any white edge. I just use the Light Blend along the outer edge to hide the white.

Assembling the Card

Adhere the inside sentiment and the embossed Crumb Cake CS strip to the inside of the Mossy Meadow CS card base. Adhere the 2 x 5 1/2 inch Real Red CS to the front of the card base.

Now with Stampin’ Dimensionals adhere the Gold Brushed Metallic CS scalloped rectangle to the card front. Follow by adhering the bird with Stampin’ Dimensionals.

Use Mini Stampin’ Dimensionals on the center of the back of the holly leaves. Adhere as desired under the bird. To finish, adhere the sentiment “Happy Christmas” under the Gold scalloped rectangle.

Add some Wonderful Gems to make the card front sparkle a little more.

Voila! You have a very festive Happy Christmas card!

I am submitting this card to the #sucolorchallenge and to my Glimmer Gals Team page for our color challenge as well. I hope you enjoyed Day 9 of the 12 Days of Christmas Card Making Challenge. See you tomorrow with card #10!

Supply List

Click on any photo to go to my Online Store and start shopping!

Product List

Thanks for stopping by. Have a most wonderful day!

Theresa

Posted in 2021 Stampin' Up! July-December Mini Catalog, Animals, Cat, Designer Series Paper, Fun/Fancy fold card, Winter Holiday

Stampin’ Up!® Sweet Little Stockings Pet Christmas Tree card

I am on Day 5 of the “12 Days of Christmas Card Making Challenge” with my stamping buddy Christy. Today’s card is a Stampin’® Up! Sweet Little Stockings Pet Christmas Tree card. Each day my blog will focus on a new holiday card. The challenge is until December 10, 2021. I plan to showcase a different stamp set with each card. This will allow you plenty of time to see the great products that are available in the 2021 Stampin’ Up! July to December Mini Catalog and to order in time to make your own Christmas cards! You can order HERE when you have your list ready!

I wanted to showcase the totally cute Sweet Stockings Designer Series Paper (DSP). My thought was to make a Christmas tree out of all the adorable pets. Here is what I came up with using a Fun Fold for Fun Fold Friday!

Measurements

Stampin’® Up! Sweet Little Stockings Pet Christmas Tree card

  • Evening Evergreen Card Stock (CS) card base: 4 1/4 x 11 inches.
  • Basic White CS: 4 x 5 1/4 inches and a scrap that is at least 1 inch wide.
  • Old Olive CS: 2 1/8 x 5 3/8 inches, 1 7/8 x 4 3/8 inches and two at 7/8 x 1 7/8 inches.

Cutting out the Pet Images

Here are all the awesome Sweet Stockings DSP designs. (Buy some HERE).

These are the adorable pets for the Stampin’ Up! Sweet Stockings Pet Christmas Tree card that I fussy cut from the Sweet Stockings DSP. The puppies, the kitten and the mouse in the stocking come from the design with all the little stockings.

Making the Fun Fold Card Base

I actually struggled with this one. I believe I finally came up with easy-to-follow instructions. If not, please leave me a comment with any suggestions you may have. Here is the template.

Scoring the Evening Evergreen CS card base. (Score=Dashed lines/ Cut=Solid line)

  1. Score at 4 1/2 inches from 2 inches to the top.
  2. Next score at 5 1/2 inches from 2 inches down to the bottom.
  3. Finish scoring at 9 inches and then 10 inches from 2 inches to the top.

Turn the card base and cut from 1 inch to 6 1/2 inches at 2 inches from the left side.

Fold as shown in the left-hand photo. Use your Bone Folder to make the folds nice and crisp.

Stamping

Before you stamp onto the 4 x 5 1/4 inch Basic White CS, remove a 1 x 2 inch piece from the upper right-hand corner. Use this piece to stamp the larger present in Memento ink. On the remainder of the 4 x 5 1/4 Basic White CS use Memento ink to stamp a cascade of the small presents. Stamp the sentiment “Santa Paws is Coming to Town” in the center. On the scrap of Basic White CS stamp the sentiment “Peace Joy & Kisses”. I had to stamp it twice to get a dark stamp.

Color the presents with the Cherry Cobbler and Old Olive Stampin’ Blends Alcohol Markers. Adhere the piece with the “Santa Paws” sentiment to the inside of the Evening Evergreen CS card base.

Creating the Card Front

Adhere the Old Olive CS card pieces as shown.

Building the Pet Christmas Tree

Start on the right by placing the dog with the wreath about 1/4 inch from the bottom. Adhere the little dog in the sweater so he looks as though he is standing on the black dog’s back. Add a second dog in the sweater to the panel behind.

Adhere the rest of the cute pets stacking the next one on the lower pet’s back. When the card is open it will look like the photo on the left. The right-hand photo shows the card folded up.

Build the left side starting with the Golden Retriever wrapped in Christmas lights. Add the cats and mice. Top it off with the cute little puppy. Add the Christmas ornaments. Now adhere the large colored present with a Stampin’ Dimensional to the bottom left-hand corner. Finish by adhering the sentiment to the large present.

Add some Wonderful Gems and Voila! you have an adorable Sweet Little Stockings Pet Christmas Tree card for your favorite pet-lover!

I am so glad you stopped by for the 5th day of my 12 Days of Christmas Card Making Challenge! I hope you will come by for tomorrow’s card! Leave me a comment as to what you think about my first 5 days of Christmas cards. Which is your favorite card?

Supplies

Click on any photo to go directly to my Online Store and start shopping!

Product List

Cheerio!

Theresa

Posted in 2021 Stampin' Up! July-December Mini Catalog, Fun/Fancy fold card, Gratitude/ Thanks, Shaker Card, Stampin' Up! 2021-2022 Annual Catalog, Thanksgiving

Stampin’ Up!® Sweets & Treats Cloche Dome Card

Happy Thanksgiving!

Today I plan to spend some time reflecting on all I have to be grateful for. An “attitude of gratitude” really keeps me from feeling down during the holidays. I am very blessed to be able to spend Thanksgiving with family this year. We missed last year, so I feel especially grateful to be visiting this year.

I have a very fun 3D card for you today:

Doesn’t that apple pie look delicious? I actually prefer pumpkin pie, but the apple pie is a close second. Which pie do you like best? Please leave me a comment below.

Measurements

  • Cinnamon Cider Card Stock (CS) card base: 5 1/2 x 8 1/2 inches
  • Cinnamon Cider CS: 3 3/8 x 4 5/8 inches
  • Basic White CS: 3 3/4 x 3 1/2 inches and a scalloped rectangle from the Scalloped Contour Dies
  • Hand Penned 12 x 12 inch Designer Series Paper (DSP): 3 3/4 x 3 3/4

The Fun Fold Card Base

The card base is made by cutting 3/4 inch off of the top and bottom of the front panel. Emboss the back panel with the Timber 3D Embossing Folder. Set aside.

Trivia: Anyone know what a cloche (Klōsh) is? I didn’t. One definition of cloche from French, literally “bell”, is a transparent cover shaped like a bell.

Stamping & Coloring The Pie Pan

Use the Cloche Dies to cut the shape of the dome from the Scalloped Contour Die rectangle. Take care to position the die so that it is about 1/4 inch down from the top and that it is centered. Tip: I use sticky note tape to hold my dies in position while putting them through the Stampin’ Cut & Emboss Machine. Save the cut out piece. Stamp the pie stand in Memento Black Ink. Use Stampin’ Blends Alcohol Markers in Smoky Slate to color the stand. Tip: I color in the “shadows” first with the Dark Smoky Slate Blend.

Then use the Light Smoky Slate Stampin’ Blend marker to blend the border of the dark into the light. Keep moving from the edges to the center until it is all colored in.

Stamping & Coloring the Pie

Now stamp the pie onto the cut out piece of the dome. Color the pie pan with Cinnamon Cider Stampin’ Blends. Start with the Dark Cinnamon Cider Blend on the edges. Use the Ivory Stampin’ Blend to color the pie crust. Since there is only one shade of the Ivory, you can make a shadow on the edges by coloring the first layer as shown.

For the pie pan, blend with the Light Cinnamon Cider marker from both edges until you reach the middle of the pie pan. Note: I used a wee bit of the Light Cinnamon Cider Blend on the pie crust. To finish the crust I used the Ivory Blend to smooth out the darker edges until I covered the entire crust. I used the Light Real Red Stampin’ Blend for the holes in the pie crust since I am making an apple pie.

Stamping the Inside

Orient the 3 3/4 x 3 1/2 inch Basic White CS card piece with the 3 1/2 inch edge on either side. Using the Memento ink, stamp the “love ya” sentiment in the center. Add the heart in Blushing Bride ink.

Assembling the Card

Adhere the inside Basic White CS panel to the inside of the Cinnamon Cider CS card base so that it is hidden when you close the front panel. Adhere the Hand Penned DSP to the front panel. Set aside.

Do Not Adhere, but just place the complete Scalloped Contour rectangle with the pie dome on the 3 3/8 x 4 5/8 inch Cinnamon Cider CS. Adhere the pie dome without getting adhesive on the Scalloped Contour piece. Remove the Scalloped Contour rectangle. Draw some steam over the pie with the Black Stampin’ Write Marker. Yummy!

Assembling the Shaker Cloche Dome

Place about 1/2 tsp of the gold and orange Sequins for Everything on the center of the dome cut out. Remove the strip covering the adhesive on the bottom of the Cloche Shaker Dome.

Carefully line up the inside edge of the shaker dome with the dome on the Cinnamon Cider CS. Push firmly around the edge of the dome. Once adhered, remove the strip covering the adhesive on the top of the Cloche Shaker Dome.

Apply adhesive to the back of the Scalloped Contour rectangle. Place it carefully over the dome and push down to make it stick. Now the sequins can move around inside the dome! Fun!

Finishing the Card

Adhere the shaker dome card piece to the front panel of the card base. Take care not to apply adhesive to the very top and bottom. Include a sentiment if desired. I really like the sentiment “any way you slice it, I’m thankful for you”.

Voila! Such a yummy looking Sweets & Treats Cloche Shaker card! Also a great Thanksgiving card to share your gratitude with a loved one.

Supplies To Make This Card

To go to my online store, click on any of the photos below.

Product List

I am very thankful that you are visiting my blog!

Starting November 29, 2021 I am embarking on a 12 Days of Christmas Card Making Challenge with my fellow stamping friend Christy. Our plan is to create and blog about a new Christmas card every day for 12 days! Come by on Monday, November 29th and see what I have in store for you!

Again- Happy Thanksgiving!

Theresa

Posted in 2021-2022 Stampin' Up! Annual Catalog, Designer Series Paper, Fun/Fancy fold card, Gratitude/ Thanks, Mystery Stamping

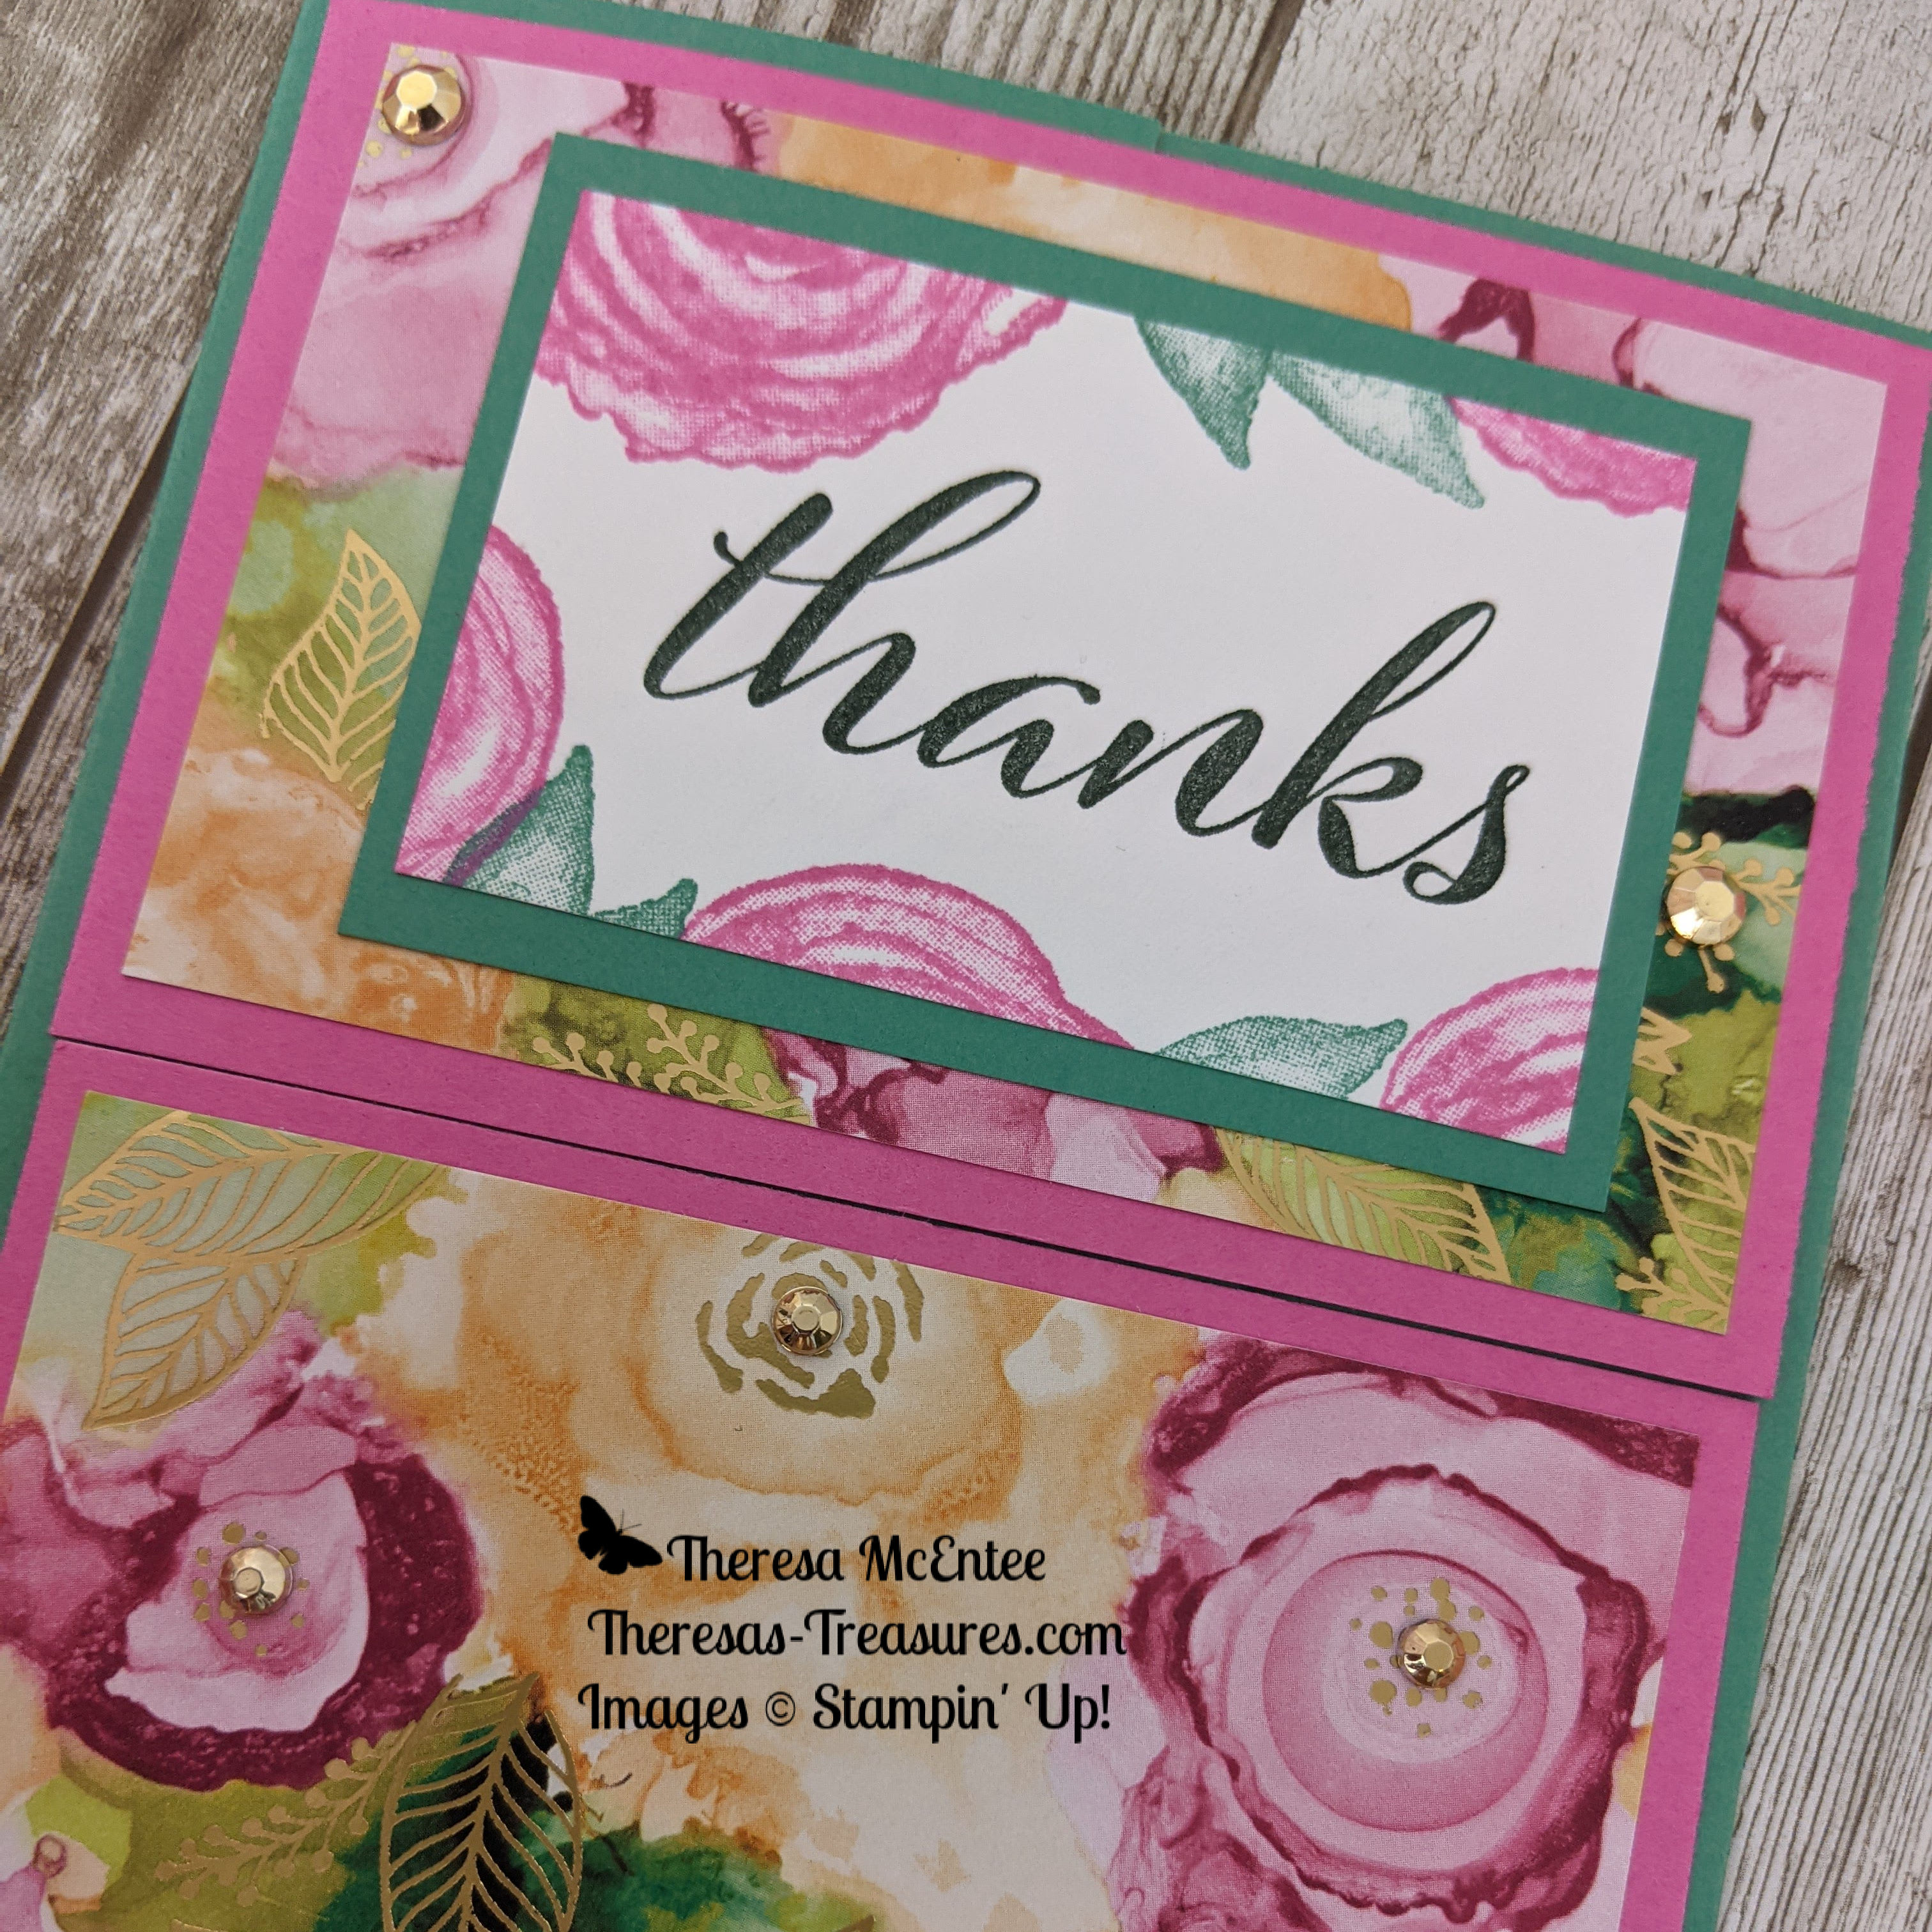
Fun Fold Friday- Stampin’ Up!® Artistically Inked Thank You Card

Join me today to make this gorgeous Artistically Inked Thank You card!

It is gradually getting cooler here in Arizona, but I am not quite ready to show Christmas cards yet. Today I have a Fun Fold that I had my Stamping Gems Team members make as a Mystery Stamping activity.

Fun Fold Friday is on!

Mystery Stamping is a fun way to make cards together. You give the clues one by one. Each person picks the paper and stamp set they want to use. All of the cards are uniquely different. Usually you do not show the finished card until the end.

Clue #1 Supplies

  1. Color Card Stock (CS) Color A: 8 1/2 x 5 1/2 inches with score lines at 2 1/8 and 6 3/8 inches. (This is the card base and it is in portrait orientation.) You also need a 3 x 2 inch piece.
  2. Color CS Color B: choose a color to coordinate with Color A. Two 4 x 2 5/8 inches.
  3. Designer Series Paper (DSP) to coordinate with the Color A and Color B CS. Two 3 3/4 x 2 3/8 inches.
  4. Basic White CS: 2 3/4 x 1 3/4 inches and 5 1/4 x 4 inches.
  5. A sentiment stamp to fit inside the 2 3/4 x 1 3/4 inch Basic White CS card piece.
  6. Images to make a border around the sentiment and the inside of the card.
  7. Coordinating ink, embellishments, adhesive and Stampin’ Dimensionals.

Clue #2

Stamp your sentiment onto the 2 3/4 x 1 3/4 inch Basic White CS. Stamp images around the sentiment.

Clue #3

Stamp the images around the outside edge of the 5 1/4 x 4 inch Basic White CS. Leave the center blank so one could write a note.

Clue #4

Adhere the sentiment to the 3 x 2 inch Color A CS. Adhere the 5 1/4 x 4 inch Basic White CS to the center panel of the 8 1/2 x 5 1/2 inch Color A CS.

Clue #5

Adhere the DSP to the Color B CS. Repeat for the other pieces. You should have two identical card pieces.

Clue #6

Bring the 2 side panels together so they meet in the center of the card. Apply adhesive to the back of the left half of one of the card pieces with the DSP on it. Adhere this to the top of the left-hand panel. Now apply adhesive to the back of the right side of the second DSP card piece. Adhere it to the bottom of the right-hand panel.

Clue # 7

Use Stampin’ Dimensionals to adhere the sentiment to the center of the upper DSP card piece.

Clue #8

Use embellishments as desired.

Voila! That is the Mystery Stamping Fun Fold using the Artistically Inked stamp set and Expressions in Ink DSP! The Mystery Stamping is a really fun way for my Stamping Gems Team and me to stamp together as part of our monthly team meeting.

Product List

I hope you have some time to do some crafting this weekend! I find stamping and card making is so peaceful and relaxing.

Bye for now!

Theresa

Posted in Avid Stamper, Emboss Powder, Fun/Fancy fold card, Nature

Stampin’ Up! Eden’s Garden Fun Fold Friday Birthday Card

Hello and Happy Friday! I am so happy to be so close to the weekend! Today I am sharing my Stampin’ Up! Eden’s Garden Fun Fold Friday Birthday Card! Yes, Fun Fold Friday is back!

Disclaimer: Today’s card is a little challenging. I am using few techniques. Let me know if you have any comments or questions about the instructions.

Today I have a very special card to share. My neighbor, who I have know for about 23 years, is turning 98! I am so excited for her! I am giving her this card to help her celebrate! Happy Birthday Jane!

The Card Base

Using the Stampin’ Up! Paper Trimmer I created the card base in Soft Succulent Card Stock (CS) with the measurements as shown above. All of the lines are scored except the two vertical lines at 1 1/4 inches and 4 1/4 inches which run from 1 inch to 5 1/4 inches in length. You will need to cut the paper along those lines. Fold as shown above.

Measurements

The first layer is Evening Evergreen CS. You will need two 1 x 3 inch pieces, a 3 x 2 3/4 inch piece and a
5 1/4 x 3/4 inch piece. The patterned paper is some of the Ever Eden Cotton Paper that I embossed with Gold Emboss Powder. You can see how to make your own patterned paper HERE. Each measurement is 1/8 inch smaller than the Evening Evergreen CS. You will need two 7/8 x 2 7/8 inch pieces, a 2 7/8 x 2 5/8 inch piece and a 5 1/8 x 5/8 inch piece. If 1/8 inches drives you nuts, you could decrease the Evening Evergreen CS measurements by 1/4 inch instead. The border would be a bit thicker.

The Gold Foil circle is from the Tasteful Labels Dies. The square is made using Partial Die Cutting with a die from the Scalloped Contours Dies. The small flower sprigs are in the Eden Dies. The center photo shows the “Happy Birthday” sentiment from the Peaceful Moments stamp set die cut with the Layered Circle Dies. The leaves and berries image is from the Eden’s Garden stamp set. This is fussy cut.

Putting the Card Base Together

The first step is to adhere the Gold Embossed Ever Eden Cotton Paper to the Evening Evergreen CS. I used a thin layer of the Multipurpose Liquid Glue spread with my finger on the back of the Embossed Cotton Paper. Then adhere these card pieces to the corresponding spot on the card base.

Adhere the 2 7/8 x 2 5/8 inch Gold Embossed Ever Eden Cotton Paper to the 3 x 2 3/4 inch Evening Evergreen CS. Follow by using Stampin’ Dimensionals to adhere the Gold Foil scalloped piece. Adhere this card piece to the center of the card base.

Adding The Decor

Use Stampin’ Dimensionals to adhere the stamped leaves and berries card piece to the center of the Gold Foil scalloped square. Adhere the “Happy Birthday” sentiment to the Gold Foil circle. Then use Stampin’ Dimensionals on the bottom half to adhere it to the front of the card base. Note: I put the Stampin’ Dimensionals only in the center of the stamped leaves and berries piece so that I can insert the flower sprigs around the edges.

Insert several of the Evening Evergreen CS flower sprigs around the sentiment and around the leaves and berries image. Add the Gold Foil flower sprigs.

Add a 5 1/4 x 3 inch Very Vanilla CS to the inside of the card. I stamped a few leaves at the edge in Evening Evergreen ink.

Bling!

Now for some Bling! The Garden Gems are really interesting. They appear to be Evening Evergreen with gold accents, but when photographed turn blue and red in places! Very cool!

Voila! You have a very special birthday card that is a little challenging but worth the effort!

It was so nice to have you drop by today. I hope you try this card out. This particular fun fold lends itself to many great cards!

Supplies- Shop Here
November Host Code: BAKE6KM6*

*Use the host code when you order $50 or greater and receive a free gift from me!  If your order is over $150, please do not use this code because you can use the Stampin’ Rewards yourself. Any questions-shoot me an email at theresastreasures.az@gmail.com

You may also click on any photo below to go to my Online Store

Product List

Start With Savings Starter Kit Promotion – November 4-30!

The Start with Savings Starter Kit promotion allows you an excellent opportunity to purchase your Starter Kit at a great deal! The Starter Kit is usually $99 which is already an awesome deal! For a limited time you may choose a custom Starter Kit for only $75!!!  This is an unbeatable bargain for Stampin’ Up! product with a value of $125!

Choose your custom Starter Kit today and join my Stamping Gems Team HERE

Benefits of Joining: Early Access to New Product, 20% or more discount on future orders and becoming part of the Stamping Gems Team with a monthly meeting featuring Mystery Stamping and a group Facebook page!

Hope to see you on my Stamping Gems Team!

Have a most wonderful day!

Theresa

Posted in Emboss Powder, Fun/Fancy fold card, Gratitude/ Thanks

Kylie’s International Blog Highlights Gallery- November 2021- Stampin’ Up!® Eden’s Garden Thank You card

Hello and welcome to Theresa’s Treasures Paper Crafts! Today I am taking part in Kylie Bertucci’s Monthly International Blog Highlights Gallery. The theme is- Thank You.

In this gallery, you can see thank you cards made by folks from all over the world! I hope you enjoy my card and then take the time to see everyone else’s inspiring creations by visiting the gallery. You can get to the gallery by selecting the Vote For Me button at the end of this blog or by clicking HERE. I would be so grateful if you stop by and vote for my card!

Here is my Eden’s Garden Thank You card. The card is made more elegant by embossing with the Gold Emboss Powder onto the Ever Eden Cotton Paper and using the Gold Foil Sheets with the Eden Dies. The extra sparkle on the flower sprig is from the Garden Gems. The sentiment is part of the Nature’s Harvest stamp set which has a coordinating label die in the Harvest Dies.

The Eden’s Garden Collection is available for purchase now!

I am a Stampin’ Up! Demonstrator and I have an Online store. If you do not already have a demonstrator I would love for you to shop with me. Shop my Online store HERE

Measurements

Card Base: Soft Succulent Card Stock (CS) 10 x 5 1/2 inches scored at 3 and 7 1/4 inches.

Basic White CS: 5 1/4 x 4 inches.

Ever Eden Cotton Paper: 5 1/2 x 4 1/4 inches

Evening Evergreen CS: 5 1/2 x 2 1/2 inches

Gold Foil Sheet: 5 1/2 x 2 inches

The sentiment label is created with a die cut Gold Foil Flower Sprig from the Eden Dies, an Evening Evergreen CS Stitched Rectangle from the Stitched Rectangle Dies and a label from the Harvest Dies. I used the Nature’s Harvest stamp set for the “Thank You” which is stamped in Evening Evergreen ink.

How To Emboss the Ever Eden Cotton Paper

When I first felt the Ever Eden Cotton paper it reminded me of tissue paper used in wrapping gifts, but thicker. The paper cuts well with the Stampin’ Up! Paper Trimmer. Be sure you have a fairly new blade. Cut the paper into four 5 1/2 x 4 1/4 inch pieces. In the photo on the left, I stamped one type of leaf in Versamark and used the Gold Emboss Powder followed by the Heat Tool. As you can see in the second photo, I stamped and embossed a second type of leaf.

In the left-hand photo, I stamped and embossed a third type of leaf. To finish it off, I stamped a fourth type of leaf. The resulting design turned out to make a great pattern!

How To Assemble the Card

Use the gorgeous Eden Dies to cut a border on the 5 1/2 x 2 inch Gold Foil Sheet, the 5 1/2 x 2 1/2 inch Evening Evergreen Card Stock (CS) and the edge of the 3 inch left hand panel on the card base.

Use the Stampin’ Up! Paper Trimmer to cut the Eden Cotton Paper that has been embossed into two 5 1/2 x 2 1/8 inch strips. Use the Multipurpose Liquid Glue spread thinly and evenly to adhere the Ever Eden Cotton Paper to the panels on the card base as shown.

Adhere the Gold Foil and the Evening Evergreen die cuts together as shown. Adhere them to the lower panel as shown.

When you fold it up, it will look like this.

For the inside of this card I stamped another sentiment from Nature’s Harvest. To make it more interesting I stamped off once then stamped the main floral image from Eden’s Garden over the sentiment.

Add the Evening Evergreen CS Stitched Rectangle label to the card front applying adhesive only to the left side. Adhere the Basic White CS “Thank You” label with Stampin’ Dimensionals. Add the Gold Foil floral sprig and the Garden Gems.

The Completed Card

Voila! You have a gorgeous elegant Thank You Card!

Supplies

SHOP HERE

Product List

I am so happy you came to visit today! I hope you have some time to craft and make this gorgeous card!

Theresa

Posted in 2021 January-June Stampin' Up!®Mini Catalog, 3D Technique, Fun/Fancy fold card, Gratitude/ Thanks, Hello

Stampin’ Up!® Hydrangea Haven Pop-Up Gift Card

Hello and Welcome to Fun Fold Friday! Today I have Pop-Up Gift Card made with the Hydrangea Hill Designer Series Paper (DSP) and Hydrangea Haven stamp set. This is a terrific set for practicing the Two Step Stamping Technique.

This awesome gift card holder is really very simple to make with the photographic tutorial that follows.

Measurements

Measurements: Misty Moonlight Card Stock (CS) card base: 4 1/4 x 9 3/4 inches with score lines at: 3, 4 1/4, 5 1/2 and 8 1/2 inches; Very Vanilla CS: two, cut at 2 3/4 x 4 inches; Hydrangea Hill DSP: striped piece: 2 3/4 x 4 inches and floral piece: 1 x 4 inches. You will also need 16 inches of the Misty Moonlight 2020-2022 In Color Ribbon.

Stamping

The first stamping is in Gorgeous Grape ink onto one of the 2 3/4 x 4 inch Very Vanilla CS. The stamp is from the So Sentimental stamp set. This is one of my favorite large sentiments which can be used in a variety of settings.

Sadly, the So Sentimental stamp set is on the Retired List and will only be available until May 3, 2021. Here is the Retired List. I recommend ordering early as product is only available while supply lasts.

The next stamping is a Two Step Stamp. Start with stamping the outline of the bunch of flowers and the leaves in Memento ink. Stamp them onto the bottom right-hand corner of the sentiment card piece.

The second step stamp uses the solid stamp to make a “watercolor” design over the outlines of the flowers and leaves. For this step use the Gorgeous Grape ink for the bunch of flowers. Use the Mossy Meadow ink for the leaves. Tip: To easily line up the second stamp I recommend you stand up. Lean over the card piece so you are looking straight down when you place the second step stamp.

Follow the same procedure to stamp the hydrangea on the other 2 3/4 x 4 inch Very Vanilla CS. Note: The ‘watercolor’ design for the second step on the hydrangea is slightly off. It is possible I did not have it turned the proper way to line up better. Or that is just the way it is supposed to be.

Finally, stamp the “for you” sentiment in Gorgeous Grape ink onto a 1/2 inch strip of Basic White CS. The sentiment is in the Hydrangea Haven stamp set.

Constructing the Gift Holder

The best tool for Fun Folds is the Bone Folder. This tool helps you make each fold nice and crisp. Start by folding the 8 1/2 inch score line as shown.

Continue by making a fold at the 5 1/2 inch score line as shown.

Next you will make a fold in the opposite direction at the 4 1/4 inch score line. Then fold the gift card holder closed at the 3 inch score line as shown.

Here is a side view.

Decorating the Gift Card Holder

With the gift card holder folded shut, adhere the striped pattern to the front.

Open the gift card holder. Adhere the sentiment card piece to the top panel. Adhere the Hydrangea to the bottom panel.

Now flip the gift card holder over. Adhere the pop-up portion by applying adhesive ONLY to the edges as shown. Note: If you glue it shut the gift card will not slide in.

Place the adhered panel in the Label Me Lovely Punch about 1/4 of the way in. Punch.

Lay the gift card on the outside of the pop-up panel and mark how wide it is with a pencil mark.

Use some Paper Snips to make a cut along the score line to the pencil marks. This is so that the gift card will slide in between the two panels.

Once you have widened the opening the gift card should slide right on in! Note: Be sure to erase the pencil marks. I almost forgot.

Fold the gift card holder shut. Adhere the 1 x 4 inch Floral design to the top. Cut a banner edge on both ends of the “for you” sentiment. Adhere to the front with Stampin’ Dimensionals.

Tie the Misty Moonlight Ribbon around the gift card holder and Viola! you are done!

Thank you for stopping by to see how to make this awesome Stampin’ Up!® Hydrangea Haven Pop-Up Gift Card! I hope yo give it a try. Have fun with using different papers and stamp sets to create your own!

Supplies

Product List

Have a crafty weekend!

Theresa

Posted in 2021 January-June Stampin' Up!®Mini Catalog, 3D Technique, Animals, Easter, Fun/Fancy fold card, Stampin" Blends Alcohol Markers, Techniques

Stampin’ Up!® Springtime Joy Pop-Up Easter Card

Hello and Welcome to Fun Fold Friday! Today I have a Springtime Joy Pop-Up Easter Card using the Hydrangea Hill Designer Series paper. Thank you to Jana Muller of Jana’s Paperdreams for the pop-up card idea!

This fun Easter pop-up card is actually fairly simple to make. I made about 20 of them to sell at a Bazaar I did last weekend. I also sent one to each of my siblings.

Measurements

Measurements: Gorgeous Grape Card Stock (CS) card base: 5 1/2 x 8 1/2 inches with a score line at 4 1/4 inches; Hydrangea Hill Designer Series Paper (DSP): 4 x 5 1/4 inches; Basic White CS: 1 7/8 x 2 3/4 inch oval die-cut (from the Layering Ovals Dies) and 4 x 5 1/4 inches (not pictured); Gorgeous Grape CS: 3 x 4 inches scored at 1, 2 and 3 inches and 3/4 x 2 1/4 inches with a score line at 1 1/4 inches.

Stamping

Using the Gorgeous Grape ink stamp the sentiment “Easter is a lovely reminder of new beginnings” toward the bottom of the 4 x 5 1/4 inch Basic White CS.

Stamp whichever critter you like in the Memento ink and color with the Stampin’ Blends Alcohol Markers. For this card I ended up using the cute sheep and the basket of eggs. The colors of Stampin’ Blends for the sheep are Gray Granite and Smoky Slate. The flowers are colored in Highland Heather, Melon Mambo, Just Jade and Daffodil Delight. I colored the Easter basket with Crumb Cake and Soft Suede and used Petal Pink, Purple Posy, Balmy Blue and So Saffron for the Easter eggs.

Assembling the Card

Adhere the 4 x 5 1/4 inch Hydrangea Hill DSP to the front of the Gorgeous Grape CS card base by applying the adhesive ONLY to the outer edge.

The next step is to use the Stitched Shapes Die Cuts and cut out the center of the card front. We will not be using the DSP oval for this card. We will be using the Gorgeous Grape CS stitched oval.

Use the Bone Folder to make a crisp fold at the 4 1/4 inch score line on the Gorgeous Grape CS card base. Open the card and adhere the Basic White CS sentiment card piece to the inside.

Assembling the Pop Up

Use the Bone Folder to make a crisp fold at the 1, 2 nd 3 inch score lines on the 3 x 4 inch Gorgeous Grape CS. Fold in half with the open end on top.

Apply a strong adhesive to the upper 1/4, turn the card piece around and adhere to the center of the inside of the card. The open ends should be on top.

Apply a strip of adhesive to the upper edge of the folded 3 x 4 inch Gorgeous Grape CS and then close the card to adhere it.

When you open the card it should look like this. This is the pop-up box for your sheep.

Fold the 3/4 x 2 1/4 inch Gorgeous Grape CS card piece at the 1 1/4 inch score line. The lengths will be uneven. Apply adhesive to the top portion of the longer side.

Turn the card piece over and adhere it to the center of the Pop-up box.

Adhere the Basic White CS oval to the Gorgeous Grape CS stitched oval. Use Stampin’ Dimensionals to adhere the sheep and the Easter basket to the oval.

Apply adhesive to the tab and press the stitched oval card piece into place. Hold until secure.

Viola! You have just created a cute pop-up Easter card!

Thanks for stopping by. I hope you give this a try. The first time may be a little challenging, but then it is a breeze!

Sorry I missed a few days this week. I was more busy than I expected for the craft bazaar I did with my friends Amanda and Christy. And I was totally exhausted afterward! I just needed a few days to recover. Bazaars are a lot of work!

Supplies

Product List

Have a great weekend and a Blessed Easter!

Theresa

Posted in 2020 August-December Mini Catalog, Designer Series Paper, Fun/Fancy fold card

Easy Fun Fold Note Card with Butterfly Bouquet

Welcome to Fun Fold Friday! There is so much you can do with the Butterfly Bouquet! I apologize to those of you who are tiring of this set, however, I have a wonderful Fun Fold for you today!

This card features the Designer Series Paper (DSP) in the Butterfly Bouquet called Butterfly Bijou. What is a Bijou? I didn’t know so I looked it up. A Bijou is something that is delicate, elegant or highly prized (defined by Merriam-Webster). I think Bijou definitely describes this Suite. Well enough of that-let’s make the card!

Measurements

Measurements: Butterfly Bijou DSP: small butterfly/pink splatter design: 2 3/4 x 3 1/4 inches, 2 1/2 x 5 1/4 inches and 4 x 5 1/4 inches, and one 6 x 6 inch piece of the large butterfly design; Calypso Coral Card Stock (CS) card base: 5 1/2 x 7 inches scored at 2 3/4 inches; Calypso Coral CS: 3 1/2 x 3 1/2 inches scored at 1/2 inches; and Basic White CS: 3 1/4 x 3 1/4 inches.

Dies

The Brilliant Wings Dies have a die that fits around all of the butterflies on the large butterfly design of the Butterfly Bijou DSP. If you do not have a die cutting machine, the butterflies can be fussy cut.

I will be using the Magenta Madness and the Calypso Coral colored butterflies.

Putting the card together

The first step is to adhere the 3 1/2 x 3 1/2 inch Calypso Coral CS to the 7 x 5 1/2 inch Calypso Coral CS so that it will fold toward the inside of the card base.

Next adhere the 4 x 5 1/2 inch Butterfly Bijou DSP with the pink splatter design side up to the inside of the 5 1/2 x 7 inch CS card base.

Continue by adhering the 2 1/2 x 5 1/4 inch Butterfly Bijou DSP to the card front. Then adhere the 2 3/4 x 3 1/4 inch Butterfly Bijou DSP, with the pink splatter side up, onto the front of the flap.

The card should end up looking like this.

To complete the inside of the card adhere the 3 1/4 x 3 1/4 inch Basic White CS to the inside of the card, minding the positioning so that the Basic White CS is hidden when the card is closed.

Adding the Butterflies

To add some dimension to the butterflies, you can use your Bone Folder to gently curl the wings.

Use Stampin’ Dimensionals to adhere the butterflies to the flap on the card front. I also added some Bling! by placing a few of the Elegant Faceted Gems around wherever I wished.

Viola! You have made a wonderful Fun Fold note card!

Thanks so much for coming by today! I hope you enjoyed this easy Fun Fold and will give it a try.

Supplies

Product List

Have a wonderful and creative day!

Theresa

Posted in 2021 January-June Stampin' Up!®Mini Catalog, Animals, Birds, Fun/Fancy fold card, Owl, Summer

Stampin’ Up!® Woodland Wonder Fun Fold for Friday

Welcome to the Stampin’ Up!® Woodland Wonder Fun Fold for Friday! This is an adorable and fun card to wish Happy Birthday to someone young at heart. The Stampin’ Up!® Woodland Wonder stamp set is found in the 2021 January to June Mini Catalog on page 53. You can buy one for yourself right HERE.

This cute Fun Fold opens up to reveal a tall tree with a family of animals ready to say “Hip-Hip-Hoo-Ray!”

Measurements

Measurements: One piece of 4 1/4 x 11 inch Basic White Card Stock (CS) with score lines at 2, 3 3/4, 7 1/4 and 9 inches.

Folding the Fun Fold

Fold the Basic White CS card base as shown.

Stamping

The first step is to stamp the bottom of the tree in Memento ink so that the top of the stamp abuts the 9 inch score line and is in the center.

Fold the card closed and use a pencil to mark where the borders of the tree trunk are. This is to help guide you where to stamp the top of the tree so that when the Fun Fold is closed the tree trunks are aligned.

The next step is to fold the card part way and make a pencil mark at the border of the tree trunk. Use these pencil marks when you stamp the large image of the tree trunk with all the animals to help keep the trunk aligned. There will be some space between the top of the trunk with the animals and the tree top trunk.

Masking

Masking. To be able to fill in the tree trunk you will need a sticky note to cover the grass on the tree trunk bottom. Use the Memento ink upside down to ink up the trunk. Then remove the sticky note before you stamp.

More Stamping

You will need to stamp the masked bottom trunk twice to fill in the space.

Use your Stampin’ Write Marker in Basic Black to fill in the spaces between the stamped trunks. Mine is a tad bit off, but little “errors” like that is what makes this card a homemade card!

Continue to use the Memento ink to stamp the pole as if the squirrel were holding it. Add the “HIP-HIP-HOO-RAY!” banner.

To finish up, stamp the sentiments “happy birthday” and “from all of us” onto the bottom of the card.

Let the Memento ink dry well. Use your bone folder to make the folds nice a crisp. This is what the front should look like when the card is closed.

Coloring

I used the Stampin’ Blends Alcohol Markers to color the tree and animals. The colors I used were: Granny Apply Green, Cinnamon Cider, Crumb Cake, So Saffron, Mango Melody, Gray Granite, Flirty Flamingo, Balmy Blue, Real Red, Smoky Slate and Daffodil Delight.

This is what it looks like on the front after coloring.

In order to keep the card closed until that special someone opens it, I used a 16-inch piece of the Bumblebee In Color Ribbon. The ribbon is adhered to the back of the card with a glue dot.

Viola! Now you have an adorable Fun Fold to wish someone a very Happy Birthday!

Confession: I had to stamp this card several times before getting it right. Several times I dropped the stamp on the card and once I forgot to remove the stick-not mask before stamping. Point is-don’t give up, keep trying and you will have a really cool card!

Thank you very much for viewing my blog today!

Specials

The Butterfly Bouquet is on sale now! This is an awesome set that features lots of butterflies! The Butterfly Brilliance stamp is one large stamp and the coordinating Brilliant Wings Die cuts out all of the butterflies in one go! The Brilliant Wings Die also cuts out a set of butterflies from the Butterfly Bijou Designer Series Paper! Buy your Butterfly Bouquet HERE today! If you want to see a bunch of cards made with the Butterfly Bouquet check out this Blog Hop.

Supplies

Product List

Have a very relaxing weekend and try some crafting!

Theresa