

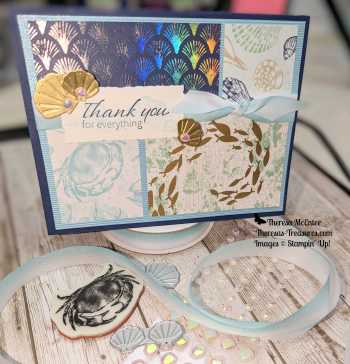
Today I have a Super Fun Seaside Bay Emboss Resist Thank You Card!
Welcome and thanks for visiting Theresa’s Treasures Paper Crafts! I am Theresa and I am a Stampin’ Up! Demonstrator in Arizona, USA. Today is the monthly Inspirations in Ink Blog Hop! I am excited to be hopping with awesome demonstrators from around the world. Be sure to check out everyone’s projects using the Seaside Bay Bundle. The Seaside Bay Bundle is in the 2023 Jan-April Mini Catalog. You may order form my Online Store HERE.
Measurements
- Balmy Blue card stock (cs) card base: 5 1/2 x 8 1/2 inches scored and folded at 4 1/4 inches
- Textured 12×12 inch Shimmer Paper, Shaded Spruce: 4 x 5 1/4 inches (algae die cuts are from the center of this piece)
- Fluid 100 5×7 inch Watercolor Paper: 3 1/2 x 4 3/4 inches
- Crumb Cake cs: 1 1/2 x 4 inches for the seashell die cuts
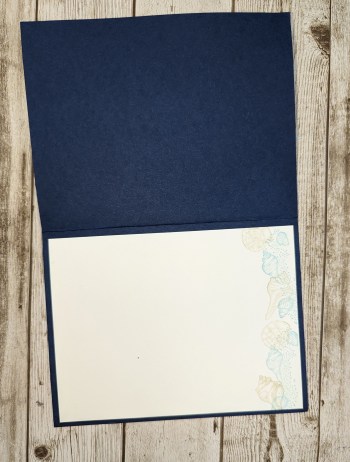
- Basic White cs: 4 x 5 1/4 inches (inside of card)

Supplies
- Seaside Bay Bundle (stamp & dies)
- Ink: Night of Navy, Shaded Spruce, Balmy Blue & Coastal Cabana
- Versamark
- Stampin’ Emboss Powder, Basics, White
- Heat Tool
- Water Painters, large pointed tip
- Stampin’ Spritzer
- Flat Adhesive-Backed Pearls
- Wink of Stella Glitter Brush
- Stampin’ Cut & Emboss Machine
Instructions

Step 1- Emboss the Watercolor Paper
- Using the Versamark Ink stamp the images onto the Fluid 100 Watercolor Paper.
- Stamp two images, then cover them with the White Emboss Powder. Shake off the excess.
- Use the Heat Tool to set.
- Stamp two more images and repeat.
- That way you can see where you stamped to avoid stamping on top of another image.
Step 2- Emboss Resist Technique
- Prepare several layers of paper towels to work on.
- Squeeze each of the colored ink pads to get ink on the inside of the lid. Open & set up in a line above the paper towels.
- Use the Stampin’ Spritzer to spray water on the embossed Watercolor Paper. The water beads up on the paper.
- Use the Water Painter to pick up ink from the lid.
- Brush the ink onto the moist Watercolor Paper one color at a time.
- TIP: In between colors, squeeze water from the Water Brush onto a paper towel until it runs clear.
- Dry overnight. Or use the Heat Tool to speed up the drying process.
Step 3- Assembling the Card


- Use the Stampin’ Cut & Emboss Machine and the Seaside Bay Dies to cut one large & one small algae from the center of the Shaded Spruce Textured Shimmer Paper. C
- Cut 2 small & one large seashell from the Crumb Cake cs.
- Adhere the Basic White cs to the inside of the Balmy Blue cs card base.
- Adhere the Shaded Spruce Textured Shimmer Paper to the card front.
- Use Stampin’ Dimensionals to adhere the embossed & watercolored card piece to the card front.
- Adhere the large algae diecut to the bottom left corner of the card front. Adhere the small algae.
- Adhere the seashells
Step 4- Bling!


- First add some Wink of Stella to the seashells.
- Then add some of the Flat Adhesive-Backed Pearls.
Voila!
Thank you so much for visiting today! Please visit all the blogs in this hop. You will see all the fun and inspiring projects made by the Inspirations In Ink demonstrators. You are currently visiting Theresa McEntee-USA creator of Theresa’s Treasures Paper Crafts.
Julie Golding Page – Canada
Rebecca Nutley – Australia
Robbie Rubala – USA
Theresa McEntee – USA
Vicky Wright – Australia
Christy Gridley – USA
Deirdre Croal – USA
Clickable Supply List
Product List ") |  | |||
 |  | |||
 |  | ") | ||
 |  |  |  |
")


 Shimmer Paper")

Have a most wonderful and creative day!
Theresa
Would you like your own Mini Cut & Emboss Machine? How about a Boho Blue Mini Cut & Emboss Machine! Join my Stamping Gems Team today and you can get a Mini Cut & Emboss Machine in your starter kit! Or if you already have a Cut & Emboss Machine and have a long wish list, you can join and get $175 UDS in product for $99 USD! This is the best deal! Click HERE to order your starter kit!

Sale-a-bration ends February 28, 2023! Order now to be able to get what you want! Remember to claim your Free product. New FREE products have been added!
Thinking of adding creativity to your life? Try a monthly paper crafting kit! The Paper Pumpkin Monthly Subscription delivers a kit with everything you need to make a project-right to your door! Sign up for a Pre-paid Paper Pumpkin Subscription HERE. The February kit has an Add On Die that coordinates with the images in the kit!

Ciao!


")


 Specialty Designer Series Paper")
 Variegated Ribbon")