Posted in 2022 January-June Stampin' Up!® Mini Catalog, Inspiration

Friday Fun Fold Stampin’ Up!® Tulip Fields

“Let today be the start of something new” is the sentiment for the Friday Fun Fold Stampin’ Up!® Tulip Fields card today. It is a great inspirational sentiment to start the New Year!

This is an Inspirational Fun Fold card using Stampin' Up Tulip Fields stamp set and Flowering Fields Designer Series Paper.
Fun Fold Stampin’ Up!® Tulip Fields

This beautiful inspirational handmade fun fold card is really pretty simple to make. Just follow the step-by-step photographic tutorial below. A complete photographic and clickable supply list is found at the end of the blog.

Measurements for the Fun Fold Stampin’ Up!® Tulip Fields

Rich Razzleberry Card Stock (CS) card base: 8 1/2 x 11 inches. With the 8 1/2 inch edge on top, score at 2 1/8 and 6 3/8 inches. Turn the card stock so the 11 inch side is on top and score at 2 3/4 and 8 1/8 inches. Cut off the corners as shown.

  • Rich Razzleberry CS: 2 1/4 x 2 1/4 inches.
  • Fresh Freesia CS: 1 x 10 inches scored at 2 1/8 and 6 3/4 inches.
  • Basic White CS: 2 1/4 x 4 inches and 4 x 5 1/4 inches (not shown)
  • Flowering Tulips Designer Series Paper (DSP): 2 x 2 1/2 inches. *Be sure the pattern is in portrait orientation

Stamping

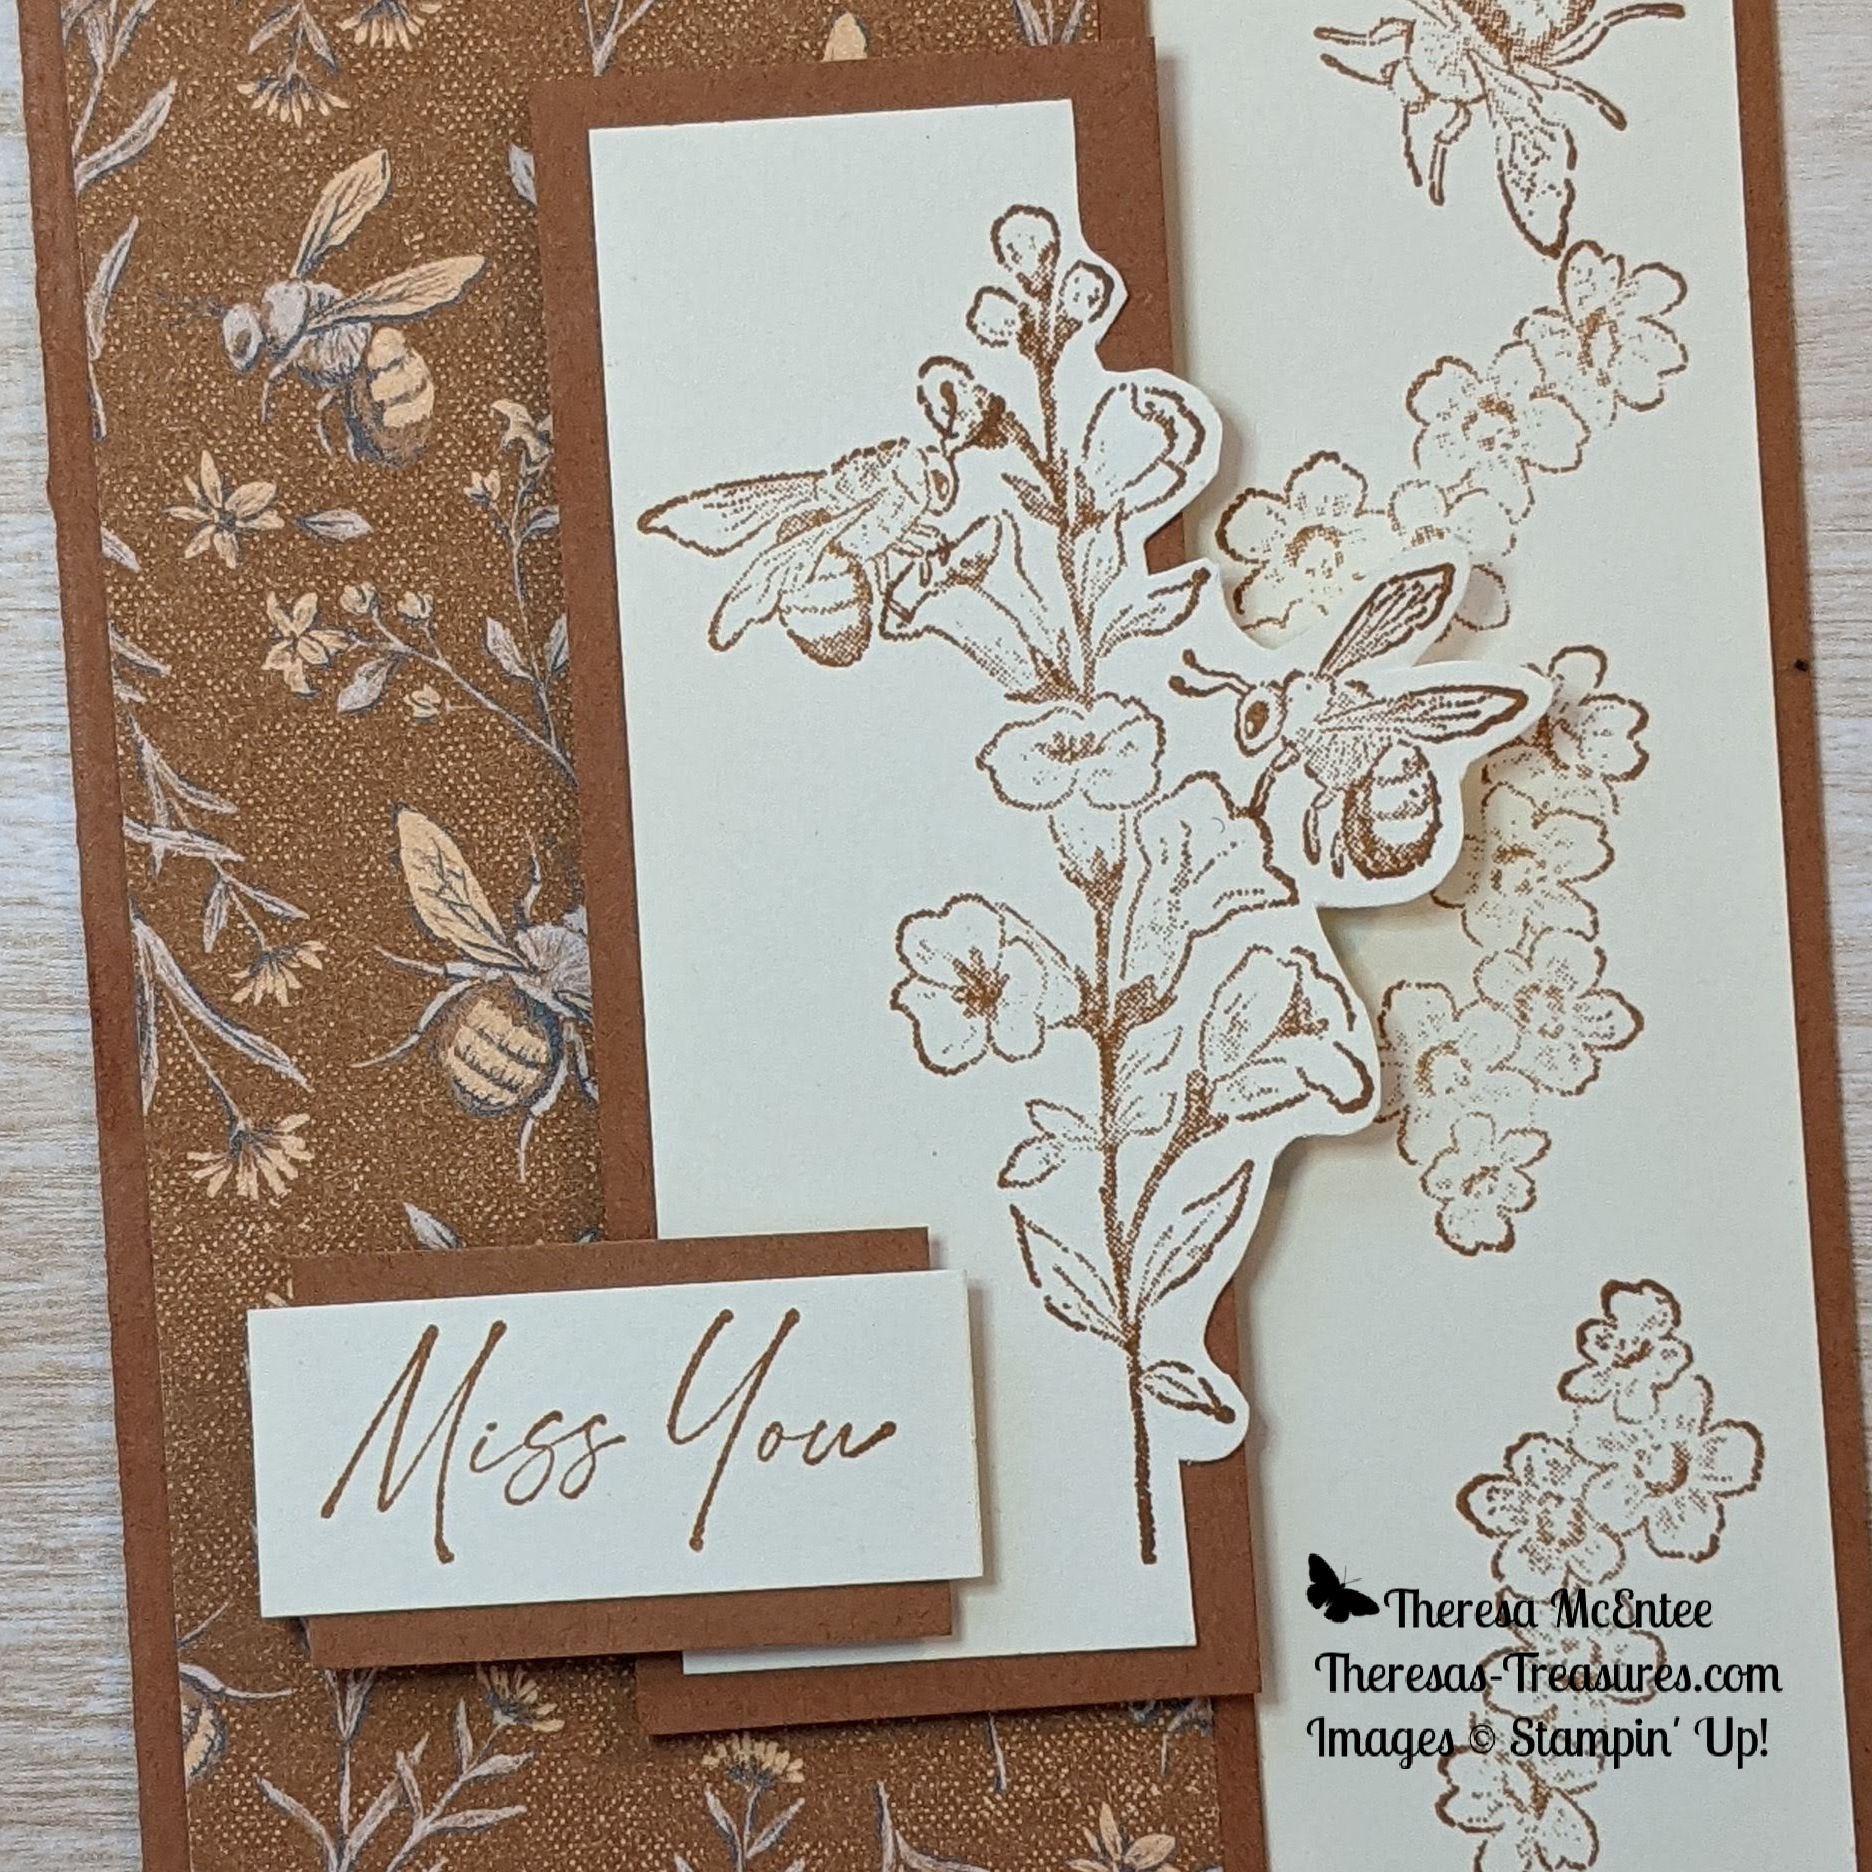
Stamp on the 4 x 5 1/4 inch Basic White CS. The tulips are a 3 step stamp. The first step is to stamp the outline in the Rich Razzleberry Ink. The second step is done in the Fresh Freesia Ink with the stamp to fill in the color. Note: Remember to use the Stampin’ Pierce Mat or a catalog to stamp on when using the clear Photopolymer Stamps.

For the third step I used Blackberry Bliss Ink. Repeat the process for the tulip bud.

Add stems using Soft Succulent Ink. You will need to use a piece of paper to mask the tulip under the tulip bud when stamping the stem for the bud.

The leaves are 2 step stamps. I used the Evening Evergreen Ink first, then the Soft Succulent Ink. And there you have the inside of the card!

Using the Blackberry Bliss Ink, stamp the sentiment on the bottom portion of the 2 1/4 x 4 inch Basic White CS. Use the Label Me Lovely Punch to punch it out. Then use Stampin’ Dimensionals to adhere the label to the 2 1/4 inch square of Rich Razzleberry CS.

Assembling the Card

To fold the Rich Razzleberry CS card base, start by folding the bottom flap up. Fold the left-hand flap to the right. Then fold the top flap down. Finally, fold the right-hand flap over to the left.

Now tuck the bottom corner of the right-hand flap under the right-hand corner of the bottom flap. This is the same as the way you would fold the top of a box. Tip: Be more gentle than I was as I made a slight crease on the bottom flap.

Adhere the Flowering Tulip DSP pieces as shown.

Open the card up and adhere the inside panel to the inside of the card base.

Fold the card and wrap the 1 x 10 inch Fresh Freesia CS band around the middle of the card. Adhere at the front. Be sure NOT to adhere the band to the card. Apply Stampin’ Dimensionals to the band and adhere the sentiment label to the band. The band shown slide off easily.

Bling!

One of my favorite embellishments in the new 2022 Stampin’ Up! January-June Mini Catalog is the Brushed Brass Butterflies! You can easily transfer the butterflies to your card with the Take Your Pick tool. They are so shiny!

This beautiful handmade inspirational fun fold card is simple to make using Stampin' Up! products including the Tulip Fields stamp set and Flowering Fields Designer Series paper.

Voila! The Fun Fold Stampin’ Up!® Tulip Fields inspirational card is finished! Give this one a try, it is a lot of fun. The first time around is always the most difficult. Tip: I often will make a new fun fold card with just the Basic White CS first until I get the hang of it.

Stampin’ Up News

Here are the new 2022 Stampin’ Up! Mini Catalog and Sale-a-bration Brochure. Click on the image to see the PDF for each one. During Sale-a-bration you earn a free product from the brochure with a $50 order!

Loving hands and heartfelt words are the best way to show you care. With hand designs that illustrate coming together in friendship and solidarity, the All Together Collection will help you create cardmaking and paper crafting projects that reflect the people you know and love. This set of stamping supplies is available now when you Join my Stamping Gems Team, or it will be available for everyone on February 1 through May 2, 2022.

Join my Stamping Gems Team by ordering a Starter Kit! This kit contains whatever you choose up to $125. You pay only $99! And you can choose 2 more stamp sets for FREE! If you are interested in the rest of the details, email me: theresastreasures.az@gmail.com.

This months Paper Pumpkin subscription will l be a Love Theme. You may still sign up until January 10, 2022. Subscribe HERE .

There are many kits available and the Light the Candles is the newest addition. Check out the rest of the kits HERE .

Supply List

Product List

Thank you and have a most wonderful day!

Theresa

Posted in 2022 January-June Stampin' Up!® Mini Catalog, Birds

Stampin’ Up!® Friendly Hello #SimpleStamping Birthday Card

Hello! There is exciting news in the Stampin’ Up! world! The 2022 Stampin’ Up! January to June Mini Catalog is live! And it is Sale-a-bration Time again! Today I am using a FREE Sale-a-bration item for my Friendly Hello #SimpleStamping Birthday Card!

What is Sale-a-bration? Sale-a-bration is a promotion by Stampin’ Up! during which you earn FREE product for a qualifying order. In the USA it is $50 for most of the FREE product. There are two selections that require a $100 order. View a PDF of the 2022 Mini Catalog HERE and the Sale-a-bration Brochure HERE. If you have any questions, don’t hesitate to shoot me an email at theresastreasures.az@gmail.com.

I have a follow up on a post I did on the In The Moment stamp set and different coloring techniques. The most popular technique was the Stampin’ Blends Alcohol Marker! I must admit that I really love to color with the Blends.

Ok, now for the Friendly Hello #SimpleStamping Birthday Card!

The #SimpleStamping Challenge for this month was to create a card using just Stamps, Ink and paper-and to use a Sale-a-bration product.

This card is made with the Friendly Hello Stamp Set + Friendly Hello 12 x 12 Designer Series Paper (DSP) which is available as a set with an order of $100 USD.

Here is how I did it:

Measurements

Friendly Hello #SimpleStamping Birthday Card:

  • Basic White Card Stock (CS): 4 x 5 1/4 inches and 3 1/2 x 4 3/4 inches
  • Friendly Hello DSP: 4 x 5 1/4 inches
  • Pale Papaya CS card base: 5 1/2 x 8 1/2 inches with a score line at 4 1/4 inches.

Ink colors:

  • Pale Papaya
  • Granny Apple Green
  • Fresh Freesia
  • Balmy Blue
  • Evening Evergreen

Stamping

Starting with the inside of the card, stamp the flowers in Pale Papaya ink onto the 4 x 5 1/2 inch Basic White CS. Next stamp in Granny Apple Green ink using the leaf sprig. Finish with the Fresh Freesia ink and the small berry bunch. Set aside.

Now we will make the front of the card. Using Balmy Blue Ink, stamp the image of the bird on the branch in the center of the 3 1/3 x 4 3/4 inch Basic White CS. Next stamp the sentiment “Hope you have the BEST BIRTHDAY” in Evening Evergreen Ink in the lower left-hand corner. Using the Pale Papaya Ink stamp the flowers around the bird. Now stamp in Granny Apple Green Ink using the sprig of leaves.

To complete the front of the card, stamp in Fresh Freesia Ink using the small berries.

Assembling the Card

First adhere the stamped inside panel to the inside of the Pale Papaya CS card base.

Next adhere the stamped card front to the 4 x 5 1/4 inch Friendly Hello DSP.

Adhere the stamped front/DSP panel to the front of the card base. Voila! Super simple and very beautiful! Perfect for the #SimpleStamping Challenge!

Supply List

Product List

Thanks for stopping by today. I hope you have a chance to try this amazing Friendly Hello Stamp Set and Friendly Hello DSP! Have an awesome day!

Theresa

Posted in 2022 January-June Stampin' Up!® Mini Catalog, Designer Series Paper, Nature, Vintage

Stampin’ Up!® Sneak Peak- Honeybee Home

I have an exciting new stamp set to give you a sneak peak of today- Honeybee Home. The 2022 January-June Stampin’ Up! Mini Catalog premieres on January 4, 2022! There are so many great stamp sets, Designer Series Papers, Dies and Embossing Folders in this catalog! If you would like me to be your Stampin’ Up! Demonstrator and are in need of a catalog, drop me an email with your name and address. I will send you a Catalog and a free gift! My email is theresastreasures.az@gmail.com.

Now for the card!

The elements that come together to make this “Miss You” Honeybee Home card are in the Heart & Home Suite. The Heart & Home Designer Series Paper (DSP) is just gorgeous!

Measurements

Honeybee Home Miss You Card

  • Cinnamon Cider Card Stock (CS) card base: 5 1/2 x 8 1/2 inches with a score line at 4 1/4 inches ( We will cut this to get the other Cinnamon Cider CS card pieces).
  • Very Vanilla CS: 4 x 5 1/4 inches, 2 1/2 x 3 3/4 inches and 3/4 x 1 3/4 inches (not pictured).
  • Heart & Home DSP: 2 1/2 x 5 1/4 inches.

Cutting the Card Base

Cut 1 1/2 inches off the left side of the Cinnamon Cider CS card base. This creates the card base and a 1 1/2 x 5 1/2 inch Cinnamon Cider CS piece. Cut 1 1/2 inches off the end of this piece. Now you have all of the card pieces needed.

Stamping

Start out by stamping the inside of the card. Use Cinnamon Cider Ink to stamp the largest Honeybee onto the top of the 4 x 5 1/4 inch Very Vanilla CS. Then stamp the group of flowers along the side.

Now stamp the flower with the stem onto the center of the 2 1/2 x 3 3/4 inch Very Vanilla CS. Next stamp the two bees in profile. Stamp close to the flowers so it looks like the bees are attending to the flowers.

To finish up the stamping, stamp the sentiment “Miss You” onto the 3/4 x 1 3/4 inch Very Vanilla CS.

Putting the Honeybee Home card together

Use the Paper Snips to cut the right side of the flower with the honeybees. Next adhere this piece to the 1 1/2 x 4 inch Cinnamon Cider CS. The cut portion of the flowers will hang over the edge of the Cinnamon Cider CS.

Adhere the stamped 4 x 5 1/4 inch Very Vanilla CS to the inside of the Cinnamon Cider CS card base.

Fold the left-hand flap forward and adhere the Heart & Home DSP to the front panel. (Sorry-forgot to make a photo!)

Adhere the “Miss You” sentiment to the left over Cinnamon Cider CS piece. Trim to about 1/4 inch on either side.

Stampin’ Dimensionals

Apply Stampin’ Dimensionals to the back of the flower and honeybee piece. Also apply a Stampin’ Dimensional on the back of the sentiment on the right. Apply two Dimensionals to the back of the sentiment on the left. You’ll see why you need two in a minute.

Remove the protective covering for the Stampin’ Dimensionals and adhere the flower and honeybee piece first. The edge of the Cinnamon Cider CS should line up with the right-sided edge of the front flap. Follow by adhering the sentiment. As you will see, you need two Dimensionals on the left because the right side is elevated by two.

Voila! You have lovely Honeybee Home “Miss You” card!

I loved making this card. I initially did not have any idea how it would turn out. Sometimes I just start out by cutting the card base and stamping some images. Then I start to see how I want them to come together.

It is very subtle, but you can add Bling!. I added the Champagne Rhinestone Jewels to the center of some of the flowers on the card to the right. In person, the rhinestones really sparkle!

Supply List

The Honeybee Home stamp set and the Heart & Home DSP will be available to order starting January 4, 2022.

Product List

Have a wonderful day! I hope you take some time to craft. This is the best time of year to make cards and papercrafts because you can give them away as Holiday gifts!

Ciao!

Theresa

Posted in 2021 Stampin' Up! July-December Mini Catalog, Ornaments, Winter Holiday

Stampin’ Up!® Stars Are Shining Christmas Card

I am on Day 11 of the “12 Days of Christmas Card Making Challenge” with my stamping buddy Christy. Today’s card is the Stampin’ Up!® Stars Are Shining Christmas Card. For the last 10 days my blog has focused on a new holiday card showcasing a new stamp set each day. The challenge ends with tomorrow’s card. If you would like to see the whole Gallery of the 12 Days of Christmas Card Making Challenge you can see it on my Welcome page HERE. Check out all the fabulous products I used that are available in the 2021 Stampin’ Up! July to December Mini Catalog. Be sure to order in time to make your own Christmas cards! You can order HERE when you have your list ready!

Be sure to order as soon as you know what you would like. Many of the products in the 2021 July-Dec Mini Catalog are retiring. Click on the image above to see the list. Many are already SOLD OUT. There is also a delay the shipping process. Order today so you will have time to make your cards!

Joy to the World! Today’s card is a simple one. After creating the Layering Diorama with the Peaceful Deer yesterday, I needed an easier card!

Measurements

Stars Are Shining Christmas Card

  • Real Red Card Stock (CS) card base: 4 1/4 x 11 inches with a score line at 5 1/2 inches.
  • Basic White CS: two at 4 x 5 1/4 inches.
  • Tidings of Christmas 6 x 6 inch Designer Series Paper (DSP): 3 1/2 x 4 inches.
  • Real Red 3/8 inch Double-Stitched Satin Ribbon: 6 1/2 inches.

Cut the Tidings of Christmas DSP into 2 triangles. Place one triangle over the top of one of the 4 x 5 1/2 inch Basic White CS. Use a pencil to draw a line at the border of the DSP. Remove the DSP and set aside for later.

Before you start stamping, figure out where you would like the ornaments to be. Place the stamps on the paper. Include the sentiment “Joy to the World” in the lower right-hand corner. Use a pencil to mark the center of the top of each ornament.

You will have three dots where the string for the ornament needs to end. Stamp the sentiment in Memento Ink. Then stamp each of the three strings for the ornaments.

Start by stamping the middle ornament. Add the other two ornaments.

On the other 4 x 5 1/4 inch Basic White CS stamp the sentiment “The Stars are Shining Brightly”. Stamp some of the stars on the side. I stamped once, then turned the stamp 180 degrees, applied more Memento Ink, and stamped a second time.

Coloring the Ornaments

I absolutely love the Stampin’ Blend Alcohol Markers but the Stampin’ Write Markers have a finer tip. Color in some of the design with the Garden Green Stampin’ Write Marker. Finish up by using the Real Red marker.

Adhere the Tidings of Christmas DSP triangle to the top left corner.

Adhere the Real Red Double-Stitched Satin Ribbon to the front panel with Mini Glue Dots. Take care on the upper right-hand corner to have the ribbon to the left of the corner. Wrap the ribbon around to the back and adhere with a Mini Glue Dot. Trim the excess off of the top corner ribbon.

Adhere the ornament card piece to the front of the Real Red CS card base. Now adhere the inside panel to the inside of the card base.

Now for some Bling! Add some Red Rhinestone Basic Jewels. Add as many as you want! The more, the more sparkle!

Voila! A nice and simple but totally Bling! Stars are Shining Christmas Card! You could really have some fun with this one. Try different colors and patterns of DSP.

Supply List

Product List

Please remember to subscribe to my Theresa’s Treasures Paper Crafts Newsletter. I am just getting started with the Newsletter. I plan to have Up-to-date Stampin’ Up! information on promotions and goings on as well as announcements about my upcoming Zoom Classes. Once I get that going I plan to add a special PDF download for a card with each Newsletter. Subscribe by scrolling down the side bar until you get past the announcement for the Zoom Class. There is a “Subscribe to My Newsletter” form there. Or you can find the form at the end of this blog if you are on your phone.

Thanks so much for visiting today! Have a most wonderful day! The weekend is almost here!

Theresa

Posted in 2021-2022 Stampin' Up! Annual Catalog, Clean and Simple, Gnomes, Winter Holiday

Stampin’ Up!® Punch Art Gnome Using the Ice Cream Cone Builder Punch and Stitched Triangle Dies

Greetings! I hope you are enjoying a wonderful day. I have a little Stampin’ Up! Punch Art Gnome to brighten your day if you need it! This card is for The Paper Players Challenge PP 568 CAS(Clean and Simple) Gnomes or Fairies.

My Gnome Punch Art Card

I did not have any stamps with gnomes or fairies. I decided to try to make a gnome with Punch Art. Punch Art used to be the art of making images using the Stampin’ Up! punches. However, right now there are not many punches in basic shapes like circles, squares and triangles. But there are many shapes in the Stampin’ Up! Dies that can be used!

The face and the boots are made from the Ice Cream Cone Builder Punch. The black lines are where I cut the punch. The little pompom for the gnome hat is from the Pierced Blooms Dies. The remaining pieces are different sizes of triangles from the Stitched Triangle Dies. The face is Blushing Bride Card Stock (CS). For the hat I used the Tidings of Christmas 6 x 6 Designer Series Paper (DSP). The boots are made with Early Espresso CS and the body is made with Soft Succulent CS. The beard and the pompom are in Basic White CS.

Assembly

First place the triangle for the body on the card front to be able to position the boots. After adhering the boots, use Stampin’ Dimensionals to adhere the body. Trim off the very tip of the triangle for the body.

Slide the white beard triangle under the “nose”. Then adhere the hat. Position the Stampin’ Dimensionals as shown.

Adhere the face with the beard and hat over the body. Stamp your greeting. I used the greeting from the Joyful Life stamp. The greeting is stamped in Soft Succulent ink.

Adhere the card front to a 5 1/4 x 4 inch piece of the Christmas Tidings DSP. Finish the card by adhering this piece to the front of an 11 x 4 1/4 inch Basic White CS card base.

Voila! A cute gnome is created for a whimsical holiday card! Stop by The Paper Players Challenge PP568 to see more cards made in the “Clean and Simple” style with gnomes or fairies.

I hope this card has brightened your day a little if you needed it. Stop by tomorrow for a 3D Thanksgiving shaker card made with the Stampin’ Up! Cloche Shaker Dome!

Remember that if you wish to subscribe to my newsletter, you can do so by scrolling down the side bar until you get to the “Subscribe to My Newsletter” form. I sent my very first Theresa’s Treasures Paper Crafts Newsletter out this past Monday. Constructive feedback on how to make my newsletter better for you is welcome.

Supplies to make this card

Click on any photo to go to my Online Store.

Product List

I hope you have a great day!

Theresa

Posted in 2021 Stampin' Up! July-December Mini Catalog, Nature, Simple stamping, Thanksgiving

Stampin’ Up!® #SimpleStamping Fall Friendship Card

Howdy! Fall is slowly giving way to the Holiday Season. Next week I will begin to show you some Holiday cards. For today I have a lovely fall friendship card made using only stamps, ink and paper. Otherwise known as #SimpleStamping.

I am actually using the Christmas Season stamp set. But I chose fall colors so I could create a nice fall friendship card. The sentiment is part of the Christmas to Remember stamp set. Stay tuned because I will soon be using the same two stamp sets to create a Christmas card.

Measurements

  • Cajun Craze Card Stock (CS) card base: 8 1/2 x 5 1/2 inches with a score line at 4 1/4 inches.
  • Very Vanilla CS: two 5 1/4 x 4 inches
  • Note: Ink colors: Cajun Craze, Pumpkin Pie and Old Olive.

Stamping

Start out by stamping the sentiment “Friends Like You Make This Season Special” in Cajun Craze ink onto one of the 5 1/4 x 4 inch Very Vanilla CS. Stamp some leaves in Old Olive ink. Then stamp another style of leaf in Pumpkin Pie ink. I started out with 3 of each color in a triangular orientation.

Add a third style of leaf in Cajun Craze ink. Fill in the spaces as desired using any of the 3 styles of leaves and their coordinating color. On the second 5 1/4 x 4 inch Very Vanilla CS stamp in the same manner just along the right-hand side. This will be the inside of the card so you need to leave space for writing.

Assembly

Adhere the first stamped Very Vanilla CS panel to the front of the Cajun Craze CS card base. Adhere the second panel to the inside of the card base.

Voila! You have a gorgeous #SimpleStamping fall friendship card!

Bling! Alert! I added a few of the Champagne Rhinestone Basic Jewels for some extra sparkle around the sentiment! This is a step up from #SimpleStamping.

Thanks so much for stopping by today. Be sure to sign up for my newsletter by scrolling to the bottom of the side bar. I will be sending my first Theresa’s Treasures Paper Crafts Newsletter out soon!

Supplies

To purchase the Stampin’ Up! products needed to make this card yourself, click on any of the photos below and you will go to my Online Store.

Product List

Have a most wonderful day!

Theresa

Posted in Simple stamping, Stampin' Up! Eden's Garden Collection

Stampin’ Up!® Eden’s Garden #SimpleStamping Friendship Card

Hello! I hope all is going well with you today. We got close to a freeze the other night, but are now back up in the 70’s during the day here in Arizona. I love fall but I don’t like it too cold!

Today I have created a fun #SimpleStamping card for you to try. This card looks more complicated than it is.

I am using Stampin’ Up! product from the Eden’s Garden Collection which is being released today! I will have the item numbers and shopping information at the end of this blog.

Measurements

Basic White Card Stock (CS): card base at 8 1/2 x 5 1/2 inches with a score line at 4 1/4 inches; One 4 1/2 x 3 3/4 inch piece; and one 2 3/4 x 1 inch piece.

Evening Evergreen CS: 5 1/4 x 4 inches, and two 1 x 7/8 inch squares.

Stamping

On the 4 1/2 x 3 3/4 inch Basic White CS, start out with one type of leaf. Stamp with the Evening Evergreen ink. Add a second type of leaf in the same color of ink. (Note: the 4 1/2 inch edge is on the top and bottom; the 3 3/4 inch edge is on either side)

Switch to the Soft Succulent ink and stamp a third type of leaf. Finish stamping this card piece with a fourth type of leaf in the Soft Succulent ink.

Return to the Evening Evergreen ink and stamp the sentiment “Dear Friend How are you?” onto the 2 3/4 x 1 inch Basic White CS. Next stamp the sentiment “My heart is tied to yours…” on the inside panel of the 8 1/2 x 5 1/2 inch Basic White CS card base. Use the Soft Succulent ink to stamp the leaf sprigs on either side of the sentiment.

How To Assemble the Card

Use your Stampin’ Up! Paper Trimmer to cut the stamped card piece into 1 1/2 inch strips. (Note: the 4 1/2 inch edge is still on the top and bottom; the 3 3/4 inch edge on either side). Adhere the strips to the 5 1/4 x 4 inch Evening Evergreen CS. Adhere this card piece to the front panel of the Basic White CS card base.

To create the sentiment, adhere the two 1 x 7/8 inch Evening Evergreen CS pieces to the ends of the sentiment strip. (Note: the 7/8 inch edge is on either side).

Voila! You have finished a great friendship card using only stamps, ink and paper! That is what #SimpleStamping is all about!

Dress It Up

If you want to “Dress It Up” a bit, add a few of the Garden Gems. I added three to make the card sparkle!

Supplies

To shop my Online Store click on any photo below.

Product List
Product List

I really appreciate you stopping by today! I just love to share my creations! My hope is that you will give this a try yourself and experience how enjoyable it is to make your own cards.

Ciao!

Theresa

Posted in Photopolymer, Stampin' Up! 2021-2022 Annual Catalog

Quick and Easy Art Gallery Note Card for Any Occasion

Today I have a quick and easy Art Gallery note card for any occasion made with #SimpleStamping. I am also showcasing two of the new 2021-2023 Stampin’ Up! In Colors! These cards will be sent along with the 2021-22 Stampin’ Up! Annual Catalog to anyone who requests one. Information on how to request your own copy of the catalog and this free note card following this blog.

Measurements

Measurements: Polished Pink Card Stock (CS) card base: 5 1/2 x 8 1/2 inches with a score line at 4 1/4 inches; Basic White CS: 4 x 5 1/4 inches and 2 1/2 x 4 inches; Flirty Flamingo Designer Series Paper: 2 x 5 1/2 inches.

Stamping

The Art Gallery stamp is a Two-Step Stamp. There is an image that has less detail (left) and one that has more detail (right). It is usually easier to use one or the other first, but it does seem to be dependent on the particular stamp. For the Art Gallery flower I have found it easier to use the one on the left first.

This flower stamp works best if the first layer is light in color. This can be done by Stamping Off one time onto a scrap piece of paper. Then stamp onto the 2 1/2 x 4 inch Basic White CS using the Polished Pink ink (available May 4, 2021). Note: Be sure to use the Stampin’ Pierce mat under the clear Photopolymer stamps to get the best image.

Next stamp the second layer using the Polished Pink ink at full strength. Tip: To line up the images I find it easier to stand up so that I am directly over the stamped image.

To make the flower look even better, I stamped a third layer using Melon Mambo ink since it is a little darker than the Polished Pink ink. I just love the 3-D effect!

The last step for this flower is to stamp the stem and leaves in Evening Evergreen ink (available May 4, 2021).

Repeat the stamping as described above on to the 4 x 5 1/4 inch Basic White CS which will be the inside of this card.

Add the stem and leaves to the flower for the inside of the card.

Assembling the Card

Begin to assemble the card by adhering the inside panel to the inside of the Polished Pink CS card base.

Close the card. Adhere the Flirty Flamingo DSP to the card front. Note: I would prefer to use the Polished Pink DSP but that is not available even to Stampin’ Up! Demonstrators yet.

Complete the front of the card with the awesome 3-D flower you just stamped.

Viola! That is all there is to this fabulous Quick and Easy Art Gallery Note Card For Any Occasion. You can use any sentiment you wish. This could easily be a Mother’s Day card (coming up soon!). Other occasions that would work include: Birthday, Sympathy, Hello, Easter, Love & Friendship and Thank You to name a few.

Thank you so much to coming by today. If you would like to receive this note card with the 2021-22 Stampin’ Up! Annual Catalog you could send me your name and address via email to theresastreasures.az@gmail.com.

Supplies

Supplies not yet available are: Polished Pink Card Stock and ink, the Brights Designer Series Paper and the Evening Evergreen ink. These will be available on my Online Store May 4, 2021. You can get to my Online Store HERE or by clicking on any of the photos below.

Product List

Happy crafting!

Theresa

Posted in 2020-2021 Stampin' Up! Catalog, Nature, Rubber Band Background Technique, Stamping-off technique

Stampin’ Up!® Forever Fern Rubber Band Background Get Well Card

Welcome to my Wacky Wednesday Technique. This Stampin’ Up!® Forever Fern card is really wacky because it is made using rubber bands around a clear block. The things we will do to make a creative background!

I will be using 2 stamp sets today. The Forever Fern stamp set has a lot of great leaf images. The So Sentimental is one of my all time favorites. Sadly it will be retiring. It is only available while supplies last so order yours HERE before it runs out.

Measurements

Measurements: Granny Apple Green Card Stock (CS) card base: 5 1/2 x 8 1/2 inches with a score line at 4 1/4 inches; Very Vanilla CS: 4 x 5 1/2 inches and 3 x 4 inches; and Shimmery White CS: 3 3/4 x 5 inches.

Stamping

Let’s start stamping! Stamp the sentiment “Sending Healing Hugs” onto the 3 x 4 inch Very Vanilla CS with the Memento Tuxedo Black Ink. Use you Stampin’ Cut & Emboss Machine and the Stitched So Sweetly dies to cut out the sentiment. Fortunately, the Stitched So Sweetly Dies are not on the retiring list!

Rubber band Background in Daffodil Delight

In order to try this technique you will need rubber bands of various thicknesses. Wrap the rubber band around an E size Clear Block in a random pattern.

For this step I used Daffodil Delight ink. Use the ink pad to apply ink to the rubber bands. Flip the clear block over onto the 3 3/4 x 5 inch Shimmery White CS.

Remove the clear block and see what you have. I think I would have needed to apply more ink. You can rotate the Shimmery White CS, apply more ink to the rubber bands, and stamp down on the Shimmery White again. I stamped once on the upper half and once on the bottom half.

Next I sprayed my rubber band background with a little water to make it bleed into the paper a little.

While the paper is still damp, use the Granny Apple Green ink and the large leaf image from the Forever Fern stamp set to stamp some leaves around the edges.

Stamp some more of the leaves onto edges of the 4 x 5 1/4 inch Very Vanilla CS. This will be the inside of the card. I Stamped Off once on the smaller leaf image before stamping onto the Very Vanilla CS.

Rubber band background in Granny Apple Green

I decided the background needed a little more added to it so I inked up the rubber band block with the Granny Apple Green ink and added more to the stamped background.

I also sprayed it with a little water again and then used a paper towel to dab it dry.

Open the Granny Apple Green CS card base and adhere the inside of the card to the inside of the card base.

Use the Bone Folder to fold the card base. Next adhere the Rubber Band Background card piece to the card front.

Use Stampin’ Dimensionals to adhere the sentiment to the background.

Bling!

The Artistry Blooms Self Adhesive Sequins are perfect to add some Bling! to this card! I use the Take Your Pick tool to easily move the sequins from the acetate sheet to the card front.

Viola! You have made a totally wacky Rubber Band Background for this get well card!

Thanks for coming by today. I hope you have had a chance to review the Retiring List in my Online Store. Some products are discounted. Check it all out HERE.

Supplies

Product List

Have a wonderful day!

Theresa

Posted in 2020 August-December Mini Catalog, Designer Series Paper, Fun/Fancy fold card

Easy Fun Fold Note Card with Butterfly Bouquet

Welcome to Fun Fold Friday! There is so much you can do with the Butterfly Bouquet! I apologize to those of you who are tiring of this set, however, I have a wonderful Fun Fold for you today!

This card features the Designer Series Paper (DSP) in the Butterfly Bouquet called Butterfly Bijou. What is a Bijou? I didn’t know so I looked it up. A Bijou is something that is delicate, elegant or highly prized (defined by Merriam-Webster). I think Bijou definitely describes this Suite. Well enough of that-let’s make the card!

Measurements

Measurements: Butterfly Bijou DSP: small butterfly/pink splatter design: 2 3/4 x 3 1/4 inches, 2 1/2 x 5 1/4 inches and 4 x 5 1/4 inches, and one 6 x 6 inch piece of the large butterfly design; Calypso Coral Card Stock (CS) card base: 5 1/2 x 7 inches scored at 2 3/4 inches; Calypso Coral CS: 3 1/2 x 3 1/2 inches scored at 1/2 inches; and Basic White CS: 3 1/4 x 3 1/4 inches.

Dies

The Brilliant Wings Dies have a die that fits around all of the butterflies on the large butterfly design of the Butterfly Bijou DSP. If you do not have a die cutting machine, the butterflies can be fussy cut.

I will be using the Magenta Madness and the Calypso Coral colored butterflies.

Putting the card together

The first step is to adhere the 3 1/2 x 3 1/2 inch Calypso Coral CS to the 7 x 5 1/2 inch Calypso Coral CS so that it will fold toward the inside of the card base.

Next adhere the 4 x 5 1/2 inch Butterfly Bijou DSP with the pink splatter design side up to the inside of the 5 1/2 x 7 inch CS card base.

Continue by adhering the 2 1/2 x 5 1/4 inch Butterfly Bijou DSP to the card front. Then adhere the 2 3/4 x 3 1/4 inch Butterfly Bijou DSP, with the pink splatter side up, onto the front of the flap.

The card should end up looking like this.

To complete the inside of the card adhere the 3 1/4 x 3 1/4 inch Basic White CS to the inside of the card, minding the positioning so that the Basic White CS is hidden when the card is closed.

Adding the Butterflies

To add some dimension to the butterflies, you can use your Bone Folder to gently curl the wings.

Use Stampin’ Dimensionals to adhere the butterflies to the flap on the card front. I also added some Bling! by placing a few of the Elegant Faceted Gems around wherever I wished.

Viola! You have made a wonderful Fun Fold note card!

Thanks so much for coming by today! I hope you enjoyed this easy Fun Fold and will give it a try.

Supplies

Product List

Have a wonderful and creative day!

Theresa