Posted in 2023-2024 Stampin' Up! Annual Catalog, Animals, Blending Brushes, Love/Affection, Watercolor Pencil

Around the World On Wednesday Blog Hop – August 2023- Never Ever Grow Up

Hello and welcome! I am Theresa McEntee, creator of Theresa’s Treasures Paper Crafts. For the first time today I have the pleasure of participating in the Blog Hop with Around the World on Wednesday (AWOW) organized by Angie McKenzie. On the second Wednesday of each month, the AWOW team put together a thematic hop to give you some inspiration for your own crafting. “Never ever grow up” is this month’s theme.

Each month this group of creative friends design a project for a theme. At the end of this blog, is an image of all of the crew and where they are from around the globe. Such a talented and wonderful group of people. You will want to visit everyone to be sure to see all the amazing projects!

My Project for today

For this theme-Never ever grow up– I was thinking about something that you never stop needing through out your life–hugs! So I was on a mission to find a Stampin’ Up!® stamp set with an image of someone hugging someone else. I never imagined the image would be a cute baby sloth being hugged by their mother!

The Sweet & Precious stamp set is perfect for this theme. Their are 3 images that I could have chosen from. The sloths had the best image of a hug.

Project Details

This card is a fun fold. The pattern for the card base will be shown at the end and is in USA inches and metric.

Next I needed some patterned paper to use, Designer Series Paper(DSP) in Stampin’ Up! lingo. I couldn’t find what I wanted, so I made my own! The underlying DSP is the in the Subtles 6″x 6″ (15.2cm x 15.2cm) DSP pack.

The Soft Sea Foam paper was chosen because I wanted a very soft color. Then after I had cut the DSP paper pieces, I used the leaf stamp from the Sweet & Precious stamp set with Old Olive Ink to stamp the leaves over the DSP.

Lemon Lolly cardstock and Pecan Pie cardstock were chosen to compliment the Soft Sea Foam cardstock.

Stamping & Completing the Project

The sloth image is stamped in Crumb Cake Ink. Next a mask was cut from full stick sticky paper to cover the sloths. The Blending Brushes gently applied Soft Sea Foam Ink over the leaves. Pool Party Ink made the perfect sky.

The next step was to color the leaves and the sloths with the Watercolor Pencils Assortment 1.

The inside of the card was created with the leaves stamp and Old Olive Ink.

To complete the card, the sentiment (cut to fit in the oval) was stamped in Pecan Pie Ink. “Bring on the cuddles” is such a lovely sentiment! The Double Oval Punch was used to punch out the sentiment with the smooth edged oval. The scalloped-edged oval is punched out of Pecan Pie cardstock.

To finish the card up, I added Brushed Brass Butterflies and a bow made from the Sheer Pool Party Ribbon.

The AWOW Team

I am so glad you have joined me today in this worldwide hug that stretches all the way from Hawaii to New Zealand.  We all love sharing joy with you through projects from our individual parts of the world. I hope that you will be filled with lots of inspiration!

See More Inspiring Projects

Stop by all of the wonderful crafters and be inspired by their projects!

Jan Clothier – AU

Leonie Stuart – AU

Rochelle Laird-Smith – AU

Cheryll Miller – AU

Melissa Gifford – AU

Aurélie Fabre – FR

Mikaela Titheridge – UK

Angie McKenzie – US

Wendy Lee – US

Chris Smith – US

Anne Marie Hile – US

Tricia Butts – US

Theresa McEntee – US <<You are here>>

Bree Renwick – US

Lori Willcox – CA

Teri West – US

Cheryl Hamilton – US

Thank you so much for visiting my blog today. I hope you enjoyed learning more about my project. Have a most wonderful day!

Theresa

Measurements for USA inches:

  1. Card base: Soft Sea Foam cardstock 5 1/2″ x 8 1/2″ (cut & score as shown on pattern above)
  2. Side panels: Lemon Lolly cardstock 1 1/8″ x 3 1/8″ and DSP 1″ x 3″
  3. Bottom strip on front: Lemon Lolly cardstock 7/8″ x 5 1/4″ and DSP 3/4″ x 5 1/8″
  4. Front Panel: Pecan Pie cardstock 2 7/8″ x 3 1/8″, Lemon Lolly cardstock 2 3/4″ x 3″ and Basic White cardstock 2 5/8 ” x 2 7/8″
  5. Label: Pecan Pie cardstock 2 1/2″ x 3″ and Basic White cardstock
    2 1/4″ x 3″
  6. Inside: Pecan Pie cardstock: 5 1/4″ x 3″, Lemon Lolly cardstock
    5 1/8″x 2 7/8″ and Basic White cardstock 5″ x 2 3/4″

Measurements for Metric

  1. Card base: Soft Sea Foam cardstock 14.9cm x 21cm (cut & score as shown on pattern above)
  2. Side panels: Lemon Lolly cardstock 3.3cm x 7.2cm and DSP
    3.1cm x 7cm
  3. Bottom strip on front: Lemon Lolly cardstock 2.6cm x 14.7cm and DSP 2.4cm x 14.5cm
  4. Front Panel: Pecan Pie cardstock 7.1cm x 7.7cm, Lemon Lolly cardstock 6.9cm x 7.2cm and Basic White cardstock 6.7cm x 7cm
  5. Label: Pecan Pie cardstock 7cm x 8cm and Basic White cardstock 6.5cm x 8cm
  6. Inside: Pecan Pie cardstock: 7.5cm x 14.7cm, Lemon Lolly cardstock 7.3cm x 14.5cm and Basic White cardstock
    7.1cm x 14.3cm

Clickable Supply List

Product List
Bough Punch
[157711]
$22.00
Posted in 2023-2024 Stampin' Up! Annual Catalog, Animals, Blending Brushes, Gratitude/ Thanks, Nature, Online Exclusives

Kylie’s International Blog Highlights Gallery-August 2023: Sweet & Precious Thank You Card

Hello, thank you for visiting Theresa’s Treasures. I am Theresa, an Independent Stampin’ Up! Demonstrator in Arizona, USA. I am really excited to be participating in Kylie Bertucci’s International Blog Highlight Gallery with my Sweet &Precious Thank You card. Today I am blogging along with very creative Stampin’ Up! demonstrators from around the world! Please be sure to see all of the inspirational projects by visiting everyone’s blog. You will need to click on the “Vote” button below to see the Gallery.

The theme for this Gallery is “Thank You“.

We often forget those simple words “Thank you”. However, it is so important to show appreciation to the people in your life who have helped you, supported you or inspired you. One way to express gratitude is to send a handmade thank you card. Discover the joy in making and sending a handmade card!

This Sweet & Precious Thank You Card was created using the Sweet & Precious stamp set in the 2023-24 Stampin’ Up! Annual Catalog.

Current Host Code: QNJKQJNV

Measurements

  • Balmy blue cardstock card base: 4 1/4″x 11″ scored at 5 1/2″ (10.5cm x 29.7cm scored at 13.75cm)
  • Balmy Blue cardstock: 3 1/4″ x 4 1/2″ (7.5cm x 11cm)
  • Blueberry Bushel cardstock: 4 1/4″ x 5 1/2″ (11cm x 14.5cm)
  • Holographic Trio: Silver Wave pattern: 3″x 4 1/4″ (7.3cm x 10.9cm)
  • Basic White cardstock for stamping: 2 3/16″ x 3 9/16″
    (5.6cm x 9cm) and 1 3/4″ x 1 3/4″ (4.4cm x 4.5cm)
  • Basic White cardstock (inside): 3 1/4″ x 4 1/2″ (11cm x 14.5cm)

Supplies

Instructions

  1. Stamp the “Thank You” sentiment in Blueberry Bushel Ink onto the square of Basic White cardstock. Make a diecut with the small circular Radiating Stitches Die. Set aside.
  2. Using Memento Ink, stamp the mamma & baby penguin onto the smaller rectangle of Basic White Cardstock. Also stamp onto a couple of full stick sticky notes. Fussy cut the image out of the sticky note and lay over the stamped image on the Basic White cardstock.
  3. Use a large Blending Brush to very gently and slowly apply Balmy Blue Ink around the penguins. Remove the sticky note.
  4. Use the Light Smoky Slate Stampin’ Blend to add shadows.
  5. Use the Light Balmy Blue Stampin’ Blend Marker to make a slightly darker area under the penguins. Cover this with Wink of Stella.
  6. Make a diecut from the Blueberry Bushel cardstock with the largest Radiating Stitches Die. Use this same die to make a diecut from the large Basic White cardstock to make the inside of the card.
  7. Adhere the diecut Radiating Stitches rectangles-the Basic White one for the inside, and the Blueberry Bushel one for the card front.
  8. Adhere the Holographic paper over the Blueberry Bushel Radiating Stitches rectangle.
  9. Make a diecut with the second largest rectangular Radiating Stitches die on the Balmy Blue cardstock.
  10. Adhere the penguin piece to the Balmy Blue rectangle. Use Stampin’ Dimensionals to adhere this piece to the Holographic piece on the card front.
  11. Use Stampin’ Dimensionals to adhere the sentiment.
  12. Tie a bow with the Azure Afternoon Sheer Ribbon. Use a Mini Glue Dot to apply the ribbon below the sentiment.
  13. Finish up by applying the Balmy Blue Pastel Iridescent Gems.

Voila!

I hope you enjoyed my card today using the Sweet & Precious stamp set.

Visit my Online Store to order what you need to make this card for yourself. There is a photographic supply list is at the end of this blog.

Current Host Code: QNJKQJNV

You are currently at Theresa McEntee-Theresa’s Treasures-USA. When you click on the Vote For Me button above you will see the gallery of creative inspiration from Demonstrators around the world! Remember to visit everyone’s blog by clicking on the photo of their card in the Gallery.

To vote for your favorite cards, click on the small heart in the upper right-hand corner of each photo. You have 5 votes! Enjoy and come visit Theresa’s Treasures again soon!

Clickable Supply List

Product List

Thanks again for stopping by! Have a most wonderful and crafty day!

Theresa

Posted in 2023-2024 Stampin' Up! Annual Catalog, Blending Brushes, Emboss Resist Technique, Gratitude/ Thanks, Nature, Stampin' Emboss Powder, Stampin' Write Marker

Kylie & Bruno Bertucci’s Demonstrator Training Program Blog Hop-July 2023- Dainty Delight Emboss Resist Technique Thank You Card

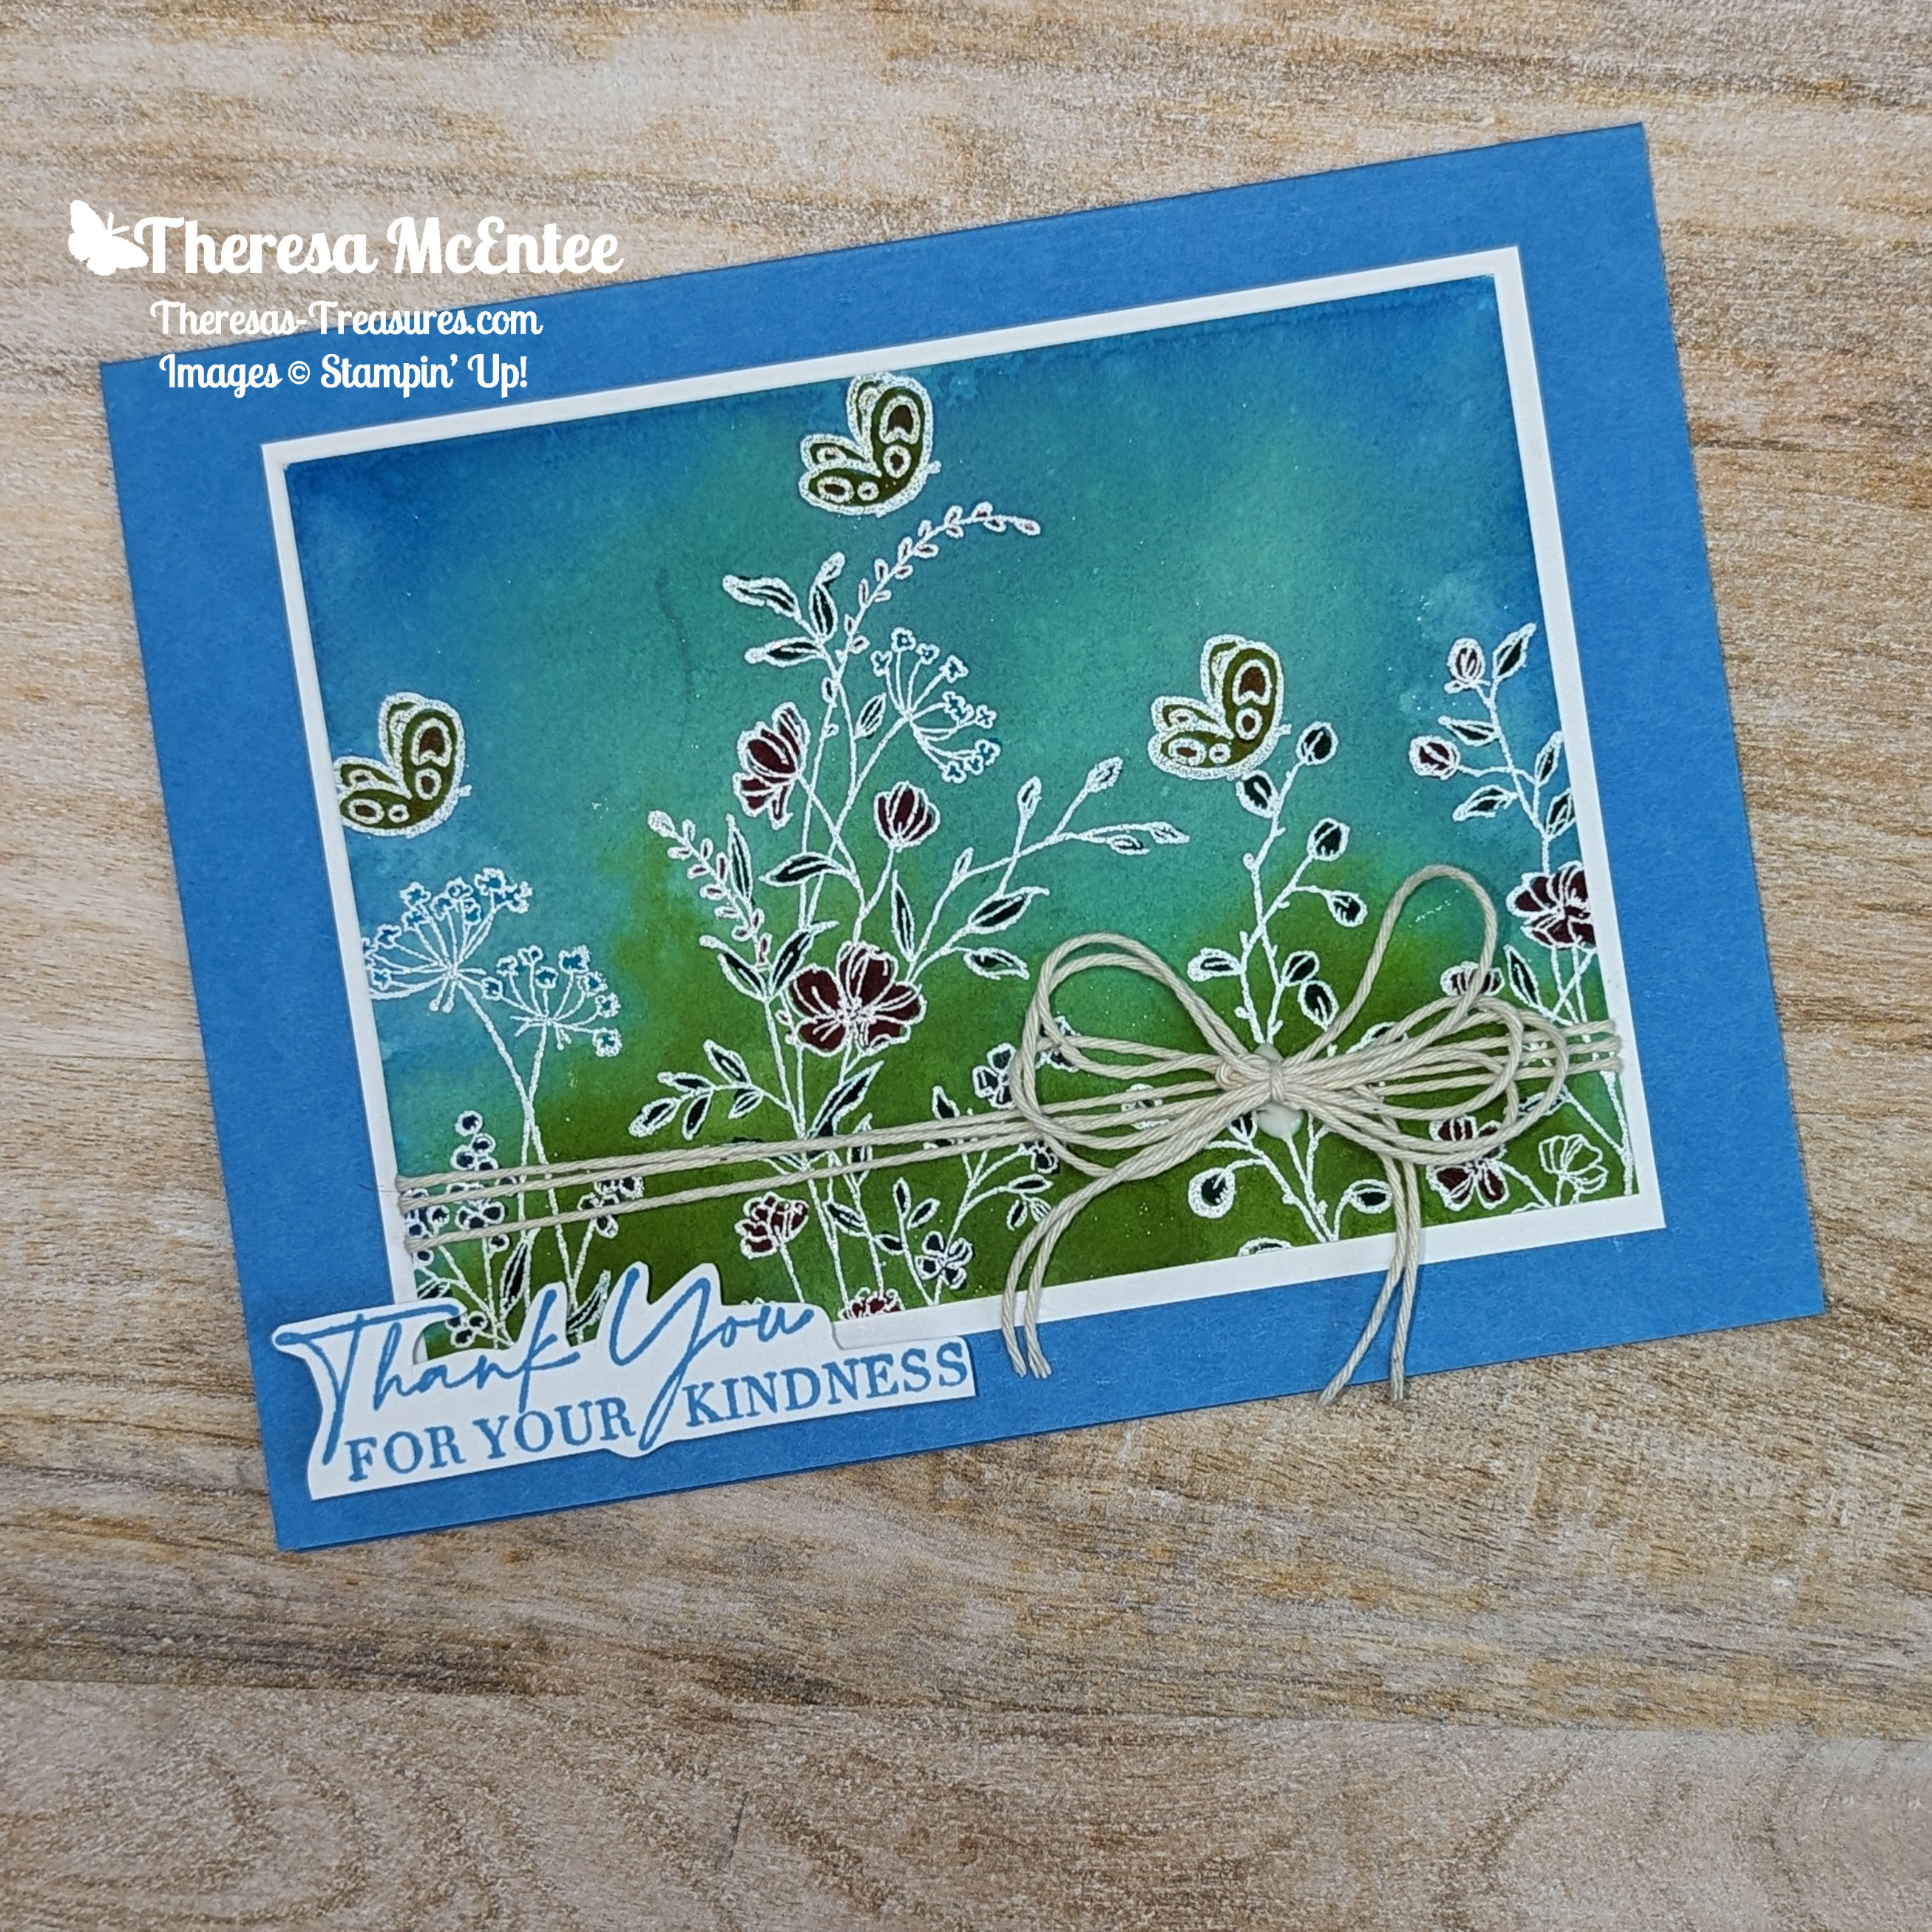
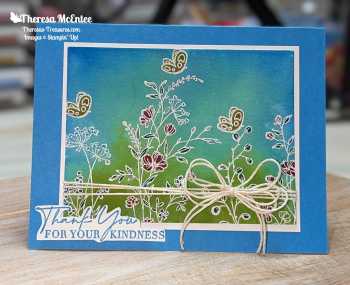
Hello! Welcome to the Kylie & Bruno Bertucci Demonstrator Training Blog Hop for July 2023. I’m Theresa, creator of Theresa’s Treasures Paper Crafts. I have a Thank You card today with the Dainty Delight stamp set using the Emboss Resist Technique. I am so glad you are joining me!

We are a group of Stampin’ Up! Demonstrators from around the world. We are taking part in training to help us build a successful Stampin’ Up! business. My goal is to participate in the monthly Blog Hop in order to create a handmade Thank You card to send to my customers! This blog hop is full of ideas and creative inspiration! Be sure to visit everyone’s blog by clicking on the links at the end of my blog.

Measurements

  • Azure Afternoon card stock (cs): 5 1/2″ x 8 1/2″ with a score line at 4 1/4 “
  • Basic White card stock (cs): 3 1/2 x 4 1/2 inches, 1″ x 2 3/4″ (sentiment) and 4″ x 5 1/4″ (inside)
  • Fluid 100 Watercolor Paper: 3 1/2″ x 5″ initially, then trimmed to be 3 1/4″ x 4 1/2″

Supplies

  • Dainty Delight stamp set
  • Easter Bunny stamp set (for the butterfly)
  • Versamark Ink
  • White Emboss Powder
  • Heat Tool
  • Acrylic Block E
  • Stampin’ Spritzer
  • Ink: Memento, Azure Afternoon, Coastal Cabana and Granny Apple Green
  • Bakers Twine Essentials Pack– Very Vanilla
  • Blender Brushes
  • Stampin’ Write Markers: Daffodil Delight, Pumpkin Pie, Shaded Spruce, Sweet Sorbet, Tahitian Tide (I don’t yet have the Azure Afternoon) and Orchid Oasis.

Instructions

Emboss Resist Technique

  1. Stamp the floral images as desired with the Versamark Ink onto the Fluid-100 Watercolor Paper. After each image, apply the White Emboss Powder. Use the Heat Tool to set. Stamp the butterfly image from the Easter Bunny stamp set. Cover with White Emboss Powder and heat set.
  2. Moisten the paper with the Stampin’ Spritzer.

  1. Use the Costal Cabana Ink Pad and apply color to the E Acrylic Block.
  2. Then use the Azure Afternoon Ink Pad and apply ink to the outer upper border.
  3. Finally, use the Granny Apple Green Ink Pad to apply color to the lower portion of the E Acrylic Block.
  4. Spritz the block with the Stampin’ Spritzer until the colors begin to blend together. Quickly turn upside down onto the Watercolor Paper with the embossed images. Let sit for 15 minutes.
  5. Remove the block, and Voila! You have a beautiful watercolor Emboss Resist panel.

Adding Color

  1. Now for the fun part! Color the flowers and butterflies as desired with the Stampin’ Write Markers.
  2. Trim this card piece to 3 1/4″ x 4 1/4″.

Putting it All Together

  1. Adhere to the 3 1/2″ x 4 1/2″ Basic White cs.
  2. Wrap the Very Vanilla Bakers Twine around the card piece three times.
  3. Make a bow with several layers. Adhere the bow to the card front with the Tom Bow Liquid Glue.
  4. Then adhere to the Azure Afternoon cs card base.
  5. Inside Card Piece: use the Blending Brushes with the Coastal Cabana, Azure Afternoon and Granny Apple Green Inks to create a light color on the Basic White cs inside card piece.

  1. Stamp the floral images in Memento Ink.
  2. Color the flowers with the Stampin’ Write Markers.
  3. Adhere to the inside of the Azure Afternoon cs card base.

Voila!

Remember to visit everyone’s blog. You will see creative inspiration from Demonstrators around the world! You are currently at Theresa McEntee-Theresa’s Treasures-USA. Enjoy!

I appreciate your visit to my blog today. Remember to sign up for my Theresa’s Treasures Paper Crafts Newsletter. You can click on the “Subscribe to my Newsletter” tab. Please subscribe to my blog as well. If you need any assistance with placing your order, let me know in the comments. Thanks!

Have a most wonderful day! Happy crafting!

Theresa

Promotions

New Online Exclusives!

Check out the Online Exclusives! These products will not be found in any Stampin’ Up! catalog. First click on my “shop” button. You will then select the “Menu” tab. Select “Shop Products” and scroll down to “Online Exclusives”. From here you can look at the currently available Online Exclusives!

Paper Pumpkin Monthly Kit

Last day to subscribe!!

Name: Fun in the Sun

This kit includes:

  • All the supplies you need to create 9 cards with fun accordion folds: 3 each of 3 designs; and coordinating envelopes.
  • An all-occasion stamp set to send friends and family words of encouragement, support and kindness.
  • Iridescent Sequin Embellishments.
  • 1 Classic Stampin’ Spot: Daffodil Delight.
  • Summertime Ephemera pieces, labels, and paper pieces.
  • Adhesive Dots and Tear & Tape Adhesive.

Completed card size: 5-1/2″ x 4-1/4″ (14 x 10.8  cm)

Coordinating Stampin’ Up! colors: Azure Afternoon, Basic Gray, Crumb Cake, Daffodil Delight, Flirty Flamingo, Granny Apple Green, Melon Mambo, Pool Party

Bonus Days!!

BONUS DAYS ARE BACK!

Why? Because you know what is a great deal? Getting rewarded for all the crafting supplies you’re already going to buy!

When you shop between July 6-31 and spend $50 USD | $60 CAD you will earn a $5 USD | $6 CAD coupon! Make sure you save all your coupons because you can redeem them (and we mean ALL of them) between August 1–31 .

There’s no limit to how many coupons you can earn!

Posted in 2023-2024 Stampin' Up! Annual Catalog, 3D Embossing Folder, Animals, Blending Brushes

Kylie’s International Blog Highlights Gallery-July 2023: Wildlife Wonder Thank You Card

Hello, thank you for visiting Theresa’s Treasures. I am Theresa, an Independent Stampin’ Up! Demonstrator in Arizona, USA. I am extremely excited to be participating in Kylie Bertucci’s International Blog Highlight Gallery with my Wildlife Wonder Thank You card. Today I am hopping along with Stampin’ Up! demonstrators from around the world! Please be sure to see all of the creative inspiration by visiting everyone’s blog.

The theme for this Gallery is “Thank You”.

We often forget those simple words “Thank you”. However, it is so very important to show appreciation to the people in your life who have helped you, supported you or inspired you. One way to express gratitude is to send a handmade thank you card. Discover the joy in making and sending a handmade card!

This Wildlife Wonder Thank You Card also showcases the Earthen Elegance and Fresh as a Daisy Designer Series Paper, and the Grassy Grove stamp set.

Current Host Code: DRT4WHEV

Measurements

  • Boho Blue cardstock card base: 5 1/2″ x 8 1/2″ scored at 4 1/4″
  • Fresh as a Daisy Designer Series Paper, blue “cloudy sky” design: 4 1/8″ x 5 3/8″
  • Earthen Elegance Designer Series Paper: 2 1/2″ x 4 1/8″
  • Pebbled Path cardstock: 1 1/4″ x 3″
  • Basic White cardstock: 1 1/4″ x 3″ and 4″ x 5 1/4″ (inside)

Supplies

  • Wildlife Wonder stamp
  • Grassy Grove stamp
  • Deckled Rectangle Dies
  • Ink: Pebbled Path, Copper Clay and Boho Blue
  • Watercolor Pencils Assortment 1
  • Blending Brush
  • Clear Emboss Powder
  • Heat Tool
  • 2023-2025 In Color Dots

Instructions

  1. Fold the Boho Blue card base and use the Bone Folder to make a crisp fold. Set aside.
  2. Take out the two pieces of Basic White cardstock. Start with the smaller piece. Use Pebbled Path Ink to stamp the wolf onto the paper.
  3. Color the rock under the wolf with the Pecan Pie Watercolor Pencil using a very light pressure. Then color the wolf with the Basic Gray Watercolor Pencil. Add some Blue Watercolor Pencil to the background. Finish up with a light layer of Early Espresso Watercolor Pencil under the rock.
  1. Use a Deckled Rectangle to diecut the edges. Set aside.
  2. For the inside card piece, use the Blending Brush and Boho Blue Ink to create a light blue background.
  3. Use the images from the Grassy Grove stamp and the Pebbled Path Ink to stamp a scene onto the inside card piece.

  1. Use a second Blending Brush and the Copper Clay Ink to add some color to the hill.
  2. Stamp the sentiment ” For All The Great Things You Do” just over the hill in Pebbled Path Ink.
  3. Adhere the inside card piece to the inside of the Boho Blue card base.
  4. Now stamp the sentiment “A Note Of Thanks” onto the Fresh as a Daisy Designer Series Paper. Immediately cover the ink with the Clear Emboss Powder. Tap off excess. Heat set.
  5. Adhere to the front of the Boho Blue card base.
  6. Use the Deckled Rectangle to cut the longest edges of the Earthen Elegance card piece. Adhere to the Fresh as a Daisy card piece.
  7. Adhere the wolf card piece to the Pebble Path cardstock. Then use Stampin’ Dimensionals to adhere it to the card front.
  8. Embellish with the 2023-2025 In Color Dots.

Voila!

I hope you enjoyed my card today using the Wildlife Wonder and Grassy Grove stamp set along with some awesome Designer Series Paper!

Visit my Online Store to order what you need to make this card for yourself. Photographic supply list is at the end of this blog.

Current Host Code: DRT4WHEV

You are currently at Theresa McEntee-Theresa’s Treasures-USA. When you click on the Vote For Me button above you will see the gallery of creative inspiration from Demonstrators around the world! Remember to visit everyone’s blog by clicking on the photo of their card in the Gallery.

To vote for your favorite cards, click on the small heart in the upper right-hand corner of each photo. You have 5 votes! Enjoy and come visit Theresa’s Treasures again soon!

Thanks again for stopping by! Have a most wonderful and crafty day!

Theresa

Clickable Supply List

Product List

Promotions

New Kit added to the Kit Collection!!

Boho Beach Kit

This kit includes: 

  • Supplies to create 8 cards—4 each of 2 designs
  • 8 coordinating envelopes
  • Boho Beach photopolymer stamp set
  • One Pecan Pie Ink Spot
  • Printed card bases, printed die cuts, adhesive, embellishments, and a clear block
  • Finished card size: 5-1/2″ x 4-1/4″ (14 x 10.8 cm)
  • Coordinating colors: Crumb Cake, Lost Lagoon, Pecan Pie, Pool Party, Wild Wheat

New Online Exclusives!

Being a Stampin’ Up! demonstrator means enjoying fun perks like preordering products before they’re available to customers! For Online Exclusives, a demonstrator can preorder any product listed on the Online Exclusives flyer! A larger selection of new, exclusive products will be available to demonstrators and customers during the customer sales period.

Demonstrator Preorder: 1 June–5 July 2023

Customer Sales Period Begins: 6 July 2023

Paper Pumpkin Monthly Kit

Bonus Days!!

BONUS DAYS ARE BACK!

Because do you know what’s a great deal? Getting rewarded for all the crafting supplies you’re already going to buy!

When you shop between July 6-31 and spend $50 USD | $60 CAD you will earn a $5 USD | $6 CAD coupon! Make sure you save all your coupons because you can redeem them (and we mean ALL of them) between August 1–31 .

There’s no limit to how many coupons you can earn!

Posted in 2023-2024 Stampin' Up! Annual Catalog, Blending Brushes, Decorative Masks, Gratitude/ Thanks, Inspiration in Ink Blog Hop, Stampin' Cut & Emboss Machine

Inspirations in Ink May 2023- Timeless Arrangements Bundle Thank You Card

Today I have a really fun and pretty Timeless Arrangements Bundle Thank You Card for you!

Welcome and thanks for visiting Theresa’s Treasures Paper Crafts! I am Theresa and I am a Stampin’ Up! Demonstrator in Arizona, USA. Today is the monthly Inspirations in Ink Blog Hop! I am excited to be hopping with awesome demonstrators from around the world. Be sure to check out everyone’s projects using the Timeless Arrangements Bundle. The Timeless Arrangements Bundle is in the 2023-24 Stampin’ Up! Annual Catalog. Order your Bundle today at my Online Store HERE.

Measurements

  • Highland Heather cardstock (cs) card base: 4 1/4″ x 11″ scored at
    5 1/2″ (10.5cm x 29.7cm scored at 14.9cm)
  • Basic White cs inside: 4″ x 5 1/4″ (10cm x 14.4cm)
  • Basic White cs for diecutting: 2″ x 8 1/2″ (5.2cm x 20.9cm)

Supplies

  • Timeless Arrangements Bundle (stamp set & dies) #161526
  • Artistic Mix Decorative Masks #159178
  • Orchid Oasis Ink #159214
  • Blending Brushes # 153611 & Small Blending Brushes #160518
  • 1/8″ (3.2mm) Metallic Woven Ribbon in Orchid Oasis #159199
  • 2022-23 In Color Pearls #161621
  • Wink Of Stella Clear Glitter Brush #141897
  • Multipurpose Liquid Glue & Stampin’ Dimensionals
  • Take Your Pick Tool
  • Silicon Craft Sheet
  • Stampin’ Cut & Emboss Machine
  • Paper Snips

Instructions

Working with the Orchid Oasis Ink

  1. Fold the Highland Heather card base on the score line. Place on a scratch paper.
  2. Position the Artistic Mix Decorative Mask over the front panel of the card base. Hold in place with sticky tape.
  3. Use the Blending Brush and the Orchid Oasis Ink to gradually apply ink in a circle slightly left of center. Remove the mask.
  4. Place the Basic White inside card piece on the scratch paper. Position the mask and hold in place with the sticky tape.
  5. Now use the Blending Brush to gradually apply ink to the upper right and lower left corner of the Basic White cs inside.
  6. Remove the mask and rinse it off with water. Set aside to dry.
  7. Stamp the “THANK YOU” sentiment on the end of the 2 1/2″ x
    8 1/2″ (6.4cm x 20.9cm) Basic White cs.
  8. Next stamp “I really appreciate You” on the Basic White inside card piece.
  9. Adhere the Basic White inside to the inside panel of the Highland Heather card base.

Timeless Arrangements Dies

  1. Diecut the following pieces from the Basic White cs with the “Thank You” stamped on it. The Dies are shown as well as the cut pieces. You will need four of the longer leaf branch.
  1. Die cut the Thank You with the medium sized rectangle die.
  2. Start gluing the leaf branches together on a Silicon Craft Sheet to make a longer branch to place over the thank you sentiment.
  3. Start with one long branch and several short branches to build the more full leaf branch to place under the sentiment.
  4. Use a Small Blending Brush to gradually add ink to the flowers as shown below.
  1. Glue the flowers to the top of the leaf branches.

Putting it altogether

  1. Position the leaves & flowers on the card front with the thank you sentiment in place but not adhered.
  2. Glue the leaves & flowers to the card front.
  3. Use Stampin’ Dimensionals to adhere the thank you sentiment.
  4. Now for the Bling!
  5. Tie a small bow with the beautiful Metallic Ribbon. Adhere to the card front with a Mini Dimensional.
  6. Add the awesome Orchid Oasis In Color Pearls. I used 5 pearls close to the leaf arrangements.
  7. If desired, use the marvelous Wink of Stella on the flowers for more sparkle!
  8. That is it!

Voila!

Thank you so much for visiting today! Please visit all the blogs in this hop. You will see fabulous, fun and inspiring projects made by the Inspirations In Ink Stampin’ Up! demonstrator group. You are currently visiting Theresa McEntee-USA creator of Theresa’s Treasures Paper Crafts. Check out these links on May 31st after midnight.

Christy Gridley – USA  

Deirdre Croal – USA

Julie Golding-Page – Canada

Karen Beck – Canada             

Theresa McEntee – USA

Robbie Rubala – USA 

Clickable Supply List

Product List
Paper Snips
[103579]
$11.00

Have a most wonderful and creative day!

Theresa

Would you like to join my Stamping Gems Team ? You can join to get good quality Stampin’ Up! products at a discount. I also have a special team Facebook page where we can share our creations. If you have a long wish list, you can join and get $125 USD in product for $99 USD! This is the best deal! Click HERE to join & order your starter kit!

Are you looking for high quality patterned paper for your card making or scrapbooking projects? Select Designer Series Paper will be 15% off starting June 1, 2023! Order early to be able to get what you want! Sale ends June 30, 2023.

The following Designer Series Papers will be 15% off June 1-30, 2023. Shop HERE.

Thinking of adding more creativity to your life? Try a monthly paper crafting kit! The Paper Pumpkin Monthly Subscription delivers a kit with everything you need to make a project-right to your door! Sign up for a Pre-paid Paper Pumpkin Subscription HERE.

ADD-ON

Welcome Inn Dies (Available for purchase starting the 11th of May while supplies last–right HERE).

Item number: 163192

$6.00 USD / $8.25 CAD,

This add-on includes:

  • One coordinating vase die: 1-1/2″ x 1-1/2″ (3.8 x 3.8 cm)
  • One coordinating flower die
  • One beautiful leaf die

Ciao!

Posted in 2022-23 Stampin' Up! Annual Catalog, 2023 January-April Mini Catalog, 2023-2024 Stampin' Up! Annual Catalog, Birds, Blending Brushes, Inspiration in Ink Blog Hop, Love/Affection, Nature, Outdoors, Stampin" Blends Alcohol Markers

Inspirations in Ink April 2023 Perched in a Tree Thinking of You Card

Perched in a Tree Thinking of You Card

Today I have a Super Cute Perched in a Tree Thinking of You Card that shows off all the new 2023-25 In Colors!

Welcome and thanks for visiting Theresa’s Treasures Paper Crafts! I am Theresa and I am a Stampin’ Up! Demonstrator in Arizona, USA. Today is the monthly Inspirations in Ink Blog Hop! I am excited to be hopping along with awesome demonstrators from around the world! Be sure to check out everyone’s projects using the 2023-25 In Colors & a stamp set/dies carrying over to the new 2023-24 Stampin’ Up! Annual Catalog. The Perched in a Tree stamp set (#159791) and Aspen Dies (#159798), Go To Greetings (#158763) and Sentimental Park Bundle (#160567) can be purchased from my online store now. The 2023-25 In Colors can be purchased starting May 2, 2023. You may order from my Online Store HERE.

Measurements

  • Very Vanilla cardstock card base: 4 1/4″ x 11″ scored at 5 1/2″ (10.4cm x 29.5cm scored at 14.7cm)
  • Very Vanilla cardstock: 2 1/2″ x 2 3/4″ (6.4cm x 7.0cm) and 1″ x
    2 3/4″ (2.5cm x 7.0cm)
  • Basic White cardstock: 3 7/8″ x 5 1/8″ (9.8cm x 13.9cm)
  • Copper Clay cardstock: 4″ x 5 1/4″ (10.1 cm x 12.2cm) and for the tree branch: 1 1/2″ x 5 1/2″ (3.8cm x 14cm)
  • Moody Mauve cardstock: flowers: 1 3/4″ x 2″ (4.5cm x 5.1cm)

Supplies

  • Perched in a Tree stamp set
  • Aspen Tree Dies
  • Sentimental Park stamp set
  • Sentimental Park Dies
  • Sentimental Park Bundle #160567 (available until May 1, 2023 at 11:59pm MDT)
  • Go to Greetings stamp set (a great stamp set for several sentiments)
  • Countryside Corners Dies
  • Ink: Memento Black and the 2023-25 In Colors: Boho Blue, Copper Clay, Moody Mauve, Wild Wheat & Pebbled Path
  • Blending Brushes
  • Stampin’ Blends Alcohol Markers: Boho Blue, Pebbled Path, Daffodil Delight, Copper Clay and Gray Granite
  • Glossy Dots
  • Wink of Stella
  • Sponge Dauber
  • Multipurpose Liquid Glue
  • Stampin’ Dimensionals

Instructions

Images

  1. Use the Memento Black Ink to stamp the bird onto the 2 1/2″ x
    2 3/4″ Very Vanilla cardstock. Color the bird with the Stampin’ Blends Alcohol Markers as desired. Die cut the bird with the Aspen Dies.
  1. Stamp the branch in Copper Clay Ink onto the 1 1/2″ x 5 1/2″ Copper Clay cardstock. Die cut the branch with the Aspen Dies.
  2. Stamp the flowers from the Sentimental Park stamp set onto the Moody Mauve cardstock using Moody Mauve Ink. Die cut the flowers with the Sentimental Park Dies.

Blending the Background

  1. Take out the Basic White cardstock. Start with the Boho Blue Ink and a Blending Brush.
  2. Apply the ink by moving the Blending Brush gently on the ink pad in small circles.
  3. Rub some of the ink off onto a scrap paper. Then apply the ink in small circles to the Basic White cardstock.
  1. After you have a smooth area of Boho Blue, apply the Pebbled Path Ink with another Blending Brush to the bottom. Tip: I have a different Blending Brush for each of the main colors (red, pink, orange, yellow, green, blue, purple, black and brown) so I do not have to wash them in between projects.
  1. Next blend in the Wild Wheat Ink over the Boho Blue.
  2. Follow with the Copper Clay Ink blended over the Wild Wheat layer.
  3. Finally blend the Moody Mauve Ink on the top of the Basic White cardstock.

Finishing Up

  1. Stamp the sentiment “Thinking of You” from the Go to Greetings stamp set onto the 1″ x 2 3/4″ Very Vanilla cardstock with the Boho Blue Ink. Die cut with the Countryside Corners Dies.
  2. Use a Sponge Dauber and the Copper Clay Ink to sponge the edges of the sentiment.
  3. Using the Moody Mauve Ink and the flowers from the Sentimental Park stamp set, stamp on the inside of the Very Vanilla cardstock card base.
  1. Die cut the card front oval with the trees from the 4″x 5 1/4″ Copper Clay cardstock using the Aspen Dies.
  2. Adhere the Copper Clay cardstock with the diecut trees to the Basic White cardstock with the blended ink on it using the Multipurpose Liquid Glue.
  3. Now adhere this card piece to the front of the Very Vanilla cardstock card base.
  4. Lay the tree branch on the card front and trim. Then adhere the tree branch to the card front with the Liquid Glue.
  5. Adhere the Moody Mauve flowers.
  6. Use Stampin’ Dimensionals to adhere the bird and the sentiment.
  7. Add the Daffodil Delight Glossy Dots to the center of the flowers.
  8. Apply Wink of Stella to the bird and flowers.

Voila!

Thank you so much for visiting today! Please visit all the blogs in this hop. You will see many fun and inspiring projects made by the Inspirations In Ink demonstrators using the 2023-25 In Colors! You are currently visiting Theresa McEntee-USA creator of Theresa’s Treasures Paper Crafts.

Robbie Rubala – USA 

Vicky Wright – Australia

Christy Gridley – USA  

Deirdre Croal – USA

Julie Golding-Page – Canada

Karen Beck – Canada

Rebecca Nutley – Australia            

Theresa McEntee – USA

Clickable Supply List

Product List

Have a most wonderful and creative day!

Theresa

Thinking of adding creativity to your life? Try a monthly paper crafting kit! The Paper Pumpkin Monthly Subscription delivers a kit with everything you need to make a project-right to your door! Sign up for a Pre-paid Paper Pumpkin Subscription HERE.

Ciao!

Posted in 2023 January-April Mini Catalog, Blending Brushes, Inspiration in Ink Blog Hop, Summer

Inspirations in Ink March 2023- Blending Brush Technique with Lighting the Way Bundle-Inspirational Card

Today I have a super charming and inspirational card spotlighting the Blending Brush Technique using the Lighting the Way Bundle & the Small Blending Brushes.

Welcome! Thanks for visiting Theresa’s Treasures Paper Crafts! I am Theresa and I am a Stampin’ Up! Demonstrator in Arizona, USA. Today is the monthly Inspirations in Ink Blog Hop! I am excited to be hopping with awesome demonstrators from around the world. Be sure to check out everyone’s projects using different Techniques.

The Lighting the Way Bundle and Small Blending Brushes I am using today are in 2023 Jan-April Mini Catalog. You may order what you need from my Online Store HERE.

Measurements

  • Pumpkin Pie card stock (cs) card base: 4 1/4″ x 11″ scored at 5 1/2″ (10.4cm x 29.5cm scored at 14.7cm)
  • Basic Black cs: two at 4″ x 5 1/4″ (10.1cm x 14.2cm) and 2″ x 4″
    (5cm x 10cm)
  • Basic White cs: two at 4″ x 5 1/4″ (10.1cm x 14.2cm) and 1 1/2″ x
    2 1/2″ (3.8cm x 6.4cm)
  • Silver Foil cs: 2″ x 3 1/2″ (5cm x 9cm)
  • Real Red cs: 2 1/2″ x 3 1/4″ (6.3cm x 8.2cm)
  • Mango Melody cs: 1″ x 3″ (2.5cm x 7.5cm)

Supplies

  • Lighting the Way Bundle
  • Deckled Rectangle Dies
  • Layering Circles Dies
  • Ink: So Saffron, Daffodil Delight, Mango Melody, Starry Sky, Orchid Oasis & Night of Navy
  • 4 Small Blending Brushes
  • Black Stampin’ Dimensionals Combo Pack
  • Stampin’ Dimensionals
  • Multipurpose Liquid Glue
  • Rhinestone Basic Jewels
  • Wink of Stella
  • Stampin’ Cut & Emboss Machine
  • scrap copy paper
  • Full Stick Sticky Notes (not sold by Stampin’ Up!)

Instructions

Most important tip: Getting a nice smooth blend takes practice.

  1. Use the largest Deckled Rectangle Die to cut a rectangle from the each of the larger Basic White cs. One will be the card front & one will be the inside.
  2. Use the scrap copy paper under the card front.
  3. Die cut the lantern from the Real Red cs.
  4. Lay the Real Red cs lantern on the card front so that it is about 3/4 inch (2cm) from the bottom edge & from the left edge. Make a very light pencil mark to delineate the inside “cage” around the light.

Using the Small Blending Brushes

  1. The Small Blending Brushes make it is easier to put color in a more precise location.
  2. Start with the So Saffron Ink Pad & a Blending Brush.
  3. Tip: Hold the brush by the end away from the brush to help in applying a light pressure to the ink pad.
  4. Move the brush over the So Saffron Ink Pad in a gentle circular motion to apply ink evenly to the brush.
  5. Tip: Tap & swirl to remove extra ink. Tap the brush on a scrap paper. Make a few circles (swirl) on the scrap paper before applying the brush & ink to your project.
  6. Apply a light layer of the So Saffron Ink inside the pencil marks. The color should be barely noticeable, soft & smooth.
  7. Use the smallest smooth edge circle die & cut two layers of the Full Stick Sticky Note.
  8. Apply the top Sticky Note circle to the area inside the pencil marks over the So Saffron Ink. Erase the pencil marks.
  9. Use the same brush & the Daffodil Delight Ink Pad. Apply ink to the brush. Tap & swirl on the scrap copy paper first. Then apply the brush to the area around the Sticky Note in a small circles going around the perimeter of the Sticky Note.
  10. Tip: Start light & go slow. You can add more ink, but if it is too dark you’re stuck with it.
  11. You may need 3-4 layers of the Daffodil Delight Ink to get a dark color that blends and is smooth.
  12. Tip: Swirl the Small Blending Brush on the copy paper in a circular motion until the ink comes off. Now use the Mango Melody Ink Pad and apply a slightly darker ring around the very edge of the Daffodil Delight layer. Start light & repeat until you like the effect.

Blending in the Night Sky

  1. Use the Starry Sky Ink Pad and a new Small Blending Brush. Tap off ink on the copy paper after each application of ink to the brush. Darker ink colors are more challenging to get smooth.
  2. Apply ink to the 4 corners of the card front. It will be very light at first. You will need about 8-10 layers of color to get it as dark as I did.
  3. Tip: Leave a white ring between the Mango Melody and the Starry Sky layers.
  4. Blend the Starry Sky layer up to the white ring using the Orchid Oasis Ink and a new Small Blending Brush. Start blending on top of the Starry Sky layer, and move in small circles with light pressure towards the Mango Melody.
  5. Tip: Do not allow the Orchid Oasis layer to blend with the Mango Melody layer. You will get a muddy green color. (Ask me how I know!)
  6. Finish with a new Small Blending Brush & the Night of Navy Ink Pad. Apply a little color to the corners and border of the card front.

Inside of the card

  1. Blend some Mango Melody Ink on the lower right-hand corner of the Basic White cs Deckled Rectangle for the inside of the card.
  2. Blend in some Starry Sky Ink from outside the corner moving toward the Mango Melody. Try not to overlap the 2 colors.
  3. Diecut a large firefly from the Basic Black cs and the Mango Melody cs.
  4. Adhere the pieces together with the Multipurpose Liquid Glue.
  5. Adhere flat to the lower right-hand corner.
  6. Adhere the inside card piece to the Basic Black cs layer.
  7. Adhere to the inside panel of the Pumpkin Pie cs card base.

Finishing Up

  • Remove the Sticky Note circle from the center of the “light”.
  • Stamp off in Pumpkin Pie Ink with the larger circular stamp in the Lighting the Way cling stamp set. Stamp the smaller circle with Pumpkin Pie Ink at full strength.
  • Adhere the Silver Foil portions of the lantern to the Real Red lantern. The Real Red cs lantern is the base. Use Stampin’ Dimensionals to adhere the lantern to the card front over the light as shown.
  • Die cut the small fireflies from the Basic Black cs & the Mango Melody cs.
  • Trim the Mango Melody cs firefly and apply the abdomen to the Basic Black cs firefly.
  • Use Mini Black Stampin’ Dimensionals to adhere the small fireflies around the light.
  • Adhere the card front to the remaining Basic Black cs.
  • Now adhere the entire piece to the front panel of the Pumpkin Pie cs card base.
  • Stamp the sentiment onto the smaller Basic White cs in Starry Sky Ink. Use the Deckled Rectangle Dies to cut it out. You will need to do some partial die cutting to make the sentiment the correct size.
  • Use Stampin’ Dimensionals to adhere the sentiment.
  • Add Wink of Stella to the wings of the fireflies on the outside & inside of the card.
  • Add the small Rhinestone Basic Jewels like stars in the sky.

Voila!

Thank you so much for visiting today! Please visit all the blogs in this hop. You will see all the fun and inspiring projects made by the Inspirations In Ink demonstrators. You are currently visiting Theresa McEntee-USA creator of Theresa’s Treasures Paper Crafts.

Theresa McEntee – USA

Robbie Rubala – USA 

Vicky Wright – Australia

Christy Gridley – USA  

Deirdre Croal – USA

Julie Golding Page – Canada

Karen Beck – Canada

Rebecca Nutley – Australia  

Clickable Supply List

Product List

Have a most wonderful and creative day!

Theresa

Thinking of adding creativity to your life? Try a monthly paper crafting kit! The Paper Pumpkin Monthly Subscription delivers a kit with everything you need to make a project-right to your door! Sign up for a Pre-paid Paper Pumpkin Subscription HERE.

Ciao!

Posted in 2022-23 Stampin' Up! Annual Catalog, 2023 January-April Mini Catalog, Blending Brushes, Grunge style, Ink & Inspiration Blog Hop, Love/Affection, Vintage

Ranunculus Romance for the Ink and Inspiration Blog Hop- February 2023

Hello fellow stampers! You are visiting with Theresa McEntee-author of Theresa’s Treasures Paper Crafts. I am hopping with the Ink & Inspiration Blog Hop today. There are several of us- you will find the list to follow the hop at the end of my blog post.

This is the challenge photo. What does it inspire you to make?

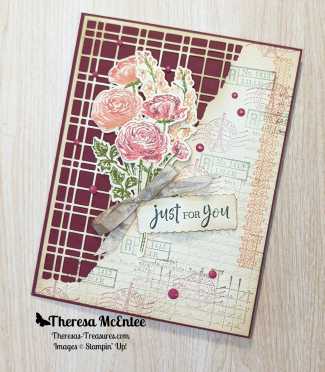
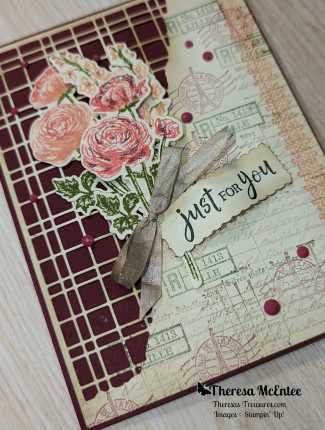
The Ink & Inspiration Challenge is both an image and a color challenge. I was inspired by the image because the flowers in the Ranunculus Romance stamp set are very similar to the photo. The colors were also very pretty and inspirational.

I had really wanted to use the Split Card Textures Dies. I got into my zone and just started stamping. Before I knew it, this card was created!

The Stampin’ Write Markers are great for applying ink to this red rubber stamp. The images of the flowers were easy to do by using the Stamparatus. That way if I missed a spot, I could reapply the ink and stamp a second time.

One of my favorite ribbons in the whole catalog is the White 1/4″ Crinkled Seam Binding Ribbon. This ribbon can be colored to coordinate with your card. Soft Suede Ink was applied with a Blending Brush until I had the off white color.

Order Supplies Here:

Product List

Have a most wonderful day!

Theresa

Posted in 2023 January-April Mini Catalog, Avid Stamper, Blending Brushes, Gratitude/ Thanks, Lake/Sea/Ocean, Sale-a-Bration 2023, Stampin" Blends Alcohol Markers

Kylie’s International Blog Highlights Gallery-February 2023: Beside Me Thank You Card

Hello, thank you for visiting Theresa’s Treasures. I am Theresa, an Independent Stampin’ Up! Demonstrator in Arizona, USA. I am super excited to be participating in Kylie Bertucci’s International Blog Highlight Gallery with my Beside Me Thank You Card, along with Stampin’ Up! demonstrators from around the world! The theme for this Gallery is “Thank You”.

We often forget those simple words “Thank you”. However, it is super important to show appreciation to the people in your life who have helped you, supported you or inspired you. One way to express gratitude is to send a handmade thank you card. Discover the joy in making and sending a handmade card!

The Beside Me Thank You Card showcases the Beside Me stamp set, the Blending Brushes and Small Blending Brushes, and the Deckled Rectangle Dies. The coloring is done with the Stampin’ Blends Alcohol Markers. There is also a unique use of a stamp from the FREE Thanks a Bunch stamp set you can earn during Sale-a-bration!

Current Host Code: B223KFE9

Measurements

  • Tahitian Tide card stock (cs): 4 1/4 x 11 inches scored at
    5 1/2 inches
  • Basic White cs: 4 1/8 x 5 3/8 inches, 4 x 5 1/4 inches 3 1/2 x 4 3/4 inches and 2 x 2 1/2 inches(sentiment)

Supplies

  • Beside Me Stamp Set
  • Deckled Rectangle Dies
  • Layering Circles Dies
  • Ink: Mango Melody, Pool Party, Coastal Cabana, Bermuda Bay, Tahitian Tide, Basic Grey and Memento Black.
  • Stampin’ Blends Alcohol Markers: Fresh Freesia, Tahitian Tide, Granny Apple Green, Night of Navy, Daffodil Delight, Medium Combo (400& 500), Medium Light (700) and Bronze.

Instructions

Top Layer

  • Lay the 3rd from the largest Deckled Rectangle in the center of the 4 1/8 x 5 3/8 inch Basic White cs. Use a pencil to lightly trace the inside of the bottom. Note: This will help with stamp placement.
  • Use the Stamparatus to position the stamp with the image of the man and children fishing. Stamp in Memento Ink. Also stamp an image onto a piece of full-stick sticky note paper.
  • Place the Deckled Rectangle Die back on the Basic White cs using the traced pencil line on the inside of the die as a guide.
  • Partially cut the Deckled Rectangle leaving the area with the pencil mark uncut. This is called a Partial Die Cut. Position the top clear plate at the border of the area to cut. Then run through the Stampin’ Cut & Emboss Machine. The die that is not under the clear plate will not cut.
  • Fussy cut the top of the image of the man & children on the Basic White cs and the sticky note paper. Cut off the fishing poles. These will be drawn in later. Place the sticky paper over the image.
  • Use a repositionable tape runner to adhere the 3 1/2 x 4 3/4 inch Basic White cs to the back of the die cut card piece. This will be the background piece.

Blending

  • Now for the fun part! Use the Blending Brushes and Small Blending Brushes to create the sunrise on the water.
  • Start by die cutting a 1 inch circle from the full-stick sticky note paper.
  • Use sticky note tape to create the horizon.
  • Use a Small Blending Brush to lightly apply some Mango Melody Ink to the area where you want the sun to rise. Then cover with the 1 inch sticky circle.
  • Start with the Mango Melody Ink and blend in a darker halo around the “sun”.
  • Then use the Small Blending Brushes to blend in Pool Party Ink followed by Coastal Cabana Ink. Use the larger Blending Brush to apply the Tahitian Tide Ink. Note: If you want the color to be as dark as my card, be patient. It takes awhile.
  • Remove the sticky note circle and horizon sticky note tape.
  • Move the “horizon” so that you can create the water. Tip: Place the sticky note tape for the horizon with a millimeter or two of the horizon showing underneath. This avoids having a white line between the sky and the water.
  • Apply a light layer of Mango Melody Ink under the “sun”. You may also leave a small amount of the space white.
  • Repeat the blending of the inks as you did for the sky. Using the small Blending Brushes, with Pool Party Ink and then Coastal Cabana Ink. Add in Bermuda Bay Ink. Use the larger Blending Brush to apply the Tahitian Tide Ink. Remove the sticky note tape.
  • Remove the sticky note paper from the image. Separate the background piece from the front.
  • Use the Blending Brushes and the inks to color in the white space on the background piece. This doesn’t have to be perfect. Color in just enough so that there is not a bright white space.

Stampin’ Blends

  • Use the Stampin’ Blends to color the man & children as desired. Colors used on this card are listed in the Supply List above and the Clickable Supply List below.
  • Use a small stamp from the FREE Thanks a Bunch stamp set to create gentle waves on the water. Waves are added to both the background and the edges of the front panel. Try the Pool Party Ink first. If you want the waves to be darker, use the Coastal Cabana Ink. Tip: less is more!
  • Adhere the background piece to the front of the Tahitian Tide cs card base.
  • Stamp the image of the flying birds in Basic Grey Ink. Note: I forgot to stamp the birds until after I had put the card together, lol!
  • Draw in the fishing poles using the Stampin’ Write Basic Black Marker.
  • Use Stampin’ Dimensionals to adhere the top layer to the card front. Take care to line up the edges and the outline of the people.

Sentiment

  • Create the sentiment by using the 3rd from the smallest Deckled Rectangle Die. By placing the die near the words, you can make a small deckled rectangle to fit just right.
  • Use Stampin’ Dimensionals to adhere the sentiment.

Voila!

I hope you enjoyed my card today using the Beside Me stamp set and the new Small Blending Brushes.

Visit my Online Store to order what you need to make this card for yourself. A photographic supply list is at the end of this blog.

Current Host Code: B223KFE9

Remember to visit everyone’s blog. When you click on the Vote For Me button you will see a gallery of creative inspiration from Demonstrators around the world! You are currently at Theresa McEntee-Theresa’s Treasures-USA. Enjoy!

To vote for your favorite cards, click on the small heart in the upper right-hand corner of each photo. You have 5 votes! Enjoy and come visit Theresa’s Treasures again soon!

Clickable Supply List

Product List

Thanks again for stopping by! Have a most wonderful and crafty day!

Theresa

Promotions

Sale-a-bration!!

Order today so you can get what you want before products sell out! Be sure to claim your FREE product! If you need any assistance please email me at theresastreasures.az@gmail.com

NOTE: The item numbers below are different than the ones in the Stampin Up Annual or 2023 Jan-Apr Mini Catalogs. When claiming the FREE product use the item numbers on the flyer below.

Posted in 2022-23 Stampin' Up! Annual Catalog, Blending Brushes, encouragement, Ink & Inspiration Blog Hop, Lake/Sea/Ocean, Nature, Outdoors, Summer

Relaxing with Paradise Palms for the Ink and Inspiration Blog Hop-January 2023

Hello fellow stampers! You are visiting with Theresa McEntee-author of Theresa’s Treasures Paper Crafts. I am hopping with the Ink & Inspiration Blog Hop today. There are several of us- you will find the list to follow the hop at the end of my blog post.

The Ink & Inspiration Challenge is both an image and a color challenge. I was inspired by the feeling of warmth and peace in the image. I could picture myself relaxing on the beach with the waves rolling in. The colors were also very inspirational and add to the feeling of peace and warmth.

I had the idea of using the Window Sheets to stamp some palms on in black to be in the shade. This created a feeling of depth to my card. I had never used the Window Sheets in this way. It was very fun to create something different! The images are from the Paradise Palms stamp set.

Here is how the card looks with the Window Sheet layer opened up. Several colors were used to create the scene. These included Tahitian Tide, Bermuda Bay, Coastal Cabana, Old Olive, Crumb Cake and Mango Melody. The colors were applied with the Blending Brushes.

Order Supplies Here

Product List
Stamparatus
[146276]
$49.00

Have a wonderful and crafty day!

Theresa