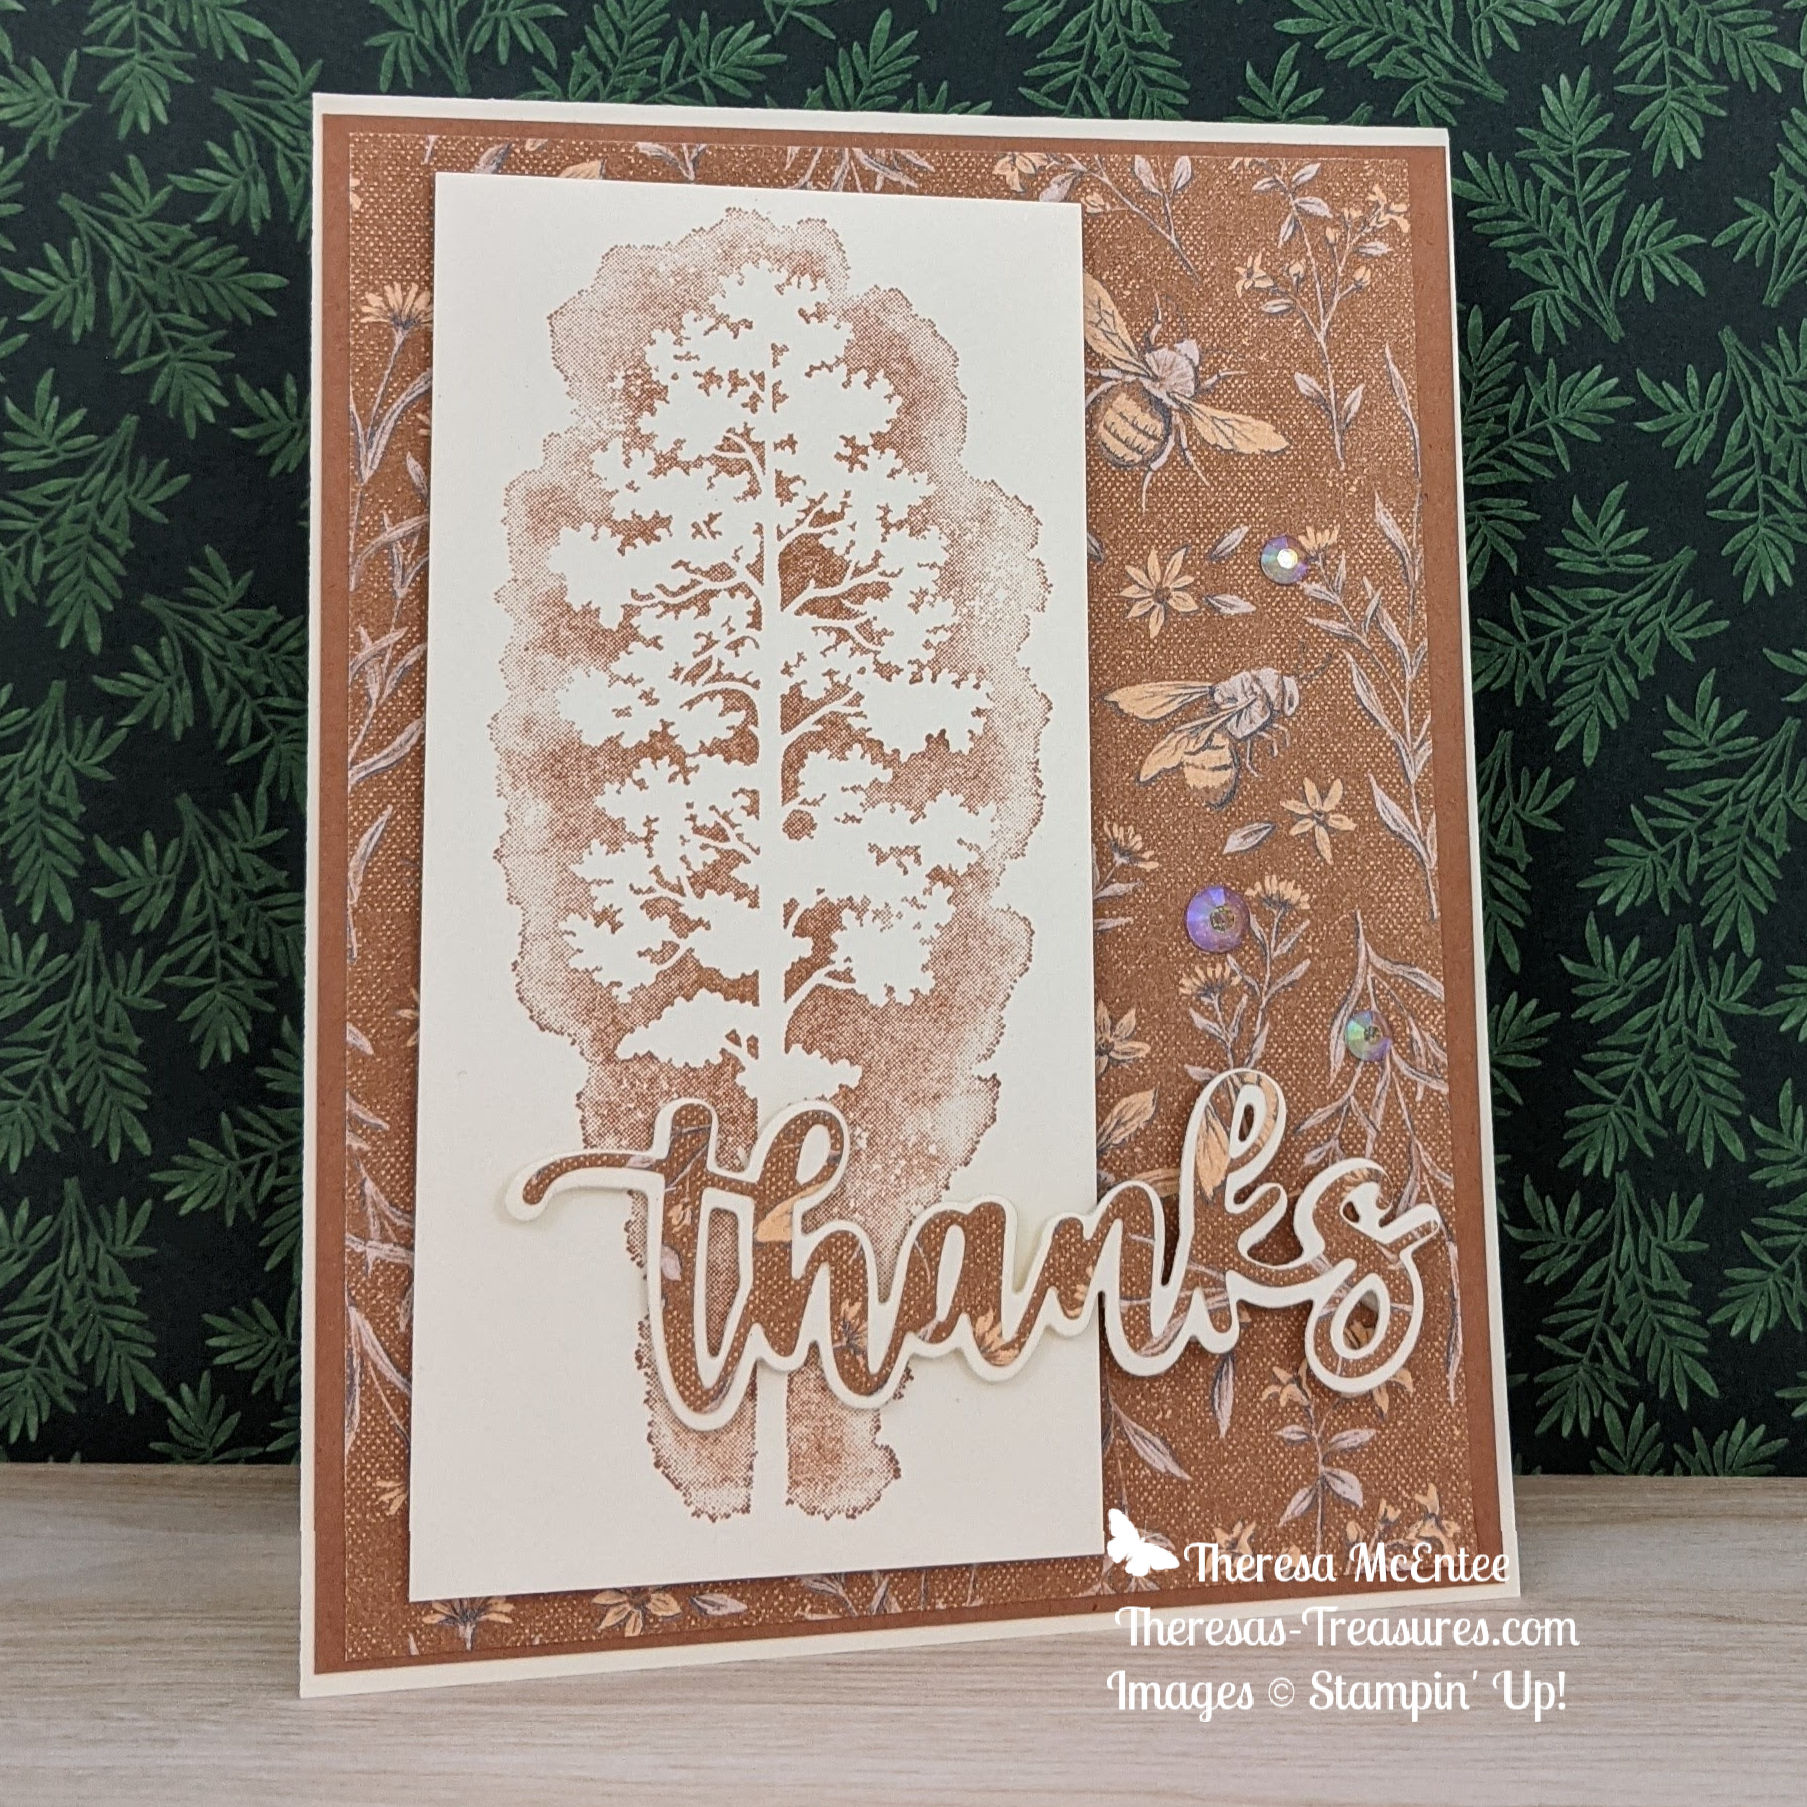
Thank you for joining me for our first Stampin’ Up!® Demonstrator Monthly Team Blog Hop by Kylie and Bruno Bertucci for 2022! I am excited that you could join us today because I know you will get lots of ideas and creative inspiration to bring into the New Year! My Amazing Silhouettes Thank You Card is made using the Amazing Silhouettes and the Amazing Thanks Dies.
I belong to a group of Stampin’ Up!® Demonstrators from around the world that are taking part in training that is helping us to build a successful Stampin’ Up!® business. I am a Demonstrator in Arizona, USA. If you are not already an amazing demonstrator, or do not have a fabulous demonstrator and live in the USA, I would love to be your most awesome demonstrator! I really appreciate your support. Also, be sure to visit all the different blogs and see all the inspiring creations!
The theme for the cards today is: Thank You. I have many customers who support me and I like to send them a thank you card every once in awhile. The following set of cards is for my fabulous customers, which I will be sending to anyone who orders during the month of January 2022. You may order HERE. And if you join my Stamping Gems Team this month I will also send a FREE pack of the In Color Jewels!
For this card I chose to use the Iridescent Rhinestone Basic Jewels for the Bling! The cool thing about the Iridescent Rhinestones is that they take on the color around them. So on green paper there is a blue and green sheen!
Thanks for joining me today on this Blog Hop. Be sure to visit the other blogs. You are currently at Theresa McEntee-USA.
“Let today be the start of something new” is the sentiment for the Friday Fun Fold Stampin’ Up!® Tulip Fields card today. It is a great inspirational sentiment to start the New Year!
Fun Fold Stampin’ Up!® Tulip Fields
This beautiful inspirational handmade fun fold card is really pretty simple to make. Just follow the step-by-step photographic tutorial below. A complete photographic and clickable supply list is found at the end of the blog.
Measurements for the Fun Fold Stampin’ Up!® Tulip Fields
Rich Razzleberry Card Stock (CS) card base: 8 1/2 x 11 inches. With the 8 1/2 inch edge on top, score at 2 1/8 and 6 3/8 inches. Turn the card stock so the 11 inch side is on top and score at 2 3/4 and 8 1/8 inches. Cut off the corners as shown.
Rich Razzleberry CS: 2 1/4 x 2 1/4 inches.
Fresh Freesia CS: 1 x 10 inches scored at 2 1/8 and 6 3/4 inches.
Basic White CS: 2 1/4 x 4 inches and 4 x 5 1/4 inches (not shown)
Flowering Tulips Designer Series Paper (DSP): 2 x 2 1/2 inches. *Be sure the pattern is in portrait orientation
Stamping
Stamp on the 4 x 5 1/4 inch Basic White CS. The tulips are a 3 step stamp. The first step is to stamp the outline in the Rich Razzleberry Ink. The second step is done in the Fresh Freesia Ink with the stamp to fill in the color. Note: Remember to use the Stampin’ Pierce Mat or a catalog to stamp on when using the clear Photopolymer Stamps.
For the third step I used Blackberry Bliss Ink. Repeat the process for the tulip bud.
Add stems using Soft Succulent Ink. You will need to use a piece of paper to mask the tulip under the tulip bud when stamping the stem for the bud.
The leaves are 2 step stamps. I used the Evening Evergreen Ink first, then the Soft Succulent Ink. And there you have the inside of the card!
Using the Blackberry Bliss Ink, stamp the sentiment on the bottom portion of the 2 1/4 x 4 inch Basic White CS. Use the Label Me Lovely Punch to punch it out. Then use Stampin’ Dimensionals to adhere the label to the 2 1/4 inch square of Rich Razzleberry CS.
Assembling the Card
To fold the Rich Razzleberry CS card base, start by folding the bottom flap up. Fold the left-hand flap to the right. Then fold the top flap down. Finally, fold the right-hand flap over to the left.
Now tuck the bottom corner of the right-hand flap under the right-hand corner of the bottom flap. This is the same as the way you would fold the top of a box. Tip: Be more gentle than I was as I made a slight crease on the bottom flap.
Adhere the Flowering Tulip DSP pieces as shown.
Open the card up and adhere the inside panel to the inside of the card base.
Fold the card and wrap the 1 x 10 inch Fresh Freesia CS band around the middle of the card. Adhere at the front. Be sure NOT to adhere the band to the card. Apply Stampin’ Dimensionals to the band and adhere the sentiment label to the band. The band shown slide off easily.
Bling!
One of my favorite embellishments in the new 2022 Stampin’ Up! January-June Mini Catalog is the Brushed Brass Butterflies! You can easily transfer the butterflies to your card with the Take Your Pick tool. They are so shiny!
Voila! The Fun Fold Stampin’ Up!® Tulip Fields inspirational card is finished! Give this one a try, it is a lot of fun. The first time around is always the most difficult. Tip: I often will make a new fun fold card with just the Basic White CS first until I get the hang of it.
Stampin’ Up News
Here are the new 2022 Stampin’ Up! Mini Catalog and Sale-a-bration Brochure. Click on the image to see the PDF for each one. During Sale-a-bration you earn a free product from the brochure with a $50 order!
Loving hands and heartfelt words are the best way to show you care. With hand designs that illustrate coming together in friendship and solidarity, the All Together Collection will help you create cardmaking and paper crafting projects that reflect the people you know and love. This set of stamping supplies is available now when you Join my Stamping Gems Team, or it will be available for everyone on February 1 through May 2, 2022.
Join my Stamping Gems Team by ordering a Starter Kit! This kit contains whatever you choose up to $125. You pay only $99! And you can choose 2 more stamp sets for FREE! If you are interested in the rest of the details, email me: theresastreasures.az@gmail.com.
This months Paper Pumpkin subscription will l be a Love Theme. You may still sign up until January 10, 2022. Subscribe HERE .
There are many kits available and the Light the Candles is the newest addition. Check out the rest of the kits HERE .
Hello! There is exciting news in the Stampin’ Up! world! The 2022 Stampin’ Up! January to June Mini Catalog is live! And it is Sale-a-bration Time again! Today I am using a FREE Sale-a-bration item for my Friendly Hello #SimpleStamping Birthday Card!
What is Sale-a-bration? Sale-a-bration is a promotion by Stampin’ Up! during which you earn FREE product for a qualifying order. In the USA it is $50 for most of the FREE product. There are two selections that require a $100 order. View a PDF of the 2022 Mini Catalog HERE and the Sale-a-bration Brochure HERE. If you have any questions, don’t hesitate to shoot me an email at theresastreasures.az@gmail.com.
I have a follow up on a post I did on the In The Moment stamp set and different coloring techniques. The most popular technique was the Stampin’ Blends Alcohol Marker! I must admit that I really love to color with the Blends.
Ok, now for the Friendly Hello #SimpleStamping Birthday Card!
The #SimpleStamping Challenge for this month was to create a card using just Stamps, Ink and paper-and to use a Sale-a-bration product.
This card is made with the Friendly Hello Stamp Set + Friendly Hello 12 x 12 Designer Series Paper (DSP) which is available as a set with an order of $100 USD.
Here is how I did it:
Measurements
Friendly Hello #SimpleStamping Birthday Card:
Basic White Card Stock (CS): 4 x 5 1/4 inches and 3 1/2 x 4 3/4 inches
Friendly Hello DSP: 4 x 5 1/4 inches
Pale Papaya CS card base: 5 1/2 x 8 1/2 inches with a score line at 4 1/4 inches.
Ink colors:
Pale Papaya
Granny Apple Green
Fresh Freesia
Balmy Blue
Evening Evergreen
Stamping
Starting with the inside of the card, stamp the flowers in Pale Papaya ink onto the 4 x 5 1/2 inch Basic White CS. Next stamp in Granny Apple Green ink using the leaf sprig. Finish with the Fresh Freesia ink and the small berry bunch. Set aside.
Now we will make the front of the card. Using Balmy Blue Ink, stamp the image of the bird on the branch in the center of the 3 1/3 x 4 3/4 inch Basic White CS. Next stamp the sentiment “Hope you have the BEST BIRTHDAY” in Evening Evergreen Ink in the lower left-hand corner. Using the Pale Papaya Ink stamp the flowers around the bird. Now stamp in Granny Apple Green Ink using the sprig of leaves.
To complete the front of the card, stamp in Fresh Freesia Ink using the small berries.
Assembling the Card
First adhere the stamped inside panel to the inside of the Pale Papaya CS card base.
Next adhere the stamped card front to the 4 x 5 1/4 inch Friendly Hello DSP.
Adhere the stamped front/DSP panel to the front of the card base. Voila! Super simple and very beautiful! Perfect for the #SimpleStamping Challenge!
Hello fellow stampers! I hope you are having a good day. Today I am going to show different coloring techniques with In the Moment, a new stamp set in the upcoming 2022 Stampin’ Up! Jan-June Mini Catalog. I will show three different media: Watercolor Pencils with the Blender Pen, Stampin’ Write Markers and Stampin’ Blend Alcohol Markers. At the end, you can vote on which one you like best!
Watercolor Pencils with the Blender Pen
The stamp set is In the Moment and is a sneak peek of what is in the 2022 Stampin’ Up! January to June Mini Catalog. The catalog will be live on January 4, 2022 at 3 am MST. This card was colored with the Watercolor Pencils followed by a Blender Pen. The Watercolor Pencils come in two different assortments. Assortment 1 has 13 pencils and Assortment 2 has 10 pencils. 23 different colors! The Blender Pen has a chemical in it which helps to smooth out the pencil marks.
Stampin’ Write Markers
The Stampin’ Write Markers were used to color this card. These are water based markers. The colors are more vivid. These can be purchased by color group (10 colors in each group) or in a pack containing all 40 colors. The color groups are: Brights, Neutrals, Regals and Subtles. The big pack is called Many Marvelous Markers.
Stampin’ Blend Alcohol Markers
I used the Stampin’ Blends Alcohol Markers to color this card. These are alcohol based markers. They are different from water based markers in that they can be blended to create a more subtle gradation of shadowing. There are 38 colors which come as a 2 marker combo-light and dark. There is also a color lifter (which I use quite frequently when I color outside the line).
Vote on which coloring technique is your favorite.
[ays_poll id=7]
Thanks for stopping by today. I hope you voted. It will be really fun to see which technique is most popular!
I am so excited and thankful to be part of the Top 10 Winners Hop from Kylie Bertucci’s International Blog Highlight! Thank you to everyone who voted for my card from December’s International Blog Highlight, allowing me an opportunity to post on the Winners Hop. Ten fabulous demonstrators from around the world will be posting today! The theme for the card today is “Thank you”.
The “Thank You” sentiment I used is one of my favorite fonts. It is from the Pansy Patch stamp set.
I used the Masking Technique to get the thin rows of tulips in different colors. I also masked the windmill. The Blending Brushes take a while to get used to. I am just now feeling that the sky turned out the way I like it.
I have another sneak peek from the upcoming 2022 Stampin’ Up! Jan-June Mini Catalog- Tulip Fields! This is an awesome stamp set which is part of the Flowering Fields Suite. This suite includes: 2 stamp sets, 2 die sets, the Flowering Fields Designer Series Paper (DSP), Evening Evergreen Windowpane Check Ribbon, and Brushed Brass Butterflies!! If you want this Suite now you can get it in your Starter Kit when you join my Stamping Gems Team! More info on that will follow. Otherwise, the Flowering Fields Suite will be available for purchase on January 4, 2022.
It is so much fun to put scenes like this one together! I encourage you to take some time to let your creativity bubble up and see what your scene might look like!
Measurements for Sneak Peek-Tulip Fields
Sneak Peek-Tulip Fields
Pear Pizzazz Card Stock (CS): 5 1/2 x 8 1/2 inches with a score line at 4 1/4 inches
Basic White CS: two at 4 x 5 1/4 inches and a 1/2 x 3 inch strip.
Stamping the Tulip Fields
The first step is to use Memento Black Ink and stamp the windmill onto one of the 4 x 5 1/4 inch Basic White CS. Also stamp a windmill onto a sticky note. (Full sticky notes work best and can be found on Amazon HERE.) The windmill will be used as a Mask.
Fussy cut the windmill stamped on the sticky note paper. Set aside. Now draw a light pencil line for the horizon and another 2 lines for the path away from the door of the wind mill.
The Masking Technique. First put a strip of sticky paper above the horizon. This is the first mask. Use Poppy Parade Ink to stamp the triangle of tulips as shown.
Cover the path with sticky note paper. Stamp in Daffodil Delight Ink to one side of the path. Move the sticky paper and then stamp on the other side of the path.
Use the sticky note paper to help you stamp a row of tulips in Mango Melody Ink between the Poppy Parade tulips and the Daffodil Delight tulips. To finish, complete the row of flowers up to the horizon stamping in Rich Razzleberry Ink.
Blending the Sky
Now move the sticky note strip so it is under the horizon. Apply the fussy cut windmill.
Use the Stampin’ Up! Blending Brushes to make a nice sky. Start with the Balmy Blue Ink. Move the Blending Brush in a circular motion on the ink pad. Then using the same circular motion, gradually apply the ink to your card front. I liked that the sky turned out a little blotchy. Next use Pacific Point Ink just around the edges to help the scene “Pop”!
Coloring the Windmill
Remove the sticky strip and the sticky windmill. Save the windmill to use again later. Use the Stampin’ Write Markers in Sahara Sand, Crumb Cake and Soft Suede to color the windmill.
More Stamping
Reapply the sticky strip mask to define the path from the door of the windmill. Use Pear Pizzazz Ink and the triangle of tulip stamp to complete the path.
Tip: I used the Stampin’ Write Markers to fill in some small white spaces between the different colors of tulips.
A trick for stamping the tree in two colors. First ink up the tree in Pear Pizzazz ink. Then carefully ink up the trunk using the corner of the Soft Suede ink pad. Stamp the tree on the horizon.
Add some more smaller trees on the horizon.
Finishing Touches
Use Pear Pizzazz Ink to stamp the sentiment “happy birthday” from the Timeless Tulips stamp set onto a 1/2 inch strip of Basic White CS. Cut the right-hand end to look like a banner.
Another coordinating stamp set, Timeless Tulips, is in the 2021-22 Stampin’ Up! Annual Catalog. With the Rich Razzleberry Ink, stamp a few of the small tulips on the second 4 x 5 1/4 inch Basic White CS. Then stamp one in Mango Melody Ink and three in Poppy Parade Ink. Finish the stamping by adding some leaves in Pear Pizzazz Ink.
To create the clouds you will need the White Stampin’ Chalk Marker. First stamp the clouds in Balmy Blue Ink. Let them dry. Then use the Chalk Marker to add dimension to the clouds.
Assembling the Card
Adhere the windmill card piece to the front of the Pear Pizzazz CS card base. Then adhere the larger tulip piece to the inside of the card base. That’s all there is to it!
Use Stampin’ Dimensionals to add the “happy birthday” sentiment and Voila! You have a beautiful little scene! That was so much fun! I just love how it turned out!
I have an exciting new stamp set to give you a sneak peak of today- Honeybee Home. The 2022 January-June Stampin’ Up! Mini Catalog premieres on January 4, 2022! There are so many great stamp sets, Designer Series Papers, Dies and Embossing Folders in this catalog! If you would like me to be your Stampin’ Up! Demonstrator and are in need of a catalog, drop me an email with your name and address. I will send you a Catalog and a free gift! My email is theresastreasures.az@gmail.com.
Now for the card!
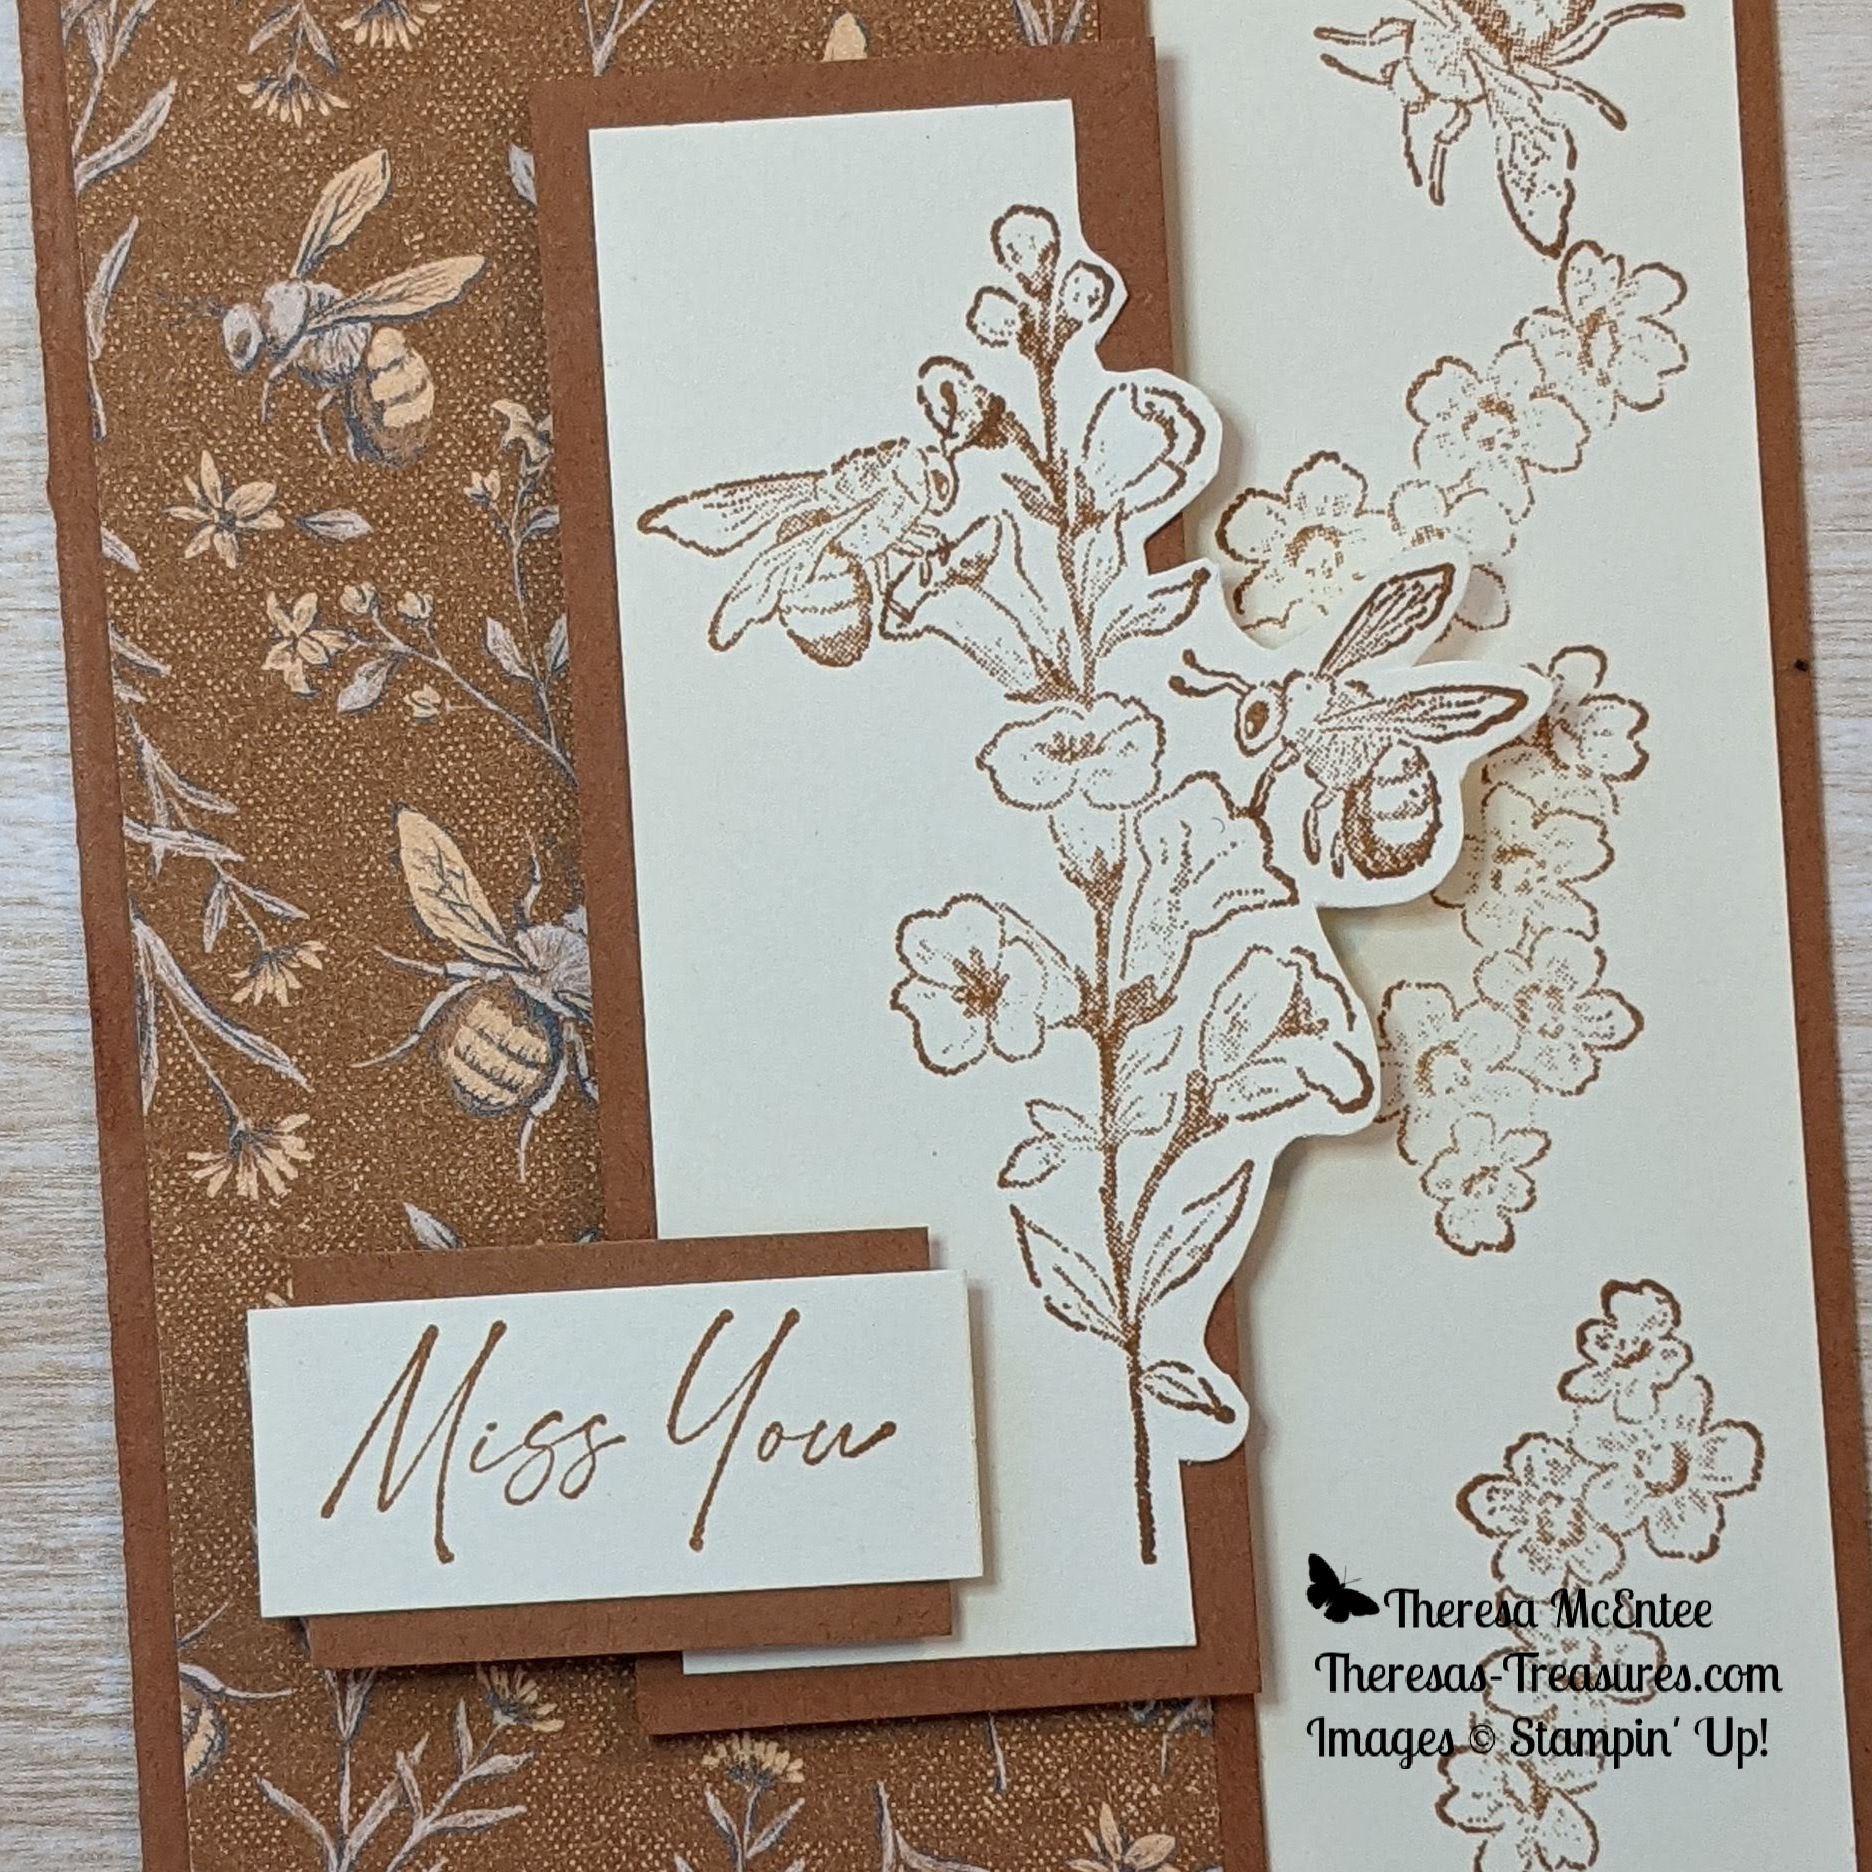
The elements that come together to make this “Miss You” Honeybee Home card are in the Heart & Home Suite. The Heart & Home Designer Series Paper (DSP) is just gorgeous!
Measurements
Honeybee Home Miss You Card
Cinnamon Cider Card Stock (CS) card base: 5 1/2 x 8 1/2 inches with a score line at 4 1/4 inches ( We will cut this to get the other Cinnamon Cider CS card pieces).
Very Vanilla CS: 4 x 5 1/4 inches, 2 1/2 x 3 3/4 inches and 3/4 x 1 3/4 inches (not pictured).
Heart & Home DSP: 2 1/2 x 5 1/4 inches.
Cutting the Card Base
Cut 1 1/2 inches off the left side of the Cinnamon Cider CS card base. This creates the card base and a 1 1/2 x 5 1/2 inch Cinnamon Cider CS piece. Cut 1 1/2 inches off the end of this piece. Now you have all of the card pieces needed.
Stamping
Start out by stamping the inside of the card. Use Cinnamon Cider Ink to stamp the largest Honeybee onto the top of the 4 x 5 1/4 inch Very Vanilla CS. Then stamp the group of flowers along the side.
Now stamp the flower with the stem onto the center of the 2 1/2 x 3 3/4 inch Very Vanilla CS. Next stamp the two bees in profile. Stamp close to the flowers so it looks like the bees are attending to the flowers.
To finish up the stamping, stamp the sentiment “Miss You” onto the 3/4 x 1 3/4 inch Very Vanilla CS.
Putting the Honeybee Home card together
Use the Paper Snips to cut the right side of the flower with the honeybees. Next adhere this piece to the 1 1/2 x 4 inch Cinnamon Cider CS. The cut portion of the flowers will hang over the edge of the Cinnamon Cider CS.
Adhere the stamped 4 x 5 1/4 inch Very Vanilla CS to the inside of the Cinnamon Cider CS card base.
Fold the left-hand flap forward and adhere the Heart & Home DSP to the front panel. (Sorry-forgot to make a photo!)
Adhere the “Miss You” sentiment to the left over Cinnamon Cider CS piece. Trim to about 1/4 inch on either side.
Stampin’ Dimensionals
Apply Stampin’ Dimensionals to the back of the flower and honeybee piece. Also apply a Stampin’ Dimensional on the back of the sentiment on the right. Apply two Dimensionals to the back of the sentiment on the left. You’ll see why you need two in a minute.
Remove the protective covering for the Stampin’ Dimensionals and adhere the flower and honeybee piece first. The edge of the Cinnamon Cider CS should line up with the right-sided edge of the front flap. Follow by adhering the sentiment. As you will see, you need two Dimensionals on the left because the right side is elevated by two.
Voila! You have lovely Honeybee Home “Miss You” card!
I loved making this card. I initially did not have any idea how it would turn out. Sometimes I just start out by cutting the card base and stamping some images. Then I start to see how I want them to come together.
It is very subtle, but you can add Bling!. I added the Champagne Rhinestone Jewels to the center of some of the flowers on the card to the right. In person, the rhinestones really sparkle!
Supply List
The Honeybee Home stamp set and the Heart & Home DSP will be available to order starting January 4, 2022.
Have a wonderful day! I hope you take some time to craft. This is the best time of year to make cards and papercrafts because you can give them away as Holiday gifts!