I have something a little different for you today. A craft retreat! I highly recommend going to a Scrapbooking or Cardmaking Retreat at some point if you love to craft. I have lots of fun photos from the Flocking Fabulous Flamingo Retreat put on by Cactus Crew Scrapbooking that I attended this last weekend. Precautions were taken to keep all of us safe all weekend. We all had so much fun!
Here I am in my Fabulous Flamingo mask that my friend Amanda gave me. We have been to several craft retreats together and always have a great time. Usually Jeanne joins us, but she wasn’t able to come this time. We really missed her!
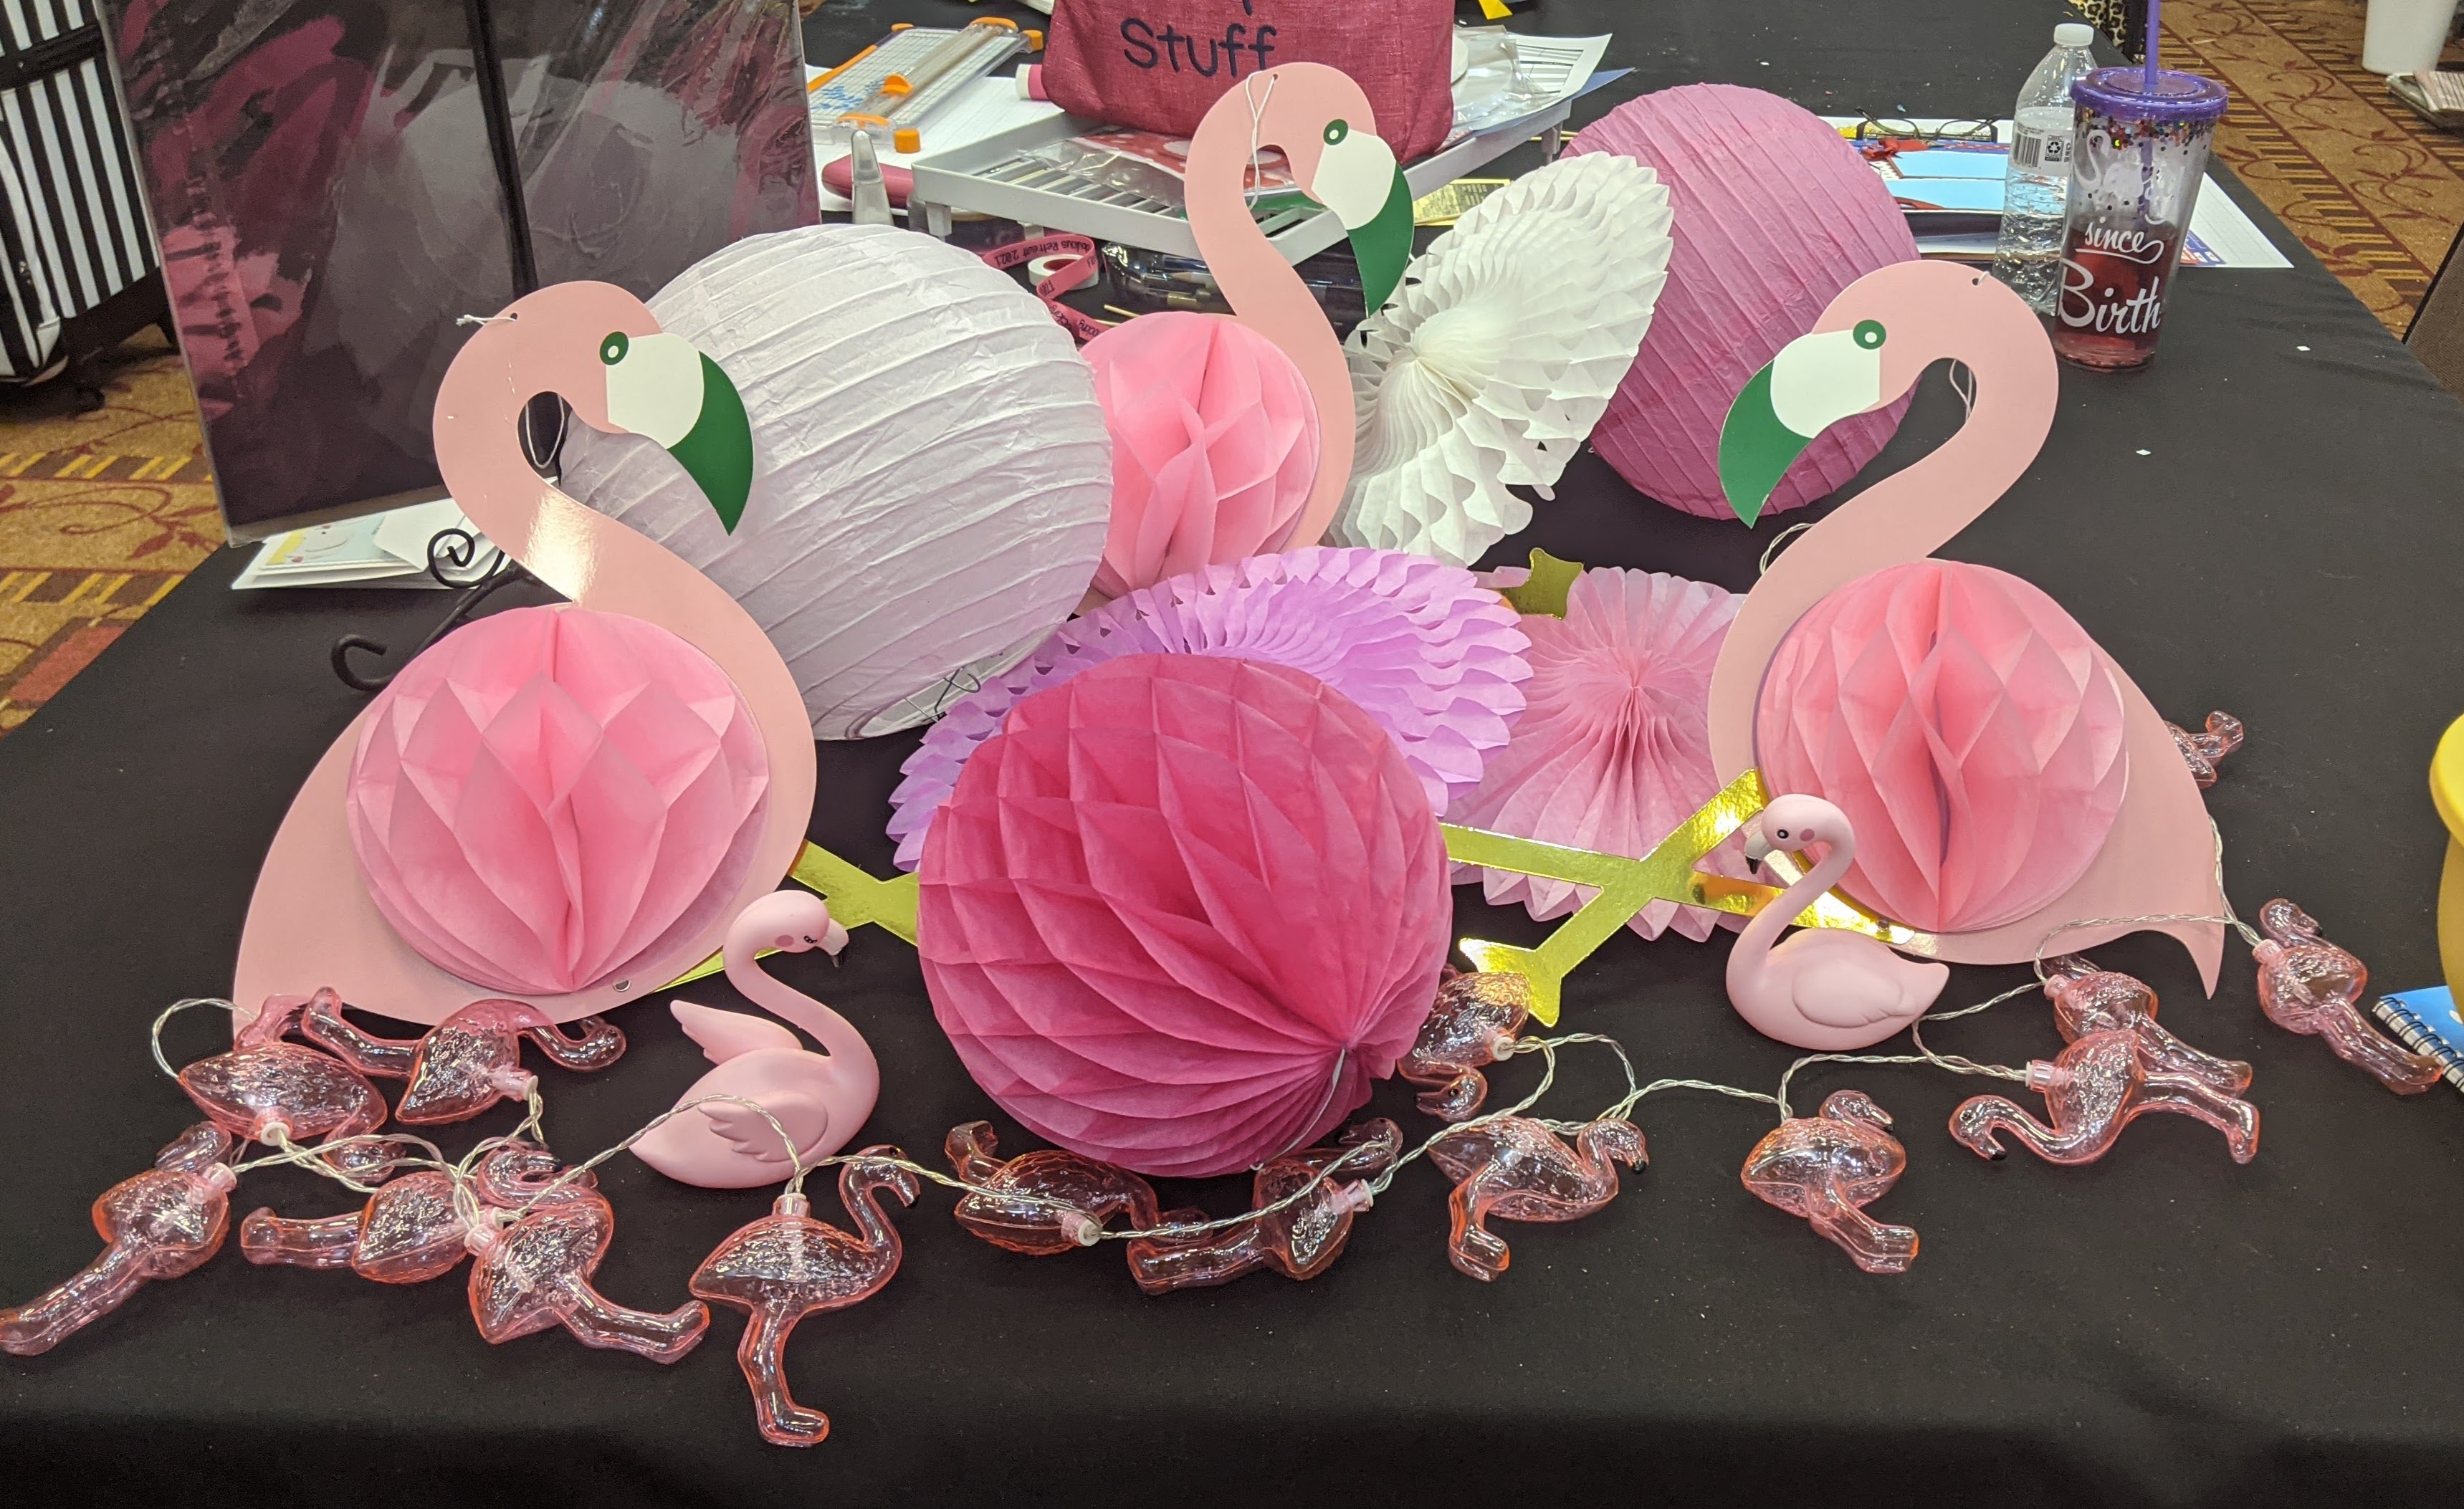
The retreat was held in a ballroom at a hotel in Mesa Arizona. Each person had an 8 x 3 foot table to themselves. The theme was Flamingos as you can tell from all the pink in the photo!
One of the ladies at my table did a great job with the decor!
Here Amanda and I are trying to stand on one foot like a Flamingo for the photo. Ha ha!
One of the unique things about this particular retreat was that there were classes offered. I took one on Watercolor Technique. These are actually stamps made to look like watercolor paintings. Fun!
Here is one card I made from a stamp set I purchased from one of the vendors. This totally speaks to me!
The sky was so beautiful in the evening!
After 4 days of crafting, I am exhausted! However, I will be back with a wonderful card for Wacky Wednesday using the Simply Succulent stamp set.
Thanks for stopping by today. I will have my usual Simple Stamping Blog Post next Tuesday.
Thank you for joining me for our Stampin’ Up!® Demonstrator Monthly Team Blog Hop! I am so excited that you could join us today! I know you will get lots of ideas and creative inspiration! My thank you cards are made with the So Sentimental stamp set. Be sure to visit all the different blogs and see all the different stamp sets and dies that will be used.
I belong to a group of Stampin’ Up!® Demonstrators from around the world that are taking part in training that is helping us to build a successful Stampin’ Up!® business. I am a Demonstrator in Arizona, USA. If you are not already an awesome Demonstrator, or do not have an awesome Demonstrator and live in the USA, I would love to be your most awesome Demonstrator! I really appreciate your support.
The theme for the cards today is: Thank You. I have many customers who support me and I like to send them a Thank You card every once in awhile. The following set of cards is for my fabulous customers which I will be sending to anyone who orders during the month of February.
The Thank You Cards
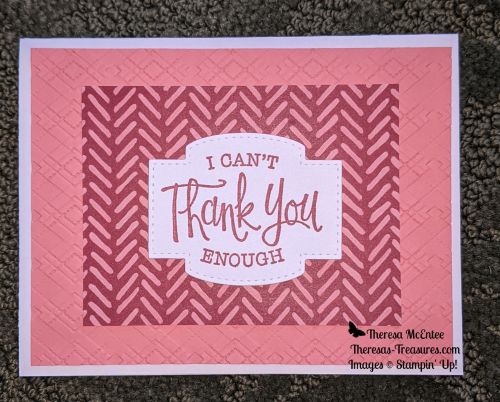
I made a whole set of Thank You cards using an Embossing Folder (EF) to emboss the first layer. For the second layer I cut the Flowers & Field Designer Series Paper (DSP) which you can get for FREE with a qualifying order during Sale-a-bration (January 5 – February 28, 2021) and adhered it to the first layer. The sentiment is made using the “I can’t Thank You enough” from So Sentimental and the Stitched So Sweetly Dies. The first layer of this card is made with the Meadow Moments EF and Cherry Cobbler Card Stock CS).
The measurements for the embossed layer are 4 x 5 1/4 inches. The second layer which is the Flower & Field DSP is 3 x 4 inches. The sentiment piece is adhered with Stampin’ Dimensionals. This card has the non-floral side of the DSP showing. The Flirty Flamingo CS layer is embossed with the Absolutely Argyle EF.
For this card I used the Seabed 3D EF on Just Jade CS.
All Together!
I have a whole bunch of different combinations of DSP and CS colors!
Thanks for stopping by Theresa’s Treasures. Look through the list below to see who is next in line for the Blog Hop.
This Stampin’ Up! Heartfelt Pop-Up Fun Fold is a cute 3 x3 inch Valentine’s card which is easy and fun to make.
Measurements
Measurements: Rococo Rose Card Stock (CS) card base: 3x 6 inches with a score line at 3 inches; Blushing Bride CS: 2 1/2 x 4 inches.
You will also need 4 scalloped hearts. Two Rococo Rose CS and two Brushing Bride CS hearts punched with the scalloped heart punch from the Heart Punch Pack.
Stamping
Start out stamping with the large sentiment heart. Stamp with the Rococo Rose ink onto the 2 1/2 x 4 inch Brushing Bride CS. Note: Be sure to use the Stampin’ Pierce mat or a catalog to get the best stamped image with the Photopolymer (see-through) stamps.
Next stamp the little lacey heart in Rococo Rose ink onto the center of the two Blushing Bride scalloped hearts. Continuing in the Rococo Rose ink, stamp the sentiment “Love You Lots” onto the center of the remaining Rococo Rose heart.
Scoring the Hearts
Set up the Trimmer to make score lines. Start by placing the right-hand edge on the 1/4 inch mark to the left of the center. Make a score line. Now move to the right so that the center of the heart is in place and score. Lastly, move the heart to the right again so that the left-hand edge is on the 1/4 inch mark and score. Repeat for all 3 hearts.
Each of the three hearts should look like this when you are finished scoring.
Putting It All Together
You will want to use a strong tape to adhere the pop-up portion of this card. I used the Tear & Tape that Stampin’ Up!® carries. The tape will be applied to the scalloped hearts as shown above.
To assemble the pop-up, start by using your Bone Folder on the center score line for the two Blushing Bride CS scalloped hearts. Remove the protective covering of the Tear & Tape on the Rococo Rose CS scalloped heart and lay it on the table face down. Adhere the Blushing Bride CS scalloped heart folded in half as shown on the right. Next adhere the other Blushing Bride CS scalloped heart on the left.
When you open it up it should look like this.
To continue to assemble the card pieces, use the Stampin’ Dimensionals to adhere the large sentiment heart piece to the remaining Rococo Rose CS scalloped heart.
The next step is to adhere the Square Vellum Doily. I just applied the glue to 3 small areas that will be covered with the scalloped heart.
To finish up the front, apply the Rococo Rose CS scalloped heart with the large sentiment heart stamped on it to the card front.
Installing the Pop-Up
To install the pop-up, first fold the pop-up heart in half as shown.
Lay the folded heart card piece onto the inside of the card as shown. Close the card and push firmly to adhere the pop-up to the inside.
When you open the card it will look like this!
Bling!
The Champagne Rhinestone Basic Jewels are perfect for this card. I added five to the front of the card. Note: An odd number of rhinestones is visually more appealing than an even number.
Voila! You have made a fun pop-up to wish someone special a Happy Valentine’s Day!
Thank you so much for visiting today. I hope you will try this out. I ended up making several with different colors of card stock.
The Hey Chick stamp set was re-released yesterday to pair with the Hey Birthday Chick stamp set in the 2021 January-June Stampin’ Up! Mini Catalog. Dies for both stamp sets were also released. Below is the information needed for purchase of these two awesome bundles of product. When you are ready to order, click HERE to SHOP
Today’s card for the Cardz4Guyz Challenge #263- Any Sport, deviates from my usual in that I am using a stamp that is not from Stampin’ Up!®. I just love the Peanuts and Snoopy, and Snoopy playing soccer seemed to be the best choice for this challenge.
I did use the new Stampin’ Up!® Blending Brushes to create the background. I first stamped Snoopy on the card front, then used a mask over him while applying the background.
I used Balmy Blue, Granny Apply Green and Mango Melody ink. The Blending Brushes are very easy to use. I will still need a little practice to get the background more uniform. Snoopy’s jersey is colored with the Stampin’ Blends Alcohol Markers in Light and Dark Mango Melody.
The soccer balls stamped along the side of the card are from a retired Stampin’ Up!® stamp set called Great Sport. Check out other sports related cards at Cardz4Guyz Challenge #263. Have a great fun-filled day!
Stampin’ Up!® Gilded Leafing Embellishment is so fun to use! I introduced the Gilded Leafing last Wednesday and showed a couple of ways to use it. Today I want to expand upon that blog by showing you a few more techniques for using the Gilded Leafing Embellishment.
This card is made using the Meant To Be and Heart to Heart stamp sets which are in the 2020-2021 Stampin’ Up!® Annual Catalog. The Heart Punch Pack is also in the Annual Catalog.
Measurements
Measurements: Merry Merlot Card Stock (CS) card base: 5 1/2 x 8 1/2 inches with a score line at 4 1/4 inches; Very Vanilla CS: 4 x 5 1/4 inches; Merry Merlot CS: 4 x 5 1/4 inches; and Gold Foil Sheets: 1 x 5 inches.
You will also need 3 of the scalloped hearts from the Heart Punch Pack in Merry Merlot.
Additional products and supplies needed include: Versamark ink, a microfiber cloth, a quarter of a Stamping Sponge, a stiff paint brush, a spoon, and the Heat & Stick Powder .
And of course you will need the star of the show- the Gilded Leafing. I have gathered some tips from other demonstrators. One tip is to open the jar and put the Gilded Leafing in a larger container. I just used a container from the dollar store that is about 1/2 of a shoe box in size.
Gilded Leafing with Stamping
The first technique is going to be to use a stamp and the Heat & Stick powder to apply the Gilded Leafing. Stamp the sentiment “Happy Valentine’s Day” in Versamark. Use a spoon to sprinkle some of the Heat & Stick Powder over the sentiment. Shake off the excess. Tip: The size of the font on the sentiment cannot be too thin or much smaller than what I have used.
The next step is to use the Heat Tool to make the Heat & Stick Powder melt. When the white powder melts it turns dark.
Now you can put the heart face down into the Gilded Leafing. Press down slightly. When you pull it out it will have a lot of Gilded Leafing stuck to it.
I brushed of the large pieces with my fingers. (Now my finger tips are gold!) I followed that up with gentle strokes over the sentiment using the Stamping Sponge. Finally I used the microfiber cloth to remove all of the excess Gilded Leafing.
One more piece that requires stamping to apply the Gilded Leafing is the background. The small heart is from the Heart to Heart stamp set. Stamp the heart in Versamark onto the 4 x 5 1/4 inch Merry Merlot CS. Now apply the Heat & Stick power and use the Heat Tool.
Again place the CS with the sticky side face down into the Gilded Leafing and press slightly. Next remove the excess with your fingers, then a Stamping Sponge and finally the microfiber cloth.
Sponging and Gilded Leafing
This is a fun technique which will apply the Gilded Leafing to the edge of the heart. The first step is to apply the Versamark by Sponging it onto the edge. Gently flick the sponge over the edge of the heart. Tip: I cut up the Stamping Sponges until I get a wedge that is an eighth of the sponge. I label the sponge with a square of CS stapled to the top of the sponge wedge.
In order to apply the Gilded Leafing, you will be repeating the procedure described above for the stamping. First you apply the Heat & Stick Powder and use the Heat Tool to melt it. Then you place the heart face down in the Gilded Leafing. Lastly, remove the excess Gilded Leafing with the Stamping Sponge then the microfiber cloth. Now you have a really pretty border around the CS heart.
Gilded Leafing with the Versamark Pad
This time I used the pad of the Versamark to apply a layer of Versamark evenly over the whole heart.
I repeated the procedure above, namely, apply the Heat & Stick Powder, melt it with the Heat Tool, place face down in the container of Gilded Leafing, and remove the excess. Here is the final result! Now I have even more Gilded Leafing on my fingers and everywhere else! Not quite as bad as glitter though.
In summary, now you have a heart with the Gilded Leafing applied with a stamp, one with sponging and one using the whole pad of Versamark.
Putting It All Together
The first step in putting the card together is to adhere the Very Vanilla CS to the inside of the Merry Merlot CS card base. Next adhere the 4 x 5 1/4 inch Merry Merlot CS to the front of the Merry Merlot CS card base. Use your Paper Snips to cut the banner end on the 1 x 5 inch strip of Gold Foil. Now apply Stampin’ Dimensionals to the back of the Gold Foil card piece and adhere it to the card front. The final step is to arrange the hearts as you like and adhere them to the Gold Foil. This is one version I came up with.
Here is the second version that has the Gold Foil strip on a diagonal and the hearts arranged in a cluster.
Viola! You have learned 3 more techniques to use with the Gilded Leafing and have versions of the card to try!
Thanks for coming by today. I hope you are able to experiment with the Gilded Leafing Embellishment soon. If you figure out any new ways to use the Gilded Leafing, please let me know in the comments.
Welcome to my blog with Happy Thoughts and Simple Stamping. I will be using the Stampin’ Up! Happy Thoughts stamp set and the Well Suited Designer Series Paper (DSP) from the 2021 January-June Stampin’ Up! Mini Catalog. This card is very simple and quick to make.
This card is a very masculine card which looks very nice and is super easy to put together. You could change the sentiment to be anything you want.
The Happy Thoughts stamp set is a great set for a beginner. Not only do you have several main categories of cards, but you also have a sentiment for the inside of the card.
The Well Suited DSP is so awesome for masculine cards! I really struggle with masculine cards. However, a great package of masculine Designer Series Paper can make all the difference. You can purchase this great DSP HERE.
Measurements
Measurements: Basic White Card Stock (CS) card base: 5 1/2 x 8 1/2 inches with a score line at 4 1/4 inches; Night Of Navy CS: 4 x 5 1/4 inches; Basic White CS: 2 1/4 x 4 inches; Well Suited DSP Striped Pattern: 1 3/8 x 2 1/4 inches and 2 1/4 x 2 5/8 inches; Well Suited DSP Diamond Pattern: 1 3/8 x 2 5/8 inches and 2 1/4 x 2 1/4 inches.
Stamping
There is minimal stamping for this card. You just need a sentiment that will fit inside the 2 inch circle punch. I started with the “Thinking of You” sentiment from the Happy Thoughts stamp set. I stamped the sentiment with Memento ink onto the 2 1/4 x 4 inch Basic White CS. Note: If you are new to stamping, please look back at my blog for applying the labels to the Cling stamps HERE.
Use the 2 inch Circle Punch to punch the sentiment out. Tip: I find it to be easy to punch when the punch is lying on the table and I use the heel of my hand to push down firmly and quickly.
Putting It All Together
The next step is to lay out the pieces so you can have an idea of where you want to adhere them. There is about a 1/8 inch border around all of the pieces.
Now we can adhere the pieces. I started with the upper left-hand corner followed by the upper right-hand corner. I finished up with the lower left-hand corner. Note: I have found the best adhesive to be the Tombow Multipurpose Liquid Glue because it allows you a little time to wiggle the piece in place before it really sticks.
Next use the Bone Folder on the Basic White CS card base at the 4 1/4 inch score line to make a crisp fold. Then adhere the front panel to the front of the Basic White CS card base.
Use Stampin’ Dimensionals to adhere the sentiment to the card front.
This step is optional. I felt the card was a little plain, so I used the Well Suited Twine Combo Pack to make a double stranded bow to place right under the sentiment. Note: I have a video to help with making a bow that you can watch HERE.
Viola! You have made a quick and easy masculine card that is good for any occasion just by changing the sentiment!
Thanks for visiting today. I hope you enjoyed how easy this card is. On Wacky Wednesday I will be showing some more Techniques for using the Gilded Leafing Embellishment so I hope you will be able to join me.
Thank you for stopping by Theresa’s Treasures today. I am Theresa and I am a Stampin’ Up!® Demonstrator in Arizona, USA. Today I am taking part in Kylie Bertucci’s Monthly International Blog Highlights Gallery. The theme is- Thank You. On this gallery, you can see thank you cards made by folks from all over the world! I hope you enjoy it.
For today’s card I am using the Hey Birthday Chick and Hey Chick stamp sets by Stampin’ Up! which will be released on February 2, 2021.
This is such a fun card to make. I am using the Buffalo Check stamp with Poppy Parade ink for the background. The letters for the “THANKS” are from the Playful Alphabet Dies.
The tower of chickens is created by using the Stamparatus. A mask is used to remove the birthday hat from the little chick at the top. I colored the chickens with Stampin’ Blends Alcohol Markers in: Poppy Parade, Cinnamon Cider, Ivory, Pumpkin Pie and Daffodil Delight.
The chicken wire embellishment is from a die in the Chicks Dies and is cut out with the Silver Foil Sheet.
Thanks so much for stopping by. Please click on the button below to go to the gallery and vote for my card. I would really appreciate your support.