

Hello fellow crafters and stampers! I am Theresa McEntee-author of Theresa’s Treasures Paper Crafts blog. I am hopping along with the Ink & Inspiration Blog Hop group today. You can visit super awesome blogs from around the world! The list to follow the hop is at the end of my blog post. Please stop by and see everyone’s projects!


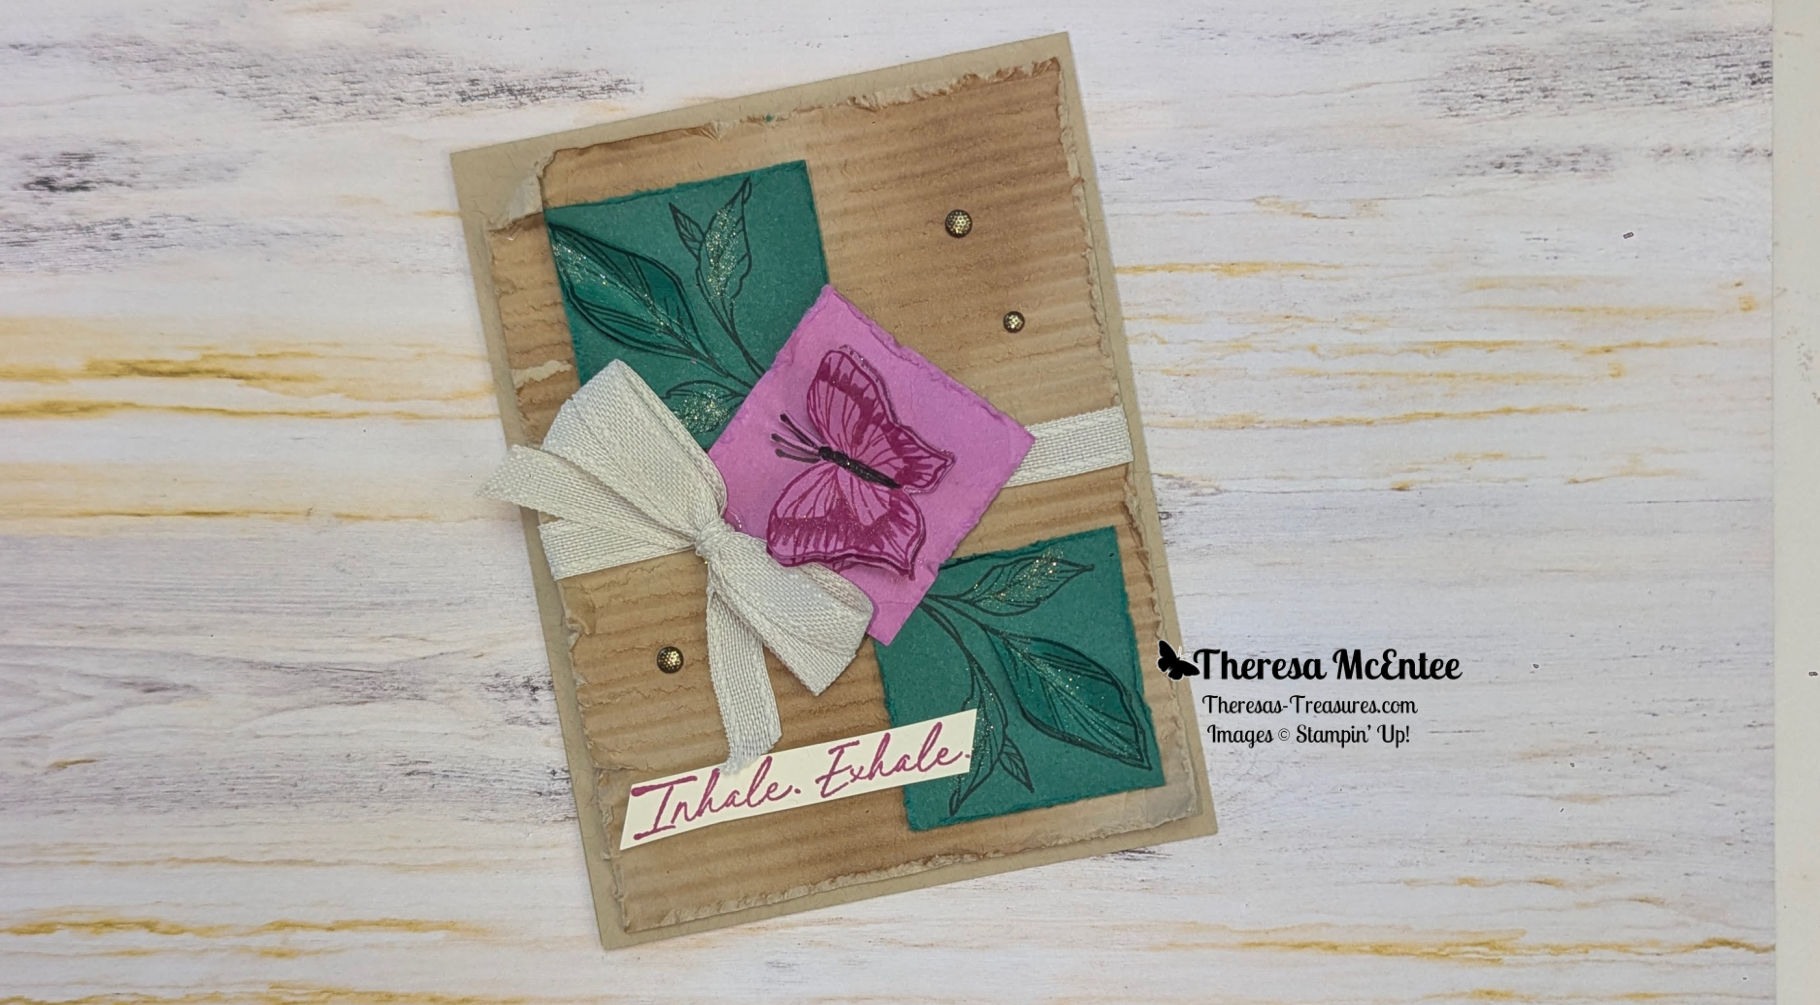
My card is made using the It’s Okay cling stamp set!

The Ink & Inspiration Challenge for March 2025 is Sketch Challenge #108. I was having a hard time with this sketch. I just wasn’t sure what I wanted to do. My card sort of happened rather that being planned. Has that ever happened to you? Ususally I sketch out my ideas first.
One type of card I like is the vintage look. I can’t say I am very good at it. I do admire other peoples vintage projects. So I tried a couple of techniques on this card.

Measurements
- Crumb Cake cardstock card base: 4 1/4″ x 11″ with a score
line at 5 1/2″ - Crumb Cake cardstock: 4″ x 5 1/4″
- Very Vanilla cardstock inside: 3 3/4″ x 5″ and 1/2″ x 2 3/4″
- Shaded Spruce cardstock: 1 3/4″ x 1 3/4″ and scrap to stamp
2 more bunches of leaves - Petunia Pop: 1 3/4″ x 1 3/4″ and scrap to stamp 2 more butterflies

Supplies
- Stamp Set: It’s Okay cling stamp (an Online Exclusive!)
- Dies: none
- Embossing Folder: Mini Corrugated 3D (another Online Exclusive!)
- Ink: Shaded Spruce, Petunia Pop, Pecan Pie & Crumb
Cake Ink Pads - Embellishments: Textured Dots
- Ribbon:Basic Beige 3/8″ Bordered Ribbon
- Blending Brushes
- Cut & Emboss Machine
- Paper Snips
- Stampin’ Dimensionals & Black Mini Stampin’ Dimensionals
- Mini Glue Dots
- Wink of Stella Glitter Brush

Instructions
Stamping the Components
- Stamp the butterfly onto the 1 3/4″ x 1 3/4″ Petunia Pop cardstock. Stamp two more butterflies onto the scrap of Petunia Pop cardstock. Fussy cut the two stamped on the scrap paper. You can cut the antennae off of one of the butterflies.
- On the butterfly with the antennae remaining, use a Basic Black Stampin’ Write Marker to darken the antennae and body. Then use the Dark Berry Burst Stampin’ Blends Alcohol Marker to make an outline around the inner wings. (see close up photos above)
- Fold the fussy-cut butterflies in half. Apply two Mini Black Dimensionals to the center of the butterfly without the antennae. Adhere over the stamped butterfly on the square of Petunia Pop cardstock. Then apply glue to the center of the butterfly with the antennae. Adhere to the butterfly that has the Dimensionals on it. separate the wings for a 3D effect.
- Use the edge of the Paper Snips to distress the edges of the Petunia Pop card stock square. Set aside.
- Now stamp the leaves in Shaded Spruce Ink onto the two
1 3/4″ x 1 3/4″ Shaded Spruce cardstock squares. Then stamp another two bunches of leaves in Shaded Spruce Ink onto the scrap of Shaded Spruce. Fussy cut the two largest leaves from the scrap. - Fold the fussy-cut leaves in half. Apply glue to the center and adhere over the leaves stamped on the square of Shaded Spruce card stock. Bend the sides up for a 3D effect.
- Use the edge of the Paper Snips to distress the edges. Set aside.
- Use the Petunia Pop Ink to stamp the sentiment “Inhale. Exhale.” onto the strip of Very Vanilla card stock. Cut the ends at a diagonal with your Paper Snips. Set aside.
Stamping the Inside
- Stamp the Very Vanilla card stock for the inside as shown below.

- Adhere the inside to the inside of the Crumb Cake card stock card base.
Creating the Front Panel
- Use the Mini Corrugated 3D Embossing Folder to emboss the panel of Crumb Cake card stock.
- With the Stampin’ Blending Brush, apply Pecan Pie Ink to the panel as desired for a vintage effect. Then use the edge of your Paper Snips to distress the edges. It is okay if the paper tears somewhat.
- Flatten the Crumb Cake card stock out. Wrap 6″ of the Beige Bordered Ribbon around the middle of the panel. Secure to the back with Mini Glue Dots.
Assembling the Card
- Apply Stampin’ Dimensionals to the back of the corrugated panel. Adhere the panel to the front of the Crumb Cake card stock card base.
- Adhere the Shaded Spruce card stock squares to the card front with Stampin’ Dimensionals.
- Use Stampin’ Dimensionals to adhere the Petunia Pop card stock butterfly to the card front.
- Use Mini Glue Dots and a little glue to adhere the bow.
- Use Stampin’ Dimensionals to adhere the sentiment.
- Finish with the Textured Dots Embellishment! Don’t forget to add Wink of Stella on the leaves and butterfly!
!Voila!

I hope you enjoyed my vintage card for the Sketch #108 Chalenge today. Leave me a comment to let me know what you think.
Be sure to visit all of the blogs for lots of wonderful inspiration with Sketch Challenge #108!
Blog Roll Call
Have a most wonderful day!
Theresa
Order Supplies Here:
Product List  $24.00 |  $11.00 |  $9.00 |  $9.00 |  $9.00 |
 $11.50 |  $11.50 |  $11.50 |  $13.00 |  $7.50 |
 $8.00 |  $15.00 |  $9.00 |  $6.25 |  $4.25 |
 $7.25 |  $6.00 |  $130.00 |  $28.00 |  $12.00 |
Stampin’ Up! 2025-2026 Annual Catalog Coming Soon!

Calling all card makers and scrapbookers! The 2025-2026 Stampin’ Up! Annual Catalog is coming in May 2025! You can get one from your Stampin’ Up! Demonstrator. If you do not already have an awesome Stampin’ Up! Demonstrator, let me know! I would be happy to be your Stampin’ Up! Demonstrator and send a Stampin’ Up! 2025-2026 Annual Catalog to you. Start by setting up an account at Stampinup.com and choosing Theresa McEntee as your demonstrator. Let me know before March 30th so I can add you to the list!


