Posted in 2024 Stampin' Up! September to December Mini Catalog, Animals, Gift Tag, Inspiration in Ink Blog Hop, Nature, Snowflakes, Stampin' Up! Online Exclusives, Winter Holiday

Reindeer Fun Bundle for the Tag Sketch Challenge- Inspirations In Ink- November 2024

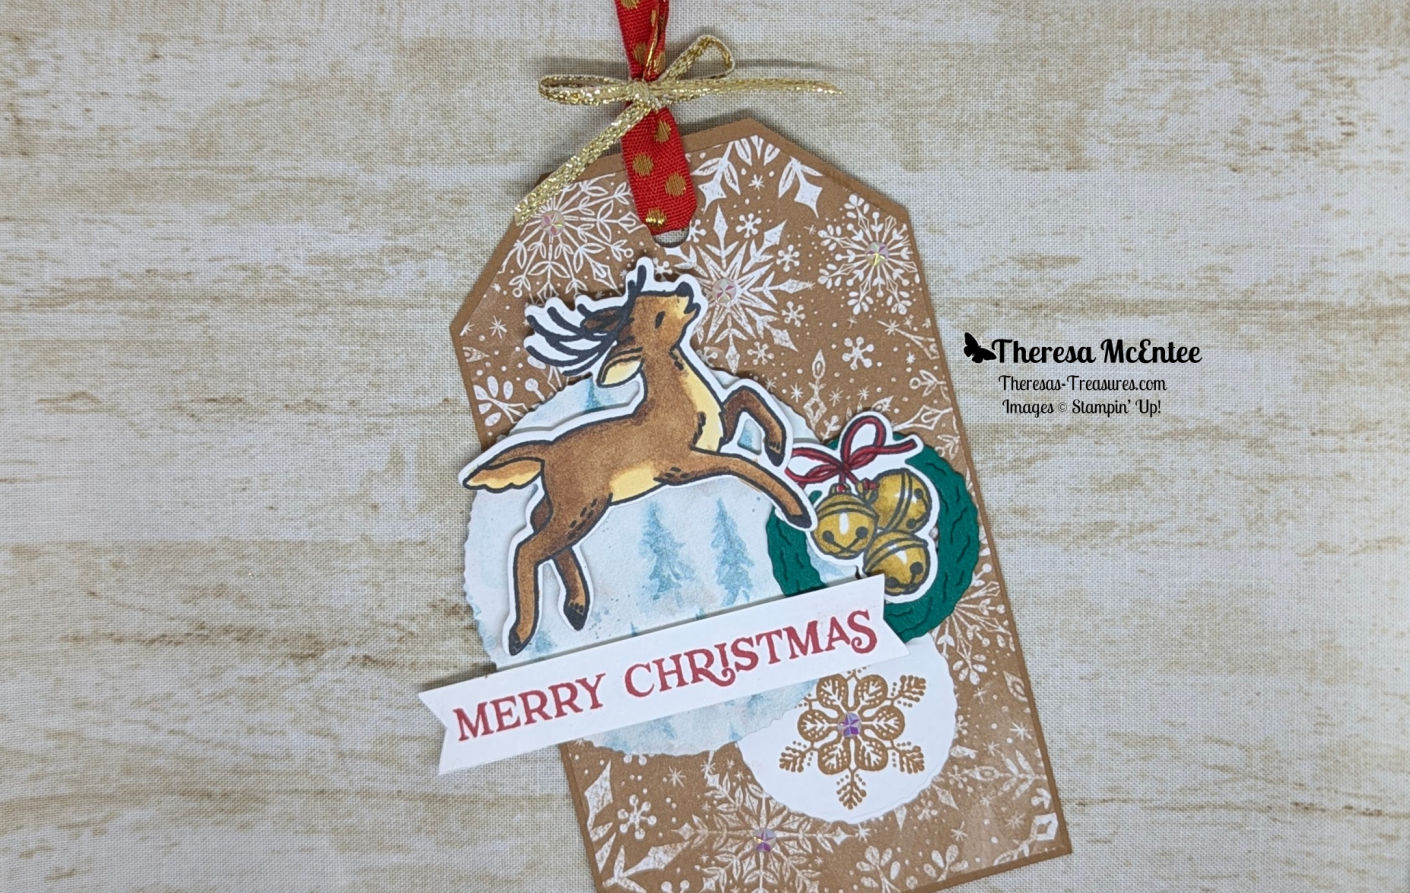
Here is my Reindeer Fun Bundle Tag for the Inspiration in Ink Tag Sketch Challenge!

Welcome! Thank you for visiting Theresa’s Treasures Paper Crafts! I am Theresa, a Stampin’ Up! Demonstrator in Arizona, USA. Today is the monthly Inspirations in Ink Blog Hop! I am excited to be hopping with such talented demonstrators today!

Today is a Sketch Challenge for a tag instead of a card! Be sure to check out everyone’s projects. For my project, I used the Reindeer Fun Bundle from the 2024 Holiday Mini Catalog. When you are ready, you may order from my Online Store HERE.

I chose the Reindeer Fun Bundle because I wanted to have the reindeer as part of my tag. I decided to make him leaping over the tree tops! The Winter Meadow Designer Series Paper (DSP) came in handy for that.

Measurements

  • Pecan Pie cardstock tag base: 3″ x 5″
  • Sentimental Christmas DSP: Snowflake Design: 2 3/4″ x 4 3/4″
  • Basic White cardstock: 1/2″ x 3″ (sentiment) and 3 1/2″ x 4 1/2″ (to stamp the snowflake, deer and bells)
  • Shaded Spruce cardstock: 1 3/4″ x 1 3/4″ (for wreath)
  • Winter Meadow DSP: Tree design, 2 3/4″ x 2 3/4″ to die cut with a Deckled Circle Die

Supplies

  • Stamp Set: Reindeer Fun, Snowy Wonder and Greetings of the Season
  • Dies: Reindeer Fun and Deckled Circles
  • Ink: Memento Tuxedo Black Ink Pad, Real Red Ink Pad and Pecan Pie Ink Pad
  • Stampin’ Blends Alcohol Markers: Light & Dark Pecan Pie, Medium Combo Pack, Medium Deep Combo Pack and Medium Light Combo Pack for the deer, and Light & Dark Wild Wheat for the bells.
  • Stampin’ Write Marker: Real Red to color the ribbon on the bells
  • Embellishment: Iridescent Faceted Gems
  • Ribbon: Real Red & Gold 3/8″ Dotted Ribbon and Gold & Silver 1/8″ Trim Combo Pack (both are Online Exclusives)

Instructions

  1. Line up the Pecan Pie Snowflake DSP and the Pecan Pie cardstock so the top edges are even. On the back of the Pecan Pie cardstock, make a mark 3/4″ in from each side on the top, and 3/4″ down from the top on each side. Cut between the two marks to make the tag top.
  2. Separate the DSP and cardstock. Adhere the DSP so that there is a border all the way around.
  3. Stamp the leaping deer and bells onto the Basic White cardstock with Memento Ink, Color with the Stampin’ Blends Markers as desired. Die cut the deer and bells.
  4. Use the Real Red Ink to stamp “Merry Christmas” onto the strip of Basic White cardstock.
  5. Stamp “To:” and “From:” from the Greetings of the Season stamp set onto the back of the Pecan Pie cardstock tag base.
  1. Use the Pecan Pie Ink to stamp the snowflake from the Snowy Wonder stamp set onto the Basic White cardstock. Die cut it out with one of the Deckled Circle Dies.
  2. Die cut a 2 1/2″ diameter circle with the Deckled Circle Dies from the Winter Meadow DSP.
  3. Position all of the pieces on the front of the Pecan Pie cardstock/snowflake DSP tag base.
  4. Adhere the Pecan Pie snowflake first.
  5. Then use Stampin’ Dimensionals to adhere the Winter Meadow DSP.
  6. Add the wreath and bells.
  7. Now use Stampin’ Dimensionals to adhere the deer and sentiment.
  8. Punch a hole in the top of the tag. Pull the Real Red & Gold 3/8″ Dotted Ribbon through the hole. Tie the Gold trim around the ribbon into a bow.
  9. Embellish with the Iridescent Faceted Gems. I placed the gems in the center of the snowflakes. The photos do not show them very well.

Voila!

Thank you so much for visiting today! I hope you enjoyed my project. You will be inspired when you visit all the blogs in the Inspirations In Ink Blog Hop!

You are currently visiting Theresa McEntee-USA creator of Theresa’s Treasures Paper Crafts.

Blog Roll Call

Clickable Supply List

Product List
Reindeer Fun Bundle (English)
$54.00
Deckled Circles Dies
$37.00
Greetings Of The Season Bundle (English)
$51.25
Tuxedo Black Memento Ink Pad
$8.00
Real Red Classic Stampin' Pad
$9.00
Pecan Pie Classic Stampin' Pad
$9.00
Pecan Pie Stampin’ Blends Combo Pack
$11.00
Wild Wheat Stampin’ Blends Combo Pack
$11.00
Stampin’ Blends Medium Light Combo Pack
$11.00
Stampin’ Blends Medium Combo
$11.00
Stampin’ Blends Medium Deep Combo
$11.00
Regals Stampin' Write Markers
$30.00
Pecan Pie 8 1/2" X 11" Cardstock
$11.50
Basic White 8 1/2" X 11" Cardstock
$13.00
Shaded Spruce 8-1/2" X 11" Cardstock
$11.50
Winter Meadow 12" X 12" (30.5 X 30.5 Cm) Designer Series Paper
$12.50
Iridescent Faceted Gems
$8.50
Real Red & Gold 3/8" (1 Cm) Dotted Ribbon
$9.00
Gold & Silver 1/8" (3.2 Mm) Trim Combo Pack
$9.00

Have a most wonderful and creative day!

Ciao!

Theresa
Posted in Around the World on Wednesday Blog Hop, Avid Stamper, Winter Holiday

Around the World On Wednesday Blog Hop-November 2024- Color Challenge with Decorative Trees

Hello and welcome! I am Theresa McEntee, creator of Theresa’s Treasures Paper Crafts. Today I have the pleasure of participating in the Blog Hop with Around the World on Wednesday (AWOW) organized by Angie McKenzie for this Holiday Vibes Color Challenge with Decorative Trees. 

On the second Wednesday of each month, the AWOW team put together a thematic hop to give you some inspiration for your own crafting. The challenge is very exciting today!

There were two color palettes to choose from- Traditional Colors & Coastal Colors. So this month’s theme for me ended up being “This or That?”since I couldn’t decide which color palette to go with.

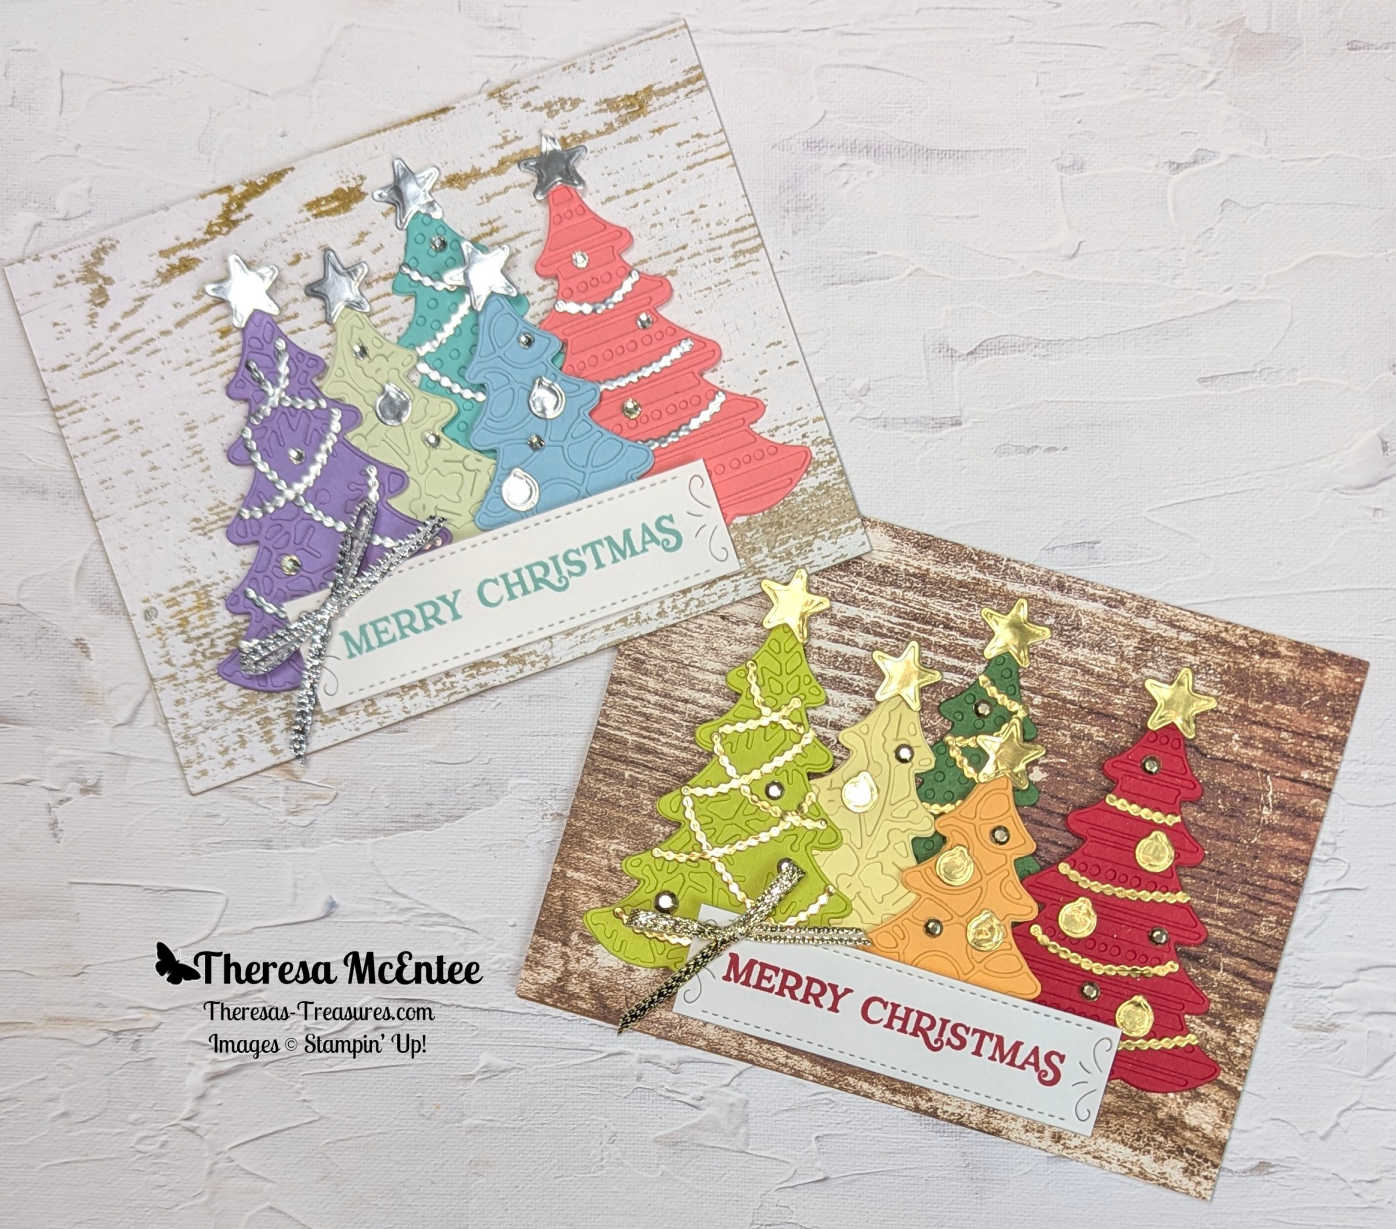
Here are my four cards showcasing the beautiful colors of each palette.

The Traditional Colors are Garden Green, Real Red, Lemon Lolly, Lemon Lime Twist and Peach Pie. The Coastal Colors are Coastal Cabana, Flirty Flamingo, Soft Sea Foam, Balmy Blue and Highland Heather.

My Project for today

This card was made with the Decorative Trees Bundle. The Merry Christmas sentiment came from the Reindeer Fun stamp set.

The reason I found this so exciting is that it challenged me to figure out which colors to use, and how to combine them onto one card. And I had a great time making all of the little stars and ornaments to decorate the trees with!

This card is made with the Traditional Colors. It does take a little time to make as you will be die cutting the trees, stars, garlands and ornaments. It is a lot of fun as well!

The Coastal Colors are used to create this card. Anotrher fun creation!

The other supplies I used are: Country Woods Designer Series Paper, Pecan Pie Cardstock, Crumb Cake Cardstock, Silver Trim (Online Exclusive), Rhinestone Basic Jewels and the Adhesive Sheets.

TIP: In order to avoid getting glue or tape where you don’t want it, use the Adhesive sheets on the top layer of the trees as well as for all of the decorations.

This or That?

Let me know it you like: This?-Traditional Colors or That?-Coastal Colors in the comments.

The AWOW Team

I am so glad you have joined me today in this worldwide hug that stretches all the way from Australia to Alaska across twelve different time zones. Each month this group of creative friends prepare a project for a theme. Below is an image of the whole crew and where they are from around the globe. Such a talented and wonderful group of people! You will want to visit everyone to be sure to see all the amazing projects!

We all love sharing joy with you through projects from our individual parts of the world. I hope that you will be filled with lots of inspiration!

See More Inspiring Projects

Blog Roll

Jan Clothier – NZ

Leonie Stuart – AU

Rochelle Laird-Smith – AU

Danielle Kassing – NL

Ximena Morales – DE

Mikaela Titheridge – UK

Tina Zinck-MacDonald – CA

Annette Ball – CA

Angie McKenzie – US

Kelly Taranto – US

Tricia Butts – US

Theresa McEntee – US

Bree Renwick – US

Lori Willcox – CA

Thank you so much for visiting today. I hope you enjoyed learning more about our projects. Have a most wonderful day!

Theresa

Posted in 2024-2026 Stampin' Up! Annual Catalog, Animals, Inspiration in Ink Blog Hop, Nature, Stampin" Blends Alcohol Markers, Winter Holiday

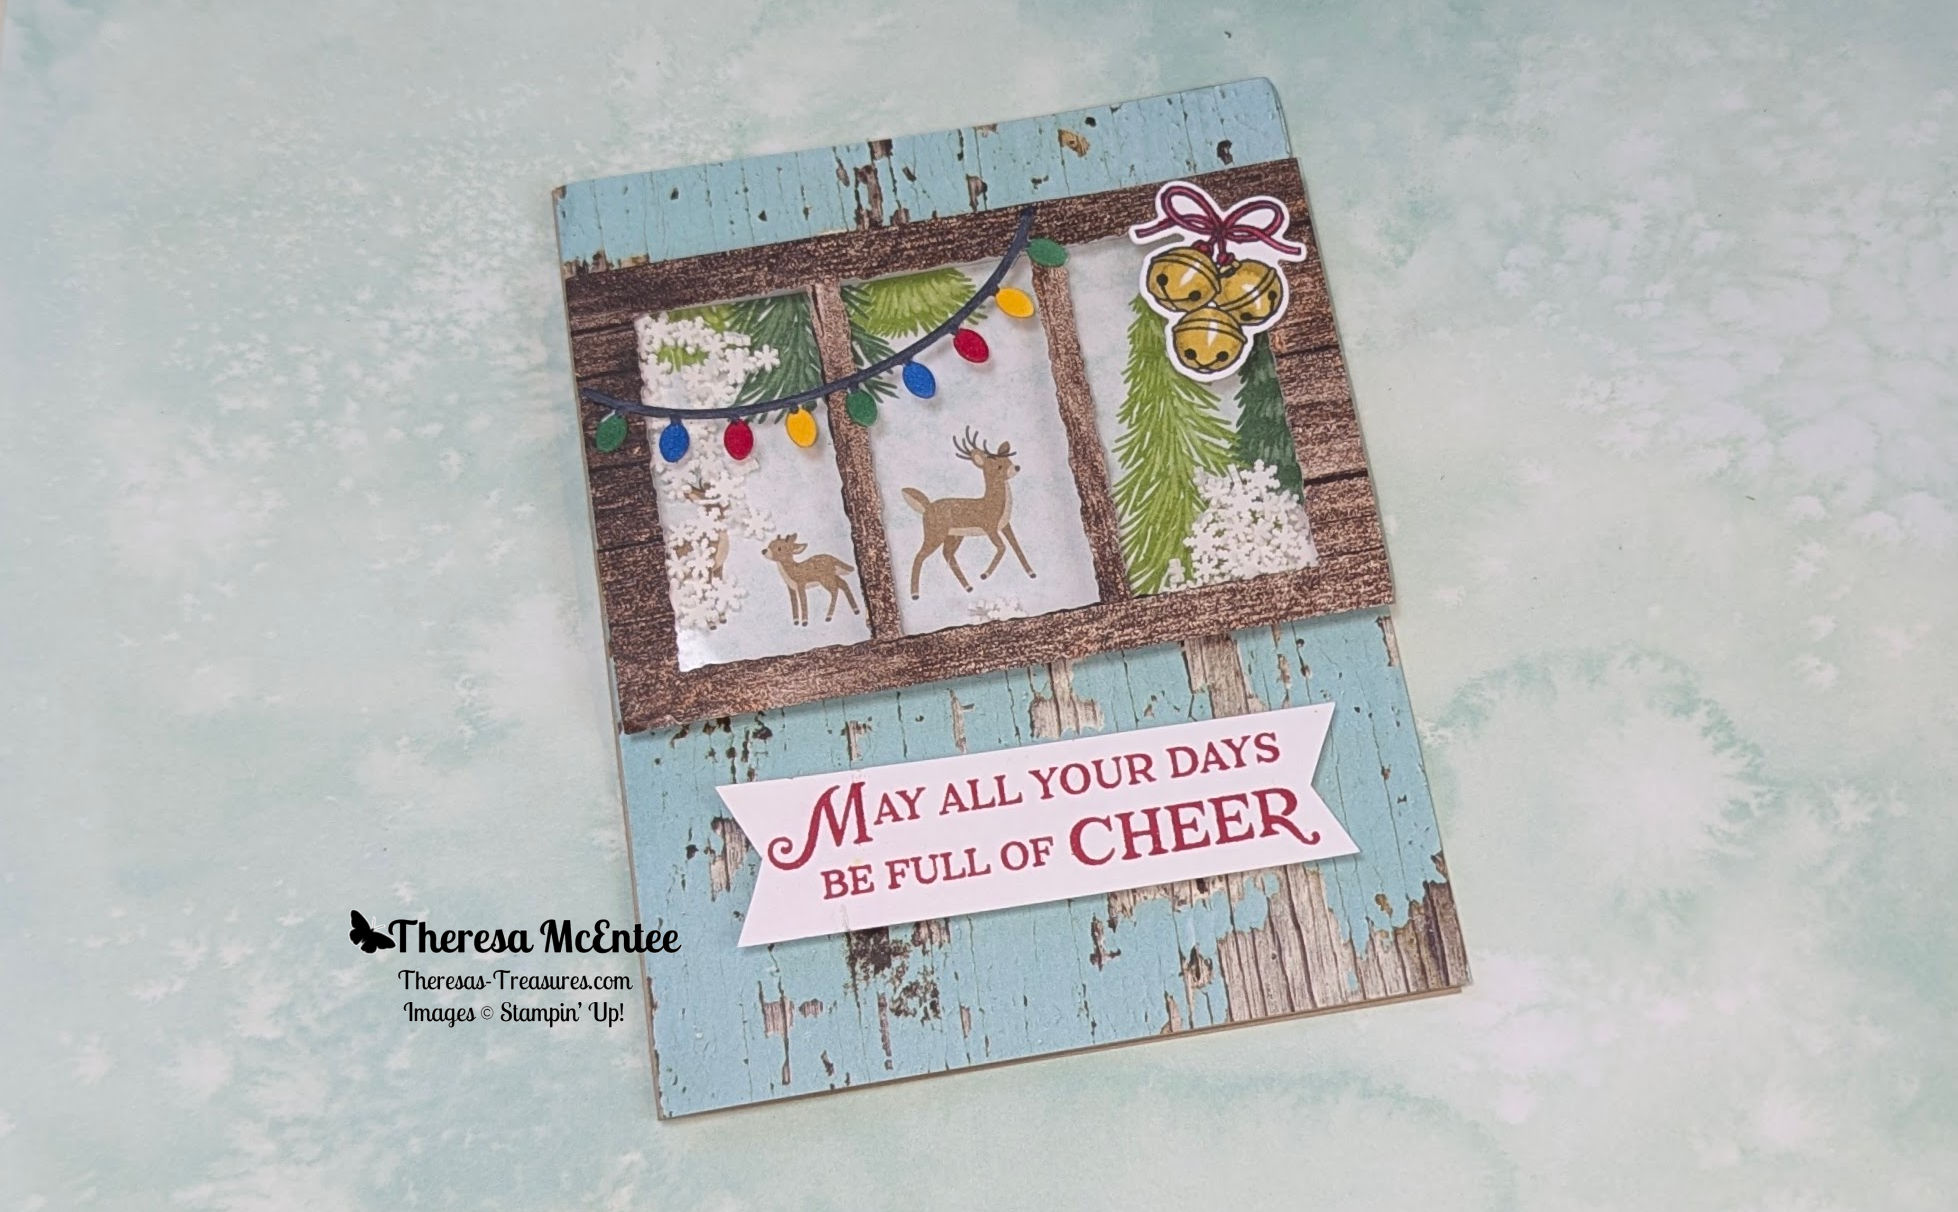
Reindeer Fun Bundle for the Inspirations in Ink October 2024 Blog Hop

replace with photo of card standing straight

Welcome! Thank you for visiting Theresa’s Treasures Paper Crafts! I am Theresa, a Stampin’ Up! Demonstrator in Arizona, USA. Today is the monthly Inspirations in Ink Blog Hop! I am excited to be hopping with such talented demonstrators today!

Today is a Sketch Challenge! Be sure to check out everyone’s projects. For my project, I used the Reindeer Fun Bundle from the 2024 Holiday Mini Catalog. When you are ready, you may order from my Online Store HERE.

I chose the Reindeer Fun Bundle. When I thought about the sketch I saw it as a window. Then, I was looking through the Reindeer Days Designer Series Paper and saw the scene with the deer! Perfect!

Measurements

  • Crumb Cake cardstock card base: 5 1/2″ x 8 1/2″ scored at 4 1/4″
  • Basic White cardstock: 3 3/4″ x 5″, 7/8″ x 3 1/2″ and scrap to die cut the string of lights and stamp the bells.
  • Reindeer Days Designer Series Paper (DSP): 2 5/8″ x 4 1/8″ (reindeer scene)
  • Window Sheet: 2 1/2″ x 4″
  • Country Woods DSP: 4 1/4″ x 5 1/2″ (turquoise wood) and 3 1/2″ x 4 3/4″ (brown wood)

Supplies

  • Stamp Set: Reindeer Fun
  • Dies: Reindeer Fun and Deckled Rectangle
  • Ink: Memento Tuxedo Black Ink Pad and Real Red Ink Pad
  • Stampin’ Blends Alcohol Markers: Wild Wheat, Blueberry Bushel, Shaded Spruce, Daffodil Delight, Basic Black and Real Red
  • Embellishment: White Loose Snowflakes
  • Adhesive Strips

Instructions

  1. Use the Memento Ink and stamp the jingle bells onto the scrap of Basic White cardstock. Color as desired witht the Stampin’ Blends Alcohol Markers.
  2. Die cut the string of lights from the scrap of Basic White cardstock. Color as desired.
  3. Stamp the sentiment for the card front in Real Red onto the 7/8″ x 3 1/2″ Basic White cardstock. Trim the ends to be banners.
  4. Use the Deckled Rectangle Die to cut the center from the brown wood design from then Country Woods DSP. Use the edge of the die to make the two planks for the inside of the window.
  5. Adhere the Window Sheet to the back of the brown wood window.
  6. Use the Real Red Ink to stamp the inside sentiment onto the 3 3/4″ x 5″ Basic White cardstock. Adhere this to the inside of the Crumb Cake cardstock card base.
  1. Adhere the turquoise wood to cover the front of the Crumb Cake cardstock card base.
  2. Adhere the reindeer scene.
  3. Apply the Adhesive Strips to surround the back of the window.
  4. Pour some of the Loose Snowflakes over the center of the reindeer scene. Carefully place the window over the reindeer scene and Loose Snowflakes. Press firmly.
  5. Use Stampin’ Dimensionals to adhere the sentiment.
  6. Use Multipurpose Liquid Glue to adhere the string of lights and jingle bells.

Voila!

Thank you so much for visiting today! I hope you enjoyed my project. You will be inspired when you visit all the blogs in the Inspirations In Ink Blog Hop!

You are currently visiting Theresa McEntee-USA creator of Theresa’s Treasures Paper Crafts.

Blog Roll Call

Clickable Supply List

Product List
Reindeer Fun Bundle (English)
$54.00
Deckled Rectangles Dies
$30.00
Tuxedo Black Memento Ink Pad
$8.00
Real Red Classic Stampin' Pad
$9.00
Real Red Stampin' Blends Combo Pack
$11.00
Wild Wheat Stampin’ Blends Combo Pack
$11.00
Basic Black Stampin' Blends Combo Pack
$11.00
Shaded Spruce Stampin' Blends Combo Pack
$11.00
Daffodil Delight Stampin' Blends Combo Pack
$11.00
Blueberry Bushel Stampin’ Blends Combo Pack
$11.00
Crumb Cake 8-1/2" X 11" Cardstock
$11.50
Basic White 8 1/2" X 11" Cardstock
$13.00
Reindeer Days 12" X 12" (30.5 X 30.5 Cm) Designer Series Paper
$12.50
Country Woods 12" X 12" (30.5 X 30.5 Cm) Designer Series Paper
$12.50
Foam Adhesive Strips
$8.25
Stampin' Dimensionals
$4.25
Multipurpose Liquid Glue
$6.00
White Loose Snowflakes
$8.00

Have a most wonderful and creative day!

Ciao!

Theresa