
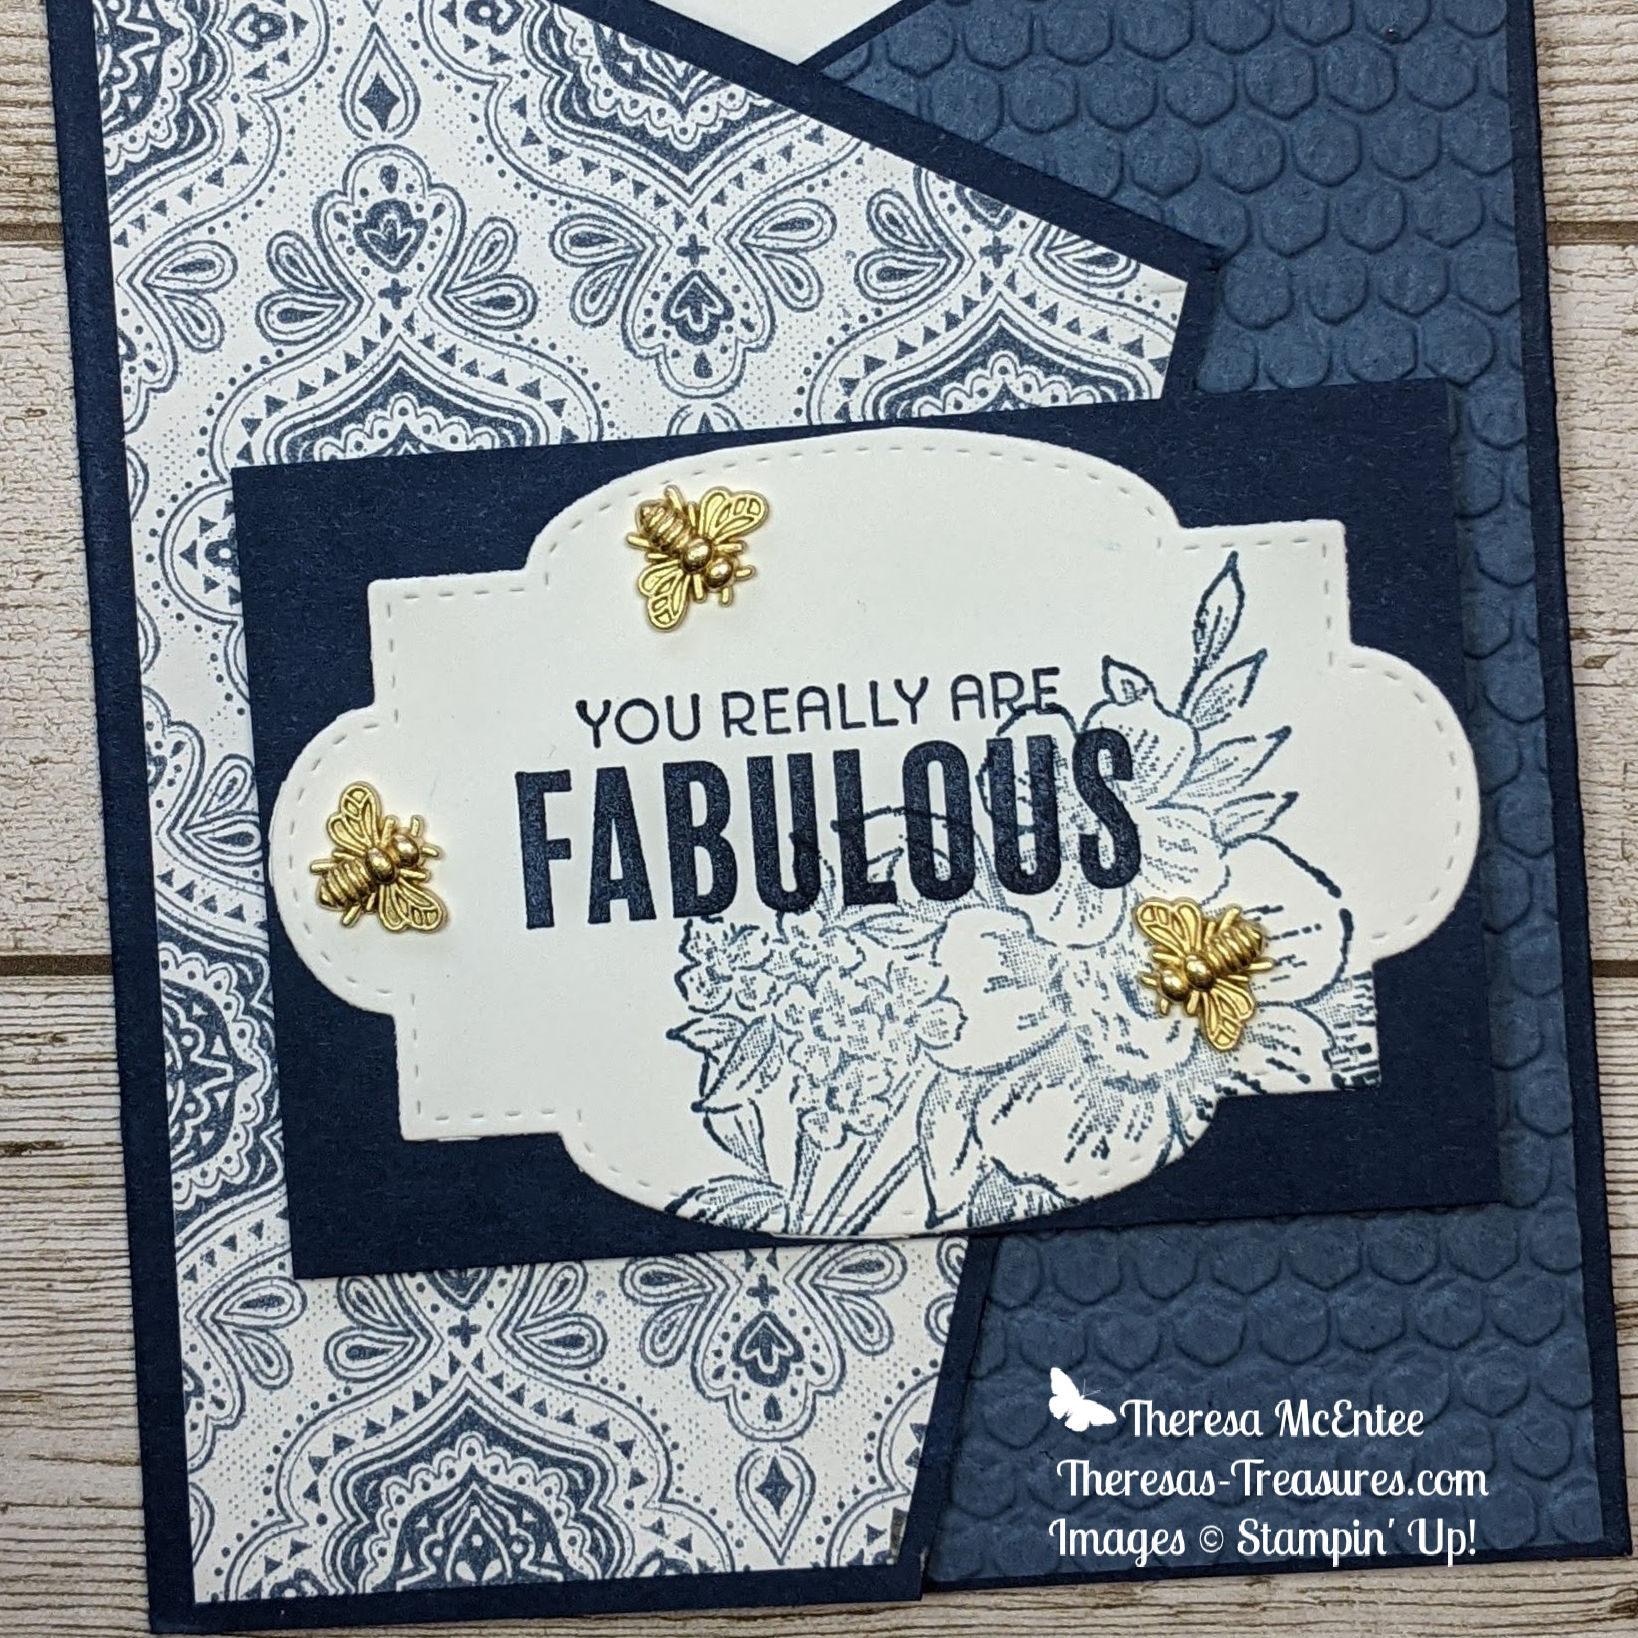
Hello! Yay for Friday! I have a nice Fun Fold card for you today using both the Blessings of Home and Slim Line Sayings stamp sets. The Heart & Home Designer Series Paper (DSP) really adds a beautiful touch.

I recommend trying to cut this card out with plain paper first. It took a couple of tries for me to get it the way I wanted. Hopefully you’ll get it on the first go around!
Measurements

Blessings of Home and Slim Line Sayings You Are Fabulous Fun Fold Card
- Night of Navy Card Stock (CS) card base: 5 1/2 x 11 inches
- Night of Navy CS: 2 3/8 x 3 1/2 inches
- Misty Moonlight CS: 3 1/8 x 5 1/4 inch
- Basic White CS: 4 x 5 1/4 inch, 3 1/8 x 5 1/4 inches, and a label from the Stitched So Sweetly Dies
- Heart & Home DSP: 3 1/8 x 5 1/4 inches
Ink: Night of Navy and Misty Moonlight
Preparing the Card Base

First make a score line at 3 3/8 and 7 5/8 inches. Then make a small notch on the horizontal axis at 1 1/8 and 9 7/8 inches, and on the vertical axis at 1 3/4 inches on each side.

Next make a cut between the score line and notch on the upper part of the card base bilaterally. Finally, cut between the 1 3/4 inch notch on the side and the notch on the bottom bilaterally.
Preparing the Front Panels


I found it easiest to make a pattern to use for this piece. Make a notch on the 3 1/8 x 5 1/4 inch Basic White CS 1 5/8 inches down the right-hand side and 1 1/8 inches in on the bottom from the right. Use this to cut the 3 1/8 x 5 1/4 inch Heart & Home DSP.


To make the other side, flip the pattern over. Note: This isn’t critical with a solid color, but would be if you were using a DSP on both panels. Cut the 3 1/8 x 5 1/4 inch Misty Moonlight CS. Then run this piece through the Stampin’ Cut & Emboss Machine with the Hive 3D Embossing Folder.
Stamping


Using the Misty Moonlight Ink Stamp Off once, then stamp the bunch of flowers from the Blessing of Home stamp set onto the label. Use the Night of Navy Ink to stamp the sentiment “You Really Are FABULOUS” onto the label. The sentiment is from the Slim Sayings stamp set.

Use the Misty Moonlight, Stamping Off once, to stamp the larger flowers onto the 4 x 5 1/4 inch Basic White CS. Then use the Night of Navy Ink to stamp the sentiment. This sentiment is in the Blessings of Home stamp set.
Assembling the Card

This is the back side of the card. Adhere the embossed Misty Moonlight CS to the left side and the Heart & Home DSP on the right.

Turn the card base over and adhere the inside panel.


Now adhere the sentiment label to the 2 3/8 x 3 1/2 inch Night of Navy CS. Place the sentiment label on the front of the card for placement.


Holding the sentiment in place, open the card. Draw a line with a pencil to mark the edge of the front of the card. Place Stampin’ Dimensionals where the label will adhere to the card front. Adhere the sentiment to the front of the card base.

Add some Bumblebee Trinkets and Voila! you have a fabulous card for someone fabulous!
Thank you for being so fabulous and visiting my blog. Have a fabulous Friday and a wonderful weekend!
Theresa
Stampin’ Up!® Promotions
Joining Special

Earn 2 FREE stamp sets of your choosing when you sign up to be a Stampin’ Up! demonstrator. Choose $125 of product for your Starter Kit and pay only $99 before shipping and handling! Join HERE. Contact me for more information at theresastreasures.az@gmail.com. Don’t delay-promotion ends February 28, 2022!
Paper Pumpkin Subscription

Answer the call of the wild—and your creativity—with the Safari Celebration Paper Pumpkin Kit. This playful, party-themed kit includes all the goodies and gear you need to create nine cards and coordinating envelopes in safari-inspired shapes and patterns you’ll go wild for! Make every occasion a celebration with this month’s amusing animals, beautiful botanicals, and celebratory sentiments.

Paper Pumpkin is a subscription kit. You earn FREE product when you order a pre-paid code from my Online Store. A pre-paid code will be sent in an email. Next, go to my Paper Pumpkin sign up and enter the code. You will get this Safari kit if you do so by February 10, 2022.
Paper Pumpkin Codes: just click on the link to order your Paper Pumpkin today!
• 3-Month Prepaid Paper Pumpkin Subscription [137859] $63.00 : —https://bit.ly/3qin54v
• 6-Month Prepaid Paper Pumpkin Subscription [137860] $114.00:–https://bit.ly/3njb4tE
• One year Prepaid Paper Pumpkin Subscription [137861] $220.00:–https://bit.ly/3zNjj66
You will get an email with the Pre-paid code. Then you will go to: https://bit.ly/subscribeTheresasTreasuresPaperPumpkin and enter the pre-paid code to start your subscription! Shoot me an email with any questions.
Celebrate Diversity

Lots of fun with diversity is coming on February 1, 2022. The All Together set will include 10 Stampin’ Blends for a range of skin colors. The images in the stamp set will celebrate diversity. Watch for more information on this fabulous set!
Get this FREE Creative Download from Stampin’ Up! for more on the celebration of diversity.
Thank you for your attention. If you need any assistance with your order please email me at theresastreasues.az@gmail.com
Supply List
Product List")
")
")


")


 Designer Series Paper")


 Host Designer Series Paper")

