Posted in 2023-2024 Stampin' Up! Annual Catalog, Animals, Blending Brushes, Love/Affection, Watercolor Pencil

Around the World On Wednesday Blog Hop – August 2023- Never Ever Grow Up

Hello and welcome! I am Theresa McEntee, creator of Theresa’s Treasures Paper Crafts. For the first time today I have the pleasure of participating in the Blog Hop with Around the World on Wednesday (AWOW) organized by Angie McKenzie. On the second Wednesday of each month, the AWOW team put together a thematic hop to give you some inspiration for your own crafting. “Never ever grow up” is this month’s theme.

Each month this group of creative friends design a project for a theme. At the end of this blog, is an image of all of the crew and where they are from around the globe. Such a talented and wonderful group of people. You will want to visit everyone to be sure to see all the amazing projects!

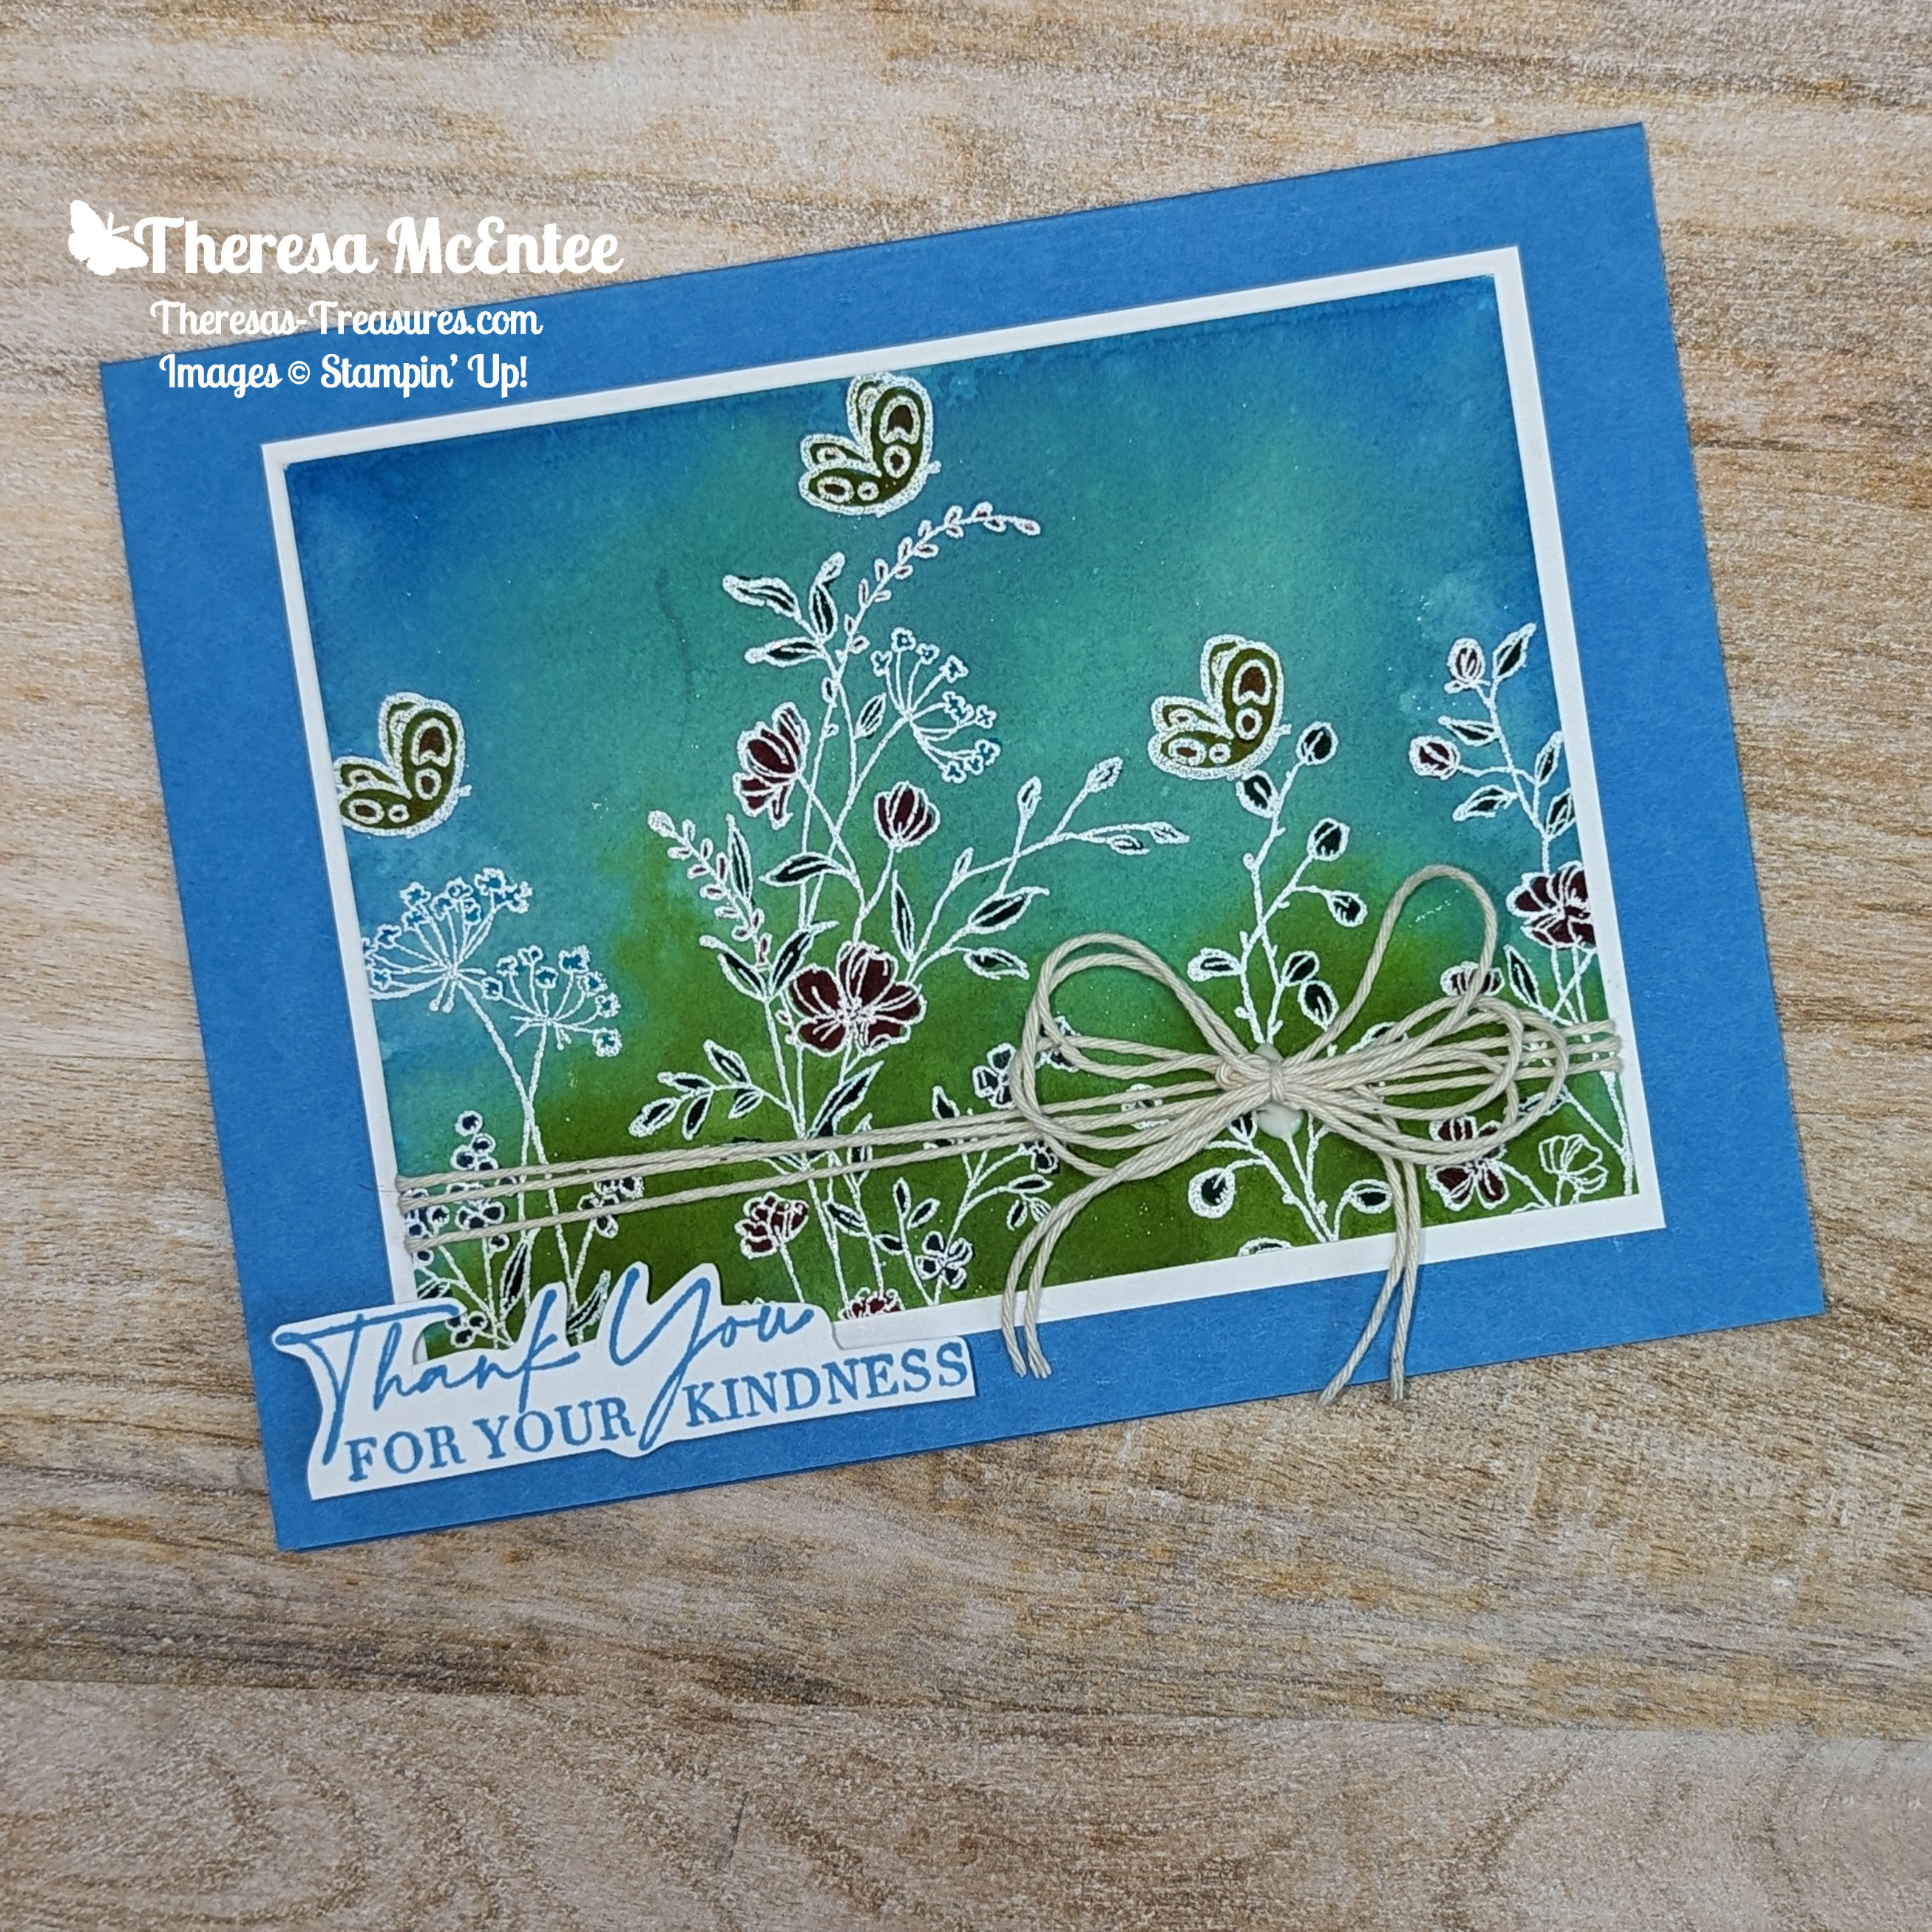
My Project for today

For this theme-Never ever grow up– I was thinking about something that you never stop needing through out your life–hugs! So I was on a mission to find a Stampin’ Up!® stamp set with an image of someone hugging someone else. I never imagined the image would be a cute baby sloth being hugged by their mother!

The Sweet & Precious stamp set is perfect for this theme. Their are 3 images that I could have chosen from. The sloths had the best image of a hug.

Project Details

This card is a fun fold. The pattern for the card base will be shown at the end and is in USA inches and metric.

Next I needed some patterned paper to use, Designer Series Paper(DSP) in Stampin’ Up! lingo. I couldn’t find what I wanted, so I made my own! The underlying DSP is the in the Subtles 6″x 6″ (15.2cm x 15.2cm) DSP pack.

The Soft Sea Foam paper was chosen because I wanted a very soft color. Then after I had cut the DSP paper pieces, I used the leaf stamp from the Sweet & Precious stamp set with Old Olive Ink to stamp the leaves over the DSP.

Lemon Lolly cardstock and Pecan Pie cardstock were chosen to compliment the Soft Sea Foam cardstock.

Stamping & Completing the Project

The sloth image is stamped in Crumb Cake Ink. Next a mask was cut from full stick sticky paper to cover the sloths. The Blending Brushes gently applied Soft Sea Foam Ink over the leaves. Pool Party Ink made the perfect sky.

The next step was to color the leaves and the sloths with the Watercolor Pencils Assortment 1.

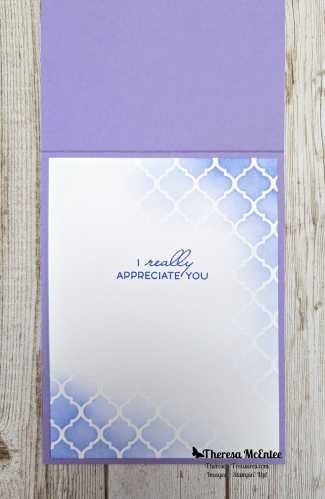
The inside of the card was created with the leaves stamp and Old Olive Ink.

To complete the card, the sentiment (cut to fit in the oval) was stamped in Pecan Pie Ink. “Bring on the cuddles” is such a lovely sentiment! The Double Oval Punch was used to punch out the sentiment with the smooth edged oval. The scalloped-edged oval is punched out of Pecan Pie cardstock.

To finish the card up, I added Brushed Brass Butterflies and a bow made from the Sheer Pool Party Ribbon.

The AWOW Team

I am so glad you have joined me today in this worldwide hug that stretches all the way from Hawaii to New Zealand.  We all love sharing joy with you through projects from our individual parts of the world. I hope that you will be filled with lots of inspiration!

See More Inspiring Projects

Stop by all of the wonderful crafters and be inspired by their projects!

Jan Clothier – AU

Leonie Stuart – AU

Rochelle Laird-Smith – AU

Cheryll Miller – AU

Melissa Gifford – AU

Aurélie Fabre – FR

Mikaela Titheridge – UK

Angie McKenzie – US

Wendy Lee – US

Chris Smith – US

Anne Marie Hile – US

Tricia Butts – US

Theresa McEntee – US <<You are here>>

Bree Renwick – US

Lori Willcox – CA

Teri West – US

Cheryl Hamilton – US

Thank you so much for visiting my blog today. I hope you enjoyed learning more about my project. Have a most wonderful day!

Theresa

Measurements for USA inches:

  1. Card base: Soft Sea Foam cardstock 5 1/2″ x 8 1/2″ (cut & score as shown on pattern above)
  2. Side panels: Lemon Lolly cardstock 1 1/8″ x 3 1/8″ and DSP 1″ x 3″
  3. Bottom strip on front: Lemon Lolly cardstock 7/8″ x 5 1/4″ and DSP 3/4″ x 5 1/8″
  4. Front Panel: Pecan Pie cardstock 2 7/8″ x 3 1/8″, Lemon Lolly cardstock 2 3/4″ x 3″ and Basic White cardstock 2 5/8 ” x 2 7/8″
  5. Label: Pecan Pie cardstock 2 1/2″ x 3″ and Basic White cardstock
    2 1/4″ x 3″
  6. Inside: Pecan Pie cardstock: 5 1/4″ x 3″, Lemon Lolly cardstock
    5 1/8″x 2 7/8″ and Basic White cardstock 5″ x 2 3/4″

Measurements for Metric

  1. Card base: Soft Sea Foam cardstock 14.9cm x 21cm (cut & score as shown on pattern above)
  2. Side panels: Lemon Lolly cardstock 3.3cm x 7.2cm and DSP
    3.1cm x 7cm
  3. Bottom strip on front: Lemon Lolly cardstock 2.6cm x 14.7cm and DSP 2.4cm x 14.5cm
  4. Front Panel: Pecan Pie cardstock 7.1cm x 7.7cm, Lemon Lolly cardstock 6.9cm x 7.2cm and Basic White cardstock 6.7cm x 7cm
  5. Label: Pecan Pie cardstock 7cm x 8cm and Basic White cardstock 6.5cm x 8cm
  6. Inside: Pecan Pie cardstock: 7.5cm x 14.7cm, Lemon Lolly cardstock 7.3cm x 14.5cm and Basic White cardstock
    7.1cm x 14.3cm

Clickable Supply List

Product List
Bough Punch
[157711]
$22.00
Posted in 2023-2024 Stampin' Up! Annual Catalog, Animals, Blending Brushes, Gratitude/ Thanks, Nature, Online Exclusives

Kylie’s International Blog Highlights Gallery-August 2023: Sweet & Precious Thank You Card

Hello, thank you for visiting Theresa’s Treasures. I am Theresa, an Independent Stampin’ Up! Demonstrator in Arizona, USA. I am really excited to be participating in Kylie Bertucci’s International Blog Highlight Gallery with my Sweet &Precious Thank You card. Today I am blogging along with very creative Stampin’ Up! demonstrators from around the world! Please be sure to see all of the inspirational projects by visiting everyone’s blog. You will need to click on the “Vote” button below to see the Gallery.

The theme for this Gallery is “Thank You“.

We often forget those simple words “Thank you”. However, it is so important to show appreciation to the people in your life who have helped you, supported you or inspired you. One way to express gratitude is to send a handmade thank you card. Discover the joy in making and sending a handmade card!

This Sweet & Precious Thank You Card was created using the Sweet & Precious stamp set in the 2023-24 Stampin’ Up! Annual Catalog.

Current Host Code: QNJKQJNV

Measurements

  • Balmy blue cardstock card base: 4 1/4″x 11″ scored at 5 1/2″ (10.5cm x 29.7cm scored at 13.75cm)
  • Balmy Blue cardstock: 3 1/4″ x 4 1/2″ (7.5cm x 11cm)
  • Blueberry Bushel cardstock: 4 1/4″ x 5 1/2″ (11cm x 14.5cm)
  • Holographic Trio: Silver Wave pattern: 3″x 4 1/4″ (7.3cm x 10.9cm)
  • Basic White cardstock for stamping: 2 3/16″ x 3 9/16″
    (5.6cm x 9cm) and 1 3/4″ x 1 3/4″ (4.4cm x 4.5cm)
  • Basic White cardstock (inside): 3 1/4″ x 4 1/2″ (11cm x 14.5cm)

Supplies

Instructions

  1. Stamp the “Thank You” sentiment in Blueberry Bushel Ink onto the square of Basic White cardstock. Make a diecut with the small circular Radiating Stitches Die. Set aside.
  2. Using Memento Ink, stamp the mamma & baby penguin onto the smaller rectangle of Basic White Cardstock. Also stamp onto a couple of full stick sticky notes. Fussy cut the image out of the sticky note and lay over the stamped image on the Basic White cardstock.
  3. Use a large Blending Brush to very gently and slowly apply Balmy Blue Ink around the penguins. Remove the sticky note.
  4. Use the Light Smoky Slate Stampin’ Blend to add shadows.
  5. Use the Light Balmy Blue Stampin’ Blend Marker to make a slightly darker area under the penguins. Cover this with Wink of Stella.
  6. Make a diecut from the Blueberry Bushel cardstock with the largest Radiating Stitches Die. Use this same die to make a diecut from the large Basic White cardstock to make the inside of the card.
  7. Adhere the diecut Radiating Stitches rectangles-the Basic White one for the inside, and the Blueberry Bushel one for the card front.
  8. Adhere the Holographic paper over the Blueberry Bushel Radiating Stitches rectangle.
  9. Make a diecut with the second largest rectangular Radiating Stitches die on the Balmy Blue cardstock.
  10. Adhere the penguin piece to the Balmy Blue rectangle. Use Stampin’ Dimensionals to adhere this piece to the Holographic piece on the card front.
  11. Use Stampin’ Dimensionals to adhere the sentiment.
  12. Tie a bow with the Azure Afternoon Sheer Ribbon. Use a Mini Glue Dot to apply the ribbon below the sentiment.
  13. Finish up by applying the Balmy Blue Pastel Iridescent Gems.

Voila!

I hope you enjoyed my card today using the Sweet & Precious stamp set.

Visit my Online Store to order what you need to make this card for yourself. There is a photographic supply list is at the end of this blog.

Current Host Code: QNJKQJNV

You are currently at Theresa McEntee-Theresa’s Treasures-USA. When you click on the Vote For Me button above you will see the gallery of creative inspiration from Demonstrators around the world! Remember to visit everyone’s blog by clicking on the photo of their card in the Gallery.

To vote for your favorite cards, click on the small heart in the upper right-hand corner of each photo. You have 5 votes! Enjoy and come visit Theresa’s Treasures again soon!

Clickable Supply List

Product List

Thanks again for stopping by! Have a most wonderful and crafty day!

Theresa

Posted in 2023-2024 Stampin' Up! Annual Catalog, Emboss Powder, Guys cards, Ink & Inspiration Blog Hop, Stampin' Emboss Powder, Watercolor Pencil

Beside Me for the Ink and Inspiration Blog Hop- July 2023

Here is my card using the Beside Me stamp set.

Hello fellow stampers! You are visiting with Theresa McEntee-author of Theresa’s Treasures Paper Crafts. I am hopping with the Ink & Inspiration Blog Hop today. There are several of us- you will find the list to follow the hop at the end of my blog post. Please visit everyone!

The Ink & Inspiration Challenge is both an image and a color challenge.

Here is the photo for the challenge. A fun and relaxing scene.

I was inspired by the photo to think of a great time on the beach during summer break. Fortunately, I had a stamp that conveys a moment of that summertime fun.

The image is part of the Beside Me stamp set. (The “Happy Birthday ” sentiment is from the Inked & Tiled stamp set.)

I had been wanting to try embossing in white emboss powder on a colored background for quite a while. I was also interested in coloring with the Watercolor Pencils using the White pencil first.

A little about how I created this card:

First I embossed the image using the White Emboss Powder & a heat tool. Tip: Remove the heat as soon as the embossing powder melts. Too much heat results in the embossing chipping off the paper.

Next I colored the entire image with the White Watercolor Pencil.

Then I used the the colored Watercolor Pencils.

For the inside, I kept it simple.

This technique was a lot of fun to try. I want to make more!

I hope you enjoyed my interpretation of this challenge. Thanks so much for stopping by. Stop by the rest of the blogs today for more inspiration!

Order Supplies Here:

Product List

Have a most wonderful day!

Theresa

Posted in 2023-2024 Stampin' Up! Annual Catalog, 3D Embossing Folder, Designer Series Paper, Inspiration in Ink Blog Hop, Nature, Online Exclusives, Punch, Summer

Inked & Tiled Bundle for the Inspirations in Ink July 2023 Blog Hop

Today I have a beautiful Inked & Tiled “just a note” Card!

Welcome and thanks for visiting Theresa’s Treasures Paper Crafts! I am Theresa, a Stampin’ Up! Demonstrator in Arizona, USA. Today is the monthly Inspirations in Ink Blog Hop! I am excited to be hopping with very talented demonstrators from around the world. Be sure to check out everyone’s projects using the Inked & Tiled Bundle. The Inked & Tiled Bundle is in the Annual Catalog. You may order from my Online Store HERE.

Measurements

  • Thick Basic White cardstock card base: 4 1/4″ x 11″ scored at 5 1/2″ (21cm x 29.7cm scored at 10.5cm)
  • Basic White cardstock: 2″ x 3″ (6cm x 8.2cm) for the sentiment
  • Lost Lagoon cardstock: 3 1/8″ x 4 1/8″ (7.5cm x 10.3cm),
    2 1/8″ x 5 1/8″ (5.5cm x 13.7cm) and optional for leaves 2″ x 3″ (6cm x 8.2cm)
  • Inked Botanicals Designer Series Paper (DSP) Lost Lagoon patterns: 3″ x 4″ (7.2cm x 10.1cm) and 2″ x 5″ (5.2cm x 13.5cm)
  • Inked Botanicals DSP Calypso Coral pattern: 2″ x 6 3/4″ (5.2cm x 17.2cm)
  • Inked Botanicals DSP Crushed Curry pattern: 2″ x 4 1/2″ (5.2cm x 11.5cm)
  • For inside of card: Lost Lagoon cardstock: 3/4″ x 4 1/8″ (2cm x 13.9cm), Inked Botanicals Lost Lagoon pattern: 3/4″ x 5 1/2″ and 1/2″ x 4 7/8″ (2cm x 14.2cm and 1.3cm x 13.1cm)

Supplies

  • Inked & Tiled stamp set and Punch Pack Bundle
  • Basics Embossing Folder (Online Exclusive)
  • Lost Lagoon Ink
  • Lost Lagoon 1/4″ (6.4mm) Bordered Ribbon
  • Iridescent Pastel Gems
  • Bone Folder
  • Stampin’ Dimensionals
  • Paper Trimmer
  • Multipurpose Liquid Glue

Instructions

  1. Adhere the Lost Lagoon colored Inked Botanicals DSP to the corresponding Lost Lagoon cardstock card pieces.
  2. Adhere to the front of the Thick Basic White cardstock card base.
  1. Use the Basics Embossing Folder with the cross hatches to emboss the front of the Thick Basic White cardstock card base with the pieces adhered to it.
  2. Complete the inside of the card base by adhering the strips of paper.
  1. To make the flowers, first punch out 3 pieces with the star pattern punch from the Calypso Coral colored Inked Botanicals DSP.
  2. Use the “X” pattern punch to punch 3 pieces from the Crushed Curry colored Inked Botanicals DSP.
  1. I used my scoring tool to gently push down in the middle of each flower. I also made score marks on the “petals” to help create a 3D look.
  2. Adhere 1 star and 1 “X” together to make each flower.
  3. Adhere to the card front.
  4. Tie a bow with the Lost Lagoon Bordered Ribbon and adhere just under the trio of flowers.
  5. Stamp “just a NOTE” in Lost Lagoon Ink onto the Basic White cardstock.
  6. Punch the sentiment out with the “X” punch. Trim off 2 arms of the “X”.
  7. Use Stampin’ Dimensionals to adhere the sentiment to the card front.
  8. Finish by adding the Calypso Coral colored Iridescent Pastel Gems to the center of each flower.

Voila!

Thank you so much for visiting today! Please visit all the blogs in the Inspirations In Ink Blog Hop. You will be amazed and inspired by all the fun and creative projects made by the Inspirations In Ink demonstrators. 

You are currently visiting Theresa McEntee-USA creator of Theresa’s Treasures Paper Crafts.

Karen Beck – Canada    Theresa McEntee – USA   Rebecca Nutley – Australia   Robbie Rubala – USA    Vicky Wright – Australia   Christy Gridley – USA     Deirdre Croal – USA

Clickable Supply List

Product List

Have a most wonderful and creative day!

Theresa

Thinking of adding creativity to your life? Try a monthly paper crafting kit! The Paper Pumpkin Monthly Subscription delivers a kit with everything you need to make a project-right to your door! Sign up for a Pre-paid Paper Pumpkin Subscription HERE.

Ciao!

Posted in 2023-2024 Stampin' Up! Annual Catalog, Blending Brushes, Emboss Resist Technique, Gratitude/ Thanks, Nature, Stampin' Emboss Powder, Stampin' Write Marker

Kylie & Bruno Bertucci’s Demonstrator Training Program Blog Hop-July 2023- Dainty Delight Emboss Resist Technique Thank You Card

Hello! Welcome to the Kylie & Bruno Bertucci Demonstrator Training Blog Hop for July 2023. I’m Theresa, creator of Theresa’s Treasures Paper Crafts. I have a Thank You card today with the Dainty Delight stamp set using the Emboss Resist Technique. I am so glad you are joining me!

We are a group of Stampin’ Up! Demonstrators from around the world. We are taking part in training to help us build a successful Stampin’ Up! business. My goal is to participate in the monthly Blog Hop in order to create a handmade Thank You card to send to my customers! This blog hop is full of ideas and creative inspiration! Be sure to visit everyone’s blog by clicking on the links at the end of my blog.

Measurements

  • Azure Afternoon card stock (cs): 5 1/2″ x 8 1/2″ with a score line at 4 1/4 “
  • Basic White card stock (cs): 3 1/2 x 4 1/2 inches, 1″ x 2 3/4″ (sentiment) and 4″ x 5 1/4″ (inside)
  • Fluid 100 Watercolor Paper: 3 1/2″ x 5″ initially, then trimmed to be 3 1/4″ x 4 1/2″

Supplies

  • Dainty Delight stamp set
  • Easter Bunny stamp set (for the butterfly)
  • Versamark Ink
  • White Emboss Powder
  • Heat Tool
  • Acrylic Block E
  • Stampin’ Spritzer
  • Ink: Memento, Azure Afternoon, Coastal Cabana and Granny Apple Green
  • Bakers Twine Essentials Pack– Very Vanilla
  • Blender Brushes
  • Stampin’ Write Markers: Daffodil Delight, Pumpkin Pie, Shaded Spruce, Sweet Sorbet, Tahitian Tide (I don’t yet have the Azure Afternoon) and Orchid Oasis.

Instructions

Emboss Resist Technique

  1. Stamp the floral images as desired with the Versamark Ink onto the Fluid-100 Watercolor Paper. After each image, apply the White Emboss Powder. Use the Heat Tool to set. Stamp the butterfly image from the Easter Bunny stamp set. Cover with White Emboss Powder and heat set.
  2. Moisten the paper with the Stampin’ Spritzer.

  1. Use the Costal Cabana Ink Pad and apply color to the E Acrylic Block.
  2. Then use the Azure Afternoon Ink Pad and apply ink to the outer upper border.
  3. Finally, use the Granny Apple Green Ink Pad to apply color to the lower portion of the E Acrylic Block.
  4. Spritz the block with the Stampin’ Spritzer until the colors begin to blend together. Quickly turn upside down onto the Watercolor Paper with the embossed images. Let sit for 15 minutes.
  5. Remove the block, and Voila! You have a beautiful watercolor Emboss Resist panel.

Adding Color

  1. Now for the fun part! Color the flowers and butterflies as desired with the Stampin’ Write Markers.
  2. Trim this card piece to 3 1/4″ x 4 1/4″.

Putting it All Together

  1. Adhere to the 3 1/2″ x 4 1/2″ Basic White cs.
  2. Wrap the Very Vanilla Bakers Twine around the card piece three times.
  3. Make a bow with several layers. Adhere the bow to the card front with the Tom Bow Liquid Glue.
  4. Then adhere to the Azure Afternoon cs card base.
  5. Inside Card Piece: use the Blending Brushes with the Coastal Cabana, Azure Afternoon and Granny Apple Green Inks to create a light color on the Basic White cs inside card piece.

  1. Stamp the floral images in Memento Ink.
  2. Color the flowers with the Stampin’ Write Markers.
  3. Adhere to the inside of the Azure Afternoon cs card base.

Voila!

Remember to visit everyone’s blog. You will see creative inspiration from Demonstrators around the world! You are currently at Theresa McEntee-Theresa’s Treasures-USA. Enjoy!

I appreciate your visit to my blog today. Remember to sign up for my Theresa’s Treasures Paper Crafts Newsletter. You can click on the “Subscribe to my Newsletter” tab. Please subscribe to my blog as well. If you need any assistance with placing your order, let me know in the comments. Thanks!

Have a most wonderful day! Happy crafting!

Theresa

Promotions

New Online Exclusives!

Check out the Online Exclusives! These products will not be found in any Stampin’ Up! catalog. First click on my “shop” button. You will then select the “Menu” tab. Select “Shop Products” and scroll down to “Online Exclusives”. From here you can look at the currently available Online Exclusives!

Paper Pumpkin Monthly Kit

Last day to subscribe!!

Name: Fun in the Sun

This kit includes:

  • All the supplies you need to create 9 cards with fun accordion folds: 3 each of 3 designs; and coordinating envelopes.
  • An all-occasion stamp set to send friends and family words of encouragement, support and kindness.
  • Iridescent Sequin Embellishments.
  • 1 Classic Stampin’ Spot: Daffodil Delight.
  • Summertime Ephemera pieces, labels, and paper pieces.
  • Adhesive Dots and Tear & Tape Adhesive.

Completed card size: 5-1/2″ x 4-1/4″ (14 x 10.8  cm)

Coordinating Stampin’ Up! colors: Azure Afternoon, Basic Gray, Crumb Cake, Daffodil Delight, Flirty Flamingo, Granny Apple Green, Melon Mambo, Pool Party

Bonus Days!!

BONUS DAYS ARE BACK!

Why? Because you know what is a great deal? Getting rewarded for all the crafting supplies you’re already going to buy!

When you shop between July 6-31 and spend $50 USD | $60 CAD you will earn a $5 USD | $6 CAD coupon! Make sure you save all your coupons because you can redeem them (and we mean ALL of them) between August 1–31 .

There’s no limit to how many coupons you can earn!

Posted in 2023-2024 Stampin' Up! Annual Catalog, 3D Embossing Folder, Animals, Blending Brushes

Kylie’s International Blog Highlights Gallery-July 2023: Wildlife Wonder Thank You Card

Hello, thank you for visiting Theresa’s Treasures. I am Theresa, an Independent Stampin’ Up! Demonstrator in Arizona, USA. I am extremely excited to be participating in Kylie Bertucci’s International Blog Highlight Gallery with my Wildlife Wonder Thank You card. Today I am hopping along with Stampin’ Up! demonstrators from around the world! Please be sure to see all of the creative inspiration by visiting everyone’s blog.

The theme for this Gallery is “Thank You”.

We often forget those simple words “Thank you”. However, it is so very important to show appreciation to the people in your life who have helped you, supported you or inspired you. One way to express gratitude is to send a handmade thank you card. Discover the joy in making and sending a handmade card!

This Wildlife Wonder Thank You Card also showcases the Earthen Elegance and Fresh as a Daisy Designer Series Paper, and the Grassy Grove stamp set.

Current Host Code: DRT4WHEV

Measurements

  • Boho Blue cardstock card base: 5 1/2″ x 8 1/2″ scored at 4 1/4″
  • Fresh as a Daisy Designer Series Paper, blue “cloudy sky” design: 4 1/8″ x 5 3/8″
  • Earthen Elegance Designer Series Paper: 2 1/2″ x 4 1/8″
  • Pebbled Path cardstock: 1 1/4″ x 3″
  • Basic White cardstock: 1 1/4″ x 3″ and 4″ x 5 1/4″ (inside)

Supplies

  • Wildlife Wonder stamp
  • Grassy Grove stamp
  • Deckled Rectangle Dies
  • Ink: Pebbled Path, Copper Clay and Boho Blue
  • Watercolor Pencils Assortment 1
  • Blending Brush
  • Clear Emboss Powder
  • Heat Tool
  • 2023-2025 In Color Dots

Instructions

  1. Fold the Boho Blue card base and use the Bone Folder to make a crisp fold. Set aside.
  2. Take out the two pieces of Basic White cardstock. Start with the smaller piece. Use Pebbled Path Ink to stamp the wolf onto the paper.
  3. Color the rock under the wolf with the Pecan Pie Watercolor Pencil using a very light pressure. Then color the wolf with the Basic Gray Watercolor Pencil. Add some Blue Watercolor Pencil to the background. Finish up with a light layer of Early Espresso Watercolor Pencil under the rock.
  1. Use a Deckled Rectangle to diecut the edges. Set aside.
  2. For the inside card piece, use the Blending Brush and Boho Blue Ink to create a light blue background.
  3. Use the images from the Grassy Grove stamp and the Pebbled Path Ink to stamp a scene onto the inside card piece.

  1. Use a second Blending Brush and the Copper Clay Ink to add some color to the hill.
  2. Stamp the sentiment ” For All The Great Things You Do” just over the hill in Pebbled Path Ink.
  3. Adhere the inside card piece to the inside of the Boho Blue card base.
  4. Now stamp the sentiment “A Note Of Thanks” onto the Fresh as a Daisy Designer Series Paper. Immediately cover the ink with the Clear Emboss Powder. Tap off excess. Heat set.
  5. Adhere to the front of the Boho Blue card base.
  6. Use the Deckled Rectangle to cut the longest edges of the Earthen Elegance card piece. Adhere to the Fresh as a Daisy card piece.
  7. Adhere the wolf card piece to the Pebble Path cardstock. Then use Stampin’ Dimensionals to adhere it to the card front.
  8. Embellish with the 2023-2025 In Color Dots.

Voila!

I hope you enjoyed my card today using the Wildlife Wonder and Grassy Grove stamp set along with some awesome Designer Series Paper!

Visit my Online Store to order what you need to make this card for yourself. Photographic supply list is at the end of this blog.

Current Host Code: DRT4WHEV

You are currently at Theresa McEntee-Theresa’s Treasures-USA. When you click on the Vote For Me button above you will see the gallery of creative inspiration from Demonstrators around the world! Remember to visit everyone’s blog by clicking on the photo of their card in the Gallery.

To vote for your favorite cards, click on the small heart in the upper right-hand corner of each photo. You have 5 votes! Enjoy and come visit Theresa’s Treasures again soon!

Thanks again for stopping by! Have a most wonderful and crafty day!

Theresa

Clickable Supply List

Product List

Promotions

New Kit added to the Kit Collection!!

Boho Beach Kit

This kit includes: 

  • Supplies to create 8 cards—4 each of 2 designs
  • 8 coordinating envelopes
  • Boho Beach photopolymer stamp set
  • One Pecan Pie Ink Spot
  • Printed card bases, printed die cuts, adhesive, embellishments, and a clear block
  • Finished card size: 5-1/2″ x 4-1/4″ (14 x 10.8 cm)
  • Coordinating colors: Crumb Cake, Lost Lagoon, Pecan Pie, Pool Party, Wild Wheat

New Online Exclusives!

Being a Stampin’ Up! demonstrator means enjoying fun perks like preordering products before they’re available to customers! For Online Exclusives, a demonstrator can preorder any product listed on the Online Exclusives flyer! A larger selection of new, exclusive products will be available to demonstrators and customers during the customer sales period.

Demonstrator Preorder: 1 June–5 July 2023

Customer Sales Period Begins: 6 July 2023

Paper Pumpkin Monthly Kit

Bonus Days!!

BONUS DAYS ARE BACK!

Because do you know what’s a great deal? Getting rewarded for all the crafting supplies you’re already going to buy!

When you shop between July 6-31 and spend $50 USD | $60 CAD you will earn a $5 USD | $6 CAD coupon! Make sure you save all your coupons because you can redeem them (and we mean ALL of them) between August 1–31 .

There’s no limit to how many coupons you can earn!

Posted in 2023-2024 Stampin' Up! Annual Catalog, Love/Affection

Cheerful Daisies Friendship Card for the Inspirations in Ink June 2023 Blog Hop

Today I have an awesome Cheerful Daisies Friendship Card!

Welcome and thanks for visiting Theresa’s Treasures Paper Crafts! I am Theresa and I am a Stampin’ Up! Demonstrator in Arizona, USA. Today is the monthly Inspirations in Ink Blog Hop! I am excited to be hopping with talented demonstrators from around the world. Be sure to check out everyone’s projects using the Cheerful Daisies Bundle. The Cheerful Daisies Bundle is in the Stampin’ Up! 2023-24 Annual Catalog. You may order from my Online Store HERE.

Measurements

  • Thick Basic White cardstock card base: 4 1/4″ x 11″ scored at 5 1/2″ (10.5cm x 29.7cm scored at 14.85cm)
  • Petal Pink cardstock: 4 1/4″ x 5 1/2″ (11cm x 14.5cm) for diecutting the largest Scalloped Contours Die
  • Basic White cardstock: 3 1/2″ x 4 3/4″ (9cm x 12cm) for diecutting the next smaller Scalloped Contours Die
  • Basic White cardstock: 4″ x 5 1/4″ (9.8cm x 14.2cm) Inside
  • Petal Pink cardstock: 3 1/4″ x 4″ (8.2cm x 12cm) for diecutting the 3rd layer of the daisies
  • Crushed Curry cardstock: 3 1/4″ x 4″ (8.2cm x 12cm) for diecutting the 2nd layer of the daisies
  • Lemon Lolly cardstock: 3 1/4″ x 4″ (8.2cm x 12cm) for diecutting the base layer of the daisies
  • Early Espresso cardstock: 1″ x 1 1/2″ (2.5cm x 3.8cm) for diecutting the center of the daisies
  • Garden Green cardstock: 3″ x 5″ (7.5cm x 12.5cm) for diecutting the leaves

Supplies

  • Cheerful Daisies stamp set and die Bundle
  • Scalloped Contours Dies
  • Ink: Early Espresso, Garden Green, Crushed Curry, Lemon Lolly and Petal Pink
  • Iridescent Rhinestone Basic Jewels
  • Adhesives: Multipurpose Liquid Glue and Stampin’ Dimensionals

Instructions

  1. Die cut all of the pieces as outlined above.
  2. Fold the Thick Basic White card base and set aside.
  3. Stamp with the small daisy outline stamp 3 times in the lower right hand corner of the 4″ x 5 1/4″ Basic White cardstock for the inside. Use the Early Espresso Ink. Then stamp the small daisy solid stamp to fill in the outline. Stamp one with Crushed Curry Ink, one with Petal Pink Ink and one with Lemon Lolly Ink. lastly, Stamp Off once using the small leaf stamp and Garden Green Ink to add the leaves.
  1. Adhere the completed inside card piece to the inside of the Thick Basic White card base. Set aside.
  2. Use Early Espresso Ink and the sentiment stamp “Your Friendship Means Everything” to stamp in the upper left-hand corner of the Basic White cardstock Scalloped Contours diecut.
  3. Use the Multipurpose Liquid Glue to adhere the layers of each of the daisies together. Adhere the Early Espresso cardstock flower centers.
  4. Arrange the Garden Green cardstock leaves and stem on the Basic White Scalloped Contours diecut. Position the flowers and see how you like the arrangement. Use Multipurpose Liquid Glue to adhere the stem and leaves. Then use Stampin’ Dimensionals to adhere the daisies.
  5. Adhere the completed Basic White Scalloped Contour diecut onto the Petal Pink Scalloped Contours diecut using Stampin’ Dimensionals.
  6. Use the Multipurpose Liquid Glue to adhere the Petal Pink Scalloped Contours diecut to the front of the Thick Basic White card base.
  7. Add as many of the Iridescent Rhinestone Basic Jewels as you wish!

Voila!

Thank you so much for visiting today! Please visit all the blogs in the Inspirations In Ink Blog Hop. You will be amazed and inspired by all the fun and creative projects made by the Inspirations In Ink demonstrators. 

You are currently visiting Theresa McEntee-USA creator of Theresa’s Treasures Paper Crafts.

Blog Line Up

Deirdre Croal – USA

Julie Golding-Page – Canada

Karen Beck – Canada 

Theresa McEntee – USA

Rebecca Nutley – Australia

Robbie Rubala – USA 

Christy Gridley – USA  

Have a most wonderful and creative day!

Theresa

Would you like the start getting a discount on quality Stampin’ Up! supplies? Join my Stamping Gems Team today! And if you have a long wish list, you can join to get $155 UDS in product for $99 USD! This is the best deal in the whole catalog! Click HERE to order your starter kit!

This special ends June 30, 2023! Join and order now to be able to get what you want!

Thinking of adding creativity to your life? Try a monthly paper crafting kit! The Paper Pumpkin Monthly Subscription delivers a kit with everything you need to make a project-right to your door! Sign up for a Pre-paid Paper Pumpkin Subscription HERE.

Ciao!

Posted in 2023-2024 Stampin' Up! Annual Catalog, 3D Embossing Folder, Gratitude/ Thanks, Online Exclusives

Kylie & Bruno Bertucci’s Demonstrator Training Program Blog Hop-June 2023- Biggest Wish Thank You Card

This Biggest Wish Thank You card is quick and simple to make!

Hello! Welcome to Kylie & Bruno Bertucci’s Demonstrator Training Blog Hop for June 2023. I’m Theresa with Theresa’s Treasures Paper Crafts. I have a quick and simple Biggest Wish Thank You card for you today! I am so glad you are joining me!

We are a group of Stampin’ Up! Demonstrators from around the world. We are taking part in this awesome training program to help us build a successful Stampin’ Up! business. My goal is to participate in the monthly Blog Hop to be more consistent with posting a blog.

Also, this blog hop is full of ideas and creative inspiration! Be sure to visit everyone’s blog by clicking on the links at the end of my blog.

Measurements

  • Starry Sky cardstock card base: 4 1/4″ x 11″ scored at 5 1/2″
  • Basic White card stock: 4″ x 5 1/4″ and 2 1/4″ x 5 1/8″
  • Delightfully Eclectic Designer Series Paper (DSP): 3/4″ x 5 1/2″ and 1/2″ x 5 1/4″- On Sale Now! See below

Supplies

Instructions

  1. Start by stamping the “THANKS” sentiment onto the top left of the 2 1/4″ x 5 1/8″ Basic White cardstock with Daffodil Delight Ink.
  2. Next stamp in Fresh Freesia Ink on the bottom left.
  3. Shift to the right and stamp in Starry Sky Ink just under the Daffodil Delight “THANKS”.
  4. Stamp on the center left in Granny Apple Green Ink.
  5. Finish up the stamping with the Berry Burst Ink shifted to the right.
  6. Run the Starry Sky card base through the Stampin’ Cut & Emboss Machine using the dot pattern of the Basics 3D Embossing Folders so that the front panel is embossed.
  7. Adhere the 1/2″ x 5 1/4″ strip of the Delightfully Eclectic DSP (rainbow stripe pattern on the back of the pretzel pattern) on the left side of the 4″ x 5 1/4″ Basic White cardstock. Leave a 1/4″ space from the left edge.
  8. Now adhere this card piece to the inside of the Starry Sky card base.
  1. Next adhere the 3/4″ x 5 1/2″ DSP strip to the left side of the front panel. Leave 1/4″ space from the left edge.
  2. Use Stampin’ Dimensionals to attach the sentiment panel to the card front.
  3. Add Bling! with the In Color Pearls.

Voila!

Remember to visit everyone’s blog. You will see creative inspiration from Demonstrators around the world! You are currently at Theresa McEntee-Theresa’s Treasures-USA. Enjoy!

I appreciate your visit to my blog today. Remember to sign up for my Theresa’s Treasures Paper Crafts Newsletter. You can click on the “Subscribe to my Newsletter” tab. Please subscribe to my blog as well. If you need any assistance with placing an order, let me know in the comments., or email me at theresastreasures.az@gmail.com. Thanks!

Have a most wonderful day! Happy crafting!

Theresa

Promotions

Designer Series Paper Sale!

Stock up on this gorgeous Designer Series Paper now! Order HERE!

Paper Pumpkin Monthly Craft Kit


Say hello to summer and get crafting under the sun with this month’s kit! With beach designs, fun accordion-fold cards, along with sentiments to support, encourage, say hello, and more, wave at those you love through uplifting cards and send family and friends oceans of kind words all summer long!

Paper Pumpkin Kits contain all you need to make the project. The Fun in the Sun kit will contain supplies for 9 accordion fun fold cards! Try it out for one month! Subscribe HERE now!

Joining Special to Join my Stamping Gems Team!!

It’s a fabulous time to join Stampin’ Up! New team members will get even more FREE products in their customizable Starter Kit. Between 1–30 June, those who sign up can get $125 USD | $165 CAD $155 USD | $206 CAD worth of products for only $99 USD | $135 CAD + free business supplies + free shipping + all the fun being a part of Stampin’ Up! Use the resources provided below to spread the word before time runs out!   Join HERE today!

New Online Exclusives!

Demonstrator Preorder: 1 June–5 July 2023

Customer Sales Period Begins: 6 July 2023

Some of the Current Online Exclusives Include:

Check out the current Online Exclusives HERE!

Supply List

Product List
Posted in 2023-2024 Stampin' Up! Annual Catalog, 3D Embossing Folder, Gratitude/ Thanks, Nature, Outdoors, Stampin" Blends Alcohol Markers

Kylie’s International Blog Highlights Gallery-June 2023: Night of Flight Thank You Card

Hello, thank you for visiting Theresa’s Treasures! I am Theresa, an Independent Stampin’ Up! Demonstrator in Arizona, USA. I am extremely excited to be participating in Kylie Bertucci’s International Blog Highlight Gallery with my Night of Flight Thank You card! Today I am hopping along with Stampin’ Up! demonstrators from around the world! Please be sure to see all of the creative inspiration by visiting everyone’s blog. You can view the Gallery by clicking on the Vote Button below.

The theme for this Gallery is “Thank You“.

We often forget those simple words “Thank you”. However, it is so very important to show appreciation to the people in your life who have helped you, supported you or inspired you. One way to express gratitude is to send a handmade thank you card. Discover the joy in making and sending a handmade card!

This Night of Flight Thank You Card showcases the Host Set, Night of Flight, available for purchase at a discount when you have a qualifying order in my Online Store HERE.

Current Host Code: S7F7S9EK

Measurements

  • Mossy Meadow cardstock card base: 5 1/2″ x 8 1/2″
  • Mossy Meadow cardstock: 3″ x 4″ for diecutting the leaves
  • Copper Clay cardstock: 4″ x 5 1/4″
  • Very Vanilla cardstock: 4″x 5 1/4″
  • Basic White cardstock: 2 1/2″ x 5″ for stamping the moth
  • Crumb Cake cardstock: 1 3/4″ x 2″ for the sign

Supplies

  • Night of Flight stamp set
  • Timeless Arrangements stamp set (for the sentiment)
  • Exposed Brick 3D Embossing Folder
  • Timber 3D Embossing Folder
  • Cheerful Daisies Dies
  • Ink: Memento, Azure Afternoon and Copper Clay
  • Basic Black Stampin’ Write Marker
  • Stampin’ Blends Alcohol Markers: Copper Clay, Azure Afternoon, Basic Black and the lighter of the Medium Deep Natural Tones (SU800)
  • Paper Snips
  • Wink of Stella
  • Stampin’ Dimensionals
  • Stampin’ Cut & Emboss Machine

I was interested in a blue moth and found several awesome photos on Google. I combined elements of the 2 moths above to create the moth on the Night of Flight Thank You card.

Instructions

  • Stamp the large moth in Memento Ink onto the Basic White cardstock.
  • Stamp the inside of the wings in Azure Afternoon ink.
  • Use the Basic Black Stampin’ Write Marker to draw the “eyes” on the wings.
  • Use the Stampin’ Blends to color the wings.
  • Fussy cut the moth with the Paper Snips. Use the bone folder to slightly curve the wings and set aside.
  • Use the Exposed Brick 3D Embossing Folder to emboss the Copper Clay cardstock.
  • Lightly drag the Copper Clay Ink Pad over the embossed Copper Clay cardstock with the raised side up. This adds dimension to the brick wall.
  • Cut the Crumb Cake cardstock into 3/4″ x 2″ and 1″ x 2″ strips.
  • Use the Copper Clay Ink to stamp the sentiment “thanks” onto the 3/4″ x 2″ strip.
  • Place the 3 Crumb Cake cardstock strips in the Timber 3D Embossing Folder and run through the Stampin’ Cut & Emboss Machine.
  • Cut the 1″ x 2″ embossed Crumb Cake cardstock strip into a
    1″ x 1 1/2″ piece. Then cut in half so you get two 1/2″ x 1 1/2″ pieces to use for the posts of the sign.
  • Die cut 3 leaves with the Cheerful Daisies Dies from the 3″ x 4″ Mossy Meadow cardstock.
  • Adhere the Very Vanilla cardstock to the inside of the Mossy Meadow card base.
  • Now adhere the embossed Copper Clay cardstock to the front of the card base.
  • Use Stampin’ Dimensionals to adhere the moth.
  • Glue the sign posts to the Thanks sign and adhere to the card front.
  • Add the Mossy Meadow cardstock diecut leaves.

  • For some extra sparkle, brush on the Wink of Stella to the moth’s wings.

Voila!

I hope you enjoyed my card today using the Night of Flight Host Set.

Visit my Online Store to order what you need to make this card for yourself. Photographic supply list is at the end of this blog.

Current Host Code: S7F7S9EK

You are currently at Theresa McEntee-Theresa’s Treasures-USA. When you click on the Vote For Me button above you will see the gallery of creative inspiration from Demonstrators around the world! Remember to visit everyone’s blog by clicking on the photo of their card in the Gallery.

To vote for your favorite cards, click on the small heart in the upper right-hand corner of each photo. You have 5 votes! Enjoy and come visit Theresa’s Treasures again soon!

Clickable Supply List

Product List
Paper Snips
[103579]
$11.00

Thanks again for stopping by! Have a most wonderful and crafty day!

Theresa

Promotions

Designer Series Paper Sale June 1 to June 30, 2023!

Shop HERE now!

Joining Special to Join my Stamping Gems Team!!

It’s a fabulous time to join Stampin’ Up! New team members will get even more FREE products in their customizable Starter Kit. Between 1–30 June, those who sign up can get $125 USD | $165 CAD $155 USD | $206 CAD worth of products for only $99 USD | $135 CAD + free business supplies + free shipping + all the fun being a part of Stampin’ Up!

Join my Stamping Gems Team HERE!

New Online Exclusives!

Being a Stampin’ Up! demonstrator means enjoying fun perks like preordering products before they’re available to customers! For Online Exclusives, a demonstrator can preorder any product listed on the Online Exclusives flyer! A larger selection of new, exclusive products will be available to demonstrators and customers during the customer sales period.

Demonstrator Preorder: 1 June–5 July 2023

Customer Sales Period Begins: 6 July 2023

Subscribe to the most wonderful monthly paper craft kit HERE! You will receive a complete kit for the project each month. Each kit includes a mini ink pad! Collect all the Stampin’ Up! ink colors! Sign up before June 10, 2023 to receive the Welcome Inn kit!

Posted in 2023-2024 Stampin' Up! Annual Catalog, Blending Brushes, Decorative Masks, Gratitude/ Thanks, Inspiration in Ink Blog Hop, Stampin' Cut & Emboss Machine

Inspirations in Ink May 2023- Timeless Arrangements Bundle Thank You Card

Today I have a really fun and pretty Timeless Arrangements Bundle Thank You Card for you!

Welcome and thanks for visiting Theresa’s Treasures Paper Crafts! I am Theresa and I am a Stampin’ Up! Demonstrator in Arizona, USA. Today is the monthly Inspirations in Ink Blog Hop! I am excited to be hopping with awesome demonstrators from around the world. Be sure to check out everyone’s projects using the Timeless Arrangements Bundle. The Timeless Arrangements Bundle is in the 2023-24 Stampin’ Up! Annual Catalog. Order your Bundle today at my Online Store HERE.

Measurements

  • Highland Heather cardstock (cs) card base: 4 1/4″ x 11″ scored at
    5 1/2″ (10.5cm x 29.7cm scored at 14.9cm)
  • Basic White cs inside: 4″ x 5 1/4″ (10cm x 14.4cm)
  • Basic White cs for diecutting: 2″ x 8 1/2″ (5.2cm x 20.9cm)

Supplies

  • Timeless Arrangements Bundle (stamp set & dies) #161526
  • Artistic Mix Decorative Masks #159178
  • Orchid Oasis Ink #159214
  • Blending Brushes # 153611 & Small Blending Brushes #160518
  • 1/8″ (3.2mm) Metallic Woven Ribbon in Orchid Oasis #159199
  • 2022-23 In Color Pearls #161621
  • Wink Of Stella Clear Glitter Brush #141897
  • Multipurpose Liquid Glue & Stampin’ Dimensionals
  • Take Your Pick Tool
  • Silicon Craft Sheet
  • Stampin’ Cut & Emboss Machine
  • Paper Snips

Instructions

Working with the Orchid Oasis Ink

  1. Fold the Highland Heather card base on the score line. Place on a scratch paper.
  2. Position the Artistic Mix Decorative Mask over the front panel of the card base. Hold in place with sticky tape.
  3. Use the Blending Brush and the Orchid Oasis Ink to gradually apply ink in a circle slightly left of center. Remove the mask.
  4. Place the Basic White inside card piece on the scratch paper. Position the mask and hold in place with the sticky tape.
  5. Now use the Blending Brush to gradually apply ink to the upper right and lower left corner of the Basic White cs inside.
  6. Remove the mask and rinse it off with water. Set aside to dry.
  7. Stamp the “THANK YOU” sentiment on the end of the 2 1/2″ x
    8 1/2″ (6.4cm x 20.9cm) Basic White cs.
  8. Next stamp “I really appreciate You” on the Basic White inside card piece.
  9. Adhere the Basic White inside to the inside panel of the Highland Heather card base.

Timeless Arrangements Dies

  1. Diecut the following pieces from the Basic White cs with the “Thank You” stamped on it. The Dies are shown as well as the cut pieces. You will need four of the longer leaf branch.
  1. Die cut the Thank You with the medium sized rectangle die.
  2. Start gluing the leaf branches together on a Silicon Craft Sheet to make a longer branch to place over the thank you sentiment.
  3. Start with one long branch and several short branches to build the more full leaf branch to place under the sentiment.
  4. Use a Small Blending Brush to gradually add ink to the flowers as shown below.
  1. Glue the flowers to the top of the leaf branches.

Putting it altogether

  1. Position the leaves & flowers on the card front with the thank you sentiment in place but not adhered.
  2. Glue the leaves & flowers to the card front.
  3. Use Stampin’ Dimensionals to adhere the thank you sentiment.
  4. Now for the Bling!
  5. Tie a small bow with the beautiful Metallic Ribbon. Adhere to the card front with a Mini Dimensional.
  6. Add the awesome Orchid Oasis In Color Pearls. I used 5 pearls close to the leaf arrangements.
  7. If desired, use the marvelous Wink of Stella on the flowers for more sparkle!
  8. That is it!

Voila!

Thank you so much for visiting today! Please visit all the blogs in this hop. You will see fabulous, fun and inspiring projects made by the Inspirations In Ink Stampin’ Up! demonstrator group. You are currently visiting Theresa McEntee-USA creator of Theresa’s Treasures Paper Crafts. Check out these links on May 31st after midnight.

Christy Gridley – USA  

Deirdre Croal – USA

Julie Golding-Page – Canada

Karen Beck – Canada             

Theresa McEntee – USA

Robbie Rubala – USA 

Clickable Supply List

Product List
Paper Snips
[103579]
$11.00

Have a most wonderful and creative day!

Theresa

Would you like to join my Stamping Gems Team ? You can join to get good quality Stampin’ Up! products at a discount. I also have a special team Facebook page where we can share our creations. If you have a long wish list, you can join and get $125 USD in product for $99 USD! This is the best deal! Click HERE to join & order your starter kit!

Are you looking for high quality patterned paper for your card making or scrapbooking projects? Select Designer Series Paper will be 15% off starting June 1, 2023! Order early to be able to get what you want! Sale ends June 30, 2023.

The following Designer Series Papers will be 15% off June 1-30, 2023. Shop HERE.

Thinking of adding more creativity to your life? Try a monthly paper crafting kit! The Paper Pumpkin Monthly Subscription delivers a kit with everything you need to make a project-right to your door! Sign up for a Pre-paid Paper Pumpkin Subscription HERE.

ADD-ON

Welcome Inn Dies (Available for purchase starting the 11th of May while supplies last–right HERE).

Item number: 163192

$6.00 USD / $8.25 CAD,

This add-on includes:

  • One coordinating vase die: 1-1/2″ x 1-1/2″ (3.8 x 3.8 cm)
  • One coordinating flower die
  • One beautiful leaf die

Ciao!