Posted in 2020-2021 Stampin' Up! Catalog, Grunge style, Love/Affection, Nature, Simple stamping, Stamping-off technique

Positive Thoughts with Comfort and Hope

There are so many beautiful stamp sets in the new 2020-2021 Stampin’ Up! Annual Catalog! There is a style for everyone. I love to make cards with a grunge style. The Comfort and Hope and the Positive Thoughts stamp sets are a perfect combination for this style.

This card is designed with elements from both of the stamp sets. The colors are: Misty Moonlight, Just Jade and Cinnamon Cider. These are 3 of the new 2020-2022 In Colors. The In Colors are a set of 5 colors that are only available for 2 years. Every year, one set retires and one set debuts. The other 2 In Colors for the next 2 years are Magenta Madness and Bumble Bee.

Measurements: Cinnamon Cider Card Stock (CS): 11 x 4 1/4 inches with a score line at 5 1/2 inches; Very Vanilla CS: two 5 1/4 x 4 inches and one 4 x 2 inches.

Using the Cinnamon Cider ink, stamp the cross hatched image from Comfort And Hope onto both 5 1/4 x 4 inch Very Vanilla CS pieces. The image near the edge is at full strength. Without applying any more ink, stamp again just above the full strength image. On the bottom piece, stamp a third time without adding any ink. This is know as the Stamping Off Technique. I use this technique a lot when stamping in the grunge style.

On the 5 1/4 x 4 inch Very Vanilla panel for the outside of the card, add the sentiment “Hugs Prayers Love” in Cinnamon Cider ink. The little design has been Stamped Off onto the scratch paper before stamping on the card. Both of these images are in the Positive Thoughts stamp set.

The leaf branch from the Positive Thoughts stamp set is Stamped Off each time in Just Jade ink.

The roll of twine from the Positive Thoughts stamp set is stamped at full strength in the middle, then Stamped Off two times.

The large branch of leaves is Stamped Off once on scrap paper, then on to the inside panel.

Using the Misty Moonlight ink, stamp the butterfly from the Positive Thoughts stamp set once at full strength on the inside panel. Stamp three full strength images on the 4 x 2 inch Very Vanilla CS.

Fussy cut the three butterflies, or use the butterfly die on a die cutting machine. Now use the Bone Folder to curve the wings of each butterfly.

Apply one half of a Stampin’ Dimensional to the middle of the back of each butterfly.

Use your Bone Folder to fold the 11 x 4 1/4 inch Cinnamon Cider CS at the 5 1/2 inch score line. Adhere the outside panel onto the front of the card base, and then the inside panel inside.

I found it easier to space the butterflies evenly if I adhered the top butterfly near the sentiment first, then the butterfly in the bottom corner, and finally the middle butterfly.

Now for the Bling! What is grunge without some sparkle?!

I placed the Champagne Basic Rhinestones with the Take Your Pick tool.

I applied Wink of Stella to the butterflies. See how sparkly they are now! Don’t forget to add Wink of Stella to the butterfly on the inside panel.

And Viola! You have a sparkly grunge card! I really like the sentiment “Hugs Prayers Love” because it is very versatile.

I am so grateful you came by today! This card is just so fun to make! I hope you give the grunge style a try.

Click on the photo for the product you need and go directly to my online store.

Product List

Have a wonderful and crafty day!

Theresa

Posted in 2020-2021 Stampin' Up! Catalog, Grunge style, Nature, Sponging technique, Stamping-off technique

Forever Greenery in Blue- SIP Series #3

This is the third in a series of cards made with stamps, ink and paper- SIP cards. For this card, I made it a little more advanced by adding a Circle Punch, a couple of techniques, Stampin’ Dimensionals and lots of Bling!

This is still a very simple card to make if you just take it step by step, so I included lots of photos. The card looks more difficult than it is. The stamp set is Forever Fern by Stampin’ Up! and is part of the Forever Greenery Suite in the new 2020-2021 Stampin’ Up! Annual Catalog. The images make it fun and easy to create elegant cards!

Measurements: Whisper White Card Stock (CS): 11 x 4 1/4 inches with a score line at 5 1/2 inches, 5 x 3 3/4 inches and 2 1/4 x 4 inches; and Misty Moonlight CS: 5 1/4 x 4 inches.

Using the Misty Moonlight ink, stamp the sentiment from the Forever Fern stamp set onto the 2 1/4 x 4 inch Whisper White CS.

Use the 1 1/2 inch Circle Punch to punch out the sentiment. Now use the punched out piece to draw a circle on the 5 x 3 3/4 inch Whisper White CS. This will be the focal point for stamping the leaves.

Using the Seaside Spray ink, stamp the largest bunch of leaves in the Forever Fern stamp set at 12 o’clock at full strength, and without adding any ink, stamp again at 4 o’clock. This is called Stamping Off. Using the Seaside Spray ink again, stamp the medium sized branch of leaves at full strength a 5 o’clock.

Stamp the long thin leaf branch in Misty Moonlight ink full strength at 1 o’clock and Stamped Off at 11 o’clock. Be mindful of where the end of the stem is. Ideally the end should stay within the pencil marked circle.

The berry type leaves are stamped in Pretty Peacock ink as shown.

One of the most fun stamps in the set is the splatter. There are so many possibilities with the splatter. For this card, I used the Seaside Spray ink and stamped full strength on some and Stamped Off on other images around the focal point.

I wanted to make this a little more interesting. I decided to use the Sponging Technique on both card pieces.

The Sponging Technique adds a darker edge to the card piece. I cut the Stampin’ Sponges into smaller pieces and label them with the color of ink. For more on how to prepare the Stampin’ Sponges click HERE. Using the Misty Moonlight ink, dab the sponge onto the ink pad. Gently rub the sponge on the edge of the card piece in a back and forth motion.

Do the same to sponge Misty Moonlight ink on the 5 x 3 3/4 inch card piece.

Adhere the sponged 5 x 3 3/4 inch card piece to the 5 1/4 x 4 inch Misty Moonlight CS. Use an eraser to erase the circle. Adhere the sentiment with Stampin’ Dimensionals.

Use the Bone Folder to fold the 11 x 4 1/4 inch Whisper White CS at the 5 1/2 inch score line. Adhere the completed card piece to the front of the Whisper White card base.

The Artistry Blooms Self-Adhesive Sequins are the perfect color to add some Bling! to this card. Use the Take Your Pick tool to easily transfer the sequins to your card.

Viola! You have a great card to send off “to a friend who makes you smile”.

Thank you for coming by today and seeing how easy it is to make this elegant card. The Forever Fern stamp set is very versatile. Check out the previous two blogs to see two other cards made from this set.

Joining Promotion

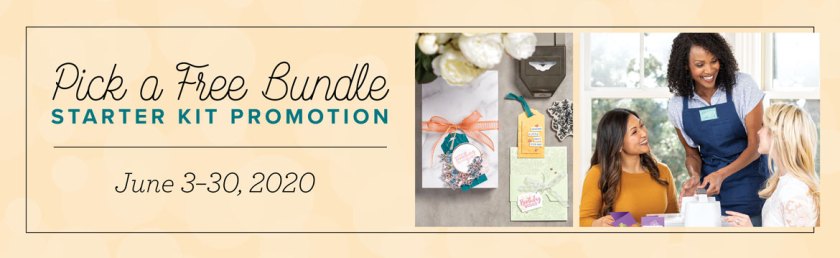
Would you like to get a FREE bundle? From now until June 30, 2020 when you sign up as a demonstrator with Stampin’ Up! you will not only get $125 worth of product for $99, you will get to choose any one stamp set with dies, or any one stamp set with a punch-for FREE!! To join click HERE and select the Specials tab on the right. Scroll down and find the “sign up now” button. If you need any further assistance, contact me via email at theresastreasures.az@gmail.com.

Product List

Have a wonderful day!

Theresa

Posted in 2020-2021 Stampin' Up! Catalog, Hello, Love/Affection, Nature, Simple stamping, Stamping-off technique

Forever Greenery in Blue- SIP Series #2

This is the second in the SIP series. SIP stands for stamps, ink and paper. The three cards in the series are made primarily from SIP-but with a little Bling! added at the end. The Forever Fern stamp set is part of the Forever Greenery Suite in the New 2020-2021 Stampin’ Up! Annual Catalog.

Here are the three cards in the SIP Series. The previous blog is for the card lying down with the sentiment “Love and Laughter Forever After” on it. You can see that card by clicking HERE.

Here is today’s card. This is my “Stamp it, Cut it, and Paste It” card. This great card is really very straightforward to make. The stamping pattern of the leaves is nearly identical to SIP card #1 in the previous blog.

Measurements: Whisper White Card Stock (CS): 11 x 4 1/4 inches with a score line at 5 1/2 inches and 5 x 3 3/4 inches; Misty Moonlight CS: 5 1/4 x 4 inches.

The first step is to cut 1/4 inch off the top of the 5 x 3 3/4 inch Whisper White CS.

Next stamp in Misty Moonlight ink the largest bunch of leaves in the Forever Fern stamp set. Before you put more ink on the stamp, stamp it in the upper right hand corner. This is a different version of the Stamping Off Technique using both the full strength and the Stamped Off image on the same card.

Using the Pretty Peacock ink, stamp once on the lower part of the card next to the first image. Stamp once under the first stamp in the right hand corner, then once above the first stamp.

Stamp the smaller bunch of leaves in Seaside Spray ink using the Stamping Off Technique.

Now that we have “Stamped It” we can “Cut it”. Cut 1 1/2 inches off the top and off the bottom.

Now we can add the sentiment “Hello” in Misty Moonlight ink.

I found it to be the most easy to have everything spaced evenly if I “Pasted it” by putting the bottom panel on first, followed by the top panel, then the center panel.

Fold the 11 x 4 1/4 inch Whisper White CS at the 5 1/2 inch score line and use the Bone Folder to get a crisp fold. Adhere this panel onto front of the Whisper White card base. You could leave the card just as it is, or you could add some Bling!

The Bling! or embellishment I chose for this card is the Artistry Blooms Self-Adhesive Sequins. They come in a rainbow of colors, of which the blue matches this card.

Tip: Transfer the self-adhesive sequins from the acetate sheet to the card with the Take Your Pick tool. Just slide the pick under the adhesive and move it to where you want it on the card. Apply light pressure on the sequin and remove the pick.

And Viola! you have made an elegant “Hello” card! Great to send to new or old friend to just say “Hello”.

Thanks for coming by and looking at my card. I really love how fast and simple it is to make elegant cards with the Forever Fern stamp set. I have also made some cards with greens, pinks and purples. It is a very versatile stamp set!

Would you like a Bundle for FREE? You can get any one stamp set with coordinating dies or any one stamp set with coordinating punch when you join Stampin’ Up! as a demonstrator. You choose your Starter Kit and pay $99 for $125 worth of product. Then you choose your FREE bundle! Next you will have 20% off of future orders as long as you continue to be a Stampin’ Up! Demonstrator. I have had a blast since signing up 4 years ago! I have not only improved my artistic skills, but also my business skills. And I have met so many new friends! Click HERE and then choose the Specials tab on the right. Scroll down and select “sign up now”. If you have any questions, please do not hesitate to comment or send me an email at theresastreasures.az@gmail.com. Thanks!

If you would like to purchase any Stampin’ Up! products in my Online Store just click on any photo below.

Product List

Have a most wonderful day!

Theresa

Posted in 2020-2021 Stampin' Up! Catalog, Blender Pen, Stamping-off technique, Watercolor Techniques

Flowers For Every Season in Blues

The Flower For Every Season Suite is just so beautiful and fun to create cards with! The Suite includes 2 different stamp sets – Jar of Flowers and Celebrate Sunflowers. The Jar of Flowers coordinates with the Jar punch and the Mason Jar Dome. To see a card with all 3 of the Jar products, check my blog from May by clicking here.

Here is the card for today. The lovely Flowers for Every Season DSP is paired with the Jar of Flowers stamp to match! Let’s get started!

This image has an empty alt attribute; its file name is IMG_20200601_105335-694x1024.jpg

Measurements: Whisper White Card Stock (CS): 8 1/2 x 5 1/2 inches scored at 4 1/4 inches and two 3 1/2 x 2 1/4 inches; Just Jade CS (New In Color!): 5 3/8 x 4 1/8 inches; Flowers For Every Season DSP: 5 1/4 x 4 inches.

This image has an empty alt attribute; its file name is IMG_20200601_140024-785x1024.jpg

Stamp the “Happy Birthday” sentiment from the Peaceful Moments stamp set in Shaded Spruce* ink onto one of the 3 1/2 x 2 1/4 inch Whisper White CS. Use the Timeless Label Punch to punch out the sentiment. (*I have used Shaded Spruce ink in this blog because the Just Jade ink was not available yet. The Just Jade ink can now be purchased and should be used in place of the Shaded Spruce.)

One really cool thing about the Jar of Flowers stamp set is that several pieces are reversible! First stamp the outline of the bowl in Balmy Blue ink onto the other 3 1/2 x 2 1/4 inch Whisper White CS. Flip the stamp over. Stamp the background color for the bowl in Balmy Blue by first Stamping Off on scrap paper, then on the card piece. That is so smart!

I used Smoky Slate ink to stamp the bunch of flowers after first Stamping Off onto the scrap paper. I used a sticky note as a Mask to shorten the flower stems. The stems are Stamped Off and stamped in Shaded Spruce ink.

This image has an empty alt attribute; its file name is IMG_20200601_110611-894x1024.jpg

I am going to use the Stampin’ Up! Watercolor Pencils to color the bunch of flowers. However, there is not a matching green Watercolor Pencil. I used a Blender Pen to add a light coloring of Shaded Spruce ink to the stems.

My goal was to try and match the coloring of the bunch of flowers to those flowers on the Flowers For Every Season DSP I had chosen for the card. I colored on top of my new catalog to keep the pencil pressure soft. The blue is the new In Color Misty Moonlight. To match the color with the Watercolor Pencils available I first colored the flowers lightly with the Basic Gray then with the Night Of Navy Watercolor Pencils.

I added some shading with a combination of a little more Basic Gray and a little more Night of Navy until I was satisfied. I used the Cajun Craze Watercolor Pencil for the larger flower, only coloring in the center of each petal.

This image has an empty alt attribute; its file name is IMG_20200601_122939-749x1024.jpg

To smooth out the Watercolor Pencil I went over the flowers with the Blender Pen.

This image has an empty alt attribute; its file name is IMG_20200601_135532-718x1024.jpg

The leaves were colored with the Blender Pen and the Shaded Spruce ink. The berries are colored in Melon Mambo Watercolor Pencil and the Pussy Willows are colored in Early Espresso Watercolor Pencil. Finally, I added some more shading to the center of the blue flowers with the Night of Navy Watercolor Pencil.

This image has an empty alt attribute; its file name is IMG_20200601_135922-708x1024.jpg

I added some “water” in the bowl with the Balmy Blue Watercolor Pencil.

This image has an empty alt attribute; its file name is IMG_20200601_140201-784x1024.jpg

Punch out a label from the Just Jade CS with the Timeless Label Punch. Set aside. Adhere the Just Jade CS to the front of the 8 1/2 x 5 1/2 inch Whisper White CS card base after you have used the Bone Folder to make a crisp fold at the 4 1/4 inch score line.

Adhere the Flowers for Every Season DSP to the Just Jade CS on the card front.

Adhere the Just Jade CS Timeless Label to the back of the sentiment label, slightly offset. Use Stampin’ Dimensionals to adhere the watercolored bunch of flowers and the sentiment to the card front.

Add a bow tied from the Misty Moonlight In Color 1/4 inch Ribbon with a Glue Dot. I plan to make a new video on how to tie bows. I tried today, but it did not work out. Soon I hope.

Now for the Bling! The Holiday Rhinestone Basic Jewels are perfect as there are several colors to choose from. I added some light blue rhinestones to the blue flowers in the bunch of flowers, dark green around the sentiment and dark blue rhinestones on the Flowers For Every Season DSP. I love lots of Bling! There is more Bling to be had for this card!

Wink of Stella!! This glitter brush can add a light sparkle to your card! But how to start using it? It comes with a black ring between the two barrels. Remove the black ring and put the two barrels back together.

Squeeze the barrel where it says “PUSH” until a little glitter is seen. Brush onto a scrap paper to get the flow going and get a feel for how it works.

Brush the glitter onto the water until you like the sparkle!

And Viola! you have a lovely floral card to send to someone for their Birthday! You could also use a different sentiment for any occasion. This card would be great for a variety of occasions!

Thanks for being here today. I appreciate you!

To go to the online store, click on any photo below.

Product List

Have a wonderful and creative day!

Theresa

Posted in Mini Catalog 2020, Multi-layer Stamping, Stamping-off technique

Sending Positive Thoughts

So much of life is just, well difficult. We all have our struggles. Sending a handmade card with positive thoughts can really make someone’s day and lift their spirits.

This card is very colorful, springy and sends a positive message. The colors are Mint Macaron, So Saffron, Balmy Blue and Highland Heather.

I used the Stampin’ Up! Positive Thoughts stamp set which is available in the 2020 Mini Catalog.

Measurements: Whisper White card stock (CS): 8 1/2 x 5 1/2 inches with a score at 4 1/4 inches, 5 x 3 3/4 inches and 4 x 2 inches; Garden Lane Designer Series Paper (DSP): 5 1/4 x 4 inches.

The technique I am going to show you today is Multi-layer Stamping. This is when you stamp several layers on top of each other. It is much easier than you would think!

Start with the main sentiment “Sending positive thoughts and feel good wishes” in Balmy Blue ink.

Use a scrap paper to stamp off before stamping the next image of this sentiment. Stamping Off is when you ink your stamp, stamp on the scrap paper, then stamp on your card front.

Do this several times, Stamping Off each time, until you reach the top of the card front. Do not worry if each line is not perfectly straight. It will not be that obvious once you add the rest of the images.

Use the Mint Macaron ink to stamp the leaf onto the card front. Stamp a second time without re-inking to the right of the first leaf. Mine is so light it is difficult to see in this photo.

Stamp the flowers in So Saffron ink at full strength.

Stamp three of the butterflies in Highland Heather ink onto the 4 x 2 inch Whisper White CS.

Cut out the butterflies with your paper snips. If you do happen to have a Big Shot or other die cutting machine, there are Natures Thoughts Dies available for this stamp set.

To make the butterflies pop off of the card, use the Bone Folder to bend the wings back a bit. Do this gently so you do not tear the wing off.

Use the Mini Stampin’ Dimensionals on the back of each butterfly.

Adhere the butterflies to the left upper side of the card front.

Fold the Whisper White CS 8 1/2 x 5 1/2 inch card base at the 4 1/4 inch score line and use the Bone Folder to make a crisp fold. Next, adhere the 5 1/4 x 4 inch Garden Lane DSP to the front panel of the Whisper White CS card base.

Adhere the stamped card front onto to the Garden Lane DSP layer.

And now for some Bling! I used the Wink of Stella Glitter Brush on the butterflies.

It is very hard to get a good photo of how sparkly this is. Try it and see for yourself!

And Viola! You now have a handmade card to send positive thoughts to someone to brighten their day!

Thank you again for joining me today. I hope you can find some creative time today and make something to spread some positive thoughts and kindness. We all need more kindness in today’s world! Be the change you want to see!

This is the best time of year to order products from Stampin’ Up! because it is Sale-a-bration! That means for every $50 of product you order, you may choose from a Sale-a-bration Brochure and receive FREE PRODUCT! There are stamp sets, Designer Series Paper and even an embossing folder! Shop Now at my online store. Sale-a-bration is only until March 31st and products do run out. The Metallic Twine and Sequins are already gone! I am an Independent Stampin’ Up Demonstrator so if you need any assistance please email me at theresastreasures.az@gmail.com or send me a message on my Facebook page

Stampin’ Up! supplies used include: Stamp Set: Positive Thoughts #151490; Paper: Whisper White CS #100730 and Garden Lane DSP #149488; Ink: Balmy Blue #146982, Mint Macaron #138337, So Saffron #105118 and Highland Heather #146986; Clear Blocks C #118486, D #118485, E #118484 and H #118490; Bone Folder #102300; Adhesives: Tombow Multipurpose Liquid Glue #110755 and Mini Stampin’ Dimensionals #144108; and the Clear Wink of Stella Glitter Brush #141897.

Posted in Blender Pen, Gratitude/ Thanks, Grunge style, Photopolymer, Stamping-off technique

Tips for Learning the Masking Technique

Hello and welcome to my blog! Today I will demonstrate the Masking Technique to make the leaves appear to be behind the flowers. This adds dimension to your card.

This card is one of three that is made using Stampin’ Up!’s Painted Harvest stamp set. The first card was a Birthday card which you can see on the previous blog. This second card is one to express gratitude. Let’s get started!

Side note: My joint replacement in my right middle finger is doing well but I do still have a bandage on it. Today I chose a purple bandage. Might as well make it colorful!

I also used the Sea of Textures stamp set to add some grunge to the card.

Measurements: 8 1/2 x 5 1/2 inch Whisper White card base scored at 4 1/4 inches, 5 1/4 x 4 inch Blushing Bride and 5 x 3 3/4 inch Whisper White.

The Stampin’ Up! ink colors for this card are: Blushing Bride, Garden Green, Crumb Cake and Early Espresso. Tip: The Early Espresso dries more slowly than the other colors so take care not to smear the ink, which I have done many times!

The clear blocks needed are: B, C, D, and H.

Tip: The stamps in this set are Photopolymer so you will need the Stampin’ Pierce Mat.

I actually made a mistake when photographing this part. You do not need the Stampin’ Pierce mat for this red rubber stamp. However, it did not seem to affect the quality of the image. Ink the stamp from the Sea of Textures stamp set with Crumb Cake and Stamp Off onto a scrap paper before stamping on the 5 x 3 3/4 inch Whisper White card piece. The idea is to create a faint frame for the flowers.

Continue around the entire border.

The flower is a Two Step Stamp. The stamp on the left is larger and less detailed than the stamp on the right. I used the larger stamp first, but you could do it either way. Try it both ways to see which is easier. Sometimes when the two layers need to be lined up, it is easier to use the more detailed stamp first as it is easier to see through the less detailed stamp.

First stamp a flower in the lower left hand corner, slightly off to the right, using the Blushing Bride ink.

Then stamp a flower in the upper left hand corner and another to the right of the flower on the bottom left hand corner. Tip: Try not to make them perfectly spaced as this does not look natural.

Now use the smaller more detailed flower stamp and stamp directly over the top of the first stamp lining up the center. It isn’t so obvious here, but the flower looks more full after the second layer is stamped on.

To stamp the center of the flower, use the Early Espresso ink and Stamp Off onto the scrap paper first.

Now to prepare for the Masking Technique. Start with three sheets of sticky note paper and stamp the image of the larger flower over the edge with the sticky on it.

Now cut around the edge. Some people cut really close to the stamped edge and others leave a little border. I left a little border.

Separate the papers so you have the three sticky note flowers.

Stick the sticky note flowers on over your stamped flowers.

Tip: Take care to line up the mask properly. Identify a recognizable part of the image to be able to place the mask over the stamped image easily.

The leaves are a Two Step Stamp also. Tip: I made a mistake when I first did this card and used the less detailed stamp on the left first. I found that it was easier to line up the second layer if the more detailed stamp on the right was used first.

Stamp the first layer of the leaves as desired around the flowers.

Go over the first layer of leaves with the second stamp.

Peel the mask off.

Oops! I had not lined my mask up properly and this left a hole in my leaves! Not to worry, there are two ways to fix this that I can think of. The first fix is to do it all over. Urgh!

The second fix is to use a Stampin’ Up! Blender Pen.

The way to use the Blender Pen is to first get some ink on the lid of your stamp pad case. Flip the ink pad over and apply firm pressure. Then open up the stamp case and there should be a nice layer of ink in the lid. Scribble the Blender Pen at the edge of the ink spot and blend it out so that there is a light amount of ink on the pen.

Now apply the ink to the paper gently with a small circular motion until the leaf looks whole again. Not too bad, eh?

When you are finished blending, scribble the Blender Pen on a scrap piece of paper until all the color is out. Now it can be used again with another color! How cool is that!?!

Okay, back to the card we were making. Use the Early Espresso ink to stamp the sentiment in the upper right hand corner. Take care not to smear the ink by allowing extra time for it to dry.

Adhere the stamped card piece to the 5 1/4 x 4 inch piece of Blushing Bride.

Adhere the Blushing Bride to the card base. Flip the card over before rubbing it so that the ink doesn’t smear.

And there you have it! Wasn’t that fun? You can do a lot of really interesting cards using the Masking Technique. Take time to play with this technique. If you liked this card and the instructions, please Like my blog. Thanks for stopping by!

The Stampin’ Up! products used include: Stamp Set: Painted Harvest #144783, Sea of Textures #146488; Cardstock: Whisper White #100730 and Blushing Bride #131198; Ink: Crumb Cake #147116, Blushing Bride #147100, Early Espresso #147114 and Garden Green #147089; Clear Blocks: B #117147, C #118486, D #118485, and H #118490; Stampin’ Pierce Mat #126199; Paper Snips #103579; Blender Pen #102845; Multipurpose Liquid Glue #110755.

Posted in Avid Stamper, Fun/Fancy fold card, Stamping-off technique

Graduation Card and Gift Card Holder

This time of year is so exciting for many folks! Graduation from High School or University is such an accomplishment! What better way to help the person celebrate than sending a handmade card that holds a gift card!

The actual idea for the gift card holder came from my stamping friend Dawn. The image on the front of the card has been posted by several folks on Pinterest. The combination is my original idea.

This card is more involved than the cards I have been posting. There are a lot of supplies needed which I will show first. A complete list will also be at the end of the instructions. Let’s get started!

The card base is an 11 x 4 1/4 inch Basic Black scored at 1 3/4 and 5 1/2. Along the 4 inch side on the left end, make a small mark at 2 1/8 inches with the scoreboard.

The front of the card is a 4 x 3 1/2 inch piece in the school color (for this card I used Pacific Point), and a 3 3/4 x 3 1/4 inch Whisper White.

The inside of the card is Whisper White in 5 1/4 x 4 inches, 4 x 3 1/2 inches and 4 x 1 1/2 inches. Along the 4 inch side of the 4 x 1 1/2 inch piece, make a small mark in pencil at 2 inches.

For the graduation cap you need a 4 1/4 x 1 inch piece of Basic Black. The diploma is made from a 1 1/2 x 3/4 inch piece of copy paper.

This card uses 3 different Stampin’ Up! stamp sets: Beautiful You, Itty Bitty Greetings and Wood Words.

Ink: Memento and Stampin’ Up!’s Pacific Point (or the school color).

Stampin’ Write Markers: Basic Black and Pacific Point (or the school color). Stampin’ Blends Alcohol Markers: Dark Basic Black, Dark Granny Apple Green, Dark Daffodil Delight (or other hair color) and Light Petal Pink (or other skin color).

Stampin’ Up! punches: 1 inch circle, 1 1/4 inch circle (retiring) and Triple Banner.

Clear blocks: C and E.

You will also need embroidery thread in the school color and in black.

Most of the adhesive I used is the Multipurpose Liquid Glue. In order to ensure the gift card holder was secure I used Tear and Tape adhesive.

Alright! Now that you have the supplies, let’s see how to make the card! Warning- this is a long post but well worth it! There are several Tips along the way.

Lay the 5 1/4 x 4 inch piece of Whisper White on the right side of the inside of the card. Fold at the score lines and burnish with the bone folder.

With the card folded closed, use the Basic Black Stampin’ Marker to draw a line. Set aside.

Use the Memento ink to stamp the lady onto the 3 3/4 x 3 1/4 inch piece of Whisper White. Tip: Be sure to leave room underneath the lady for the sentiment.

Using Memento ink stamp the sentiment “Congratulations” under the lady. Set aside.

Next we will stamp on the inside card pieces, the 4 x 1 1/2 inch and 5 1/4 x 4 inch pieces of Whisper White. We will only be stamping on the right side of the line drawn on the larger piece.

Starting with the 4 x 1 1/2 inch card piece, use the Stamping Off Technique with the school color ink (Pacific Point) to stamp the stars onto the card piece.

Stamp until the card piece is full of stars. Set aside.

For the 5 x 4 1/4 inch Whisper White card piece, use a copy paper mask. Tip: Do not use a cardstock for the mask because there will be a white space between the line and the stamped image if you do. You will see a little white space even with the copy paper (shown later).

Again use the Stamping Off Technique to stamp the stars on the right side of the black line only.

Tip: Take care not to push the stamp into the ink pad too far. The ink will get around the stamp and leave a halo on the card. Fortunately, this halo was very small so I did not do anything about it.

Continue Stamping Off and fill the right side with stars. Note the white space between the second and third stars and the black line. This can be minimized by pressing a little more firmly when stamping.

Tip: Mount the sentiment “Happy Graduation” about 1/4 inch from the top edge of the C block to aid in spacing the sentiment. Take extra care to go straight down and up when stamping without rocking.

Use the top edge of block clear block to line up with the top edge of the paper for the first stamped sentiment. Thereafter, line up the top edge of the block so it is underlining the sentiment you just stamped.

Repeat the process on the smaller strip of stars. Set the card pieces aside.

Using the Dark Black Stampin’ Blend Alcohol Marker, color in the lady’s dress to make the graduation gown. Leave the ruffles under the skirt uncolored.

Draw in the sleeves of the gown to complete it.

Color the hair. I used the Dark Daffodil Delight Stampin’ Blend. Then color the ruffle and legging in the school color. I used Pacific Point.

I used the Light Petal Pink Stampin’ Blend for the skin color and the Dark Granny Apple Green Stampin’ Blend for the grass.

In order to get the graduation cap right, I punched the 4 1/4 x 1 inch Basic Black piece with the Triple Banner Punch. I used the smaller piece.

I used the Paper Snips to cut parallel to the punched edges to create the diamond-shaped graduation cap.

Pierce a hole into the center of the cap using the Stampin’ Pierce Mat and the Paper-Piercing tool.

Using the black embroidery thread, tie a knot on one end. With the knot on the top side, thread it through the hole in the graduation cap. Secure the underside with scotch tape.

Trim the tassel and set aside.

You will need the 1 1/2 x 3/4 inch piece of copy paper, the Paper-Piercing Tool and the school colored embroidery thread for the diploma. Use the end of the Paper-Piercing Tool to start rolling the diploma.

Trim the excess copy paper once you like how the diploma looks. Tie the school-colored embroidery thread around the diploma and make a double knot. Trim the excess thread. Set aside.

Take the stamped 4 x 1 1/2 inch piece of Whisper White and place the 1 1/4 inch circle punch so that the small mark you made at 2 inches is in the middle. Use about 1/3 of the punch to create the thumb notch.

Take the Basic Black card base and place the 1 inch circle punch so that the mark you made at 2 1/8 inches is in the middle. Punch using about 1/3 of the circle punch to create the thumb notch.

Finally! We have all the pieces and we can start putting everything together! Start with the inside of the card. Adhere the 5 1/4 x 4 inch stamped Whisper White on the right-hand side and the 4 x 3 1/2 inch blank Whisper White in the middle.

Place the tear tape as close to the outside edge as you can. This allows enough space for the gift card to fit.

Flip the card base over. First adhere the lady to the 4 x 3 1/2 inch piece of the school color (here it is Pacific Point). Then adhere the combination to the front panel of the Basic Black card base.

Tip: Use the Paper-Piercing Tool to slide under the protective cover of the Tear Tape. This is an easy way to remove the covering. Close the panel toward the inside of the card. Press firmly to ensure the Tear Tape securely adheres. Place the gift card in the space.

I used a Stampin’ Dimensional on the graduation cap.

I used a generous amount of the Multipurpose Liquid Glue to adhere the diploma. Note: Since there are raised portions on the front of the card, place an extra 5 1/4 x 4 inch piece of Whisper White cardstock over the front before mailing. This card can be mailed in the USA with a regular US postage stamp.

Congratulations! You have made it through – and you now have an extraordinary Graduation card and gift card holder to help that special someone celebrate their accomplishments! Thanks to everyone who stuck with me! Visit my Facebook Page at Theresa’s Treasures Arts and Crafts Store to see this card in more colors on the post from April 19, 2019.

Stampin’ Up products used include: Stamp Sets: Beautiful You #143637, Itty Bitty Greetings #146667 and Wood Words #143928; Punches: Triple Banner #138292, 1 inch circle #119868, 1 1/4 inch circle(retiring, available only while supplies last!) #119861; Cardstock: Basic Black #121045, Whisper White #100730 and Pacific Point #111350; Ink: Memento #132708 and Pacific Point #147098; Stampin’ Write Markers: Basic Black #100082 and Pacific Point (available in a set-Brights Stampin’ Write Markers #147157); Stampin’ Blends Alcohol Markers: Dark Basic Black #147941, Dark Daffodil Delight #144585, Light Petal Pink #146866 and Dark Granny Apple Green #146877; Clear Blocks: C #118486 and E #118484; Stampin’ Pierce Mat #126199; Paper-Piercing Tool #126189; Paper Snips #103579; Tear and Tape #138995; Stampin’ Dimensionals #104430; and Multipurpose Liquid Glue #104430.

The Stampin’ Up! 2019-20 Annual Catalog is just around the corner! For now there are great deals, up to 60% off of the Clearance Rack and a complete list of all the retiring product. Select the Click Here for My Store or Shop Now button above to go to my Stampin’ Up Webpage and then select “Shop” to get to the store. Enjoy!

Posted in Stamping-off technique

Recovery, Creating, and Sneak Peek all in one

Well it has been awhile since I have been able to type a blog. My middle finger joint replacement is healing well and I am giving it a shot today. We’ll see how it holds up!

One of the best benefits of stamping and creating is that it takes your mind off of any pain you may be suffering from. Stamping allows you to shift your focus to something more positive and fun!

Today I will show you 2 stamp sets that will not be retiring, and a new embellishment coming on June 4, 2019 in the 2019-20 Stampin’ Up! Annual Catalog. I will also share several tips and techniques.

Today’s card is a beautiful and fun Birthday card. This is easier to make than you may think. Let’s get started!

I will be using two Stampin’ Up! stamp sets that are not retiring. The first is Painted Harvest and the second is Perennial Birthday. These are both great sets to have in your collection.

Measurements: 8 1/2 x 5 1/2 inch Whisper White card base scored at 4 1/4 inches; Gorgeous Grape 5 1/4 x 4 inches and 4 1/4 x 1 inches; Whisper White 5 x 3 3/4 inches and 4 1/4 x 1 inches.

This card uses Stampin’ Up! ink in Gorgeous Grape, Highland Heather, Granny Apple Green and Soft Suede. You will also need the Stampin’ Pierce mat, paper snips and adhesive. I prefer the Multipurpose Liquid Glue.

To add dimension to the sentiment I used the Stampin’ Dimensionals. The embellishment called Bird Ballad Trinket will be in the new catalog available online on June 4, 2019. The clear blocks I used are “B”. “C”, “D” and “H”. (One of the perks about being a Stampin’ Up! Demonstrator is that you get to order the new stuff early!)

The first step is to use the Gorgeous Grape ink and stamp the Happy Birthday sentiment onto the 4 1/4 x 1 inch piece of Whisper White cardstock.

Next, apply adhesive to one half of the 4 1/4 x 1 inch piece of Gorgeous Grape cardstock, and adhere the Happy Birthday sentiment to it with a little Gorgeous Grape border on the bottom edge.

Tip: To cut a perfect banner , use the paper snips to cut in the middle first. Then cut from one outside corner to the inside of the middle cut. Now cut the other side from the corner to the inside of the middle cut.

Viola! A perfect banner!

The flower is a Two Step Stamp. This means that you are going to stamp one part, then with the same color, and over the first stamp, you will add the second stamp. For this flower I stamped the larger, less detailed flower stamp first. I used Highland Heather ink. Tip: To stamp an organized random pattern, I start in the upper left hand corner and stamp a partial flower. Then I stamp additional flowers moving to the bottom right hand corner, but not exactly in a straight line. I rotated the flower as I went so that the image would not be identical.

Next I stamped the flower in the open spaces to fill it all in.

This is the completed first step of the Two Step Stamping.

The second step of the Two Step Stamp is to stamp the smaller, more detailed stamp directly over the top of the first stamp. You can use a different color if you wish, but I used the same color of ink as I used for the First Step.

Here is the completed card piece done withTwo Step Stamping.

I used Soft Suede ink for the center of the flower. You will need a scrap piece of paper to be able to Stamp Off .

Stamping Off. First apply ink to the center stamp and stamp onto the scrap paper lightly but evenly. Next stamp onto the card piece. This gives a slightly lighter color to the stamped image. It is good to use when using a dark color and not wanting the color to be too strong.

Continue with the stamping off until all of the flowers have a center.

I used Granny Apple Green and one of the leaf stamps from the Perennial Birthday to add some greenery between the flowers.

Use your adhesive to adhere the stamped card piece to the 5 1/4 x 4 inch piece of Gorgeous Grape.

Now adhere the card piece to the Whisper White card base.

Apply the Stampin’ Dimensionals to the back of the Happy Birthday sentiment.

Remove the backing on the Dimensionals and adhere to the bottom of the card.

Now to use these wonderful Bird Ballad Trinkets.

I have tried glue dots but they do not last. I recommend a generous amount of the Multi Purpose Liquid Glue. This glue dries clear. Place the trinkets on the glue carefully so you do not have to move them. Leave them be for 20 minutes before moving the card.

And that is all there is to it!

The new catalog is coming June 4, 2019! Here I gave you a sneak peek at some embellishments and non-retiring stamp sets. I plan on showing some new stamp sets soon. For the next 2 cards I will use the Painted Harvest as the main stamp set. That way, when you buy this beautiful stamp set, you will already have 3 different card ideas!

The Stampin’ Up! products used include: Stamp Sets: Painted Harvest #144783 and Perennial Birthday #145760; Cardstock: Whisper White #100730 and Gorgeous Grape #146987; Ink: Gorgeous Grape #147099, Highland Heather #147103, Granny Apple Green #147095 and Soft Suede #147115; Embellishments: Bird Ballad Trinkets #149594 (not available until June 4, 2019); Clear Blocks: A #118487, B #117147, D #118485, and H #118490; Stampin’ Pierce Mat #126199; Paper Snips #103579; Stampin’ Dimensionals #104430 and Multipurpose Liquid Glue #110755.

Posted in Cat, Occasions Catalog 2019, Punch, Stamping-off technique

Love My Cat

I just love cats! I have had a cat, although not the same cat, since I was in the 9th grade. All of my cats have been very loving and compassionate, helping me through the tough times and celebrating with me during the happy times. This card is a celebration of the love I feel for my little furry friends.

This card is the 2nd in a series of 3 cards I am making using Stampin’ Up!’s Nine Lives stamp set, the Cat Builder Punch and the Floral Romance Designer Series Paper (DSP).

Measurements: Whisper White card base 8 1/2 x 5 1/2 inches folded at 4 1/4 inches, Pear Pizzazz 5 1/4 x 4 inches, Floral Romance DSP 5 x 2 inches, Whisper White 4 x 2 1/4 inches and 2 3/4 x 2 3/4 inches.

You will also need Stampin’ Up!’s Soft Suede ink, Melon Mambo ink and Memento ink.

Use the Soft Suede ink to stamp the outline of the cat onto the 4 x 2 1/4 inch strip of Whisper White. Stamp towards the bottom of the paper.

We are going to use the Soft Suede ink to add stripes to the cat. Take care to line up the edges before stamping down. Sometimes this takes a couple of tries. This reminds me of a friend’s cat who recently passed away. (The cat not the friend!) In memory of him, I will name this cat Oliver.

Put the strip of card stock with Oliver on it into the Cat Builder punch. Line the edges up and squeeze gently to hold Oliver in place, lay the punch on the table and push quickly and firmly to punch him out. Viola!

Lay Oliver on the Whisper White square to place the sentiment. Using the Memento ink, stamp the sentiment “True Love has four paws” onto the lower left hand cornet.

We want Oliver to be able to speak his mind. Use the Memento ink to stamp the “Meow!” next to Oliver.

Use the Melon Mambo ink and the hearts stamp to put cute little hearts around Oliver. He is a very loving cat!

Add the hearts until you are satisfied with the result.

Use the Stampin’ Dimensionals on the back of Oliver. I cut a sliver off of one to put on the back of the tail.

Peel off the backing on the Dimensionals and adhere Oliver to the sentiment piece.

Adhere the Floral Romance DSP to the piece of Pear Pizzazz.

Now to add a little mouse, eek! This is a Two Step stamp. Using the Soft Suede stamp the outline to the mouse onto the bottom right hand corner of the Pear Pizzazz. An example of the solid part of the mouse is on the scrap paper.

We are going to use the Stamping Off Technique on the mouse. I didn’t want the body to be so dark as to obscure the eye. Using the Soft Suede ink stamp onto the scrap paper first, then onto the outline of the mouse. Be sure to line it all up before stamping down. Isn’t that mouse so cute, eek!

Now lay Oliver and the sentiment onto the Pear Pizzazz card piece and stamp a few more of the little hearts.

Use the Stampin’ Dimensionals to adhere Oliver and the sentiment to the Pear Pizzazz card piece.

Now adhere the Pear Pizzazz piece to the Whisper White card base, and you have another great card!

Don’t forget to check out the cute kitty card I made on my previous blog. This is a really fun stamp set and there are so many possibilities.

Stampin’ Up! just added more to the choices of free product today! You may choose a free product for every $50 you order. For example, if you order the Nine Lives stamp set, Cat Builder punch, the Floral Romance DSP and a bottle of the Multipurpose Liquid Glue, you can choose a free product! It is that simple! Check it out by going to my store after you select the Shop button above.

Stampin’ Up! products used on this card include: Stamp set: Nine Lives #148703; Punch: Cat Builder Punch #144666; Cardstock: Whisper White #100730 and Pear Pizzazz #131201; Designer Series Paper: Floral Romance #148586; Ink: Memento #132708, Melon Mambo #147051 and Soft Suede #147115; Clear Blocks: B #117147, C #118486 and D #118485; Stampin’ Pierce Mat #126199; Stampin’ Dimensionals #104430 and Multipurpose Liquid Glue #110755.

Posted in Cat, Occasions Catalog 2019, Photopolymer, Punch, Simple stamping, Stamping-off technique

Cute Kitty

Hello Everyone! So I am at my medical conference waiting for the lectures to start and writing my blog about cards! So fun! Think I am the only doctor here doing that?

The next series of 3 cards will be from Stampin’ Up!’s Nine Lives stamp set which is so cute! We will also be using the Cat Builder punch.


This card is for that special friend who “only comes around once in nine lives”!

Measurements: Whisper White card base 8 1/2 x 5 1/2 inches folded at 4 1/4 inches, Melon Mambo 3 3/4 x 3 3/4 inches, Whisper White 3 1/2 x 3 1/2 inches and 4 x 2 1/2 inches.

We will also be using Melon Mambo ink and Memento ink.

Let’s start with the sentiment “A friend like you comes around once in nine lives” in Memento ink stamped on the upper left hand corner of the 3 1/2 inch Whisper White square.

Using the Memento ink, stamp the outline to the kitty onto the Whisper White 4 x 2 1/4 inch piece on the bottom half.

Next use the Memento ink to ink up the spots. Carefully line up all the outlines and stamp the spots onto the kitty. Isn’t he so adorable?

Insert the stamped cat piece in through the top of the punch and line it up. Squeeze it slightly then push firmly and quickly with your hand to punch the cat out.

Lay the cat onto the piece with the sentiment to be able to position the ball of yarn. This is a Two-step stamp. I tried it both ways and found it easier to stamp the outline first.

I decided to Stamp Off once to lighten the background stamp for the ball of yarn. Use a scrap of paper to stamp on first, then stamp over the outline of the ball of yarn.

I had to try this a few times before I was happy with the result.

We are going to adhere the kitty with the Stampin’ Dimensionals. I cut a sliver from one to put on the tail.

Peel off the protective layer and adhere to the sentiment piece.

Adhere the sentiment and kitty to the square of Melon Mambo.

Now adhere the entire piece to the Whisper White card front. I just love it!

You can leave the card this way or if you have some rhinestones or sequins you may add some bling to the card. I wanted to leave it simple. Tip: When it is time to mail a card with rhinestones on the front, cut a piece of Whisper White card stock at 5 1/4 x 4 inches to lay over the top before sliding the card into the envelope. This helps it slide through the mail sorter without damaging your card.

Stampin’ Up!’s biggest sale of the year, Sale-a-bration, is going on until March 31, 2019. The Nine Lives stamp set is from the 2019 Occasions Catalog and the Cat Builder Punch is in the Annual Catalog. For every $50 that you order from either catalog, you may choose a free Sale-a-bration product from the Sale-a-bration Brochure. Select the shop button on top to check it out!

Stampin’ Up! products used on this card include: Stamp set: Nine Lives #148703; Punch: Cat Builder Punch #144666; Cardstock: Whisper White #100730 and Melon Mambo #141416; Ink: Memento #132708 and Melon Mambo #147051; Clear Blocks: B #117147, C #118486 and D #118485; Stampin’ Pierce Mat #126199; Stampin’ Dimensionals #104430 and Multipurpose Liquid Glue #110755.