Posted in 2021 Stampin' Up! July-December Mini Catalog, Avid Stamper, Emboss Powder, Religious, Winter Holiday

Stampin’ Up!® Angels of Peace Christmas Card

Today’s card is the Stampin’ Up!® Angels of Peace Christmas Card for Day 3 of the “12 Days of Christmas Card Making Challenge”!

Peace on Earth! I would really like to see more of that. As I said above, I am on Day 3 of the “12 Days of Christmas Card Making Challenge” with my stamping buddy Christy. I will be blogging a new holiday card each day until December 10, 2021. I plan to showcase a different stamp set with each card. This will allow you plenty of time to see the great products that are available in the 2021 Stampin’ Up! July to December Catalog and order it in time to make your own Christmas cards! You can order HERE when you have your list ready!

Disclaimer: This is a somewhat advanced card as there are several steps before you can put the card together. I used the Silver Emboss Powder, the Blending Brushes, Watercolor Pencils, the Wink of Stella, and the Metallic Mesh Ribbon in creating this fabulous card! I went through many different versions of this card before deciding on the final one.

This card will be submitted to The Paper Players PP569 Sketch Challenge.

Here is what you need to emboss: Silver Emboss Powder-Metallics, Versamark and the Heat Tool.

Measurements

  • Basic White Card Stock (CS) card base: 4 1/4 x 11 inches with a score line at 5 1/2 inches.
  • Basic White CS: 3 x 5 inches and a 3/8 x 3 7/8 inch strip.
  • Peaceful Place Designer Series Paper (DSP): one 1 7/8 x 12 inch piece of the trees and night sky design. First cut a 5 1/8 inch piece with the tree on it. Then cut the remaining DSP into a 5 inch piece. Cut that piece at 2 1/2 inches to make two small rectangles. Trim 1/8 inch off the length on each piece. You will also need a 1/2 x 4 1/2 inch piece of the night sky.
  • Disregard the white and silver design as I ended up not using it in the final version.
  • Silver Foil: 4 x 5 1/4 inches.

Stamping

Start out by making the sentiment. Use the Basic Black Stampin’ Write Marker to ink up the “Peace on Earth” only. Stamp onto the 3/8 x 3 7/8 inch Basic White CS. Set aside.

Blending with the Blending Brushes

Use medium pressure as you put the Blending Brush to the Pacific Point Ink Pad. Move in small circles until you have some ink on the Blending Brush. Practice on a scrap piece of paper, moving the Blending Brush in circles. Try different amounts of pressure. Learn which pressure is needed to lightly apply the color to the paper. Blend the Pacific Point Ink onto the top and right side of one of the night sky pieces. Next, blend the ink onto the bottom and right side of the other night sky piece.

Apply the Pacific Point Ink to the top and left side of the tree piece. Blend ink onto the ends of the 1/2 x 3 7/8 inch night sky piece.

Here is how the Peaceful Place DSP pieces will fit together when they are adhered to the Silver Foil. The strip will be used on the inside of the card.

More Stamping

Create the inside of the card by stamping in Memento ink the sentiment “Blessings to you and yours this season and in the coming year” onto the inside of the 4 1/4 x 11 inch Basic White CS card base. Stamp the snowflakes in Pacific Point ink. Adhere the 3/8 x 3 7/8 inch night sky piece to the bottom of the inside panel.

Heat Embossing the Angel

Steps for Heat Embossing:

  1. Apply an Anti-Static powder to the 3 x 5 inch Basic White CS.
  2. Use Versamark to stamp the angel onto the CS.
  3. Sprinkle the Silver Emboss Powder over the Versamark until it sticks to it evenly.
  4. Tap the paper to remove the Emboss Powder that is not stuck to the Versamark TIP: If you see some Silver Emboss Powder stuck in a place where it should not be, you can use the tip of a fine tip paint brush to remove the powder before heating.
  5. Heat the Heat Tool for about 10 seconds, then wave the heat over the Silver Emboss Powder until it is all melted. Let it cool.

Coloring the Angel

To create the angel the same way I did, you will need the Pacific Point Watercolor Pencil. First apply an even but light layer on the dress. Then darken certain areas to make shadows. I am not great at the shadows. Just do what seems right for you. The hair is a light layer of the Daffodil Delight Watercolor Pencil. The face and hand are done in a very light layer of Calypso Coral. I did color the wings and the dove, but later wished I had left it alone. To finish the angel, use the Wink of Stella on the dress and wings.

Assembling the Card

Begin by adhering the Peaceful Place DSP pieces to the 4 x 5 1/4 inch Silver Foil as shown. Next tie a bow with the 1 1/2 inch metallic Mesh Ribbon leaving long tails. Use glue dots to adhere to the card front. Then use Stampin’ Dimensionals to adhere the angel. Wrap the tails of the bow around her. Finish by adhering the sentiment.

Complete the card by adhering the Silver Foil panel to the front of the Basic White CS card base. Take care to know which panel has the inside sentiment on it so you adhere the Silver Foil to the correct side.

Add some Rhinestone Basic Jewels to the sky. Voila! You have made a beautiful, shining angel Christmas card.

Thanks for joining me for Day 3 of the “12 Days of Christmas Card Making Challenge”. I have a great 3D card for tomorrow!

Happy crafting!

Theresa

Posted in 2021 Stampin' Up! July-December Mini Catalog, 2021-2022 Stampin' Up! Annual Catalog, Emboss Powder, Ornaments, Techniques, Winter Holiday

Stampin’ Up!® Bright Baubles Gold Emboss Christmas Card

I am on Day 2 of the “12 Days of Christmas Card Making Challenge” with my stamping buddy Christy. I will be blogging a new holiday card each day until December 10, 2021. I plan to showcase a different stamp set with each card. This will allow you plenty of time to see the great products that are available in the 2021 Stampin’ Up! July to December Mini Catalog and to order in time to make your own Christmas cards!

This Stampin’ Up! Bright Baubles Gold Emboss Christmas Card is rather simple to make with the instructions that follow. The Bright Baubles stamp set is just fabulous! The ornaments are very ornate and elegant.

To be able to heat emboss you will need: Stampin’ Emboss Powder-Metallic, Versamark Ink and the Heat Tool which are found in the 2021-2022 Stampin’ Up! Annual Catalog. These supplies are pictured below with links to my Online Store.

Measurements

  • Very Vanilla Card Stock (CS): 5 1/4 x 4 inches
  • Blackberry Bliss CS card base: 11 x 4 1/4 inches with a score line at 5 1/2 inches.
  • Blackberry Bliss CS card front: 5 1/4 x 4 inches.

Stamping

Stamp the sentiment first with Blackberry Bliss ink. Be sure to try it out on a scrap piece of paper to check the alignment. Follow by stamping one of each of the gorgeous ornaments. Finish with the sparkles on either side of the sentiment. Set aside.

Embossing

It takes practice to be able to get great images with the Gold Emboss Powder on a dark card stock. I strongly recommend purchasing an Anti-Static Powder bag or pouch. This helps prevent the emboss powder from sticking to other parts of the card piece, like to the oils from fingerprints. There are many anti-static pouches available from different suppliers. Also have a microfiber cloth on hand to get the powder off after embossing.

Start the embossing process by applying the anti-static powder to the 5 1/4 x 4 inch Blackberry Bliss CS. Next stamp the image of the larger ornament in Versamark. Tap out some of the Gold Emboss Powder and move it around so it sticks to the Versamark. Take care not to touch it. Use the Heat Tool until all of the powder has melted. Follow by stamping the second ornament, applying the Gold Emboss Powder and using the Heat Tool. Repeat the process for the “JOY” sentiment.

Again repeat the embossing process for the sparkles. See how hazy the card piece looks? After the Gold Emboss Powder has cooled, use a microfiber cloth to gently rub off the anti-static powder.

Adhere the Gold Embossed Blackberry Bliss CS to the front of the Blackberry Bliss card base. Adhere the stamped Very Vanilla CS card piece to the inside of the card base.

Add some Gilded Gems and Voila! you have a gorgeous elegant handmade Christmas card!

I hope you enjoy trying this card for yourself. I actually ended up making several. The other emboss powders in the Metallics set are silver and copper. Try them out on different colors of card stock to see how fabulous they are!

The complete list of supplies will be at the end of the blog.

Retiring Products from the July – December Mini Catalog

You may download the list to look over and make your shopping list.

Supplies

Product List

Thank you very much for stopping by to see my 2nd day of the 12 Day Christmas Card Challenge! See you tomorrow for day 3!

Theresa

Posted in 2021 Stampin' Up! July-December Mini Catalog

Stampin’ Up!® #SimpleStamping Christmas Season Christmas Card

Season’s Greetings! I am embarking on the “12 Days of Christmas Card Making Challenge” with my stamping buddy Christy. Our plan is to create and blog about a new holiday card each day from November 29, 2021 until December 10, 2021. Each day I plan to showcase a different stamp set. This will allow you plenty of time to see what is available in the 2021 Stampin’ Up! July to December Catalog and order it in time to make your own Christmas cards! You can Shop Here when you are ready to place your order.

This lovely #SimpleStamping Christmas card is made from two stamp sets. The images are in the Christmas Season stamp set. The sentiment is from the Christmas to Remember stamp set.

You can get both sets along with 2 sets of dies, Cherry Cobbler & Gold ribbon, Gold Holly Leaves and gorgeous Painted Christmas Designer Series Paper (DSP) when you order the Painted Christmas Suite Collection. You will find the Painted Christmas Collection on pages 16- 17 in the Mini Catalog.

Measurements

  • Basic White Card Stock (CS) card base: 5 1/2 x 8 1/2 inches with a score line at
    4 1/4 inches.
  • Basic White CS: 5 x 3 3/4 inches
  • Real Red CS: 5 1/4 x 4 inches

Stamping

The first step in creating this card is to stamp the sentiment in Real Red ink onto the 5 x 3 3/4 inch Basic White CS. The next step involves using a Two Step Stamp. To start, lay down the large and the small of the less detailed of the 2 pinecone stamps for positioning. Then use the Clear Acrylic block E to pick up the stamps. Stamp this layer in Crumb Cake ink.

Now lay the more detailed stamps on the stamped images for positioning. Pick up the stamps with an acrylic block as you did in the previous step. Use Early Espresso ink to stamp the images.

See how the pinecones now have a more 3D quality! Next use Shaded Spruce ink and the dual small pine needle stamp to stamp twice around the smaller pinecone. Stamp the second time without adding any ink to your stamp. This is called Stamping Off.

Continue to use the Shaded Spruce ink and stamp the larger pine needle image around the pinecones. Use the Stamping Off Technique here too. This helps to add a 3D quality to the pine needles.

Assembly

Adhere the stamped card piece onto the 5 1/4 x 4 inch Real Red CS. Adhere this piece onto the front of the 8 1/2 x 5 1/2 inch Basic White CS card base.

Add a bow and Voila! you have finished a #simplestamping Christmas card!

Join me again tomorrow for another Holiday Card complete with instructions and a supply list!

Supplies for today’s card

Click on any photo to get to my Online Store and start shopping!

Product List

I hope you have a great start to your week! Happy stamping!

Theresa

Posted in 2021 Stampin' Up! July-December Mini Catalog, Fun/Fancy fold card, Gratitude/ Thanks, Shaker Card, Stampin' Up! 2021-2022 Annual Catalog, Thanksgiving

Stampin’ Up!® Sweets & Treats Cloche Dome Card

Happy Thanksgiving!

Today I plan to spend some time reflecting on all I have to be grateful for. An “attitude of gratitude” really keeps me from feeling down during the holidays. I am very blessed to be able to spend Thanksgiving with family this year. We missed last year, so I feel especially grateful to be visiting this year.

I have a very fun 3D card for you today:

Doesn’t that apple pie look delicious? I actually prefer pumpkin pie, but the apple pie is a close second. Which pie do you like best? Please leave me a comment below.

Measurements

  • Cinnamon Cider Card Stock (CS) card base: 5 1/2 x 8 1/2 inches
  • Cinnamon Cider CS: 3 3/8 x 4 5/8 inches
  • Basic White CS: 3 3/4 x 3 1/2 inches and a scalloped rectangle from the Scalloped Contour Dies
  • Hand Penned 12 x 12 inch Designer Series Paper (DSP): 3 3/4 x 3 3/4

The Fun Fold Card Base

The card base is made by cutting 3/4 inch off of the top and bottom of the front panel. Emboss the back panel with the Timber 3D Embossing Folder. Set aside.

Trivia: Anyone know what a cloche (Klōsh) is? I didn’t. One definition of cloche from French, literally “bell”, is a transparent cover shaped like a bell.

Stamping & Coloring The Pie Pan

Use the Cloche Dies to cut the shape of the dome from the Scalloped Contour Die rectangle. Take care to position the die so that it is about 1/4 inch down from the top and that it is centered. Tip: I use sticky note tape to hold my dies in position while putting them through the Stampin’ Cut & Emboss Machine. Save the cut out piece. Stamp the pie stand in Memento Black Ink. Use Stampin’ Blends Alcohol Markers in Smoky Slate to color the stand. Tip: I color in the “shadows” first with the Dark Smoky Slate Blend.

Then use the Light Smoky Slate Stampin’ Blend marker to blend the border of the dark into the light. Keep moving from the edges to the center until it is all colored in.

Stamping & Coloring the Pie

Now stamp the pie onto the cut out piece of the dome. Color the pie pan with Cinnamon Cider Stampin’ Blends. Start with the Dark Cinnamon Cider Blend on the edges. Use the Ivory Stampin’ Blend to color the pie crust. Since there is only one shade of the Ivory, you can make a shadow on the edges by coloring the first layer as shown.

For the pie pan, blend with the Light Cinnamon Cider marker from both edges until you reach the middle of the pie pan. Note: I used a wee bit of the Light Cinnamon Cider Blend on the pie crust. To finish the crust I used the Ivory Blend to smooth out the darker edges until I covered the entire crust. I used the Light Real Red Stampin’ Blend for the holes in the pie crust since I am making an apple pie.

Stamping the Inside

Orient the 3 3/4 x 3 1/2 inch Basic White CS card piece with the 3 1/2 inch edge on either side. Using the Memento ink, stamp the “love ya” sentiment in the center. Add the heart in Blushing Bride ink.

Assembling the Card

Adhere the inside Basic White CS panel to the inside of the Cinnamon Cider CS card base so that it is hidden when you close the front panel. Adhere the Hand Penned DSP to the front panel. Set aside.

Do Not Adhere, but just place the complete Scalloped Contour rectangle with the pie dome on the 3 3/8 x 4 5/8 inch Cinnamon Cider CS. Adhere the pie dome without getting adhesive on the Scalloped Contour piece. Remove the Scalloped Contour rectangle. Draw some steam over the pie with the Black Stampin’ Write Marker. Yummy!

Assembling the Shaker Cloche Dome

Place about 1/2 tsp of the gold and orange Sequins for Everything on the center of the dome cut out. Remove the strip covering the adhesive on the bottom of the Cloche Shaker Dome.

Carefully line up the inside edge of the shaker dome with the dome on the Cinnamon Cider CS. Push firmly around the edge of the dome. Once adhered, remove the strip covering the adhesive on the top of the Cloche Shaker Dome.

Apply adhesive to the back of the Scalloped Contour rectangle. Place it carefully over the dome and push down to make it stick. Now the sequins can move around inside the dome! Fun!

Finishing the Card

Adhere the shaker dome card piece to the front panel of the card base. Take care not to apply adhesive to the very top and bottom. Include a sentiment if desired. I really like the sentiment “any way you slice it, I’m thankful for you”.

Voila! Such a yummy looking Sweets & Treats Cloche Shaker card! Also a great Thanksgiving card to share your gratitude with a loved one.

Supplies To Make This Card

To go to my online store, click on any of the photos below.

Product List

I am very thankful that you are visiting my blog!

Starting November 29, 2021 I am embarking on a 12 Days of Christmas Card Making Challenge with my fellow stamping friend Christy. Our plan is to create and blog about a new Christmas card every day for 12 days! Come by on Monday, November 29th and see what I have in store for you!

Again- Happy Thanksgiving!

Theresa

Posted in 2021 Stampin' Up! July-December Mini Catalog, Nature, Simple stamping, Thanksgiving

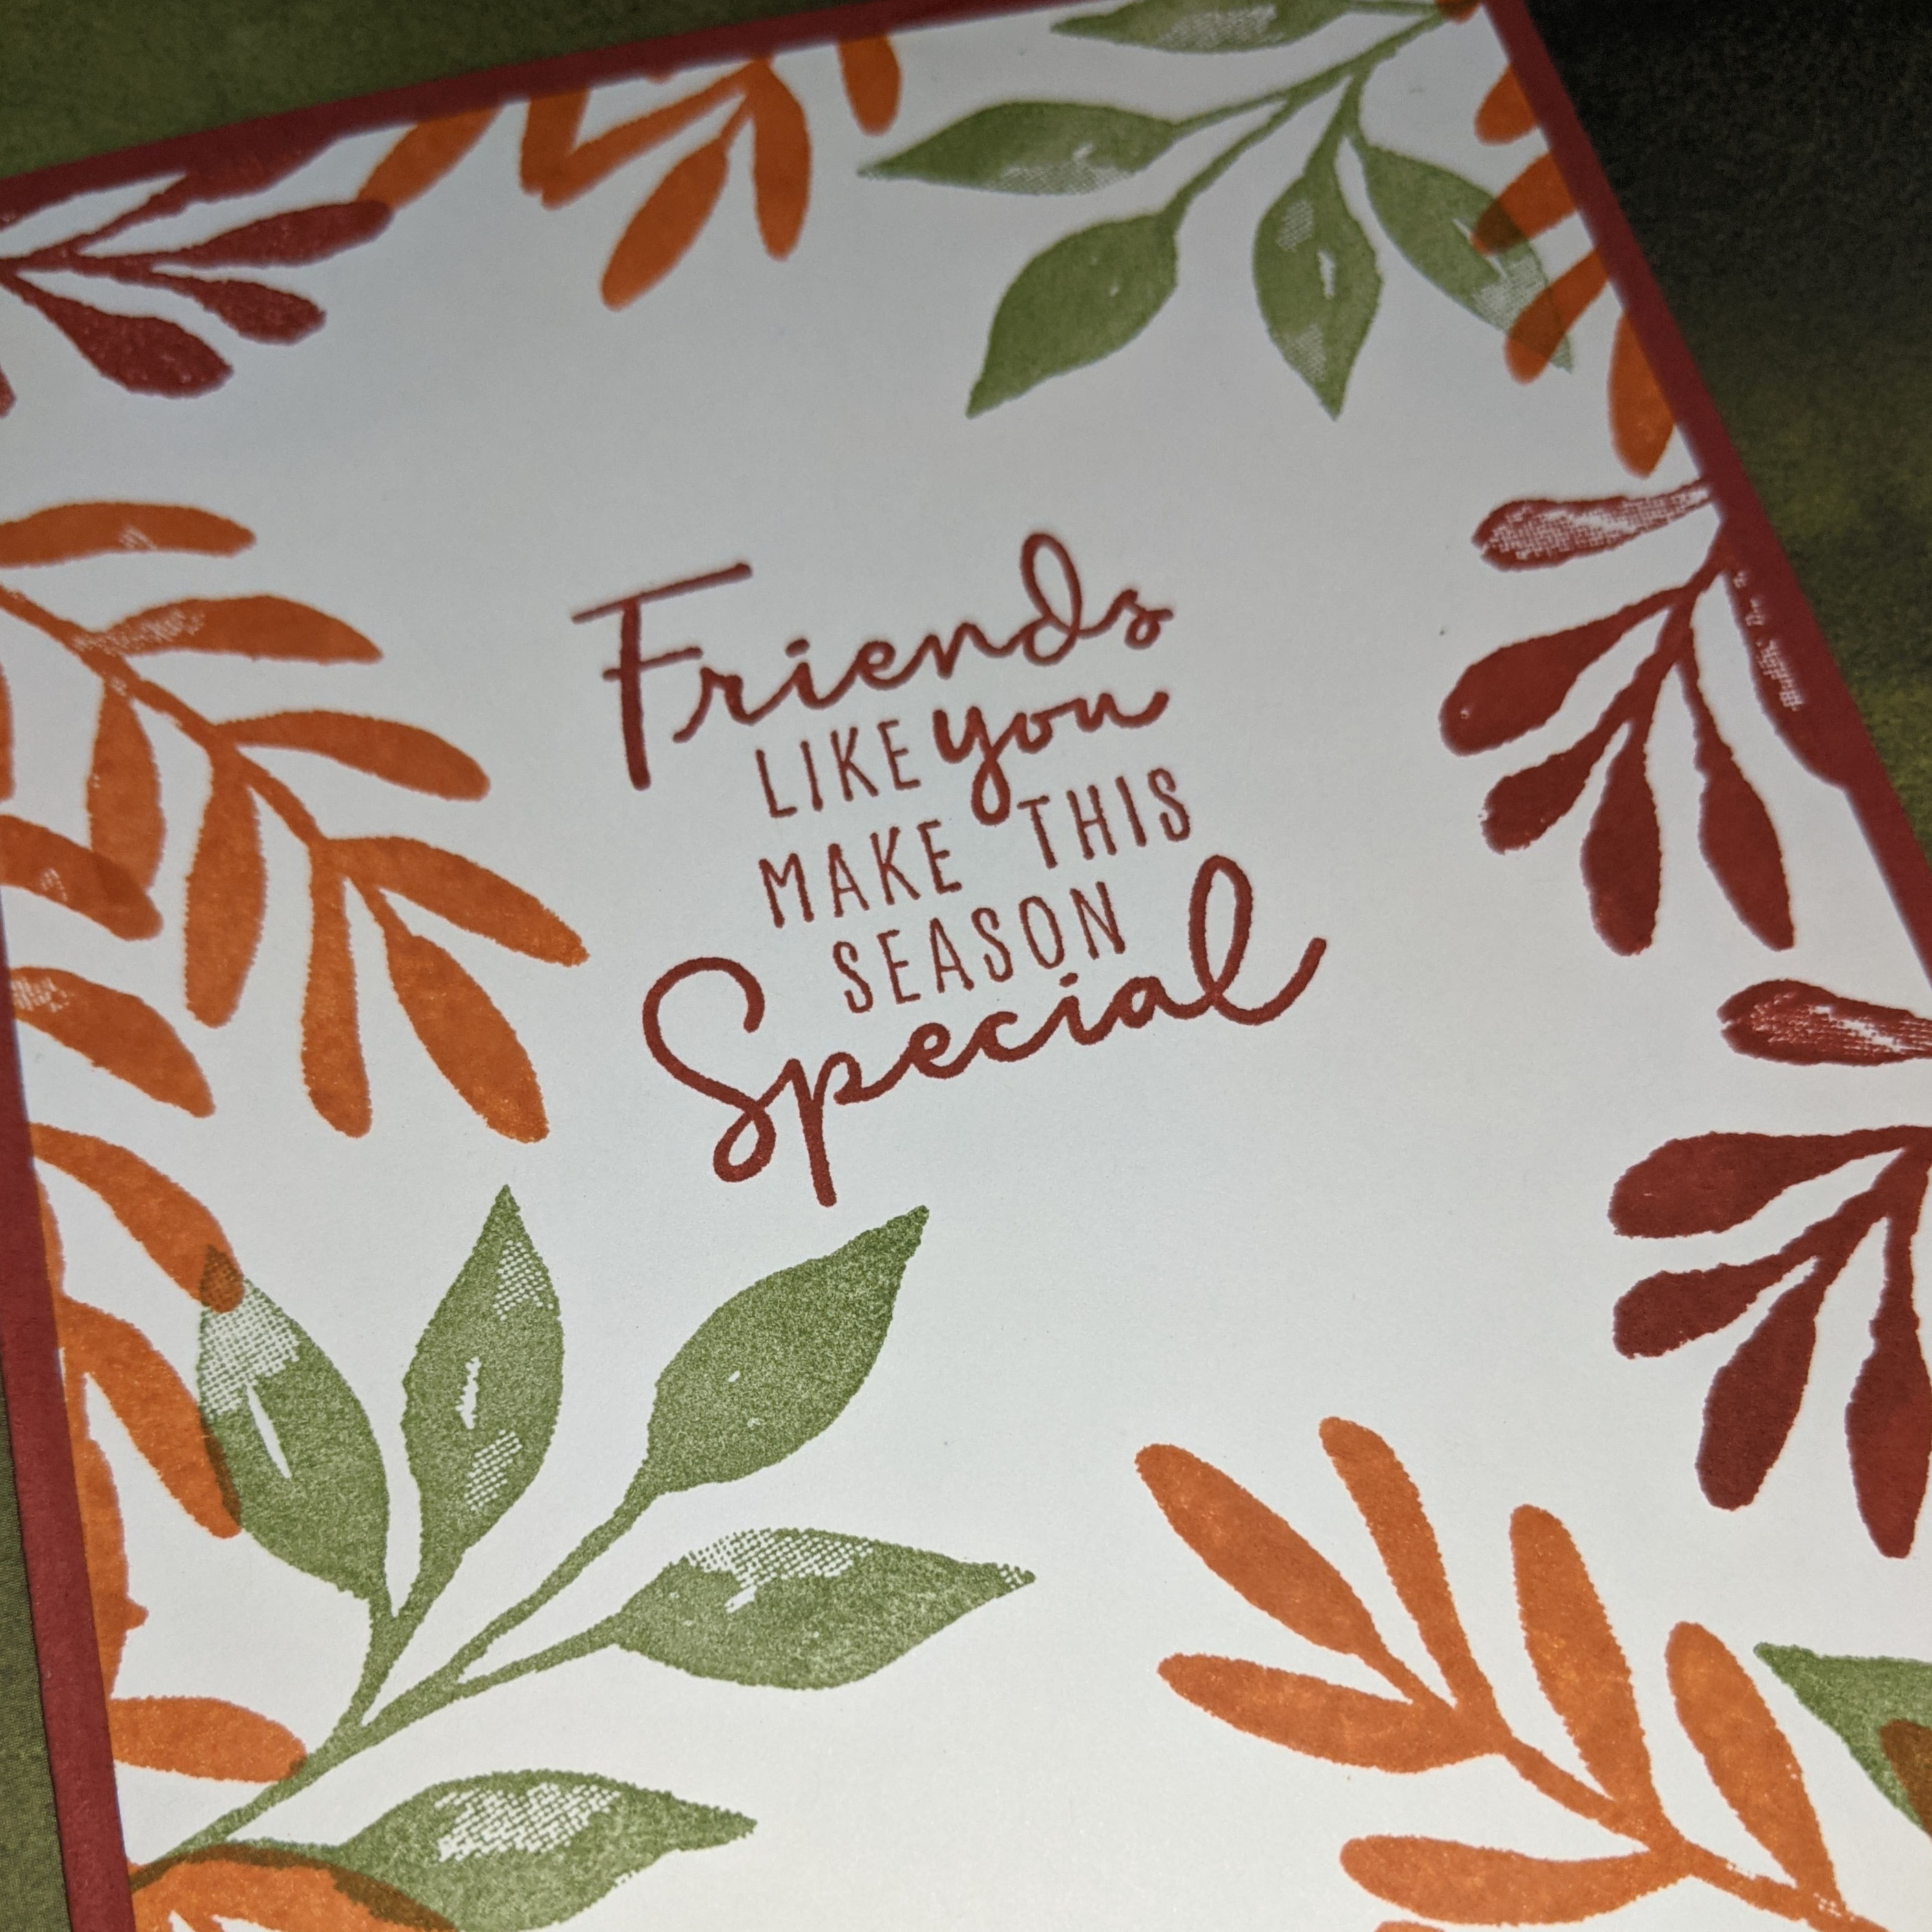
Stampin’ Up!® #SimpleStamping Fall Friendship Card

Howdy! Fall is slowly giving way to the Holiday Season. Next week I will begin to show you some Holiday cards. For today I have a lovely fall friendship card made using only stamps, ink and paper. Otherwise known as #SimpleStamping.

I am actually using the Christmas Season stamp set. But I chose fall colors so I could create a nice fall friendship card. The sentiment is part of the Christmas to Remember stamp set. Stay tuned because I will soon be using the same two stamp sets to create a Christmas card.

Measurements

  • Cajun Craze Card Stock (CS) card base: 8 1/2 x 5 1/2 inches with a score line at 4 1/4 inches.
  • Very Vanilla CS: two 5 1/4 x 4 inches
  • Note: Ink colors: Cajun Craze, Pumpkin Pie and Old Olive.

Stamping

Start out by stamping the sentiment “Friends Like You Make This Season Special” in Cajun Craze ink onto one of the 5 1/4 x 4 inch Very Vanilla CS. Stamp some leaves in Old Olive ink. Then stamp another style of leaf in Pumpkin Pie ink. I started out with 3 of each color in a triangular orientation.

Add a third style of leaf in Cajun Craze ink. Fill in the spaces as desired using any of the 3 styles of leaves and their coordinating color. On the second 5 1/4 x 4 inch Very Vanilla CS stamp in the same manner just along the right-hand side. This will be the inside of the card so you need to leave space for writing.

Assembly

Adhere the first stamped Very Vanilla CS panel to the front of the Cajun Craze CS card base. Adhere the second panel to the inside of the card base.

Voila! You have a gorgeous #SimpleStamping fall friendship card!

Bling! Alert! I added a few of the Champagne Rhinestone Basic Jewels for some extra sparkle around the sentiment! This is a step up from #SimpleStamping.

Thanks so much for stopping by today. Be sure to sign up for my newsletter by scrolling to the bottom of the side bar. I will be sending my first Theresa’s Treasures Paper Crafts Newsletter out soon!

Supplies

To purchase the Stampin’ Up! products needed to make this card yourself, click on any of the photos below and you will go to my Online Store.

Product List

Have a most wonderful day!

Theresa

Posted in 2021 Stampin' Up! July-December Mini Catalog, 2021-2022 Stampin' Up! Annual Catalog, Slim Line Cards, Snow, Snowflakes

Stampin’ Up!® Wonderful Snowflakes Season’s Greetings

Although I am not quite ready for Christmas cards, I couldn’t resist using the Wonderful Snowflakes as part of my card for The Paper Players Color Challenge PP567.

Here is my card:

This is a Slim Line card. The card base measures 8 1/2 x 7 inches with a score line at 3 1/2 inches. The scalloped rectangle in the background is not a Stampin’ Up! product, but I hear tell that there are some Slim Line Dies in the upcoming Stampin’ Up! 2022 Jan-June Mini Catalog!

The Wonderful Snowflakes are iridescent! The greeting from the Christmas To Remember stamp set is embossed with Silver Emboss Powder. The embossed snowflakes behind the sentiment are from the Time of Giving stamp set. The ribbon is the White 1/4 inch Crinkled Seam Binding in the Stampin’ Up! 2021-22 Annual Catalog.

I added a lot of Bling! using the Rhinestone Basic Jewels. There are 16 rhinestones on this card!

I love to enter The Paper Player Challenges because I need to push myself to imagine and think outside of my usual modus operandi. I find that I create cards in a new and exciting way.

Voila! That is it for today! Thanks for stopping by. Stop by The Paper Players and see the other entries to the Color Challenge PP567 HERE

Have a most wonderful day!

Theresa

Posted in 2021 Stampin' Up! July-December Mini Catalog, Ornaments, Theresa's Treasures Paper Crafts Zoom Card Making Classes

Zoom Card Making Class- Stampin’® Up! Frosted Gingerbread

From Theresa’s Treasures Paper Crafts

My Monthly Zoom Card Making Class is a way for you to stamp with me in your own home. You’ll love this Zoom Card Making Class because I will demonstrate step-by-step the process of stamping and assembling 4 different Holiday cards made with the Frosted Gingerbread stamp set. You will also receive a color PDF tutorial with your card kit!

If you prefer, I can send you the Zoom class recording and you can work at your own pace, stopping and starting as often as you like. This class is perfect for both the beginning and experienced stamper. You may use the card layouts to inspire you to make more cards as you wish!

Frosted Gingerbread Zoom Card Making Class Details

Class is on Zoom at 1 pm MST on Saturday December 11. 2021

Sneak Peek

This month’s card making class includes 4 colorful cards using most of the stamps in the Frosted Gingerbread stamp set. The Frosted Gingerbread stamp set is part of the Gingerbread & Peppermint Suite Collection found on pages 8-10 of the Stampin’ Up! July-December Mini Catalog. There is a PDF of the catalog in the sidebar of this blog. The products needed to complete the cards as shown in the photo above will be listed at the end of this blog.

This is not a monthly club and you will not have a monthly commitment. When you place your order* of $50 or more using this exclusive Host Code: VXE4WC4X in Theresa’s Treasures Stampin’ Up! Online Store, you will receive the card kit for FREE! You must order with the exclusive Host Code in my Online Store by November 28, 2021 to allow 2 weeks for shipping. Your order can be for any Stampin’ Up! product. If you have questions about adding the Host Code, see the tab “How to Add a Host Code” page above this blog post on the right.

*If your order totals more than $150, do not use the Host Code. You will use the Stampin’ Rewards (free $) for yourself. You will still get the free card kit.

If you do not place an order the card kit is $15.

Your color PDF Tutorial and Zoom log in information will be emailed to you by December 6, 2021. The card kit will be mailed to you by December 2, 2021.

There are door prizes at each class!

Supplies needed to complete the cards exactly as I have are listed in the supplies list below.

Supplies

Click on any of the photos to go directly to my online store. Don’t forget the Host Code: VXE4WC4X

Product List

The VXE4WC4X Host Code is good for a Free card kit and disqualifies you from the class discount associated with another Host Code.

RSVP at theresastreasures.az@gmail.com before you pay. Class size is limited so sign up today!

If you have questions, please email me: theresastreasures.az@gmail.com

I would be so happy to have you join us for the Frosted Gingerbread Zoom Class on December 11, 2021 at 1 pm MST!

Theresa

Posted in 2021 Stampin' Up! July-December Mini Catalog, Avid Stamper, Gratitude/ Thanks, Thanksgiving

Stampin’ Up!® Gorgeous Leaves Paper Lattice Thanksgiving Card

Stampin’ Up! Gorgeous Leaves Paper Lattice Thanksgiving Card. I have a very colorful Thanksgiving Card made using the Gorgeous Leaves stamp set and Intricate Leaves Dies.

I also found a fun trick with the Paper Lattice! This card was inspired by one made by Mary Knabe. Click on the photo below to get to her blog.

Here is Mary Knabe’s card that inspired me

I also got some inspiration from the current Theme Challenge from The Paper Players.

Measurements

Soft Suede Card Stock (CS) card base: 11 x 4 1/4 inches with a score line at 4 1/4 inches.

Very Vanilla CS: 5 1/4 x 4 inches and 5 1/4 x 3 1/2 inches.

Pumpkin Pie, Pear Pizzazz and Crushed Curry CS: 5 1/2 x 3 /8 inches
(one of each except the Pumpkin Pie CS cut two).

Paper Lattice: one.

Label Parts

Very Vanilla CS label from the Tasteful Labels Dies.

Pumpkin Pie, Pear Pizzazz and Crushed Curry CS leaves from the Intricate Leaves Dies.

Very Vanilla CS Stitched Rectangle from the Stitched Rectangle Dies (the sentiment is from the Banner Year stamp set and is in Early Espresso ink).

Early Espresso Faux Suede Trim: approx. 7 inches to make one bow.

Stamping

Start by stamping the 5 1/4 x 4 inch Very Vanilla CS which is the inside of the card. Stampin’ Up! inks for this card are: Pumpkin Pie, Pear Pizzazz and Crushed Curry. Decorate the inside by stamping a variety of leaf shapes from the Gorgeous Leaves stamp set in a variety of color.

Weaving

Now for the fun trick! Gently weave the color CS strips into the Paper Lattice. Flip the Paper Lattice over. I recommend using the Foam Adhesive Sheets cut into 1/4 inch strips to add dimension and hold the paper strips in place on the back of the Paper Lattice.

Assembling the card

Adhere the Paper Lattice to the 5 1/4 x 3 1/2 inch Very Vanilla CS. Follow by adhering the card piece to the front of the Soft Suede CS card Base.

Complete the inside of the card by adhering the stamped 5 1/4 x 4 inch Very Vanilla CS to the inside of the Soft Suede CS card base.

Assembling the Label

Arrange the Intricate Leaves as desired and adhere them to the Very Vanilla Tasteful Label. Use Mini Stampin’ Dimensionals to adhere the “Happy Thanksgiving” sentiment over the leaves.

Adhere the label to the card front with Stampin’ Dimensionals. Adhere the Early Espresso Faux Suede bow just under the sentiment with a Mini Glue Dot.

Add some Champagne Rhinestone Jewels and Voila! you have a fun and colorful Thanksgiving card!

Supplies- Shop Here
November Host Code: BAKE6KM6*

*Use the host code when you order $50 or greater and receive a free gift from me!  If your order is over $150, please do not use this code because you can use the Stampin’ Rewards yourself. Any questions-shoot me an email at theresastreasures.az@gmail.com

You may also click on any photo below to go to my Online Store

Product List

Start With Savings Starter Kit Promotion – November 4-30!

The Start with Savings Starter Kit promotion allows you an excellent opportunity to purchase your Starter Kit at a great deal! The Starter Kit is usually $99 which is already an awesome deal! For a limited time you may choose a custom Starter Kit for only $75!!!  This is an unbeatable bargain for Stampin’ Up! product with a value of $125!

Choose your custom Starter Kit today and join my Stamping Gems Team HERE

Benefits of Joining: Early Access to New Product, 20% or more discount on future orders and becoming part of the Stamping Gems Team with a monthly meeting featuring Mystery Stamping and a group Facebook page!

I hope you are able to start enjoying all the fall colors! Be sure to use fall colors in your crafts.

This year I am doing a 12 day Holiday Card/Project Challenge with my stamping friend Christy starting November 29, 2021. Stay tuned for that!

Thanks for visiting today!

Theresa

Posted in 2021 Stampin' Up! July-December Mini Catalog, Nature, Simple stamping

Stampin’ Up!® #SimpleStamping Birthday With Amaryllis Abloom

This lovely birthday card is actually very simple to make with the Amaryllis Abloom stamp set. This set is available when you Host a Party and reach a sales goal of $150 USD. If you would like to host an online Stampin’ Up! party, let me know at theresastreasures.az@gmail.com

Stamping

The card base is an 8 1/2 x 5 1/2 inch Poppy Parade card stock that is scored at 4 1/4 inches. Fold the card base in half at the score line. Use Poppy Parade ink to stamp the images randomly over the front panel.

Next stamp onto a 2 1/2 x 4 inch Basic White cardstock. Start with the amaryllis. Use Garden Green for the leaves and stem and Poppy Parade for the amaryllis. Place the stamp on the ink pad carefully so that the Poppy Parade ink is only on the amaryllis and the Garden Green ink is only on the stem and leaves. Huff on it to moisten the ink and then stamp. Remember to use your Stampin’ Pierce Mat since this is a Photopolymer stamp to get the best stamped images.

Add a “Happy Birthday” sentiment. This one is from the Pansy Patch stamp set, but you could use any “Happy Birthday” sentiment. Add the diamond design under the sentiment with Garden Green ink.

Stamp a design onto a 5 1/4 x 4 inch Basic White card stock for the inside panel.

Assembling the card

Adhere the stamped Basic White card stock card piece to the center of the front of the Poppy Parade card base. Adhere the inside panel to the inside of the Poppy Parade card base.

Voila! This is a great #simplestamping card! I hope you give it a try.

If you are interested in earning this set, please send me an email and we can get you set up to host an online party with your friends. Contact me at theresastreasures.az@gmail.com

Supplies

Click on any photo to go to my Online Store.

Product List

Thanks for stopping by today! Happy crafting!

Theresa

Posted in 2021 Stampin' Up! July-December Mini Catalog, 2021-2022 Stampin' Up! Annual Catalog, Designer Series Paper, Gratitude/ Thanks, Nature, Punch, Punch Art

Kylie’s Stampin’ Up!® International Blog Highlights Gallery- September 2021- Daisy Punch Fall Thank You card

Welcome to Theresa’s Treasures today for my Daisy Punch Fall Thank You card. I am using the Daisy and Medium Daisy Punches along with the rich colors in the Regals Designer Series Paper stack. All of these products are available for purchase in the 2021-2022 Stampin’ Up! Annual Catalog.

I am Theresa and I am a Stampin’ Up!® Demonstrator in Arizona, USA. If you do not have a Stampin’ Up! Demonstrator, live in the US, and would like a copy of the catalog, please send a request to my email: theresastreasures.az@gmail.com. I would love to help you get started on stamping and making you own cards!

Today I am taking part in Kylie Bertucci’s Monthly International Blog Highlights Gallery. The theme is- Thank You. On this gallery, you can see thank you cards made by people from all over the world! I hope you enjoy my card and take the time to see everyone else’s inspiring creations by visiting the gallery. You can get to the gallery by selecting the “Vote For Me” button at the end of this blog. Please remember to vote for my card!

About the Daisy Punch Fall Thank You card

Fall is one of my favorite times of year. I just love all of the rich colors which inspired me to make this Daisy Punch Fall Thank You card. I made this card with the following Stampin’ Up! colors: Cajun Craze, Pumpkin Pie, Crushed Curry and Old Olive. The Regals Designer Series Paper Stack which contains all of these colors is great for the background. The strips each measure 3/8 inch in width.

You also will see several embellishments I used to make the Daisy Punch Fall Thank You card extra special. The vintage Diamond Weave Ribbon #156507 and the Brushed Metallic Dots #156506 can be found in the 2021 Stampin Up! July-December Mini Catalog. The colorful sequins are from the Artistry Blooms Adhesive-Backed Sequins #152477 and can be found in the Stampin’ Up! 2021-2022 Annual Catalog.

Voila! Such a lovely combination of fall colors in this Daisy Punch Fall Thank You card!

Please vote for my card when you visit the Gallery by selecting the “Vote For Me” button below. Thank you!

Supplies

Select any photo to be directed to my Online Store.

Product List

Thanks for visiting! Happy stamping!

Theresa