Posted in beginner stamper, Occasions Catalog 2019, Photopolymer, Punch, Stamping-off technique

Doggone cloudy day

Well, the weather outside is menacing. It is a perfect day to stay inside and cozy, and make some cards!

The next series of 3 cards will focus on “man’s best friend”.

The Stampin’ Up! Happy Tails stamp set and Dog Builder punch can be purchased until March 31, 2019 from the Stampin’ Up! Occasions Catalog. If you do purchase both as a bundle, you will save 10%. So let’s make some cards!

The first step is to open the punch. Just squeeze the punch while sliding the plastic button upward. The punch will spring open.

You can insert the paper to be punched from the top or either side.

Measurements: Whisper White card base 8 1/2 x 5 1/2 folded in half at 4 1/4 inches and burnished with the Bone Folder; Blueberry Bushel 5 1/4 x 4 inches; Whisper White 5 x 3 3/4 inches and 4 x 2 1/4 inches.

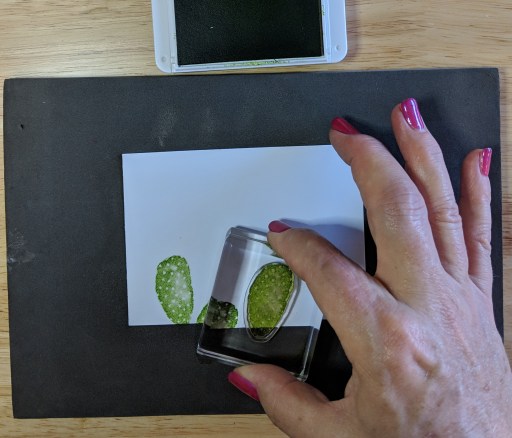
First we will stamp the dog in Memento ink onto the 4 x 2 1/4 inch strip. I used a D block. Stamp at the bottom of the strip so you can use the punch. Tip: Be sure to use the Stampin’ Pierce Mat, since this is a Photopolymer stamp, to get the best image.


The way to use the punch is to have it laying upside down on the table. Insert the strip of cardstock and line up the image. You can depress the punch slightly to hold the cardstock in place, then push firmly and quickly to cut the image out.

The dog house is a 2 step stamping process. The body of the house will be in Real Red and the details (the shingles and wood grain) will be in Memento ink. I used a B and a C block.

Try to get an even layer of ink on the stamp. It may not look perfectly even, but will still give a good image. Tip: Hold the stamp onto the cardstock for a few seconds to ensure the ink will transfer completely.

The second step is to ink the details of the dog house in Memento, line it up and stamp over the Real Red house. I had to do this a couple of times to get the hang of it.

Now lay the dog without adhesive in the position you desire, to help with placement of the sentiment. Stamp the sentiment in Memento ink.

Add the bone in Memento ink and the small hearts in Real Red.

There is even a little dog collar!

You can add some spots to make a Dalmatian!

For “Spot” here, you need to Stamp Off to make the spots light enough to still see the eye. To Stamp Off, get a scrap piece of paper and have it on the Stampin’ Pierce mat. Ink the spot stamp with Memento ink and stamp onto the scrap paper first, then place the stamp over the dog image and stamp down.

Choose whichever dog you like best.

Adhere the doghouse and sentiment piece to the Blueberry Bushel piece, then adhere that to the card base.

I added some Stampin’ Dimensionals to the back of the dog. I cut one in half to better fit behind the leg. Tip: Some folks cut all of their Dimensionals in half to make them last longer.

Peel off the backing from the Dimensionals and adhere the dog to the card. Now you have a great card to send to your best (human) friend!

The next 2 cards will also be using the Happy Tails stamp set and Dog Builder punch. I will also introduce the technique of Sponging.

Sale-a-bration is still going strong! There are plenty of new products in the Occasions Catalog, so check out my shop but selecting the “Shop Now” button at the top of the page, or the “Click Here for my Store” button on the sidebar.

Thank you for stopping by! Please leave a comment and let me know how I am doing!

Stampin’ Up Products used include: Stamp Set: Happy Tails #148682; Punch: Dog Builder #148543; Bundle: Happy Tails stamp set and Dog Builder Punch #150631; cardstock: Whisper White #100730 and Blueberry Bushel #146968; Ink: Real Red #147084 and Memento #132708; Clear Blocks: B #117147, C #118486 and D #118485; Stampin’ Pierce Mat #126199; Stampin’ Dimensionals # 104430; Multipurpose Liquid Glue #110755.

Posted in beginner stamper, Cars, Cling Stamp, Designer Series Paper, Occasions Catalog 2019

Fast Car Card

Still looking for a great card for your guy? This is a fast one, and is the last in a series of 3 masculine cards using the Stampin’ Up! Geared Up Garage Stamp Set. Today I introduce you to a card made with Stampin’ Up! Designer Series Paper.

Stampin’ Up! has several types of paper, one being Designer Series (DSP). This paper is a little thinner than cardstock and will have a pattern on both sides. Some come in 12 x 12 inch size. The Classic Garage Designer Series Paper comes in 6 x 6 inches with 4 each of 12 double-sided designs.

The designs are pictured above. For this card I chose the lug nut design.

Measurements: Whisper White card base 8 1/2 x 5 1/2 inches folded in half at 4 1/4 inches; Whisper White 3 1/2 x 2 inches and 3 x 3/4 inches; Shaded Spruce 5 1/2 x 3 1/4 inches and Classic Garage DSP 5 1/2 x 3 inches.

This card will also be pretty quick to make. First I adhered the DSP to the Shaded Spruce. Then I adhered that piece to the card base.

I stamped the car image in Memento ink onto the Whisper White 3 1/2 x 2 inch piece.

Next, I stamped the sentiment “All Geared Up To Celebrate” onto the 3/4 inch strip of Whisper White. It is important to get the label on straight so you can stamp straight! See the post on the Stampin’ Up! Cling Stamps to help you do this.

I cut the banner edge as shown.

I added 3 Stampin’ Dimensionals to raise the sentiment up a bit.

You can leave the car this way, or choose to color it. Refer to the first post in this series for instructions on coloring and shading with the Stampin’ Blends markers.

So there you have it my friends! A fast car card that was fast to make!

Stampin’ Up! continues their Sale-a-bration sale! For every $50 you spend, you can choose a free product from the Sale-a-bration brochure.

Stampin’ Up! Products used include: Stamp Set: Geared Up Garage #148590; Cardstock: Whisper White #100730 and Shaded Spruce #146981; Classic Garage Designer Series Paper #148482; Ink: Memento #132708; Stampin’ Blends: Real Red combo pack #147935; Clear Block: C #118486 and D #118485; Paper Snips #103579; Stampin’ Dimensionals #104430; and Multipurpose Liquid Glue #110755.

Posted in beginner stamper, Cling Stamp, Father's Day, Grunge style, Occasions Catalog 2019, Stamping-off technique

Father’s Day in January?

This is the 2nd in a series of Blog posts about masculine cards. I have had many a time when a holiday has crept up on me before I was able to get a card ready. Ever had that happen? Well, today I am making a Father’s Day card, mostly because the sentiment is in the stamp set -Geared Up Garage-which I started using the other day. But also, I want to be ready this year!

This style of card is “grunge”. It is a lot easier than it looks!

Measurements: Whisper White card base 8 1/2 x 5 1/2 inches folded in half and burnished with the Bone Folder, Basic Black 5 1/4 x 4 inches, Whisper White 4 1/2 x 3 1/4 inches and a scrap of Whisper White 2 3/4 x 2 1/2 inches, and Real Red 2 1/4 x 1 inch.

You will also need Memento ink and a C block to start. Later you will need an A, B, C and D block.

Just a reminder for how to put the label on the new Cling Stamps. First remove the stamp. Then turn the label sheet so the words are backward. Pinch the middle of the desired label.

Gently remove the paper backing without removing the label. Place the stamp with the foam side down over the label, taking care to line up the edges. Press firmly.

Now gently remove the label attached to the stamp. This is very sticky! Do not set it down on anything. Put it on the block right away and when finished, directly back into the stamp case. I do not always put the labels on, but I typically will put on the labels for sentiments.

Use the Memento ink and stamp the Father’s Day sentiment onto the scrap of Whisper White. Note: You do not need the Piercing mat for the red rubber stamps, just stamp onto a smooth firm surface.

Use your paper snips to cut around the sentiment leaving a slight border.

Adhere the sentiment to the Real Red piece. Now cut a banner edge, first by making a cut in the center, then from each corner to the center as shown. Set aside.

Now for the “grunge”! Mount the lug nuts on an A block, the oil can on a B block, the tool box on a C block and the oil spill on a D block (Clockwise from top).

Start with the tool box since it is one of the larger images. Stamp an odd number of times.

Now stamp the oil can and then the lug nuts an odd number of times. I messed up and stamped 6 lug nuts! Fortunately the sentiment with cover one!

We are going to use a technique called “Stamping Off” for stamping the oil spill. First apply Memento ink to the oil spill stamp and stamp it on a scrap of paper. Then stamp onto the card piece. This gives a slightly lighter image. That way the oil spill doesn’t over-power the rest of the images. It just makes it “grungy”.

Continue to first stamp on the scrap paper, then on the card piece, until you like the result.

Adhere the Basic Black to the folded card base. Now adhere the stamped “grunge” piece.

Apply Dimensionals to the back of the sentiment banner and adhere to the front of the card. Viola! You have a Father’s Day card ready to go! Now, if you can just put it away somewhere where you can find it!

Stampin’ Up! products used include: Stamp set: Geared Up Garage #148590; Cardstock: Whisper White #100730, Basic Black 121045 and Real Red #102482; Ink: Memento #132708; Blocks A #118487, B #117147, C #118486 and D #118485; Paper Snips #103579; Dimensionals #104430; Multipurpose Liquid Glue #110755

Posted in beginner stamper, Sale-A-Bration 2019, Simple stamping

Garage Grunge

Ever have trouble coming up with just the right card for a guy? There are plenty of flowers, butterflies, cakes and treats that lend themselves to more feminine cards. But what to do for a more masculine card?

The next series of 3 Blog posts with show several cards made with the Stampin’ Up! Geared Up Garage stamp set. I will also introduce the concept of a “grunge” style of card. So let’s rev up our engines and Go!

Measurements: Whisper White card base 8 1/2 x 5 1/2 inches folded in half. Poppy Parade 4 x 2 1/2 inches and Whisper White 3 3/4 x 2 1/4 inches.

First I would like to share a tip. I use a Bone Folder to rub the folded edge of my card base. This makes the fold a lot tighter and it looks more professional.

Tip: I mounted the car stamp onto a D block from corner to corner. This way you can get a slightly larger stamp on a smaller block. Using Memento ink, stamp the car image onto the Whisper White rectangular piece.

Mount the sentiment “You’re a Classic” on an H block and ink it in Memento ink. Be sure to push straight down and straight up with moderate pressure in order to get the ink evenly on the sentiment. I placed the car image on the Poppy Parade rectangle without adhesive for placement before stamping the sentiment on the card base.

Now adhere the car image to the Poppy Parade rectangle, then adhere them to the card base. Here is the first version of this card. You can stop right here, or pull ahead for a more “souped-up” version!

You can “soup it up” by adding red color to the car, or by adding “grunge” or both . First we will add color to the car.

Stampin’ Up! has the most amazing alcohol markers called Stampin’ Blends. The amazing part is that the markers come in a light and a dark version of many of the same colors used for the ink and cardstock.

There are many ways to use the Stampin’ Blends to get an interesting image. First, I used the light Poppy Parade on the whole car. Next, I added the dark Poppy Parade to the areas I wanted shaded. Lastly, I used the light Poppy Parade again to blend the edges.

Now let’s add some “grunge”!

I am going to use the “oil stain” and “lug nuts” to make the card more interesting. This is not for everyone, so if you don’t like it, just leave it as is.

First I put the Poppy Parade rectangle with the car image on the top of the card without adhesive for placement. Next, I added the oil stains, then the lug nuts. Tip: Often an odd number of a design element looks better than an even number. For example: 3 lug nut images is more interesting than 2. I did only 2 oil stains because of the size of this element but I rotated the stamp so it looks like 2 different images.

Now adhere the car image to the Poppy Parade rectangle, then to the card base.

Here is the completely “souped-up” version of the car card with “grunge”!

Join me for the next blog where I will show a Father’s Day card using the “grunge” style!

To purchase the supplies needed for these cards, select the “Click for my store” button at the top. It is currently the best time to buy Stampin’ Up! products because of Sale-a-bration, during which for every $50 you spend, you may select a free item from the Sale-a-bration brochure. Happy shopping!

Supplies used include: Stamp set: Geared Up Garage #148590; Cardstock: Whisper White #100730 and Poppy Parade #119793; Ink: Memento #132708; Stampin’ Blends: Poppy Parade combo pack #147275; Blocks: A #118487, D #118485 and H #118490; Bone Folder #102300 and Multipurpose Liquid Glue #110755

Posted in beginner stamper, cactus, desert, Hello, Occasions Catalog 2019, Simple stamping

Beautiful Desert

Living in the desert can be very peaceful and colorful. When the cacti bloom and add color to the usually brown desert, it is breath-taking!

Today I am using the Stampin’ Up! stamp set called Flowering Desert. I have had a great deal of fun with this set! I am using the same colors I have used in previous blog posts, Shaded Spruce and Pineapple punch. I have added Granny Apple Green.

Here is today’s card. In addition to the cardstock and ink in Shaded Spruce, Granny Apple Green and Pineapple Punch you will need Whisper White cardstock and some adhesive. If you would like pink flowers on top of the cacti, you may use Melon Mambo ink.

I started with Whisper White cardstock cut at 4 1/2 x 3 1/4 inches using the larger cactus ‘leaf’ stamp in Granny Apple Green ink.

I added a couple more leaves allowing space in between for other smaller cactus leaves.

I added more to the cactus with the smaller leaf.

Keep adding more of the small leaves until you like how it looks.

Next I used the Agave leaves stamp in Shaded Spruce ink.

Top the cactus using the Pineapple Punch ink and the larger flower stamp.

To finish the design, I used Pineapple Punch ink to add the flower branch.

I used the Shaded Spruce ink for the sentiment “Hi There!”.

I am now done with the stamping.

Tip: Some of the ink will get on your Pierce Mat. This can easily be removed with a baby wipe or wet washcloth. Another option is to wrap white copy paper around the mat so the extra ink goes on the paper instead of the mat.

In order to assemble the card I cut a piece of Pineapple Punch cardstock at 5 1/4 x 4 inches and adhered it  to the Whisper White card base. The card base measures 8 1/2 x 5 1/2 and is folded in half.

I cut a piece of Shaded Spruce the same size as the stamped piece of Whisper White, 4 1/2 x 3 1/4 inches.

Place the Shaded Spruce piece at a slight angle and adhere to the card.

Adhere the stamped piece horizontally parallel to the Pineapple Punch piece.

And now you have the completed card! Be sure to send it to someone special. It’s always nice to get a handmade card in the mail from a good friend just saying “Hello”!

Here are some other variations. Have fun creating your own. To order any of the supplies listed below, click on the shop now button at the top of the blog and you will be connected to my store. If you have any questions about ordering please contact me. There is a special sale right now called Sale-a-bration which lasts until March 31, 2019. During Sale-a-bration, for every $50 ordered, you my choose a free item from the Sale-a-bration brochure. So, check out my store and get your deal on stamping supplies today!

Products used included: Stamps: Flowering Desert  #148700; Cardstock: Shaded Spruce #146981, Pineapple Punch #146971, Granny Apple Green #146990 and Whisper White #100730; Ink: Shaded Spruce #147088, Pineapple Punch #147141 and Granny Apple Green #147095; Clear Blocks: A, B, C and D; Multipurpose Liquid Glue #110755 If you wish to have pink flowers on top of the cactus’ you may use Melon Mambo ink # 147051.

Posted in beginner stamper, cactus, desert, Occasions Catalog 2019, Photopolymer, Simple stamping

Let’s Get Stamping!

Today I will show you how to use the Photopolymer stamps that Stampin’ Up! has. This set is Flowering Desert and is found in the Occasions Catalog. I just love to give a handmade card to someone to let them know I think they are awesome!

These are the supplies you will need to make this card. In addition to the stamp set, I used Shaded Spruce ink, Whisper White cardstock, Clear Block E, the Stampin’ Pierce Mat, and (not shown- Clear Block H, Gingham Gala Adhesive-Backed Sequins, Multipurpose Liquid Adhesive and Stampin’ Dimensionals)

The first step is to carefully remove the Photopolymer stamp from the sheet and place it on a Clear Block as shown.

Next is to tap the stamp onto the ink pad with a light to moderate pressure. You want to get ink on the image and not around the image. Be sure to press straight down, and lift straight up. If there is ink on your block, try using a lighter pressure.

When using the Photopolymer stamps you will need to have the Pierce Mat or a magazine under it to get the best image. Place the stamp straight down onto the paper and apply light to moderate pressure for about 5 seconds. This allows the ink to transfer onto the paper.  Lift the stamp straight up. It may take some practice to get a nice clear image. If there is ink around the image, that is called a halo, and it means you need to place the stamp on the ink with a lighter touch.

To finish the card, I stamped the sentiment onto a 3/4 inch strip of cardstock and cut a banner on one end. The cactus was cut to measure 4 x 2 1/2 inches and adhered to a 4 1/4 x 2 3/4 inch piece of Shaded Spruce. I then adhered the cactus piece onto a card base which measured 8 1/2 x 5 1/2, folded in half length-wise. The “You’re So Awesome” sentiment was adhered using Stampin’ Dimensionals to give it lift and add dimension to the card. I finished it off with some sequins.

This is a really nice, simple card that can definitely be given to someone to express how you feel about them, and pass on some positive energy!