Posted in 2021 January-June Stampin' Up!®Mini Catalog, 3D Technique, beginner stamper, Birthday, Congratulations, flowers, Friendship, Fun/Fancy fold card, Graduation, Gratitude/ Thanks, Hello, Two-step stamping

Stampin’ Up!® Hydrangea Haven Pop-Up Gift Card

Hello and Welcome to Fun Fold Friday! Today I have Pop-Up Gift Card made with the Hydrangea Hill Designer Series Paper (DSP) and Hydrangea Haven stamp set. This is a terrific set for practicing the Two Step Stamping Technique.

This awesome gift card holder is really very simple to make with the photographic tutorial that follows.

Measurements

Measurements: Misty Moonlight Card Stock (CS) card base: 4 1/4 x 9 3/4 inches with score lines at: 3, 4 1/4, 5 1/2 and 8 1/2 inches; Very Vanilla CS: two, cut at 2 3/4 x 4 inches; Hydrangea Hill DSP: striped piece: 2 3/4 x 4 inches and floral piece: 1 x 4 inches. You will also need 16 inches of the Misty Moonlight 2020-2022 In Color Ribbon.

Stamping

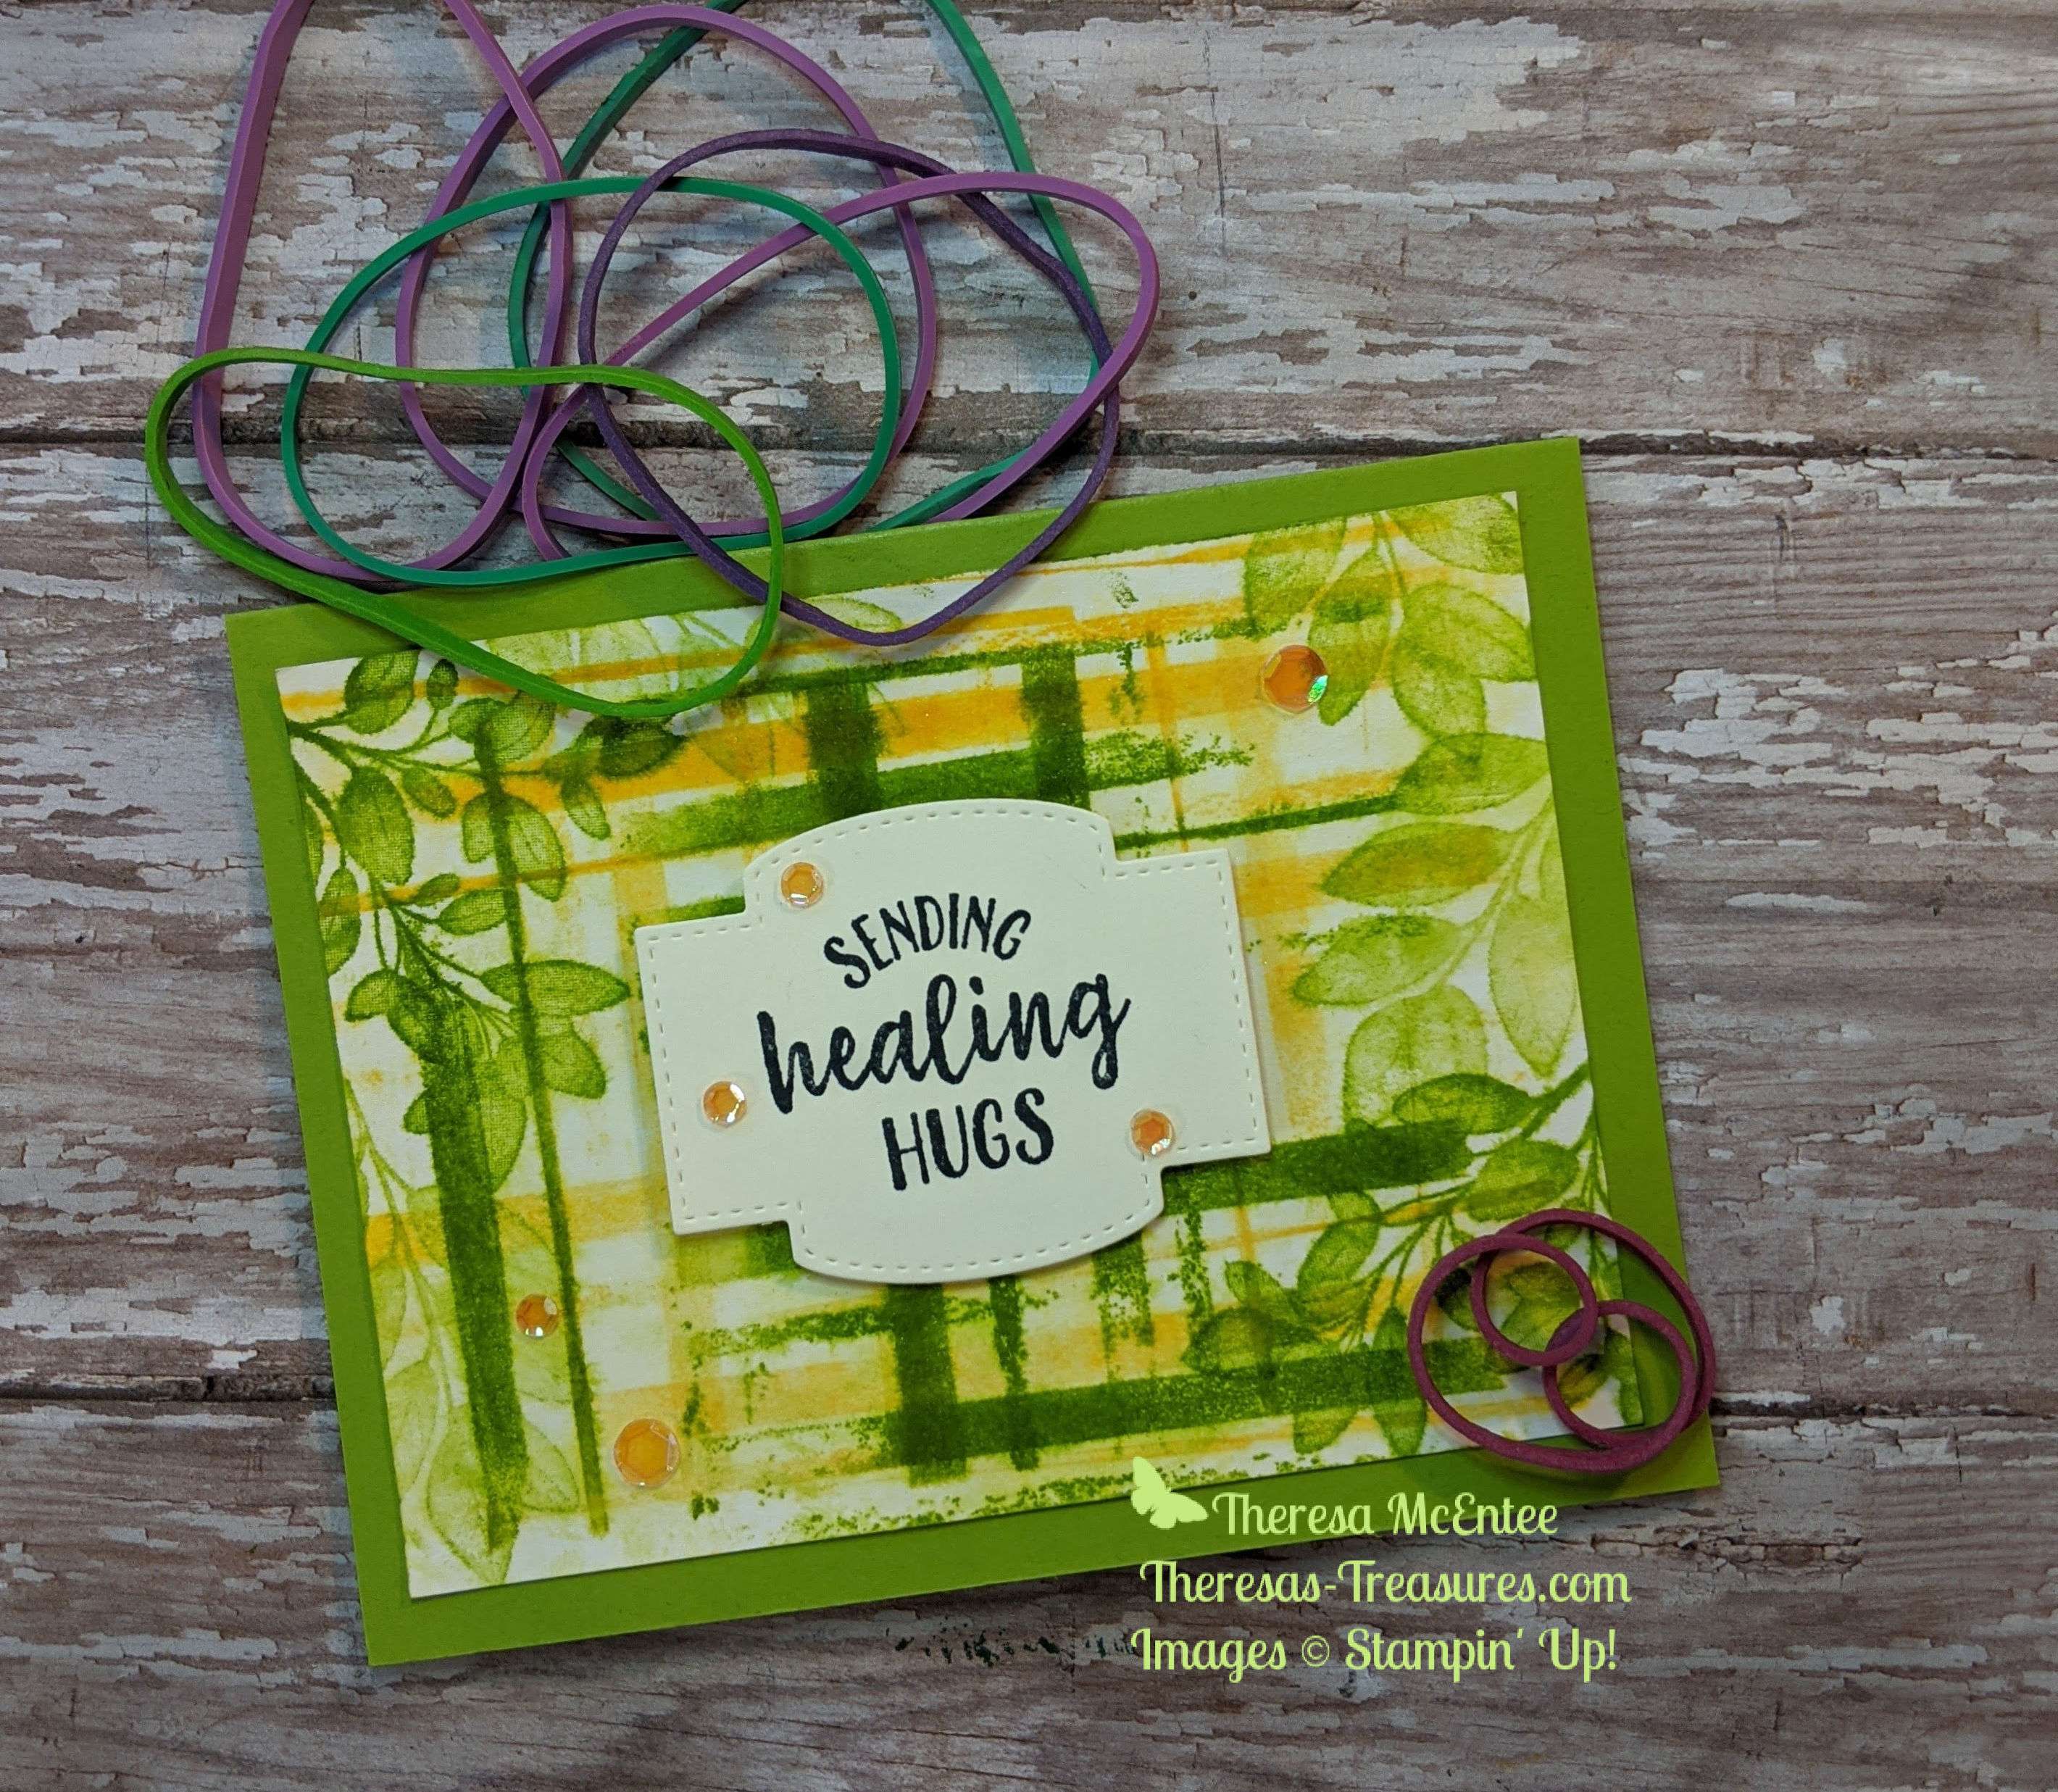
The first stamping is in Gorgeous Grape ink onto one of the 2 3/4 x 4 inch Very Vanilla CS. The stamp is from the So Sentimental stamp set. This is one of my favorite large sentiments which can be used in a variety of settings.

Sadly, the So Sentimental stamp set is on the Retired List and will only be available until May 3, 2021. Here is the Retired List. I recommend ordering early as product is only available while supply lasts.

The next stamping is a Two Step Stamp. Start with stamping the outline of the bunch of flowers and the leaves in Memento ink. Stamp them onto the bottom right-hand corner of the sentiment card piece.

The second step stamp uses the solid stamp to make a “watercolor” design over the outlines of the flowers and leaves. For this step use the Gorgeous Grape ink for the bunch of flowers. Use the Mossy Meadow ink for the leaves. Tip: To easily line up the second stamp I recommend you stand up. Lean over the card piece so you are looking straight down when you place the second step stamp.

Follow the same procedure to stamp the hydrangea on the other 2 3/4 x 4 inch Very Vanilla CS. Note: The ‘watercolor’ design for the second step on the hydrangea is slightly off. It is possible I did not have it turned the proper way to line up better. Or that is just the way it is supposed to be.

Finally, stamp the “for you” sentiment in Gorgeous Grape ink onto a 1/2 inch strip of Basic White CS. The sentiment is in the Hydrangea Haven stamp set.

Constructing the Gift Holder

The best tool for Fun Folds is the Bone Folder. This tool helps you make each fold nice and crisp. Start by folding the 8 1/2 inch score line as shown.

Continue by making a fold at the 5 1/2 inch score line as shown.

Next you will make a fold in the opposite direction at the 4 1/4 inch score line. Then fold the gift card holder closed at the 3 inch score line as shown.

Here is a side view.

Decorating the Gift Card Holder

With the gift card holder folded shut, adhere the striped pattern to the front.

Open the gift card holder. Adhere the sentiment card piece to the top panel. Adhere the Hydrangea to the bottom panel.

Now flip the gift card holder over. Adhere the pop-up portion by applying adhesive ONLY to the edges as shown. Note: If you glue it shut the gift card will not slide in.

Place the adhered panel in the Label Me Lovely Punch about 1/4 of the way in. Punch.

Lay the gift card on the outside of the pop-up panel and mark how wide it is with a pencil mark.

Use some Paper Snips to make a cut along the score line to the pencil marks. This is so that the gift card will slide in between the two panels.

Once you have widened the opening the gift card should slide right on in! Note: Be sure to erase the pencil marks. I almost forgot.

Fold the gift card holder shut. Adhere the 1 x 4 inch Floral design to the top. Cut a banner edge on both ends of the “for you” sentiment. Adhere to the front with Stampin’ Dimensionals.

Tie the Misty Moonlight Ribbon around the gift card holder and Viola! you are done!

Thank you for stopping by to see how to make this awesome Stampin’ Up!® Hydrangea Haven Pop-Up Gift Card! I hope yo give it a try. Have fun with using different papers and stamp sets to create your own!

Supplies

Product List

Have a crafty weekend!

Theresa

Posted in 2020-2021 Stampin' Up! Catalog, Nature, Rubber Band Background Technique, Stamping-off technique

Stampin’ Up!® Forever Fern Rubber Band Background Get Well Card

Welcome to my Wacky Wednesday Technique. This Stampin’ Up!® Forever Fern card is really wacky because it is made using rubber bands around a clear block. The things we will do to make a creative background!

I will be using 2 stamp sets today. The Forever Fern stamp set has a lot of great leaf images. The So Sentimental is one of my all time favorites. Sadly it will be retiring. It is only available while supplies last so order yours HERE before it runs out.

Measurements

Measurements: Granny Apple Green Card Stock (CS) card base: 5 1/2 x 8 1/2 inches with a score line at 4 1/4 inches; Very Vanilla CS: 4 x 5 1/2 inches and 3 x 4 inches; and Shimmery White CS: 3 3/4 x 5 inches.

Stamping

Let’s start stamping! Stamp the sentiment “Sending Healing Hugs” onto the 3 x 4 inch Very Vanilla CS with the Memento Tuxedo Black Ink. Use you Stampin’ Cut & Emboss Machine and the Stitched So Sweetly dies to cut out the sentiment. Fortunately, the Stitched So Sweetly Dies are not on the retiring list!

Rubber band Background in Daffodil Delight

In order to try this technique you will need rubber bands of various thicknesses. Wrap the rubber band around an E size Clear Block in a random pattern.

For this step I used Daffodil Delight ink. Use the ink pad to apply ink to the rubber bands. Flip the clear block over onto the 3 3/4 x 5 inch Shimmery White CS.

Remove the clear block and see what you have. I think I would have needed to apply more ink. You can rotate the Shimmery White CS, apply more ink to the rubber bands, and stamp down on the Shimmery White again. I stamped once on the upper half and once on the bottom half.

Next I sprayed my rubber band background with a little water to make it bleed into the paper a little.

While the paper is still damp, use the Granny Apple Green ink and the large leaf image from the Forever Fern stamp set to stamp some leaves around the edges.

Stamp some more of the leaves onto edges of the 4 x 5 1/4 inch Very Vanilla CS. This will be the inside of the card. I Stamped Off once on the smaller leaf image before stamping onto the Very Vanilla CS.

Rubber band background in Granny Apple Green

I decided the background needed a little more added to it so I inked up the rubber band block with the Granny Apple Green ink and added more to the stamped background.

I also sprayed it with a little water again and then used a paper towel to dab it dry.

Open the Granny Apple Green CS card base and adhere the inside of the card to the inside of the card base.

Use the Bone Folder to fold the card base. Next adhere the Rubber Band Background card piece to the card front.

Use Stampin’ Dimensionals to adhere the sentiment to the background.

Bling!

The Artistry Blooms Self Adhesive Sequins are perfect to add some Bling! to this card! I use the Take Your Pick tool to easily move the sequins from the acetate sheet to the card front.

Viola! You have made a totally wacky Rubber Band Background for this get well card!

Thanks for coming by today. I hope you have had a chance to review the Retiring List in my Online Store. Some products are discounted. Check it all out HERE.

Supplies

Product List

Have a wonderful day!

Theresa

Posted in 2020-2021 Stampin' Up! Catalog, 3D Embossing Folder, beginner stamper, flowers, Gratitude/ Thanks, Sale-A-Bration 2021

Kylie’s Stampin’ Up!® Demonstrator Training Program Blog Hop- February 2021-Thank You Cards with So Sentimental

Thank you!

Thank you for joining me for our Stampin’ Up!® Demonstrator Monthly Team Blog Hop! I am so excited that you could join us today! I know you will get lots of ideas and creative inspiration! My thank you cards are made with the So Sentimental stamp set. Be sure to visit all the different blogs and see all the different stamp sets and dies that will be used.

I belong to a group of Stampin’ Up!® Demonstrators from around the world that are taking part in training that is helping us to build a successful Stampin’ Up!® business. I am a Demonstrator in Arizona, USA. If you are not already an awesome Demonstrator, or do not have an awesome Demonstrator and live in the USA, I would love to be your most awesome Demonstrator! I really appreciate your support.

The theme for the cards today is: Thank You. I have many customers who support me and I like to send them a Thank You card every once in awhile. The following set of cards is for my fabulous customers which I will be sending to anyone who orders during the month of February.

The Thank You Cards

I made a whole set of Thank You cards using an Embossing Folder (EF) to emboss the first layer. For the second layer I cut the Flowers & Field Designer Series Paper (DSP) which you can get for FREE with a qualifying order during Sale-a-bration (January 5 – February 28, 2021) and adhered it to the first layer. The sentiment is made using the “I can’t Thank You enough” from So Sentimental and the Stitched So Sweetly Dies. The first layer of this card is made with the Meadow Moments EF and Cherry Cobbler Card Stock CS).

The measurements for the embossed layer are 4 x 5 1/4 inches. The second layer which is the Flower & Field DSP is 3 x 4 inches. The sentiment piece is adhered with Stampin’ Dimensionals. This card has the non-floral side of the DSP showing. The Flirty Flamingo CS layer is embossed with the Absolutely Argyle EF.

For this card I used the Seabed 3D EF on Just Jade CS.

All Together!

I have a whole bunch of different combinations of DSP and CS colors!

Thanks for stopping by Theresa’s Treasures. Look through the list below to see who is next in line for the Blog Hop.

Supplies

Product List

Have a wonderful creative day!

Theresa

Posted in 2020 August-December Mini Catalog, 2020-2021 Stampin' Up! Catalog, beginner stamper, Gratitude/ Thanks

Kylie’s Stampin’ Up!® Demonstrator Training Program Blog Hop- November 2020-So Sentimental

Thank you for joining me for our Stampin’ Up!® Demonstrator Monthly Team Blog Hop! I am so happy that you could join us today for this blog hop to get ideas and creative inspiration. We are a group of Stampin’ Up!® Demonstrators from around the world that are taking part in training that is helping us to build a successful Stampin’ Up!® business and reach some goals we have set. I really appreciate your support.

You may be starting here at Theresa’s Treasures or have come from another blog – either way you can find the link list at the bottom of this post so that you can see every blog post and idea today. Enjoy!

The theme for the cards today is: Thank You. I have many customers who support me and I like to send out a Thank You card every once in awhile. The following set of cards is for my awesome customers.

I must admit that I was not a fan of any plaid. However, I really like the plaid in the Plaid Tidings Designer Series Paper. I used the Old World Paper 3D Embossing Folder to make the Whisper White card stock background.

Tip for arthritic hands: I have a difficult time with the Stampin’ Dimensionals due to mobility problems from arthritic changes in my fingers. I found that if I cut the Foam Adhesive Sheets into 1/4 inch strips I can use them on the back of labels and such. This is so much easier to peel off than those hexagonal Dimensionals!

The sentiment “I Can’t Thank You Enough” is from the So Sentimental stamp set. The dies are from Stitched So Sweetly. I hand-colored the Whisper White Crinkled Seam Binding Ribbon to match the color of the card stock. Be sure to heat set, otherwise you get very inky fingers!

I have the cards open in two different ways to add variety to the Thank You notes.

“I can’t thank you enough” for stopping by today.

There is an amazing line up of Stampin’ Up!® demonstrators from around the world that are working hard to learn how to be even more successful. I know you are going to love seeing all the amazing projects today. Be sure you comment and show them some love so they keep creating and sharing fantastic ideas for us all.

Don’t miss one blog link. Remember you are currently on my page – Theresa McEntee-Theresa’s Treasures. See who is below me to know where to go next.

Blog Hop

Stampin’ Up! products used:

Product List

Theresa McEntee- Theresa’s Treasures-USA

Posted in 2020-2021 Stampin' Up! Catalog, Designer Series Paper, encouragement, Love/Affection, Nature, Simple stamping

Stamping on Designer Series Paper with Forever Fern Wishing You Happiness

These beautiful colorful cards are so easy to make! The leaves come from the Forever Fern stamp set and the sentiments are from So Sentimental. Both of these sets are so versatile. The So Sentimental has several great sentiments in addition to those in the photo, including “hello baby”, “healing hugs”, “for you”, and “this calls for confetti”.

Here is the card I will demonstrate today. The colors are Magenta Madness, Rich Razzleberry, Blackberry Bliss and Balmy Blue.

Measurements: Rich Razzleberry Card Stock (CS) card base: 5 1/2 x 8 1/2 inches with a score line at 4 1/4 inches: Whisper White CS: 4 x 5 1/4 inches and 2 1/2 x 3 inches; Artistry Blooms Designer Series Paper (DSP): 4 x 5 1/4 inches; and Balmy Blue CS: 2 5/8 x 3 1/8 inches.

Stamp the sentiment “Wishing you much happiness today and always” from the So Sentimental stamp set in Blackberry Bliss ink onto the 2 1/2 x 3 inch Whisper White CS. Then use the Blackberry Bliss ink and the largest bunch of leaves from the Forever Fern stamp set and stamp the leaves to frame the sentiment. Be sure to use a scrap paper underneath so you don’t stamp on your table! Our nickname for Blackberry Bliss is Blackberry Mess!

Next use the Balmy Blue ink to stamp a smaller bunch of flowers on the upper left corner, and the Magenta Madness ink to stamp the berry design on the lower right corner of the sentiment. This creates a little frame around the sentiment.

Use the Blackberry Bliss ink and the larger bunch of leaves to stamp onto the Artistry Blooms DSP. I tried to visualize where the sentiment will be and use that as a focal point for the end of the stems.

Next use the Magenta Madness ink to stamp the berry design, and the Balmy Blue ink to stamp the smaller bunch of leaves. I continued to use the focal point for the ends of the stems. On some I turned the stamp around and stamped with the stem off the edge of the paper to fill in the blank spots.

I wanted to make the inside a little more fancy. I started on the top of the 4 x 5 1/4 inch Whisper White CS with the Blackberry Bliss ink and the large bunch of leaves, and worked down the right side. I used the Balmy Blue ink with the small bunch of leaves and then the Magenta Madness with the berry design on the bottom.

Adhere the stamped Whisper White CS panel to the inside of the 5 1/2 x 8 1/2 inch Rich Razzleberry CS card base. Use you Bone Folder to fold the card base at the 4 1/4 inch score line so you get a nice crisp fold.

Adhere the stamped sentiment card piece to the 2 5/8 x 3 1/8 inch Balmy Blue CS. Use Stampin’ Dimensionals or the new Foam Adhesive Sheets on the back. Tip: If you have arthritis in you fingers, I have found that cutting the Adhesive Sheets into 1/4 inch strips is much easier to use than the little hexagonal Stampin’ Dimensionals. I just have a hard time peeling of the backs of those hexagons!

Adhere the stamped DSP to the front of the Rich Razzleberry card base, then add the sentiment card piece to the middle of the front.

And now for some Bling! I am so in love with the Artistry Blooms Self Adhesive Sequins Pack because there are 4 colors with 2 different sizes! They go with just about everything! To easily transfer the sequin I use the Take Your Pick tool. I slide the pointed end under the adhesive on the back of the sequin and than just set it down where I want it, apply a little pressure, and it sticks in place.

Viola! You have stamped on Designer Series Paper to make a wonderful, colorful card to wish some happiness to someone!

I really appreciate that you stopped by today. I hope you enjoyed the card and will give it a try. Experiment with different papers and stamps to see what you like. There are so many possiblities!

If you would like to purchase any of the Stampin’ Up! products from my Online Store, you may click HERE or click on any of the photos below to get to the Online Store.

Product List

Here’s wishing you happiness today and everyday!

Theresa